Fix Now, Pay Later with Klarna - Available at Checkout!

Why Is My Laptop Battery Not Charging? Causes & Fixes

Quick Answer

If your laptop battery is not charging, the problem is usually caused by a faulty charger, damaged charging port, worn-out battery, outdated battery drivers, incorrect power settings, BIOS issues, overheating, or motherboard faults. Start by checking the charger, power adapter and charging cable, then restart your laptop, inspect the charging port, update battery drivers, and test the battery health. If the battery still refuses to charge, professional diagnosis may be required.

Why Is My Laptop Battery Not Charging?

Few things are more frustrating than plugging in your laptop only to see the battery percentage stay exactly the same. Whether you’re working from home, attending online classes, travelling for business, or simply watching your favourite series, a laptop that refuses to charge can quickly interrupt your day.

The good news is that a charging problem doesn’t always mean the battery has failed. In many cases, the issue is surprisingly simple. A loose charger, faulty charging adapter, outdated battery driver, software glitch, or damaged charging port can all prevent your laptop from charging correctly.

However, there are also situations where the problem runs much deeper. A worn-out battery, overheating, BIOS errors, motherboard damage, or failed charging IC can stop your device from receiving power even when everything appears connected properly.

This complete UK guide explains the most common reasons why a laptop battery stops charging, the best troubleshooting methods you can safely perform at home, and when it’s time to seek professional laptop repair. Whether you own a MacBook, Dell, HP, Lenovo, ASUS, Acer, Microsoft Surface or another Windows laptop, these solutions will help you identify the cause and restore normal charging performance.

Common Signs Your Laptop Battery Has a Charging Problem

Charging issues don’t always look the same. Some laptops refuse to charge altogether, while others only charge intermittently or lose power much faster than normal.

Watch for these common warning signs:

  • Battery percentage stays at the same level even when plugged in.
  • “Plugged in, not charging” message appears.
  • Laptop only charges when the cable is held at a certain angle.
  • Battery drains immediately after unplugging the charger.
  • Charging stops randomly during use.
  • Laptop switches off as soon as the charger is disconnected.
  • Battery icon repeatedly changes between charging and not charging.
  • Laptop becomes unusually hot while charging.
  • Battery percentage jumps unexpectedly.
  • Charging takes several hours without reaching 100%.

If you’ve noticed one or more of these symptoms, it’s time to investigate the underlying cause before the issue worsens.

Before Trying Advanced Fixes, Check These First

Many charging issues can be resolved in just a few minutes by performing a few basic checks. Before assuming the battery needs replacing, go through the following checklist.

Check Why It Matters Difficulty
Ensure the charger is firmly connected Loose connections prevent consistent charging Easy
Inspect the charging cable Frayed or damaged cables interrupt power delivery Easy
Test another wall socket Faulty sockets can mimic charging problems Easy
Restart the laptop Temporary software glitches may stop charging Easy
Remove dust from the charging port Debris can block proper electrical contact Easy
Verify the power adapter output Incorrect voltage prevents charging Easy

These simple checks solve a surprising number of charging issues without requiring repairs.

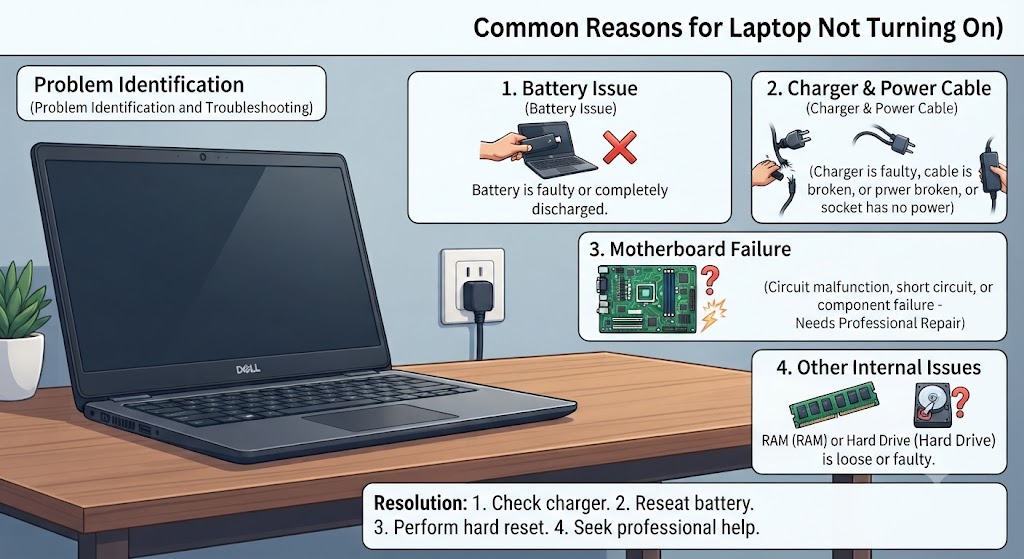
The 10 Most Common Reasons Your Laptop Battery Is Not Charging

1. Faulty Charger or Power Adapter

The charger is the first component to inspect. Power adapters gradually wear out, particularly if the cable has been bent repeatedly, pulled sharply, or exposed to excessive heat. Common symptoms include:

  • Charging only works intermittently.
  • Adapter becomes extremely hot.
  • LED indicator turns off unexpectedly.
  • Charger emits buzzing sounds.
  • Battery percentage never increases.

Whenever possible, test your laptop with another compatible charger. If it charges normally, the original adapter is almost certainly the problem.

2. Damaged Charging Port

A loose or damaged charging port is another common cause of charging failures. Constant plugging and unplugging can weaken the internal connector over time. Typical signs include:

  • Charger feels loose.
  • Charging starts and stops.
  • Laptop only charges when held in one position.
  • Sparks or burning smell near the port.
  • Visible bent connector.

Continuing to use a damaged charging port can eventually damage the motherboard, making repairs far more expensive.

3. Battery Has Reached the End of Its Lifespan

Laptop batteries don’t last forever. Most lithium-ion batteries are designed to withstand around 300-1,000 full charge cycles, depending on the manufacturer and usage habits.

As batteries age, they gradually lose their ability to hold a charge. You may notice:

  • Rapid battery drain.
  • Laptop shuts down unexpectedly.
  • Charging never reaches 100%.
  • Battery health warnings.
  • Swollen battery casing.

If your laptop is several years old and used daily, battery wear is a likely cause.

4. Battery Drivers Are Corrupted

Windows relies on battery management drivers to communicate with the battery and charging system. After major updates or unexpected shutdowns, these drivers can become corrupted, causing the system to incorrectly report charging status or stop charging altogether.

Signs of driver-related issues include:

  • “Plugged in, not charging” despite a working charger.
  • Battery percentage frozen for long periods.
  • Charging resumes after restarting the laptop.
  • Windows battery icon behaves unpredictably.

In many cases, reinstalling or updating the battery drivers through Device Manager resolves the issue without replacing any hardware.

5. Outdated BIOS or Firmware Issues

Your laptop’s BIOS (Basic Input/Output System) plays an important role in managing hardware, including the battery and charging system. If the BIOS becomes outdated or corrupted, your laptop may stop recognising the battery correctly or refuse to charge altogether.

Although BIOS-related charging problems are less common than hardware faults, they can occur after major Windows updates, failed BIOS updates, or incorrect firmware settings.

Common Symptoms

  • Battery is detected but won’t charge.
  • Charging stops after a Windows update.
  • Battery status changes randomly.
  • The battery disappears from BIOS diagnostics.
  • Charging resumes temporarily after restarting.

How to Fix It

  • Visit your laptop manufacturer’s official website.
  • Download the latest BIOS version for your exact model.
  • Connect your charger throughout the update.
  • Never interrupt a BIOS update once it has started.
  • Restart your laptop and test charging again.

Tip: If you’re uncomfortable updating the BIOS yourself, it’s safer to let a professional technician perform the update to avoid firmware corruption.

6. Overheating Is Preventing the Battery from Charging

Modern laptops include built-in thermal protection to prevent battery damage. If the internal temperature becomes too high, the charging system may automatically pause until the device cools down.

This is particularly common in older laptops, gaming laptops, and devices with blocked cooling vents.

Signs Your Laptop Is Overheating

  • The fan runs constantly at high speed.
  • The laptop feels extremely hot underneath.
  • Charging starts, then suddenly stops.
  • Performance becomes noticeably slower.
  • Unexpected shutdowns occur.

Common Causes of Overheating

Cause Effect on Charging
Dust blocking cooling vents Internal temperature rises quickly
Dried thermal paste Poor heat transfer from the processor
Faulty cooling fan Reduced airflow
Heavy gaming or video editing Increased heat generation
Soft surfaces blocking vents Restricted airflow

How to Reduce Overheating

  • Place the laptop on a hard, flat surface.
  • Clean air vents using compressed air.
  • Avoid using the laptop on beds or sofas.
  • Close unnecessary background applications.
  • Allow the laptop to cool before charging.

If your laptop regularly overheats, it may need an internal cleaning or cooling system service. You can also read our guide on How to Fix a Slow Laptop for additional performance optimisation tips, as overheating and slow performance often occur together.

7. Faulty Battery Drivers in Windows

Windows manages battery communication through Microsoft ACPI battery drivers. If these become corrupted, the laptop may incorrectly display battery information or stop charging. Fortunately, this is one of the easiest issues to fix.

Reinstall Battery Drivers

  1. Right-click the Start Menu.
  2. Open Device Manager.
  3. Expand Batteries.
  4. Right-click Microsoft ACPI-Compliant Control Method Battery.
  5. Select Uninstall Device.
  6. Restart your laptop.
  7. Windows will automatically reinstall the correct driver.

Many users find that charging begins working again immediately after the restart.

8. Windows Power Settings Are Incorrect

Power management settings can occasionally interfere with battery charging, especially after installing system updates or third-party battery management software.

Things to Check

  • Battery Saver Mode
  • Manufacturer battery charging limits
  • Power Plan settings
  • Sleep and Hibernate settings
  • Fast Startup

Some manufacturers intentionally limit charging to around 80% to extend battery lifespan. If enabled, this behaviour is completely normal.

9. Motherboard or Charging IC Failure

If you’ve already tested the charger, charging cable, battery, power settings, and charging port but your laptop still refuses to charge, the problem may lie with the motherboard or charging integrated circuit (Charging IC).

The Charging IC controls how electrical power flows from the charger to the battery. If this tiny component becomes damaged due to overheating, power surges, liquid spills, or electrical failure, the laptop may stop charging completely-even though the charger and battery are working perfectly.

Motherboard-related charging faults are among the more advanced hardware issues and usually require professional diagnostics.

Common Symptoms

  • Laptop shows no charging indicator.
  • Battery percentage never increases.
  • Charger works on another laptop.
  • Charging port is undamaged but charging still fails.
  • Laptop randomly powers off while connected to power.
  • Burning smell or excessive heat around the charging area.

Common Causes

Cause Effect
Power surge Damages charging circuitry
Liquid damage Causes corrosion on motherboard
Failed Charging IC Prevents battery from receiving power
Short circuit Interrupts power delivery
Previous poor-quality repairs Damages board components

How to Fix It

Unlike replacing a battery or charger, motherboard repairs require specialist equipment and board-level expertise. Professional technicians will normally:

  • Perform motherboard diagnostics.
  • Test the charging circuit.
  • Inspect power rails.
  • Replace faulty Charging IC components.
  • Repair damaged motherboard traces using micro-soldering techniques.

If the motherboard is causing the charging issue, professional repair is usually far more affordable than replacing the entire laptop.

10. Using an Incorrect or Incompatible Charger

Many charging problems occur simply because the wrong charger is being used. Modern laptops require a charger with the correct voltage, amperage, and wattage. Using an underpowered charger – or a low-quality third-party adapter – may provide enough power to run the laptop but not enough to charge the battery.

USB-C laptops are particularly sensitive to charger compatibility, as many require USB Power Delivery (USB-PD) chargers with specific wattage ratings.

Signs You’re Using the Wrong Charger

  • Battery percentage stays the same.
  • Laptop displays “Slow Charging.”
  • Charging only occurs while the laptop is switched off.
  • Battery drains even while plugged in.
  • Charging is extremely slow.

Recommended Charger Wattage

Laptop Type Typical Charger Power
Lightweight Windows Laptop 45W-65W
Business Laptop 65W-90W
Gaming Laptop 180W-330W
MacBook Air 30W-70W
MacBook Pro 67W-140W

How to Fix It

Always use:

  • The original manufacturer charger whenever possible.
  • A charger with the correct voltage and wattage.
  • Certified USB-C Power Delivery chargers for USB-C laptops.
  • High-quality replacement adapters from trusted suppliers.

Avoid cheap, unbranded chargers, as they may deliver unstable power and can eventually damage both the battery and charging circuitry.

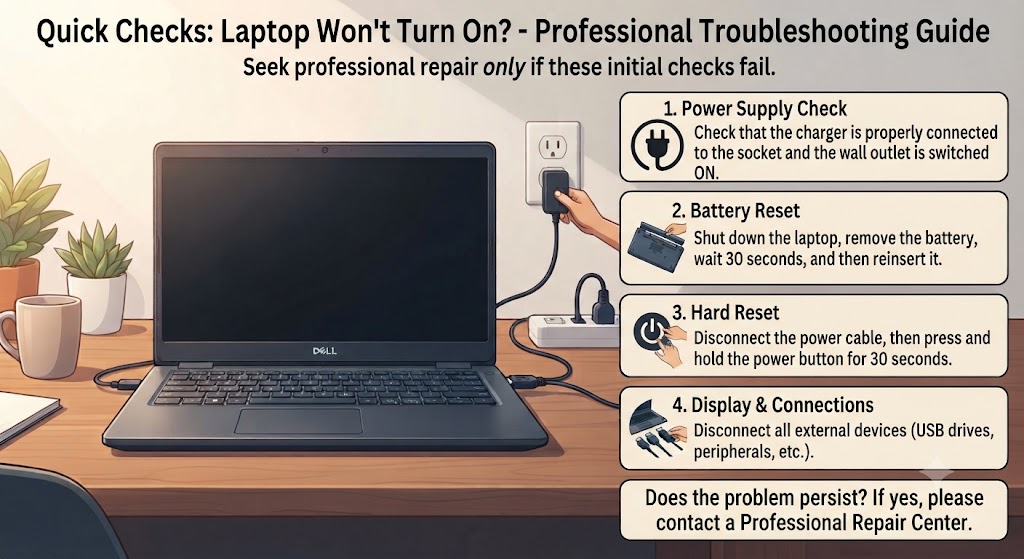
How to Troubleshoot Laptop Battery Charging Problems Step by Step

Instead of randomly trying different fixes, work through the following checklist in order.

Step Action Result
1 Restart the laptop Eliminates temporary software glitches
2 Test another wall socket Rules out power supply issues
3 Inspect the charger Identifies cable or adapter damage
4 Check the charging port Detects loose or broken connectors
5 Update Windows Installs battery-related fixes
6 Reinstall battery drivers Resolves driver corruption
7 Run battery diagnostics Measures battery health
8 Update BIOS Resolves firmware conflicts
9 Test with another charger Confirms adapter failure
10 Contact a repair specialist Diagnoses hardware faults

Following these steps in sequence can save time and help identify the exact cause without replacing parts unnecessarily.

How to Check Laptop Battery Health?

Before replacing your battery, it’s important to confirm whether it’s actually worn out. Both Windows and macOS provide tools that can help you assess battery condition.

1. On Windows

Windows includes a built-in battery report.

Steps

  1. Open Command Prompt as Administrator.
  2. Type:
powercfg /batteryreport
  1. Press Enter.
  2. Open the generated HTML report.

The report shows:

  • Battery design capacity
  • Full charge capacity
  • Charge cycle count
  • Recent battery usage
  • Battery life estimates

If the Full Charge Capacity is significantly lower than the Design Capacity, the battery has naturally degraded over time.

2. On a MacBook

MacBook users can quickly check battery health by following these steps:

  1. Open System Settings.
  2. Select Battery.
  3. Click Battery Health.

Apple will display the battery condition, which may show:

  • Normal
  • Service Recommended

If you see Service Recommended, the battery has deteriorated and may need professional replacement.

Can You Continue Using a Laptop That Won’t Charge?

It depends on the cause. If the battery has simply worn out, your laptop may still work normally while connected to the charger.

However, if the charging problem is caused by a damaged charging port, swollen battery, overheating, or motherboard fault, continuing to use the device could lead to further damage and potentially more expensive repairs.

Stop Using the Laptop Immediately If:

  • The battery is swollen.
  • You notice a burning smell.
  • The charger becomes excessively hot.
  • The charging port sparks.
  • The laptop randomly powers off.

These symptoms indicate a hardware fault that should be inspected by a qualified technician as soon as possible.

MacBook Battery Not Charging? Common Causes & Fixes

If you own a MacBook, the troubleshooting process is slightly different from Windows laptops. Apple devices include advanced battery management features that sometimes pause charging to extend battery lifespan.

Why Your MacBook May Not Be Charging?

A MacBook may stop charging due to:

  • Battery Health Management
  • Optimised Battery Charging
  • Faulty USB-C charging cable
  • Damaged USB-C charging port
  • Incorrect power adapter wattage
  • macOS software issues
  • Battery reaching the end of its service life
  • Logic board or charging IC faults

Try These Fixes

  1. Restart your MacBook.
  2. Check that you’re using the correct Apple-certified charger.
  3. Inspect the USB-C cable for damage.
  4. Try another compatible charger if available.
  5. Update macOS to the latest version.
  6. Check System Settings > Battery > Battery Health.
  7. Allow the MacBook to cool if it’s overheating.

If the battery still won’t charge or macOS displays “Service Recommended”, professional diagnostics are recommended.

For MacBook-specific repairs, visit our MacBook Repair service page to learn more about battery replacements, charging port repairs, and motherboard diagnostics.

Brand-Specific Charging Problems

Although the causes are often similar, each laptop brand can have its own common charging issues.

Brand Common Charging Issue Recommended Action
HP BIOS battery protection, worn charging ports Update BIOS and inspect the charging port
Dell AC adapter not recognised Test with a genuine Dell charger and update BIOS
Lenovo Battery Conservation Mode enabled Disable charging limits in Lenovo Vantage
ASUS Battery health charging mode Review battery settings in MyASUS
Acer Loose DC jack Inspect the charging port and adapter
Microsoft Surface Surface Connect cable issues Test another charger and clean the connector
Apple MacBook Battery Health Management Check Battery Health and Optimised Charging settings

If you need brand-specific repairs, iExpert Repairs provides dedicated services for HP Laptop RepairDell Laptop RepairLenovo Laptop Repair, and MacBook Repair, with support for customers across the UK.

When Does a Laptop Battery Need Replacing?

Every rechargeable battery has a limited lifespan. After years of daily charging, it naturally loses capacity and can no longer hold enough power for normal use.

Signs You Need a New Battery

  • Battery drains very quickly.
  • Laptop only works while plugged in.
  • Battery never reaches full charge.
  • Battery health report shows significant degradation.
  • The battery is swollen or distorted.
  • The laptop shuts down unexpectedly, even with charge remaining.

If your battery has reached the end of its life, replacing it is usually more cost-effective than buying a new laptop.

Battery Replacement vs Laptop Repair

Problem Battery Replacement Professional Repair
Old battery Yes Usually not required
Swollen battery Yes Recommended inspection
Faulty charging port No Yes
Damaged motherboard No Yes
Charging IC failure No Yes
BIOS issue No Sometimes
Driver corruption No Usually not required

Replacing the battery only solves the problem if the battery itself has failed. If the charging system or motherboard is faulty, professional repair is the better option.

When Should You Contact a Professional?

If you’ve tried the basic troubleshooting steps and your laptop still won’t charge, it’s time for a professional diagnosis. Seek expert help if:

  • The laptop won’t detect the charger.
  • The charging port is loose or damaged.
  • The battery is swollen.
  • The laptop powers off immediately when unplugged.
  • Liquid damage has occurred.
  • You suspect motherboard or charging IC failure.

Ignoring these issues can lead to further damage and more expensive repairs later.

Why Choose iExpert Repairs?

At iExpert Repairs, we provide fast, reliable laptop repairs for customers across the UK. Whether you’re dealing with a failing battery, damaged charging port, overheating, or motherboard fault, our certified technicians use premium OEM-grade parts and professional diagnostic equipment to restore your device safely.

Our Laptop Repair Services Include:

  • Laptop battery replacement
  • Charging port repair
  • Motherboard diagnostics
  • Power IC and charging circuit repair
  • Screen replacement
  • Keyboard replacement
  • Cooling system servicing
  • Software troubleshooting
  • Data recovery
  • Performance optimisation

We repair all major laptop brands, including Apple MacBook, HP, Dell, Lenovo, ASUS, Acer, Microsoft Surface, Samsung, MSI, and gaming laptops.

Why customers choose iExpert Repairs:

  • Same-day repairs available for many common faults
  • Nationwide UK mail-in repair service
  • Free diagnostic assessment
  • Premium OEM-grade replacement parts
  • 12-month warranty on repairs
  • Experienced certified technicians
  • Flexible Fix Now, Pay Later with Klarna option available at checkout

If your battery issue turns out to be part of a wider performance problem, you may also find our guides on How to Fix Laptop Overheating and How to Fix a Slow Laptop helpful.

FAQs About Laptop Battery Not Charging

1. Why is my laptop battery not charging even though it’s plugged in?

If your laptop is plugged in but the battery isn’t charging, the problem could be caused by a faulty charger, damaged charging port, worn-out battery, outdated battery drivers, incorrect power settings, BIOS issues, or motherboard faults. Start by checking the charger, testing another power outlet, updating your battery drivers, and inspecting the charging port. If the issue persists after these steps, professional diagnostics may be required to identify the exact cause.

2. How do I fix a laptop that says “Plugged in, not charging”?

Begin by restarting your laptop and ensuring the charger is securely connected. Test another wall socket and inspect the charging cable for damage. Next, update Windows, reinstall the Microsoft ACPI battery driver, and check your laptop manufacturer’s battery management settings. If the message still appears, the battery, charging port, or motherboard may require professional repair.

3. How can I tell if my laptop battery needs replacing?

A laptop battery may need replacing if it drains unusually fast, won’t charge beyond a certain percentage, shuts down unexpectedly, overheats, or only works while connected to the charger. You can also generate a battery health report on Windows or check Battery Health on a MacBook. If the battery’s full charge capacity has significantly decreased, replacement is usually the best solution.

4. Can a faulty charger stop my laptop battery from charging?

Yes. A damaged power adapter or charging cable is one of the most common reasons a laptop battery won’t charge. Broken wires, bent connectors, or an adapter providing incorrect voltage can prevent the battery from receiving sufficient power. Testing your laptop with another compatible charger is an easy way to determine whether the charger is the problem.

5. Why is my laptop charging very slowly?

Slow charging may occur due to a low-powered charger, background applications consuming excessive power, overheating, battery degradation, or charging through an incompatible USB-C port. Using the original manufacturer-approved charger and reducing system load while charging can often improve charging speed.

6. How do I check my laptop battery health on Windows?

Windows includes a built-in battery report tool. Open Command Prompt as Administrator, type powercfg /batteryreport, and press Enter. The report displays the battery’s design capacity, current full charge capacity, cycle count, and recent usage. Comparing the design capacity with the current capacity helps determine whether the battery has significantly degraded.

7. Why is my MacBook battery not charging?

MacBook charging problems can result from Battery Health Management, Optimised Battery Charging, faulty USB-C cables, damaged charging ports, outdated macOS software, or a battery nearing the end of its lifespan. Checking Battery Health in System Settings and ensuring you’re using a genuine Apple-compatible charger are good first steps.

8. Can overheating stop a laptop from charging?

Yes. Most modern laptops include thermal protection that temporarily pauses charging when internal temperatures become too high. Dust-clogged cooling vents, failing fans, dried thermal paste, or heavy workloads can all cause overheating. Cleaning the cooling system and allowing the laptop to cool down often restores normal charging.

9. How long does a laptop battery usually last?

Most lithium-ion laptop batteries are designed to last between 300 and 1,000 charge cycles, depending on the manufacturer and usage habits. For many users, this equates to approximately three to five years of regular use before battery capacity noticeably declines.

10. Can a damaged charging port prevent my laptop from charging?

Yes. A loose, bent, or damaged charging port can interrupt the flow of power from the charger to the battery. Common signs include charging only at certain angles, intermittent charging, or a loose charger connection. Charging port repairs should be carried out promptly to avoid further damage to the motherboard.

Final Thoughts

A laptop battery that won’t charge doesn’t always mean you need a new laptop. In many cases, the issue is caused by something simple, such as a faulty charger, damaged charging port, outdated battery drivers, incorrect power settings, or an ageing battery. Identifying the root cause early can help you avoid unnecessary replacement costs and keep your device running reliably for years to come.

By following the troubleshooting steps in this guide, you can often resolve common charging problems yourself. However, if your laptop still refuses to charge, shows signs of a swollen battery, overheats excessively, or has a damaged charging port or motherboard, it’s important to seek professional assistance. Attempting DIY repairs on complex hardware can lead to further damage and higher repair costs.

At iExpert Repairs, our certified technicians specialise in diagnosing and repairing charging issues for all major laptop brands, including Apple MacBook, HP, Dell, Lenovo, ASUS, Acer, Microsoft Surface, Samsung, MSI, and gaming laptops. From battery replacements and charging port repairs to motherboard diagnostics and power circuit repairs, we use premium OEM-grade parts and advanced diagnostic equipment to ensure every repair is completed to the highest standard.

Whether you visit our repair centre or use our secure nationwide UK mail-in repair service, you’ll benefit from transparent pricing, fast turnaround times, a 12-month warranty, and flexible Fix Now, Pay Later with Klarna options. Our goal is to get your laptop back to full working condition quickly, safely, and affordably.

Keep Your Laptop Running at Its Best

Looking after your laptop doesn’t stop once the battery issue has been fixed. Regular maintenance can significantly improve performance, extend battery life, and reduce the risk of future hardware failures.

For more expert advice, explore our latest repair and troubleshooting guides, including:

Our technical team regularly publishes practical repair advice to help UK users keep their devices performing at their best.

Looking to Upgrade Instead of Repairing?

Sometimes replacing an ageing laptop is a smarter long-term investment – especially if your current device has multiple hardware issues or repair costs are no longer economical.

If you’re considering an upgrade, visit iExpert Market, our trusted refurbished technology store, where you’ll find a carefully selected range of professionally tested devices at competitive prices.

Whether you’re looking for a powerful Refurbished MacBook, a reliable Refurbished Windows Laptop, a premium Refurbished iPad, or a quality Refurbished iPhone or Samsung Galaxy device, every product is thoroughly inspected, professionally tested, securely data-wiped, and backed by a warranty for complete peace of mind.

Back to posts

Why Is My iPad Battery Draining So Fast? Causes & Easy Fixes

Quick Answer:Why Is My iPad Battery Draining So Fast?

If your iPad battery is draining unusually fast, the most common causes include battery ageing, high screen brightness, background app activity, outdated iPadOS, poor Wi-Fi connections, location services, overheating, or hardware faults. Most battery problems can be improved by updating iPadOS, adjusting settings, reducing background activity, and checking battery usage. However, if your iPad still loses power rapidly after troubleshooting, the battery may need professional replacement.

Why Is My iPad Battery Draining So Fast?

Few things are more frustrating than charging your iPad to 100% only to see the battery drop dramatically within a few hours. Whether you use your iPad for work, online learning, streaming, gaming, video editing, or everyday browsing, poor battery life can quickly become a major inconvenience.

Fortunately, fast battery drain doesn’t always mean your battery is permanently damaged. In many cases, the issue is caused by software settings, background processes, or features that consume more power than expected. Simple adjustments can often restore several hours of battery life.

At iExpert Repairs, our certified technicians diagnose and repair hundreds of battery-related iPad issues every year across the UK. We’ve seen everything from batteries that degrade naturally after years of use to hidden hardware faults caused by accidental drops or liquid damage.

In this guide, you’ll learn exactly why your iPad battery drains so quickly, how to fix the problem yourself, and when it’s time to consider a professional battery replacement.

Introduction

If you’re wondering, “Why is my iPad battery draining so fast?”, you’re not alone. Fast battery drain is one of the most common problems affecting iPad, iPad mini, iPad Air, and iPad Pro users. It can interrupt work, online classes, streaming, gaming, and everyday tasks, making your device less reliable when you need it most.

In many cases, rapid battery drain is caused by software issues, battery-hungry apps, outdated iPadOS, high screen brightness, poor charging habits, or background activity. However, if your iPad continues losing power unusually fast after trying basic fixes, it could indicate battery wear or an underlying hardware problem requiring professional attention.

In this expert guide, the certified technicians at iExpert Repairs explain the most common causes of fast iPad battery drain, practical troubleshooting steps, battery-saving tips, and when a professional iPad battery replacement is the best solution. We’ll also help you decide whether repairing or upgrading your iPad is the smarter long-term investment.

How Long Should an iPad Battery Last?

Apple designs most iPads to provide around 10 hours of battery life during typical use, including web browsing over Wi-Fi or watching videos. However, real-world battery performance depends on several factors, including:

  • iPad model
  • Battery age
  • Display brightness
  • Running apps
  • Network strength
  • Temperature
  • Charging habits
  • iPadOS version

A brand-new iPad can easily last an entire working day. After several years of daily charging, however, lithium-ion batteries naturally lose their ability to hold a full charge.

Most iPad batteries begin showing noticeable wear after 500-1,000 complete charge cycles, although actual lifespan varies depending on usage patterns. If your older iPad now lasts only two or three hours despite light usage, battery degradation is likely the primary cause.

Signs Your iPad Battery Has a Problem

Not every battery issue looks the same. Some iPads lose power gradually, while others shut down unexpectedly even when the battery percentage appears high.

Common warning signs include:

  • Battery percentage drops rapidly
  • Battery drains while the iPad is idle
  • Device becomes unusually warm
  • Charging takes much longer than normal
  • Battery level jumps unexpectedly
  • iPad shuts down before reaching 0%
  • Battery drains overnight
  • Reduced performance while unplugged
  • iPad only works when connected to a charger
  • Battery swelling causing the display to lift

If your iPad also struggles to charge correctly, our guide on Why Is My iPad Not Charging? Common Causes & Easy Fixes explains how charging faults can directly affect battery performance and long-term health.

What Actually Causes an iPad Battery to Drain Faster?

Battery drain is rarely caused by a single issue. Instead, several software and hardware factors often work together. Below are the most common causes our technicians identify during professional diagnostics.

1. High Screen Brightness Is One of the Biggest Battery Killers

Your display is the largest power consumer inside the iPad.

Running maximum brightness for extended periods can reduce battery life significantly, especially on Liquid Retina and XDR displays. Signs brightness is consuming excessive battery include:

  • Battery dropping quickly while watching videos
  • Fast drain during outdoor use
  • Device warming while streaming
  • Reduced battery despite light workloads

Fix

  • Enable Auto-Brightness
  • Lower brightness manually indoors
  • Enable Dark Mode where appropriate
  • Reduce screen timeout duration

These simple adjustments often improve battery life immediately without affecting usability.

2. Background Apps Continue Running Even When You’re Not Using Them

Many users assume closing an app means it completely stops working. In reality, numerous apps continue refreshing content, syncing files, checking notifications, updating cloud storage, and accessing location services in the background.

Apps commonly responsible include:

  • Social media
  • Cloud storage
  • Video streaming platforms
  • Navigation apps
  • Email clients
  • Messaging apps

Over time, background activity becomes one of the largest hidden causes of battery drain.

Fix

Go to:

Settings → General → Background App Refresh

Disable Background App Refresh completely or restrict it to essential apps only. You’ll often notice longer battery life without affecting normal daily use.

3. Poor Wi-Fi Connections Can Drain More Battery Than You Realise

A weak Wi-Fi signal forces your iPad’s wireless radios to work harder while constantly searching for stronger connections. This is especially common when:

  • Moving around large buildings
  • Travelling
  • Using public Wi-Fi
  • Sitting far from your router

If your battery drains quickly only while connected to certain networks, unstable Wi-Fi may be contributing to the problem.

If you’re also experiencing slow internet or connection problems, read our guide on Why Is My iPad Wi-Fi Not Working? Causes, Fixes & Complete Troubleshooting Guide to identify network-related issues that may also impact battery life.

4. Location Services Constantly Use GPS

Many applications request location access even when it isn’t necessary.

  • Weather apps
  • Food delivery
  • Maps
  • Shopping apps
  • Fitness tracking
  • Social media
  • Photo tagging

Each GPS request consumes battery power.

Fix

Navigate to:

Settings → Privacy & Security → Location Services

Choose:

  • Never
  • Ask Next Time
  • While Using the App

Avoid allowing “Always” unless absolutely necessary.

5. Push Email and Constant Syncing

Your iPad may be checking multiple email accounts every few seconds. If you have:

  • Outlook
  • Gmail
  • Exchange
  • iCloud Mail

running simultaneously, background syncing becomes continuous. Large attachments and multiple inboxes increase battery consumption even further. Changing email fetch intervals from Push to every 30-60 minutes can noticeably improve battery life.

6. Outdated iPadOS Can Cause Unexpected Battery Drain

Apple regularly releases iPadOS updates to improve performance, security, and battery efficiency. Occasionally, however, an outdated version – or even a recently installed update that hasn’t finished background indexing – can temporarily increase battery usage.

After a major iPadOS update, your iPad may spend several hours or even a couple of days rebuilding photo libraries, indexing files, syncing iCloud data, and optimising apps. During this period, battery life can seem much worse than usual.

Signs a Software Issue Is Draining Your Battery

  • Battery drain started immediately after an update
  • Apps crash frequently
  • iPad feels slower than normal
  • Device becomes warm while idle
  • Battery usage differs significantly from previous weeks

How to Fix It

  • Go to Settings → General → Software Update
  • Install the latest version of iPadOS.
  • Restart your iPad after updating.
  • Leave it connected to Wi-Fi and charging overnight so background optimisation can finish.
  • If the issue only began after a recent update, give the device 24-48 hours before assuming the battery is faulty.

7. Ageing Batteries Eventually Lose Capacity

Like all lithium-ion batteries, an iPad battery gradually loses its ability to store energy. This is a normal part of ageing and cannot be completely prevented. Most users begin noticing reduced battery life after two to four years of regular use, depending on charging habits and daily workload.

As battery health declines, you may notice:

  • Shorter battery life than when the iPad was new
  • Unexpected shutdowns
  • Slower overall performance
  • Longer charging times
  • Battery percentage dropping in large jumps

Unlike iPhones, most iPads don’t display battery health as a percentage, making professional diagnostics the most reliable way to assess battery condition.

8. Overheating Makes Your Battery Drain Faster

Heat is one of the biggest enemies of lithium-ion batteries. When an iPad becomes too hot, the system automatically reduces performance to protect internal components. At the same time, the battery discharges more quickly.

Common causes include:

  • Gaming for long periods
  • Video editing
  • Charging while using demanding apps
  • Direct sunlight
  • Hot cars
  • Thick protective cases trapping heat

What You Should Do

  • Move the iPad to a cooler environment.
  • Remove the case if it feels excessively warm.
  • Avoid charging while gaming or streaming.
  • Close unnecessary apps.
  • Allow the device to cool naturally.

Never place an overheating iPad in a refrigerator or freezer, as sudden temperature changes can cause moisture damage.

9. Some Apps Consume Far More Battery Than Others

Not every app is equally power-efficient. Applications that constantly access the internet, GPS, camera, or graphics processor naturally consume more battery. Typical battery-hungry apps include:

  • YouTube
  • Netflix
  • TikTok
  • Instagram
  • Facebook
  • Zoom
  • Microsoft Teams
  • High-end games
  • Photo and video editing apps

Check Battery Usage

Go to:

Settings → Battery

Review which apps have used the most power during the last 24 hours and the previous 10 days. If one app is consuming an unusually high percentage of battery, update it or reinstall it.

10. Bluetooth and Connected Accessories Can Reduce Battery Life

Wireless accessories make your iPad more convenient, but they also increase power consumption. Examples include:

  • Apple Pencil
  • Bluetooth keyboards
  • Wireless headphones
  • External speakers
  • Game controllers

Although the effect is usually small, multiple connected devices throughout the day can noticeably shorten battery life. Turn Bluetooth off whenever you’re not actively using accessories.

11. Widgets and Live Activities Can Continuously Refresh

Modern versions of iPadOS allow widgets to display live information such as weather, calendars, reminders, stock prices, and news. Every refresh uses processing power and battery.

If you rarely use these widgets, removing unnecessary ones from your Home Screen can extend battery life.

12. Notifications Also Consume More Power Than Most Users Expect

Every notification activates the screen, processor, and wireless connection. Apps sending dozens of notifications every hour can have a measurable impact on battery performance.

Reduce notifications for:

  • Shopping apps
  • Games
  • News apps
  • Promotional apps
  • Social media

You’ll not only improve battery life but also reduce distractions.

13. Low Storage Can Affect Overall Performance

Although storage itself doesn’t directly consume battery power, an almost full iPad often works harder managing files and temporary system data. If storage is nearly full, you may notice:

  • Slower app launches
  • Reduced performance
  • Longer indexing times
  • Increased battery consumption

Try keeping at least 10-15% of your storage free for optimal performance.

How Much Does an iPad Battery Replacement Cost?

If you’ve tried every software fix and your battery still drains unusually fast, the battery itself may simply be worn out. Professional diagnostics can determine whether replacement is necessary or if another hardware issue is responsible.

Before replacing your battery, it’s worth reading our complete guide on How Much Does an iPad Battery Replacement Cost?, where we explain UK pricing, replacement options, expected lifespan, and when replacing the battery is better than buying a new iPad.

Step-by-Step Fixes for an iPad Battery That Drains Quickly

Follow these troubleshooting steps in order. Many users notice a significant improvement before reaching the final step.

1. Restart Your iPad

A simple restart clears temporary software glitches, background processes, and memory issues. Restart your iPad at least once every few days rather than leaving it running continuously.

2. Update Every Installed App

Developers frequently release updates that improve battery efficiency and fix software bugs. Open the App Store and install all available updates.

3. Reduce Screen Brightness

Enable Auto-Brightness and avoid running maximum brightness indoors. Even reducing brightness by 20-30% can noticeably increase battery life.

4. Turn Off Background App Refresh

Disable unnecessary background activity to reduce hidden battery consumption.

Go to:

Settings → General → Background App Refresh

Switch off apps that don’t need constant updates.

5. Disable Unnecessary Location Services

Only allow GPS access while an app is actively being used. Many apps request location access even when it’s unnecessary.

6. Enable Low Power Mode (When Available)

Low Power Mode limits background tasks, visual effects, downloads, and automatic syncing. It’s especially useful when travelling or working away from a charger.

7. Check Battery Usage Statistics

Review battery usage every few weeks. If one app suddenly starts consuming excessive battery, uninstalling or reinstalling it often resolves the problem.

8. Restart After Every Major Update

Many users forget this simple step. Restarting after installing iPadOS updates allows the operating system to reload essential services correctly.

9. Reset Settings (If Necessary)

If battery drain began after changing multiple settings, resetting system settings may help. This doesn’t erase your personal data.

Go to:

Settings → General → Transfer or Reset iPad → Reset → Reset All Settings

10. Book a Professional Battery Diagnostic

If your battery still loses power rapidly despite completing every troubleshooting step, professional testing is the fastest way to identify whether the issue is:

  • A worn battery
  • Charging circuit fault
  • Motherboard issue
  • Software corruption
  • Liquid damage
  • Internal component failure

Professional diagnostics prevent unnecessary battery replacements when another repair is actually required.

Professional iPad Battery Replacement Services Across the UK

If you’ve worked through every troubleshooting tip in this guide and your iPad battery is still draining much faster than it should, the problem may no longer be software-related. While changing settings, updating iPadOS, and reducing background activity can solve many battery issues, they cannot restore a battery that has naturally worn out or repair damage caused by faulty internal hardware.

At iExpert Repairs, we provide professional iPad battery replacement and complete iPad Repair services for customers across the UK. Our certified technicians diagnose hundreds of Apple devices every month, helping customers identify whether the problem is a worn battery, charging fault, damaged logic board, or another hidden issue affecting battery performance.

Rather than replacing parts based on guesswork, every repair begins with a full diagnostic inspection. We carefully assess your battery health, charging behaviour, software condition, internal components, and overall device performance before recommending the most suitable repair. This approach saves customers money by ensuring only the necessary repair is carried out.

Whether you own an iPad, iPad mini, iPad Air, or the latest iPad Pro, our technicians use professional tools and premium-quality replacement parts to restore your device safely and efficiently.

Here’s what we commonly discover during battery diagnostics:

Issue We FindWhat It Usually Means for Your iPadRecommended Solution
Battery health has significantly deterioratedThe battery can no longer hold enough charge for everyday use.Replace the battery with a high-quality new unit.
Charging port isn’t supplying stable powerThe battery may appear faulty even though charging is the real problem.Inspect and repair the charging port.
Background software processes are consuming excessive powerThe battery itself may still be healthy.Optimise software settings and remove problematic apps.
Liquid or accidental drop damage has affected internal componentsBattery drain is being caused by damaged hardware rather than the battery itself.Perform a full hardware repair after diagnostics.
Logic board or power management issuesThe battery cannot communicate correctly with the system.Advanced motherboard diagnostics and repair.

Because every iPad problem is different, accurate diagnostics are essential before replacing any component. Our repair services include:

Every repair is completed using premium-quality replacement parts and is backed by our 12-month warranty. Customers can either visit our repair centre for same-day service or use our secure UK-wide mail-in repair service, making professional iPad repairs available wherever you are in the UK.

When Should You Replace Your iPad Battery Instead of Continuing to Troubleshoot?

Many battery-related problems can be fixed by changing settings, updating software, or removing apps that consume excessive power. However, there comes a stage where software fixes simply aren’t enough because the battery has reached the end of its natural lifespan.

Like every lithium-ion battery, an iPad battery slowly loses its capacity with each charging cycle. After several years of daily charging, it simply cannot store the same amount of energy it did when it was new. At this point, even the best battery-saving tips will only provide limited improvement.

If you’ve already tried the troubleshooting steps in this guide and still need to recharge your iPad several times a day, replacing the battery is often the smartest long-term solution.

The table below shows the difference between normal battery behaviour and warning signs that usually indicate professional replacement is required.

What You’re ExperiencingIs It Usually Normal?What We Recommend
Battery drains slightly faster after a major iPadOS updateYes. The system may still be indexing files in the background.Wait 24-48 hours and keep your iPad updated.
Battery lasts a little less than it did when newYes. All batteries naturally age over time.Continue monitoring performance.
Battery only lasts one or two hours during light useNo. This usually indicates significant battery wear.Book a professional battery diagnostic.
iPad randomly shuts down while battery percentage still shows chargeNo.Battery replacement is often required.
Battery percentage suddenly jumps from 40% to 10%No.Internal battery cells may be failing.
Battery begins swelling or pushes against the displayNever normal.Stop using the device and arrange immediate repair.
Your iPad only works while connected to the chargerNo.The battery or charging circuit should be inspected professionally.

Ignoring these warning signs can eventually affect other internal components. For example, a swollen battery may place pressure on the display, while unstable power delivery can reduce overall device performance. Replacing the battery before additional damage occurs is usually much more affordable than repairing multiple components later.

Prevent Your New iPad Battery From Wearing Out Too Quickly

After replacing your battery -or even if your current battery is still healthy – good charging habits can make a noticeable difference to how long it lasts.

Although every lithium-ion battery naturally degrades over time, following a few simple practices can slow that ageing process and help your iPad maintain better battery life for years. Below are the habits our technicians recommend to customers after every battery replacement.

Good Battery HabitWhy It Makes a Difference
Charge your iPad before it reaches 0% whenever possibleDeep discharging the battery regularly increases long-term wear.
Avoid leaving the battery at 100% for extended periods every dayKeeping the battery under constant full charge creates unnecessary stress over time.
Keep your iPad away from excessive heatHigh temperatures permanently reduce battery capacity faster than normal ageing.
Use Apple-certified or trusted charging accessoriesStable power delivery protects both the battery and charging circuitry.
Install iPadOS updates regularlySoftware updates often include battery optimisation improvements and bug fixes.
Remove apps you no longer useFewer background processes mean less unnecessary battery consumption.
Lower screen brightness whenever possibleThe display is one of the largest sources of battery usage on every iPad model.

Following these simple habits won’t stop battery ageing completely, but they can significantly extend the lifespan of your iPad and reduce the chances of needing another battery replacement sooner than expected.

Why Choose iExpert Repairs for Your iPad Battery Replacement?

Choosing where to repair your iPad is just as important as deciding whether it needs a repair in the first place. A poor-quality battery replacement can lead to reduced battery life, charging issues, overheating, or even damage to other internal components.

At iExpert Repairs, every repair is carried out by experienced technicians who work with Apple devices every day. Instead of replacing parts based on assumptions, we perform a complete diagnostic assessment to identify the root cause of the issue before recommending any repair.

Here’s what you can expect when you choose iExpert Repairs:

What We OfferHow It Benefits You
Certified TechniciansYour iPad is repaired by professionals with experience across all iPad generations.
Premium Replacement PartsReliable components designed to restore long-term performance and battery life.
Comprehensive DiagnosticsWe identify the actual problem before replacing any parts, helping you avoid unnecessary repair costs.
12-Month WarrantyEvery qualifying repair is backed by warranty for added confidence.
Same-Day Repairs (Where Available)Many common repairs can be completed much faster than manufacturer turnaround times.
UK-Wide Mail-In Repair ServiceCustomers across England, Scotland, Wales, and Northern Ireland can access our repair services without visiting the workshop.
Transparent PricingClear quotations with no hidden surprises after your device has been inspected.

Whether your iPad needs a simple battery replacement or a more complex hardware repair, our goal is always the same – to restore your device safely, professionally, and as quickly as possible.

Final Verdict

If your iPad battery is draining faster than normal, don’t assume the battery needs replacing straight away. In many cases, the problem can be solved by updating iPadOS, reducing background activity, adjusting display settings, or removing apps that consume excessive power.

However, if you’ve completed all of the troubleshooting steps in this guide and your iPad still loses charge unusually quickly, shuts down unexpectedly, or only lasts a few hours on a full charge, it’s time to have the device professionally inspected.

A timely battery replacement not only restores battery life but can also improve your iPad’s overall performance and extend its lifespan by several years. Ignoring symptoms such as battery swelling, random shutdowns, or rapid power loss may eventually lead to more expensive repairs.

At iExpert Repairs, we provide trusted iPad battery replacement and iPad repair services across the UK. With experienced technicians, premium-quality replacement parts, comprehensive diagnostics, a 12-month warranty, and a convenient UK-wide mail-in service, we’re committed to helping you get your iPad back to performing at its best.

FAQs About iPad Battery Draining Fast

1. Why is my iPad battery draining so fast all of a sudden?

If your iPad battery suddenly starts draining much faster than usual, it’s often caused by a recent iPadOS update, a power-hungry app, Background App Refresh, Location Services, poor Wi-Fi connectivity, or an ageing battery. Start by checking Settings > Battery to identify which apps are consuming the most power. If the problem continues after updating your software and adjusting battery settings, a professional diagnostic may be needed to determine whether the battery requires replacement.

2. How long should an iPad battery last on a full charge?

Most modern iPads are designed to deliver around 10 hours of web browsing or video playback over Wi-Fi under normal conditions. However, actual battery life varies depending on your screen brightness, app usage, network connection, battery age, and iPad model. Older devices naturally lose battery capacity after years of regular use.

3. Why does my iPad battery drain even when I’m not using it?

Battery drain while your iPad is idle is usually caused by Background App Refresh, email syncing, app notifications, Location Services, Bluetooth accessories, or software running in the background. If your battery continues draining rapidly while the device is locked, checking Battery Usage and disabling unnecessary background processes can often solve the issue.

4. Can a recent iPadOS update cause battery drain?

Yes. After installing a major iPadOS update, your iPad may temporarily use more battery while indexing files, updating apps, syncing iCloud data, and optimising system processes. This increased battery usage usually settles within 24 to 48 hours. If excessive battery drain continues beyond that period, another software or hardware issue may be responsible.

5. How can I check which apps are draining my iPad battery?

Open Settings > Battery to view detailed battery usage information. Your iPad will show which apps have consumed the most power over the past 24 hours and the last 10 days. If one application is using significantly more battery than expected, updating, reinstalling, or limiting its background activity may improve battery life.

6. Does screen brightness affect iPad battery life?

Yes. The display is one of the biggest power consumers on every iPad. Keeping brightness at maximum for long periods can significantly reduce battery life. Enabling Auto-Brightness or manually lowering the brightness when indoors is one of the easiest ways to make your battery last longer.

7. Does Wi-Fi or mobile data use more battery on an iPad?

Both can affect battery life, but a weak Wi-Fi or cellular signal often causes higher battery usage because the iPad continuously searches for a stronger connection. If you’re in an area with poor signal strength, battery drain may increase until the connection improves.

8. Why does my iPad get hot while the battery drains quickly?

Overheating is commonly caused by gaming, video editing, long video calls, charging while using demanding apps, or software running excessively in the background. Heat forces the battery to work harder and can accelerate battery wear over time. Allowing your iPad to cool naturally and reducing heavy workloads can help improve battery performance.

9. Is it normal for an older iPad battery to drain faster?

Yes. Lithium-ion batteries naturally lose capacity over time. After several hundred charge cycles, an older battery will no longer hold as much power as it did when new. If your iPad only lasts a few hours on a full charge despite light use, the battery may be nearing the end of its lifespan.

10. How do I know if my iPad battery needs replacing?

Common signs include rapid battery drain, unexpected shutdowns, slow charging, overheating, battery percentage jumping suddenly, swelling, or your iPad only working while connected to the charger. If several of these symptoms appear together, it’s a good idea to have your battery professionally tested.

11. Can Low Power Mode help reduce battery drain?

Yes. Low Power Mode limits background activity, automatic downloads, visual effects, and some system processes to help extend battery life. While it won’t fix a worn-out battery, it can significantly reduce power consumption during daily use.

12. Should I let my iPad battery reach 0% before charging it?

No. Modern lithium-ion batteries perform better when they are charged before becoming completely empty. Regularly allowing your battery to reach 0% can increase long-term wear. Keeping the battery between approximately 20% and 80% is generally considered better for long-term battery health.

Final Thoughts: Fix Your iPad Battery Before Replacing Your Device

A rapidly draining iPad battery doesn’t automatically mean it’s time to buy a new tablet. In many cases, the issue is caused by software settings, power-hungry apps, outdated iPadOS, poor charging habits, or background processes that can be fixed with the troubleshooting steps covered in this guide.

However, if your iPad continues to lose power unusually fast after trying these solutions – or you’re experiencing problems such as unexpected shutdowns, overheating, battery swelling, charging issues, or battery life that lasts only a few hours – it may be a sign that the battery or another internal component has reached the end of its lifespan.

Having your iPad professionally diagnosed is the safest way to identify the real cause of the problem. Accurate diagnostics help avoid unnecessary repairs and ensure your device receives the correct solution the first time.

At iExpert Repairs, our certified technicians provide expert iPad battery replacement and comprehensive iPad repair services for every major model, including the iPad, iPad mini, iPad Air, and iPad Pro. Every repair begins with a detailed diagnostic assessment and is completed using premium-quality replacement parts, professional repair techniques, transparent pricing, and is backed by a 12-month warranty. Whether you visit our repair centre or choose our convenient UK-wide mail-in repair service, you can expect fast, reliable, and professional support from experienced Apple device specialists.

Back to posts

Why Is My iPad Camera Not Working? Causes & Fixes

Why Is My iPad Camera Not Working?

If your iPad camera has suddenly stopped working, displays a black screen, freezes, crashes, or produces blurry photos, the problem could be caused by several different software or hardware issues.

The most common causes include:

  • Temporary iPadOS software bugs
  • Camera app glitches
  • Outdated iPadOS
  • Incorrect privacy or Screen Time settings
  • Storage running out of space
  • Camera being used by another app
  • Physical damage after a drop
  • Loose internal camera connector
  • Water or liquid damage
  • Faulty front or rear camera module
  • Logic board or camera IC failure

Fortunately, many camera problems can be resolved without replacing the device. In many cases, a simple restart, software update, or settings adjustment restores normal camera functionality. However, if the fault is caused by impact damage or internal hardware failure, professional diagnostics are usually required.

Quick Answer:Why Is My iPad Camera Not Working?

If your iPad camera is not working, it could be caused by a temporary software glitch, outdated iPadOS, incorrect camera permissions, app conflicts, low storage space, or hardware damage. In most cases, you can fix the issue by restarting your iPad, updating iPadOS, checking camera settings, and resetting your device’s settings. However, if the camera still shows a black screen, takes blurry photos, or stopped working after a drop or liquid damage, the problem is likely hardware-related and may require professional iPad camera repair.

Introduction

Your iPad’s camera is no longer just for taking photos. Whether you’re attending online classes, joining FaceTime calls, scanning important documents, creating social media content, recording videos, or using augmented reality apps, a fully functioning camera has become an essential part of everyday use.

So when the camera suddenly stops working, opens to a black screen, refuses to focus, or crashes every time you launch the Camera app, it can quickly become frustrating.

The good news is that a non-working iPad camera doesn’t always mean the camera itself is broken. In fact, many camera issues are caused by software conflicts, outdated iPadOS versions, temporary bugs, or incorrect settings that can often be fixed at home in just a few minutes.

However, if your iPad has recently been dropped, exposed to liquid, or repaired using low-quality replacement parts, the issue may involve the camera module, internal connectors, or the logic board.

At iExpert Repairs, we’ve diagnosed camera problems across every major iPad model, including the standard iPad, iPad Air, iPad mini and iPad Pro. In this guide, we’ll explain the most common causes of iPad camera issues, walk you through proven troubleshooting steps, and help you determine when professional repair is the safest and most cost-effective solution.

Signs Your iPad Camera Has a Problem

Not every camera fault presents in the same way. Understanding the symptoms can make it much easier to identify whether the issue is software-related or caused by failing hardware.

Some of the most common signs include:

  • The Camera app opens to a completely black screen.
  • The front camera doesn’t work but the rear camera does.
  • The rear camera has stopped working while the front camera still functions.
  • Photos appear blurry or cannot focus.
  • Videos are shaky or distorted.
  • The Camera app freezes or crashes repeatedly.
  • FaceTime cannot access the camera.
  • Third-party apps such as Zoom, WhatsApp or Microsoft Teams cannot use the camera.
  • The camera displays a spinning loading icon indefinitely.
  • Flash no longer works with the rear camera.
  • Error messages appear when opening the Camera app.
  • The camera works only after restarting the iPad.
  • Camera quality suddenly becomes poor after an accidental drop.
  • The camera lens appears cracked or scratched.
  • The camera refuses to switch between the front and rear lenses.

If your iPad is also showing display issues such as an unresponsive touchscreen or a completely black screen, we recommend reading our iPad Screen Not Responding? and Why Is My iPad Screen Black? troubleshooting guides, as physical damage can affect multiple internal components at the same time.

How the iPad Camera Works?

Before attempting any fixes, it helps to understand how the iPad camera system functions. Unlike a standalone digital camera, your iPad’s camera relies on several hardware and software components working together seamlessly.

These include:

ComponentPurpose
Front CameraUsed for FaceTime, selfies and video calls.
Rear CameraUsed for photos, videos, document scanning and AR features.
Camera AppControls camera functions and communicates with iPadOS.
Camera ModuleCaptures images and videos.
Camera ConnectorConnects the camera hardware to the logic board.
Image Processing SoftwareEnhances image quality using iPadOS.
Logic BoardControls communication between the camera and other hardware.

A fault affecting any one of these components can prevent the camera from working correctly.

Why Is My iPad Camera Not Working?

There isn’t a single reason why an iPad camera stops working. During professional diagnostics at iExpert Repairs, we regularly encounter a range of software and hardware faults.

Below are the most common causes.

1. Temporary Software Glitch

A temporary software bug is the most common reason an iPad camera suddenly stops working. After long periods of continuous use, installing a new iPadOS update, or running multiple apps in the background, the Camera app may fail to communicate properly with the operating system.

Typical symptoms include:

  • Black camera screen
  • Frozen Camera app
  • Camera closes unexpectedly
  • Camera works after restarting the iPad
  • Camera switches slowly between lenses

Fortunately, these issues are usually resolved with a simple restart or force restart.

2. Outdated iPadOS

Apple regularly releases software updates that improve camera performance, fix bugs and enhance compatibility with newer apps. Running an outdated version of iPadOS can cause:

  • Camera crashes
  • FaceTime camera problems
  • Autofocus issues
  • Slow image processing
  • App compatibility problems

Installing the latest stable version of iPadOS often resolves these software-related issues.

3. Camera Permissions Are Disabled

Many users accidentally deny camera access without realising it. If camera permissions are disabled, apps like:

  • FaceTime
  • Zoom
  • Microsoft Teams
  • WhatsApp
  • Instagram
  • Snapchat
  • Google Meet

may display a black screen or report that no camera is available. Checking your privacy settings should always be one of the first troubleshooting steps.

4. Another App Is Using the Camera

Only one application can access the camera at a time. If another app is already using the camera in the background, the Camera app may fail to launch correctly.

Common examples include:

  • FaceTime running in the background
  • Zoom meetings
  • QR scanner apps
  • Barcode readers
  • Social media apps using the camera
  • Video recording applications

Closing all background apps usually restores normal functionality.

5. Low Storage Space

Your iPad requires free storage to process images and save photos. When storage becomes almost full, you may experience:

  • Camera freezing
  • Photos failing to save
  • Slow image processing
  • Video recording stopping unexpectedly
  • Camera app crashes

Deleting unnecessary files or moving photos to iCloud can often improve camera performance.

6. Physical Damage After a Drop

One of the most common hardware causes we see at iExpert Repairs is accidental impact damage. Even if your screen appears undamaged, dropping your iPad can affect delicate internal camera components.

Possible damage includes:

  • Loose camera connector
  • Misaligned camera module
  • Cracked camera lens
  • Damaged autofocus mechanism
  • Internal cable damage

In many cases, the camera may initially work intermittently before failing completely.

7. iPad is Liquid Damage

Moisture is one of the biggest threats to modern electronic devices. Even a small amount of liquid entering the iPad can corrode camera connectors and sensitive circuitry.

Signs of liquid-related camera damage include:

  • Foggy camera images
  • Camera not detected
  • Black screen
  • Camera app freezing
  • Flash failing to operate
  • Intermittent camera function

Because corrosion can continue spreading over time, it’s important to have liquid-damaged devices inspected as soon as possible.

8. Faulty Camera Module

Like any electronic component, camera modules wear out over time or fail after physical damage. A failing camera module may cause:

  • Blurry images
  • Constant focusing problems
  • Camera shaking
  • Rear camera not opening
  • Front camera showing a black screen
  • Camera app crashing every time it opens

Unlike software issues, replacing the faulty camera module is often the only permanent solution.

9. Logic Board or Camera IC Failure

Although less common, logic board faults are among the most serious causes of camera problems. The camera may stop working if the Camera IC or related circuits become damaged due to:

  • Severe impact
  • Liquid damage
  • Electrical faults
  • Previous poor-quality repairs

Typical symptoms include:

  • Neither front nor rear camera works.
  • Face ID or Centre Stage features malfunction.
  • Flash no longer works.
  • Camera app crashes instantly.
  • Multiple hardware features fail simultaneously.

Professional board-level diagnostics are required to confirm these faults.

How to Fix an iPad Camera That Isn’t Working?

The good news is that most iPad camera problems are caused by software rather than hardware. Before considering a repair, work through the troubleshooting steps below in order. Each solution is designed to eliminate the most common causes first, helping you avoid unnecessary repairs and save time.

Quick Troubleshooting Checklist

ProblemTry This First
Black camera screenRestart the iPad
Camera app keeps crashingForce close the Camera app
Front camera not workingTest camera permissions
Rear camera blurryClean the camera lens
Camera freezesUpdate iPadOS
Camera unavailable in appsCheck Privacy settings
Camera stopped after a dropInspect for hardware damage
Both cameras not workingProfessional diagnostics recommended

Fix 1. Restart Your iPad

A simple restart refreshes background processes and reloads the camera drivers. Many temporary software bugs disappear after restarting the device.

Steps

  1. Press and hold the Power button together with either Volume button.
  2. Drag the Power Off slider.
  3. Wait approximately 30 seconds.
  4. Turn the iPad back on.
  5. Open the Camera app again.

If the issue was caused by a temporary software conflict, the camera should now function normally.

Fix 2. Force Close the Camera App

Sometimes only the Camera app has frozen rather than the camera hardware itself. Closing it completely forces iPadOS to reopen the application from scratch.

Steps

  • Swipe up from the bottom of the screen.
  • Pause in the middle.
  • Find the Camera app.
  • Swipe it upwards to close it.
  • Open Camera again.

This frequently resolves camera freezing and black screen problems.

Fix 3. Force Restart Your iPad

If a normal restart doesn’t work, perform a force restart. Unlike a standard restart, this refreshes more system processes without deleting any personal data.

For iPads Without a Home Button

  1. Press and release Volume Up.
  2. Press and release Volume Down.
  3. Hold the Power button until the Apple logo appears.

For iPads With a Home Button

Press and hold both the Home and Power buttons together until the Apple logo appears. Many camera-related software glitches disappear after a force restart.

Fix 4. Check Camera Permissions

One of the most overlooked causes of camera problems is disabled app permissions.

If camera access has been denied, apps such as FaceTime, Zoom, WhatsApp or Microsoft Teams won’t be able to use the camera even though the hardware is working correctly.

To Check Permissions

  1. Open Settings.
  2. Tap Privacy & Security.
  3. Select Camera.
  4. Ensure the required apps have permission enabled.

Also review Screen Time > Content & Privacy Restrictions, as camera access may have been restricted there.

Fix 5. Update iPadOS

Apple frequently releases software updates that improve camera stability, fix bugs and enhance compatibility with third-party applications.

To Update

  1. Open Settings.
  2. Go to General > Software Update.
  3. Install any available updates.
  4. Restart the device.

Keeping iPadOS up to date helps prevent many software-related camera issues.

If your iPad also experiences random restarts or startup issues, our Why Is My iPad Not Turning On? guide explains additional software troubleshooting steps that may help.

Fix 6. Clean the Camera Lens Properly

A dirty camera lens often causes blurry photos that users mistake for hardware failure. Dust, fingerprints and pocket lint can all reduce image quality.

Clean the Lens Using

  • A clean microfiber cloth
  • Lens cleaning wipes
  • Gentle circular movements

Avoid using:

  • Tissue paper
  • Harsh chemicals
  • Household cleaning products
  • Abrasive cloths

If the lens itself is cracked, cleaning won’t resolve the issue.

Fix 7. Remove Your iPad Case or Camera Cover

Some protective cases partially block the camera or interfere with autofocus. This is especially common with:

  • Thick rugged cases
  • Cheap third-party covers
  • Magnetic accessories
  • Camera lens protectors

Remove the case and test the camera again.

Fix 8. Test Both Cameras

Testing both cameras helps identify whether the fault affects only one camera module.

Check

  • Rear camera
  • Front camera
  • Video mode
  • Portrait mode (where available)
  • FaceTime
  • Third-party camera apps
Test ResultLikely Cause
Rear camera only failsRear camera module fault
Front camera only failsFront camera issue
Both cameras failSoftware or logic board problem
Camera works in some apps onlyPermission or app conflict

Fix 9. Close Other Apps Using the Camera

Only one application can access the camera at a time. If another app is still running in the background, the Camera app may not function correctly.

Close apps such as:

  • FaceTime
  • Zoom
  • WhatsApp
  • Teams
  • Snapchat
  • Instagram
  • QR Scanner apps

After closing them, reopen the Camera app.

Fix 10. Free Up Storage Space

Low storage doesn’t just prevent photos from saving – it can also affect camera performance.

Check Storage

Go to:

Settings > General > iPad Storage

If storage is nearly full:

  • Delete unwanted videos
  • Remove duplicate photos
  • Clear large downloads
  • Empty Recently Deleted
  • Move files to iCloud

Keeping sufficient free space allows the Camera app to operate more smoothly.

Fix 11. Reset All Settings

If incorrect system settings are preventing the camera from working, resetting all settings may help. This does not delete:

  • Photos
  • Apps
  • Documents
  • Videos
  • Personal files

It simply restores system settings to their defaults.

Steps

Go to:

Settings > General > Transfer or Reset iPad > Reset > Reset All Settings

Restart the device once complete.

Fix 12. Factory Reset Your iPad (Last Software Option)

If every previous software fix has failed, a factory reset may eliminate deep software corruption.

Before Resetting

Always back up your iPad using:

  • iCloud
  • Finder (Mac)
  • iTunes (Windows)

Reset Steps

Settings > General > Transfer or Reset iPad > Erase All Content and Settings

After setup, test the camera before restoring your backup. If the camera still doesn’t work on a clean installation, the problem is almost certainly hardware-related.

Fix 13. Test the Camera in Another App

Sometimes only the Camera app itself is affected. Try opening:

  • FaceTime
  • Zoom
  • Microsoft Teams
  • WhatsApp
  • Instagram
  • Snapchat

Results

ResultPossible Cause
Works everywhereCamera is healthy
Works only in Camera appApp glitch
Works only in third-party appsCamera app corruption
Doesn’t work anywhereHardware failure likely

Why Is My iPad Camera Showing a Black Screen?

A black screen is one of the most common complaints we see during professional diagnostics. Possible causes include:

  • Camera app bug
  • Frozen software
  • Failed camera module
  • Loose camera connector
  • Logic board damage
  • Camera being used by another app

Try These Solutions

  • Restart the iPad
  • Force restart
  • Close all camera apps
  • Update iPadOS
  • Test both cameras
  • Reset settings

If the black screen persists after all software troubleshooting, the camera hardware should be professionally inspected.

Why Is My iPad Camera Blurry?

Blurry photos aren’t always caused by a faulty camera. Common reasons include:

  • Dirty camera lens
  • Protective film covering the lens
  • Cracked camera glass
  • Autofocus malfunction
  • Camera movement
  • Moisture inside the lens
  • Internal camera damage after a drop

Cleaning the lens should always be your first step.

Why Does My iPad Camera Keep Freezing?

A camera that freezes repeatedly often points to software instability. Possible causes include:

  • Outdated iPadOS
  • Low storage
  • Background apps
  • Camera app corruption
  • Memory management issues
  • Hardware beginning to fail

Restarting the device and updating iPadOS usually resolve software-related freezing.

Why Does the Camera App Keep Crashing?

If the Camera app opens briefly before closing again, the issue may be caused by:

  • Corrupted app processes
  • Damaged system files
  • Insufficient storage
  • Outdated software
  • Hardware communication failure

If restarting and updating the device don’t resolve the issue, further diagnostics may be required.

Why Is My Front iPad Camera Not Working?

If your front-facing camera has stopped working while the rear camera functions normally, the problem is usually isolated to the front camera module, its connector, or a software-related issue affecting FaceTime and video calling apps. This issue is particularly frustrating if you regularly use your iPad for online meetings, virtual classes, or FaceTime calls.

Common causes include:

  • Camera permissions are disabled.
  • FaceTime restrictions in Screen Time.
  • Temporary software glitches.
  • Outdated iPadOS.
  • Loose front camera connector after a drop.
  • Water or liquid damage.
  • Faulty front camera module.

Common symptoms

  • FaceTime shows a black screen.
  • Zoom cannot detect the camera.
  • Selfies don’t work.
  • Front camera freezes.
  • Unable to switch to the selfie camera.
  • Camera app crashes when changing cameras.

If the rear camera works perfectly but the front camera doesn’t, professional diagnostics can quickly determine whether the issue is software-related or requires replacement of the front camera module.

Why Is My Rear iPad Camera Not Working?

The rear camera is responsible for taking photos, recording videos, scanning QR codes, and using augmented reality features. If only the rear camera has stopped working, the issue is often caused by damage to the rear camera module itself.

Possible causes include:

  • Physical impact damage.
  • Loose camera connector.
  • Faulty autofocus mechanism.
  • Cracked camera lens.
  • Camera module failure.
  • Internal logic board fault.

Common symptoms

  • Rear camera displays a black screen.
  • Photos won’t save.
  • Camera constantly refocuses.
  • Videos appear blurry.
  • Flash doesn’t work.
  • Camera app freezes.

Rear camera problems are more common after accidental drops because the larger camera module absorbs much of the impact.

Front Camera vs Rear Camera Problems

Understanding which camera has failed helps narrow down the underlying cause much more quickly.

ProblemMost Likely Cause
Front camera only not workingFront camera module, connector or permissions
Rear camera only not workingRear camera module or impact damage
Both cameras not workingSoftware issue, logic board or Camera IC failure
Camera switches but freezesiPadOS software conflict
Neither camera opensHardware diagnostics recommended

Model-Specific iPad Camera Problems

Although camera issues can affect any iPad, certain models are known for experiencing particular faults more frequently.

1. iPad Pro

The iPad Pro features Apple’s most advanced camera system. However, because many models include larger camera modules, accidental drops can occasionally damage:

  • Rear camera connector
  • Autofocus system
  • Ultra-wide camera (newer models)
  • LiDAR sensor (supported models)

Users often report:

  • Blurry photos
  • Camera shaking
  • Black screen
  • Focus constantly hunting

If your iPad Pro has also suffered a cracked display, our How Much to Fix an iPad Screen? guide explains repair options and pricing, as impact damage often affects multiple components.

2. iPad Air

The iPad Air generally offers excellent long-term reliability. Most camera issues are software-related rather than hardware failures. Typical problems include:

  • Camera app freezing
  • FaceTime camera not working
  • Camera permissions disabled
  • Slow camera opening after software updates

Updating iPadOS and resetting settings often resolves these issues.

If your iPad Air is also experiencing charging problems, our Why Is My iPad Not Charging? guide covers common power-related faults and fixes.

3. iPad mini

The compact size of the iPad mini makes it easy to carry, but frequent drops can sometimes loosen internal camera connectors. Symptoms include:

  • Intermittent camera operation.
  • Front camera randomly failing.
  • Rear camera freezing.
  • Blurry photos after impact.

Professional diagnostics can determine whether the connector simply needs reseating or the camera module requires replacement.

4. Standard iPad

Standard iPads most commonly experience software-related camera issues. These include:

  • Camera app crashes.
  • Temporary software glitches.
  • Outdated iPadOS.
  • Storage-related problems.
  • Privacy settings preventing camera access.

Fortunately, these faults are often resolved using the troubleshooting steps covered earlier in this guide.

When Is It a Hardware Problem?

Software fixes won’t solve every camera issue. If you’ve completed all the troubleshooting steps and your camera still doesn’t work, there’s a strong possibility that a hardware component has failed.

Warning signs of hardware failure

  • Camera always shows a black screen.
  • Camera doesn’t work after a factory reset.
  • Camera stopped working immediately after being dropped.
  • Camera lens is cracked.
  • Front and rear cameras both fail.
  • Flash has stopped working.
  • Camera shakes continuously.
  • Photos remain blurry even after cleaning the lens.
  • Camera cannot focus.
  • Device has suffered liquid damage.

At iExpert Repairs, our technicians use specialist diagnostic equipment to identify whether the fault lies with the camera module, internal connectors, camera IC, or the logic board before recommending any repair.

Can Liquid Damage Affect the iPad Camera?

Yes. Even a small amount of liquid can damage the delicate components responsible for camera operation. Unlike cracked screens, liquid damage isn’t always immediately visible. Corrosion may continue spreading internally for days or even weeks after exposure.

Common symptoms include:

  • Camera intermittently working.
  • Fog inside the camera lens.
  • Blurry images.
  • Black camera screen.
  • Camera app freezing.
  • Flash no longer functioning.
  • FaceTime camera failing.
  • Unexpected restarts.

If your iPad has been exposed to water, avoid charging it until it has been professionally inspected.

When Should You Seek Professional iPad Camera Repair?

Many camera issues can be resolved at home, but persistent problems often require specialist equipment and experience. We recommend professional diagnostics if:

  • The camera remains black after completing all troubleshooting.
  • Your iPad has been dropped.
  • Liquid damage is suspected.
  • The camera lens is physically damaged.
  • Photos remain blurry.
  • The Camera app crashes every time it opens.
  • The camera cannot focus.
  • Both cameras have stopped working.
  • A factory reset didn’t fix the problem.

At iExpert Repairs, every iPad undergoes a comprehensive diagnostic assessment before any repair begins. This ensures the correct fault is identified, preventing unnecessary part replacements and helping you avoid extra costs.

Common Hardware Faults That Affect iPad Cameras

Hardware FaultCommon Symptoms
Faulty front cameraSelfie camera not working
Faulty rear cameraBlack screen or blurry photos
Loose camera connectorCamera works intermittently
Damaged camera lensBlurry or distorted images
Camera IC failureBoth cameras stop working
Logic board damageMultiple camera functions fail
Liquid damageRandom camera failures

How Much Does iPad Camera Repair Cost in the UK?

The cost of repairing an iPad camera depends on the exact fault, the model, and whether the issue involves the camera module or board-level components.

Repair TypeEstimated UK Price
Diagnostic InspectionOften Free or £20-£40
Front Camera Replacement£50-£100
Rear Camera Replacement£70-£150
Camera Lens Replacement£40-£90
Camera Connector Repair£60-£120
Camera IC / Board-Level Repair£100-£220+
Logic Board Repair£150-£300+

Please note: Prices vary depending on the iPad model, the extent of the damage, and the replacement parts required. If your iPad also has battery or display issues, repairing multiple faults together can often reduce overall labour costs.

DIY Repair vs Professional Repair

Although replacing an iPad camera may appear straightforward in online videos, modern iPads contain delicate flex cables, adhesive, and precision components that are easily damaged without the correct tools and experience.

DIY RepairProfessional Repair
Risk of damaging the display or logic boardPerformed by experienced technicians
No professional diagnostic equipmentAdvanced diagnostic tools used
Difficult to source quality partsPremium-quality replacement parts
No warranty12-month warranty on eligible repairs
Higher risk of accidental damageFully tested before return
Can take several hoursFast turnaround for most repairs

Unless you’re experienced in electronics repair, attempting to replace the camera yourself can often lead to more expensive damage.

Thinking About Replacing Your iPad Instead?

If your iPad is several years old, has multiple hardware faults, or the repair cost outweighs its value, upgrading to a professionally refurbished model may be the smarter long-term investment.

At iExpert Market, you’ll find a wide range of professionally refurbished Apple iPads, including:

Every device is:

  • Professionally tested
  • Fully functional
  • Data wiped securely
  • Backed by a 12-month warranty
  • Available at significantly lower prices than buying new

A refurbished iPad offers excellent value while reducing electronic waste and giving you premium Apple performance for less.

FAQs About iPad Camera Problems

1. Why is my iPad camera not working?

Your iPad camera may stop working due to software bugs, incorrect camera permissions, outdated iPadOS, app conflicts, physical damage, liquid exposure, or a faulty camera module.

2. How do I fix an iPad camera that isn’t working?

Start by restarting your iPad, closing the Camera app, checking Screen Time and camera permissions, updating iPadOS, resetting all settings, and testing the camera in another app. If the problem persists, professional diagnostics may be required.

3. Why is my iPad camera showing a black screen?

A black camera screen is often caused by software glitches, camera app crashes, or hardware faults such as a damaged camera module or loose internal connector.

4. Why is my front camera not working on my iPad?

The front camera may fail because of hardware damage, disabled camera permissions, software issues, or a faulty front camera module. Testing the rear camera can help identify whether the issue affects one or both cameras.

5. Why is my rear camera not working?

A faulty rear camera can result from impact damage, internal hardware failure, software bugs, a damaged camera lens, or a loose camera connector.

6. Why is my iPad camera blurry?

Blurry photos are commonly caused by a dirty lens, protective case obstruction, autofocus issues, moisture inside the lens, or a damaged camera module.

7. Why does my iPad camera keep freezing?

Camera freezing is usually caused by software bugs, low storage space, outdated iPadOS, memory issues, or corrupted system files.

8. Why does the Camera app keep crashing on my iPad?

Frequent Camera app crashes may be caused by software corruption, app conflicts, insufficient storage, or hardware faults affecting the camera system.

9. Can an iPadOS update fix camera problems?

Yes. Apple regularly releases iPadOS updates that include camera bug fixes, performance improvements, security patches, and compatibility enhancements.

10. Can resetting settings fix my iPad camera?

Yes. Resetting all settings can resolve camera issues caused by incorrect system configurations without deleting your photos, apps, or personal files.

11. Does resetting my iPad delete my photos?

No. Resetting settings does not erase your photos or apps. However, performing a factory reset will erase all data unless you’ve created a backup first.

12. Can water damage stop an iPad camera from working?

Yes. Liquid damage can affect the camera module, internal connectors, or logic board, resulting in blurry images, black screens, or complete camera failure.

13. Why is my iPad camera shaking or vibrating?

A shaking camera may indicate a faulty autofocus mechanism, camera module damage, or internal hardware failure that requires professional repair.

14. How much does iPad camera repair cost in the UK?

Repair costs vary depending on the model and the fault. Camera repairs are generally more affordable than replacing the entire device, while board-level repairs are typically more expensive.

15. How long does an iPad camera repair take?

Many camera repairs can be completed the same day, while more complex repairs involving the logic board may take one to three working days.

Need Professional iPad Camera Repair?

At iExpert Repairs, we specialise in fast, reliable iPad repairs for customers across the UK. Whether your iPad has a camera fault, charging issue, cracked screen, battery problem, Wi-Fi connectivity issue or liquid damage, our certified technicians can accurately diagnose the fault and provide a high-quality repair using premium replacement parts.

Why Choose iExpert Repairs?

  • Certified Apple repair specialists
  • Same-day repairs for many common faults
  • UK-wide secure mail-in repair service
  • Premium-quality replacement parts
  • Transparent pricing with no hidden charges
  • Comprehensive diagnostics before every repair
  • 12-month warranty on eligible repairs
  • Trusted by thousands of customers across the UK

Whether you visit our repair centre or use our nationwide mail-in service, we’re committed to getting your iPad back to perfect working condition as quickly as possible.

Back to posts

Why Is My iPad Wi-Fi Not Working? Causes & Fixes

Why Is My iPad Wi-Fi Not Working?

If your iPad won’t connect to Wi-Fi, keeps disconnecting, shows “Unable to Join Network”, or connects without internet access, the problem could be caused by:

  • Temporary software bugs
  • Incorrect Wi-Fi settings
  • Router or broadband issues
  • Outdated iPadOS
  • VPN or network configuration conflicts
  • Weak Wi-Fi signal
  • DNS or IP address problems
  • Hardware damage to the Wi-Fi antenna
  • Previous liquid damage
  • Logic board faults

Fortunately, many Wi-Fi issues can be fixed at home without losing your data. However, persistent connectivity problems may require professional diagnostics.

Introduction

An iPad without a stable internet connection quickly becomes frustrating. Whether you’re attending online classes, joining Zoom meetings, streaming Netflix, browsing Safari, gaming, or using cloud-based apps, reliable Wi-Fi is essential.

Many users assume their iPad is broken when Wi-Fi suddenly stops working. In reality, the issue is often caused by something much simpler, such as incorrect network settings, a temporary software bug, or your home router.

However, if your iPad has recently been dropped, exposed to liquid, or repaired using low-quality replacement parts, the problem may involve the internal Wi-Fi antenna or logic board.

At iExpert Repairs, we’ve helped thousands of customers across the UK diagnose Wi-Fi connectivity issues on every generation of iPad. In this guide, we’ll explain the most common causes, show you how to fix them step by step, and help you decide when professional repair is the better option.

If your tablet is also experiencing charging problems, our guide on Why Is My iPad Not Charging? can help you diagnose power-related faults before they become more serious.

Quick Answer:Why Is My iPad Wi-Fi Not Working?

If your iPad Wi-Fi is not working, the issue is usually caused by a software glitch, incorrect network settings, router problems, an outdated version of iPadOS, or internal hardware damage. In most cases, you can fix the problem by restarting your iPad, restarting your Wi-Fi router, forgetting and reconnecting to the network, resetting network settings, or updating iPadOS. If your iPad still won’t connect to Wi-Fi after trying these fixes – especially if it was dropped or exposed to liquid – the fault may be with the Wi-Fi antenna, wireless IC, or logic board, and professional iPad Wi-Fi repair may be required.

Signs Your iPad Has a Wi-Fi Problem

Not every Wi-Fi issue looks the same. Understanding the symptoms can help narrow down the underlying cause.

Common signs include:

  • iPad won’t detect nearby Wi-Fi networks.
  • Wi-Fi button is greyed out.
  • Connected to Wi-Fi but no internet access.
  • Internet disconnects every few minutes.
  • Apps say “No Internet Connection.”
  • Safari pages won’t load.
  • FaceTime calls constantly disconnect.
  • Slow download speeds.
  • Streaming buffers frequently.
  • Unable to join known networks.
  • Wi-Fi password repeatedly rejected.
  • Wi-Fi works only when standing near the router.

If you’re also experiencing display issues, such as a black screen or an unresponsive touchscreen, we recommend reading our Why Is My iPad Screen Black? and iPad Screen Not Responding? troubleshooting guides, as some hardware failures can affect multiple components.

Why Is My iPad Wi-Fi Not Working?

There isn’t one single cause behind Wi-Fi problems. Below are the most common reasons we encounter during professional iPad repairs.

1. Temporary Software Glitch

This is by far the most common reason. After an iPadOS update or prolonged use without restarting, background services responsible for wireless communication may stop responding correctly.

Symptoms include:

  • Wi-Fi disconnecting randomly
  • Slow browsing
  • Network disappears unexpectedly
  • Unable to reconnect after sleep mode

Fortunately, this usually resolves after restarting the device.

2. Your Router Is the Real Problem

Many users blame the iPad when the router is actually causing the issue. Possible router problems include:

  • ISP outages
  • Firmware bugs
  • Router overheating
  • Too many connected devices
  • DHCP conflicts
  • Weak signal strength

Before changing settings on your iPad, test whether other devices such as your phone or laptop can connect to the same Wi-Fi network.

If every device struggles to connect, the issue is likely your broadband or router rather than the iPad.

3. Weak Wi-Fi Signal

Walls, furniture, mirrors, thick floors and electronic appliances can all weaken wireless signals. You may notice:

  • Wi-Fi works in one room only.
  • Streaming constantly buffers.
  • Signal drops while walking around the house.
  • Downloads take much longer than usual.

Modern homes with multiple floors often require Wi-Fi extenders or mesh networking systems to provide reliable coverage.

4. Incorrect Network Settings

Corrupted saved network settings can prevent your iPad from communicating properly with your router. Examples include:

  • Incorrect DNS servers
  • Invalid IP addresses
  • Old network profiles
  • Static IP conflicts
  • Broken VPN configurations

Resetting network settings often fixes these issues without affecting your photos, apps, or personal files.

5. Outdated iPadOS

Apple regularly releases software updates that include:

  • Wi-Fi stability improvements
  • Security patches
  • Driver updates
  • Bug fixes
  • Better router compatibility

Running an older version of iPadOS may cause compatibility issues with newer Wi-Fi routers that support advanced wireless standards.

Always install the latest stable version when available.

6. VPN or Security Apps

VPN applications are useful for privacy but can sometimes interrupt internet connectivity. Signs include:

  • Wi-Fi connects but websites won’t load.
  • Certain apps lose internet access.
  • Slow browsing.
  • Random disconnections.

Temporarily disabling the VPN helps determine whether it’s causing the issue.

7. Incorrect Date and Time

Although it sounds unusual, incorrect date and time settings can interfere with secure internet connections. This commonly affects:

  • Safari
  • App Store
  • iCloud
  • Banking apps
  • Email services

Enabling Set Automatically usually resolves this problem.

8. Hardware Damage

If your iPad has recently been:

  • Dropped
  • Bent
  • Repaired previously
  • Exposed to liquid
  • Suffered impact damage

…the internal Wi-Fi antenna, antenna cable, or logic board may have been damaged. Unlike software issues, hardware faults usually require professional diagnostics and repair.

At iExpert Repairs, our technicians use advanced diagnostic tools to identify whether the problem lies with the antenna, wireless chip, charging circuitry, or motherboard before recommending a repair.

How to Fix an iPad That Won’t Connect to Wi-Fi?

The good news is that many Wi-Fi problems can be fixed at home without specialist tools. Work through these solutions in order.

Fix 1. Restart Your iPad

Restarting refreshes background processes and reloads the wireless drivers.

Steps

  1. Press and hold the Power button together with either Volume button.
  2. Drag the power slider.
  3. Wait around 30 seconds.
  4. Turn the iPad back on.
  5. Try reconnecting to Wi-Fi.

This simple step solves a surprising number of connectivity issues.

Fix 2. Restart Your Wi-Fi Router

Power cycling your router clears temporary network errors.

Steps

  1. Switch the router off.
  2. Unplug it from the wall.
  3. Wait 60 seconds.
  4. Plug it back in.
  5. Allow it to fully reconnect.
  6. Test your iPad again.

If multiple devices in your home have lost internet access, this should always be your first troubleshooting step.

Fix 3. Forget the Wi-Fi Network

Saved network settings occasionally become corrupted.

Here’s how:

  • Open Settings
  • Tap Wi-Fi
  • Select the information icon beside your network
  • Tap Forget This Network
  • Reconnect using your Wi-Fi password

This creates a fresh connection between your iPad and router.

Fix 4. Reset Network Settings

If restarting your iPad and reconnecting to your Wi-Fi network hasn’t solved the problem, resetting your network settings is often the next best step.

This removes saved Wi-Fi networks, Bluetooth pairings, VPN settings and network configurations without deleting your photos, apps or personal files.

How to Reset Network Settings

  1. Open Settings.
  2. Tap General.
  3. Select Transfer or Reset iPad.
  4. Tap Reset.
  5. Choose Reset Network Settings.
  6. Enter your passcode if prompted.
  7. Restart your iPad and reconnect to your Wi-Fi network.

Many persistent connectivity problems are resolved after resetting corrupted network configurations.

Fix 5. Check for an iPadOS Update

Apple frequently releases software updates that improve wireless stability, fix known bugs and enhance compatibility with modern routers.

To check for updates:

  1. Open Settings.
  2. Go to General > Software Update.
  3. Download and install any available updates.
  4. Restart your iPad after installation.

If your iPad struggles with other software-related issues, you may also find our guide on Why Is My iPad Not Turning On? helpful, as outdated software can contribute to several startup and performance problems.

Fix 6. Turn Wi-Fi Off and Back On

Sometimes the wireless radio simply needs to reconnect.

Steps

  • Open Settings > Wi-Fi.
  • Turn Wi-Fi off.
  • Wait around 30 seconds.
  • Turn Wi-Fi back on.
  • Reconnect to your network.

Although simple, this often restores a stable connection.

Fix 7. Disable VPN or Security Apps

VPN services can occasionally interfere with your internet connection. Try temporarily disabling:

  • VPN applications
  • Network security apps
  • Firewall utilities
  • Private DNS services

If Wi-Fi works normally afterwards, the VPN configuration may need updating or reinstalling.

Fix 8. Disable Private Wi-Fi Address (If Necessary)

Apple includes a privacy feature called Private Wi-Fi Address, which changes your device’s MAC address. While useful for privacy, some older routers may struggle to recognise it.

To disable it:

  1. Open Settings > Wi-Fi.
  2. Tap the next to your connected network.
  3. Turn Private Wi-Fi Address off.
  4. Reconnect to the network.

Only do this on trusted home or office networks.

Fix 9. Renew the IP Address

Sometimes your router assigns an invalid IP address. To renew it:

  • Open Settings > Wi-Fi.
  • Tap the beside your network.
  • Scroll down.
  • Tap Renew Lease.
  • Confirm the action.

This requests a fresh IP address from your router.

Fix 10. Check Date & Time Settings

Incorrect date and time settings can affect secure internet services.

Go to:

Settings > General > Date & Time

Enable:

Set Automatically

This helps ensure secure connections with Apple services and websites.

Fix 11. Test Another Wi-Fi Network

One of the easiest ways to identify the source of the problem is to connect your iPad to another network. Try using:

  • Mobile hotspot
  • Friend’s Wi-Fi
  • Office network
  • Public Wi-Fi

If your iPad connects successfully

The problem is probably your home router or broadband connection.

If it fails everywhere

The issue is more likely to be with the iPad itself.

Fix 12. Restart Your Router Properly

Many people simply press the router’s power button, but a complete restart is more effective.

Recommended method

  1. Turn the router off.
  2. Disconnect the power cable.
  3. Wait 60–90 seconds.
  4. Plug it back in.
  5. Wait until all indicator lights become stable.
  6. Test your iPad again.

If every device in your home has Wi-Fi problems, contact your broadband provider before assuming your iPad requires repair.

Fix 13. Reset All Settings

If none of the previous solutions work, resetting all settings may help. Unlike a factory reset, this does not erase your apps, photos or documents.

It simply restores system settings to their defaults. Go to:

Settings > General > Transfer or Reset iPad > Reset > Reset All Settings

Why Does My iPad Keep Disconnecting from Wi-Fi?

An iPad that connects successfully but keeps dropping the connection usually points to one of several common issues. Possible causes include:

  • Weak Wi-Fi signal
  • Router firmware problems
  • Interference from nearby devices
  • VPN conflicts
  • Power-saving software behaviour
  • Hardware faults affecting the Wi-Fi antenna

If your internet disconnects repeatedly even when you’re close to the router, professional diagnostics may be worthwhile.

Why Won’t My iPad Find Any Wi-Fi Networks?

If your Wi-Fi list is completely empty, the issue is more serious than a simple password problem.

Possible causes include:

  • Wi-Fi radio failure
  • Internal antenna damage
  • Logic board fault
  • Software corruption
  • Hardware failure following a drop

If the Wi-Fi toggle is greyed out, hardware damage becomes much more likely.

Could the Router Be Causing the Problem?

Absolutely. During diagnostics at iExpert Repairs, we often discover that the iPad itself is functioning perfectly. Router-related problems include:

  • Outdated firmware
  • Faulty DHCP settings
  • Dual-band configuration issues
  • MAC address filtering
  • Channel congestion
  • ISP outages

Testing another device on the same network helps determine whether the issue is with the router or the iPad.

Model-Specific Wi-Fi Problems

Although Wi-Fi issues can affect any iPad, certain models tend to experience particular problems more frequently.

1. iPad Pro

Older iPad Pro models occasionally develop antenna connector issues following accidental drops. Users may notice:

  • Weak signal strength
  • Slow downloads
  • Frequent disconnections

If your device has also suffered display damage, you may wish to read our guide on How Much to Fix iPad Screen?, as impact damage can sometimes affect more than just the display.

2. iPad Air

Many iPad Air models continue to perform reliably for years.

However, ageing batteries and outdated software can contribute to connectivity problems.

If your tablet is also experiencing rapid battery drain or charging issues, our How Much Does an iPad Battery Replacement Cost? guide explains when replacing the battery becomes worthwhile.3.

3. iPad mini

The compact design of the iPad mini makes it more portable, but repeated drops can occasionally loosen internal antenna connections. Symptoms may include:

  • Weak signal
  • Random Wi-Fi loss
  • Slow browsing

4. Standard iPad

Standard iPads generally experience software-related Wi-Fi problems rather than hardware failures. Updating iPadOS and resetting network settings often restores normal operation.

When Is It a Hardware Problem?

Software fixes won’t help if physical components inside the iPad have failed. Warning signs include:

  • Wi-Fi switch is permanently greyed out.
  • No networks appear anywhere.
  • Device has suffered liquid damage.
  • Wi-Fi stopped working immediately after being dropped.
  • Bluetooth also fails.
  • Wi-Fi works only when pressure is applied to the device.
  • Signal is extremely weak compared with other devices.

These symptoms usually require professional diagnostics.

At iExpert Repairs, we inspect the Wi-Fi antenna, antenna cable, wireless IC, charging circuitry and logic board before recommending any repair. This ensures customers only pay for the repair they actually need.

Can iPad Liquid Damage Affect Wi-Fi?

Yes. Even a small amount of moisture can corrode delicate internal components responsible for wireless communication. Sometimes the problem appears days or even weeks after the device was exposed to liquid.

Common symptoms include:

  • Intermittent Wi-Fi
  • Weak signal
  • Bluetooth problems
  • Unexpected restarting
  • Charging issues

If your iPad has been exposed to water, it’s important to avoid charging it until it has been professionally inspected.

When Should You Seek Professional iPad Wi-Fi Repair?

If you’ve tried all the troubleshooting steps in this guide and your iPad still won’t connect to Wi-Fi, it’s time to have the device professionally diagnosed.

While many wireless issues are software-related, persistent problems often point to failing internal hardware. Continuing to use a faulty iPad or repeatedly resetting it without identifying the real cause may waste time and, in some cases, allow the issue to become worse.

We recommend professional diagnostics if:

  • The Wi-Fi toggle is permanently greyed out.
  • Your iPad cannot detect any wireless networks.
  • Wi-Fi stopped working immediately after a drop.
  • The device has suffered liquid damage.
  • Bluetooth and AirDrop have also stopped working.
  • Your iPad frequently loses connection even when other devices remain connected.
  • Network settings have been reset but the issue persists.

At iExpert Repairs, every device undergoes a full diagnostic assessment before any repair is recommended. Our technicians identify whether the problem is caused by software corruption, antenna damage, a faulty Wi-Fi IC, or a logic board issue, ensuring you only pay for the repair your device actually needs.

Common Hardware Faults That Affect iPad Wi-Fi

Although software issues are more common, these hardware faults are regularly seen during professional repairs.

Hardware FaultCommon Symptoms
Damaged Wi-Fi antennaWeak signal or frequent disconnections
Loose antenna connectorWi-Fi works intermittently
Faulty Wi-Fi/Bluetooth ICWi-Fi toggle greyed out or no networks detected
Logic board damageWi-Fi, Bluetooth and AirDrop all stop working
Liquid damageUnstable wireless connectivity and random failures

A proper diagnostic test is the safest way to determine which component has failed.

How Much Does iPad Wi-Fi Repair Cost in the UK?

The cost of repairing an iPad’s Wi-Fi depends on the underlying fault rather than the iPad model alone.

Repair TypeEstimated UK Price
Diagnostic InspectionOften free or £20-£40 (frequently deducted from the repair cost)
Wi-Fi Antenna Repair£50-£90
Antenna Cable Replacement£40-£80
Wi-Fi IC / Board-Level Repair£90-£180+
Logic Board Repair£120-£250+

Please note: Actual pricing varies depending on the iPad model, the extent of the damage and the replacement parts required.

DIY Repair vs Professional Repair

Although online repair tutorials may make iPad repairs appear straightforward, Wi-Fi hardware repairs are highly specialised.

DIY RepairProfessional Repair
Risk of damaging the display or logic boardPerformed by trained technicians
No specialist diagnostic equipmentAdvanced diagnostic tools used
No warranty12-month warranty on eligible repairs
Higher chance of accidental damageReliable, tested repairs
Time-consumingFast turnaround for most repairs

Unless the issue is clearly software-related, attempting to repair internal Wi-Fi components at home is generally not recommended.

Why Choose iExpert Repairs?

Thousands of customers across the UK trust iExpert Repairs for reliable iPad repairs because we focus on accurate diagnostics, quality workmanship and transparent pricing.

Here’s what you can expect:

  • Certified technicians with experience repairing all iPad generations
  • Professional diagnostics before any repair begins
  • Premium-quality replacement parts
  • Same-day repairs for many common faults
  • UK-wide secure mail-in repair service
  • Competitive pricing with no hidden costs
  • 12-month warranty on eligible repairs
  • Friendly customer support throughout the repair process

Whether you own an iPad, iPad Air, iPad mini or iPad Pro, our technicians can diagnose and repair a wide range of software and hardware faults.

FAQs About iPad Wi-Fi Problems

1. Why is my iPad not connecting to Wi-Fi?

Your iPad may not connect to Wi-Fi because of incorrect network settings, outdated iPadOS, router issues, weak signal strength, or internal hardware faults such as a damaged Wi-Fi antenna.

2. How do I fix Wi-Fi not working on my iPad?

Start by restarting your iPad and router, forgetting the Wi-Fi network, resetting network settings, updating iPadOS, and checking your router configuration. If the issue continues, professional diagnostics may be required.

3. Why does my iPad keep disconnecting from Wi-Fi?

Frequent disconnections are commonly caused by weak signal strength, software bugs, outdated firmware, VPN conflicts, router interference, or a faulty Wi-Fi antenna.

4. Why won’t my iPad find any Wi-Fi networks?

If your iPad cannot detect any Wi-Fi networks, the cause may be disabled wireless settings, software corruption, or hardware problems affecting the Wi-Fi module.

5. Why is my iPad connected to Wi-Fi but has no internet?

This usually indicates a router, broadband, or DNS issue rather than a fault with the iPad itself. Testing another device on the same network can help identify the source of the problem.

6. What should I do if my iPad says “Unable to Join Network”?

Forget the saved network, restart your iPad and router, check the Wi-Fi password, update iPadOS, and reconnect. Persistent errors may require resetting network settings.

7. Can a software update fix iPad Wi-Fi problems?

Yes. Apple regularly releases iPadOS updates that improve wireless stability, security, and compatibility with newer routers.

8. Why is the Wi-Fi button greyed out on my iPad?

A greyed-out Wi-Fi option often indicates a hardware issue involving the Wi-Fi chip, antenna, or logic board, especially if restarting the device doesn’t resolve the problem.

9. Can resetting network settings fix Wi-Fi issues?

Yes. Resetting network settings removes corrupted Wi-Fi configurations, saved networks, VPN settings, and Bluetooth pairings without deleting your personal data.

10. Does resetting network settings erase my photos or apps?

No. It only resets network-related settings and does not remove your photos, apps, files, or personal information.

11. Can water damage stop my iPad from connecting to Wi-Fi?

Yes. Liquid exposure can damage the Wi-Fi antenna, wireless chip, or logic board, causing intermittent or complete loss of wireless connectivity.

12. Is it worth repairing an iPad with Wi-Fi problems?

In most cases, yes. If the issue is caused by a damaged antenna or wireless component, repairing the iPad is often more affordable than replacing the device.

13. How much does iPad Wi-Fi repair cost in the UK?

The cost depends on the fault and model. Simple antenna repairs are generally less expensive than board-level repairs involving the Wi-Fi IC or logic board.

14. How long does an iPad Wi-Fi repair take?

Many Wi-Fi repairs can be completed the same day, while more complex hardware repairs may take one to three working days.

15. Do all iPad models experience Wi-Fi problems?

Yes. Wi-Fi issues can affect iPad, iPad Air, iPad mini, and iPad Pro models due to software bugs, ageing hardware, accidental damage, or network configuration issues.

16. Can a damaged Wi-Fi antenna be replaced?

Yes. A damaged internal Wi-Fi antenna or antenna cable can usually be replaced by a qualified repair technician.

17. Should I repair or replace my iPad?

If the repair cost is reasonable and your iPad still meets your needs, repairing it is usually the most cost-effective option. Older devices with multiple faults may be better replaced with a professionally refurbished model.

18. Can a faulty router cause iPad Wi-Fi problems?

Yes. Router firmware issues, broadband outages, incorrect settings, or interference can prevent your iPad from connecting even when the tablet is functioning correctly.

19. Why is my iPad Wi-Fi slow even with a strong signal?

Slow Wi-Fi speeds may result from network congestion, ISP issues, background downloads, outdated software, DNS problems, or router performance rather than the iPad itself.

20. When should I seek professional iPad Wi-Fi repair?

If your iPad still won’t connect after basic troubleshooting, the Wi-Fi toggle is greyed out, or the device has suffered accidental or liquid damage, it’s best to have it professionally diagnosed and repaired.

Final Verdict

A Wi-Fi problem doesn’t always mean your iPad has reached the end of its life. In many cases, issues such as incorrect network settings, temporary software glitches, outdated iPadOS, or router configuration problems can be resolved with a few simple troubleshooting steps.

However, if your iPad still won’t connect to Wi-Fi after trying the solutions in this guide, or if the problem started after a drop, liquid exposure, or physical damage, the fault may lie with the internal Wi-Fi antenna, wireless IC, or logic board. These hardware issues require professional diagnostics and specialist repair equipment to resolve safely.

The sooner you identify the cause, the better your chances of avoiding further damage and restoring your iPad to full working condition.

Back to posts

Why Is My iPad Not Turning On? Causes & Fixes

Why Is My iPad Not Turning On?

If your iPad won’t turn on, don’t panic. In many cases, the problem isn’t as serious as it seems. A completely unresponsive iPad may simply have:

  • A deeply discharged battery
  • Software crash
  • Failed iPadOS update
  • Faulty charging cable
  • Dirty charging port

However, some iPads refuse to power on because of hardware problems such as:

  • Battery failure
  • Charging port damage
  • Water damage
  • Display failure
  • Logic board issues
  • Power management IC failure

The good news is that many of these issues can be diagnosed-and sometimes fixed-without replacing the entire device.

Quick Answer:Why Is My iPad Not Turning On?

If your iPad is not turning on, first charge it for at least 30-60 minutes using a genuine Apple-compatible charger, then perform a force restart. If the screen remains black or the device won’t respond, check the charging accessories, inspect the charging port, and try Recovery Mode. If none of these fixes work, the issue is likely hardware-related and requires professional diagnosis.

Why Won’t My iPad Turn On?

An iPad can fail to power on for several different reasons. Some problems are temporary and easy to fix, while others require component replacement.

The most common causes include:

Cause Can You Fix It Yourself? Professional Repair Needed?
Battery completely drained ✅ Yes ❌ Usually No
Frozen iPadOS ✅ Yes ❌ No
Faulty charger ✅ Yes ❌ No
Dirty charging port ✅ Yes ❌ Usually No
Failed software update ✅ Sometimes ❌ Sometimes
Battery failure ❌ No ✅ Yes
Charging port damage ❌ No ✅ Yes
Water damage ❌ No ✅ Yes
Display failure ❌ No ✅ Yes
Logic board fault ❌ No ✅ Yes

Understanding the root cause saves both time and money.

Signs Your iPad Has a Power Problem

Before attempting repairs, identify exactly how your iPad behaves. Common symptoms include:

  • Completely black screen
  • Apple logo appears then disappears
  • Doesn’t respond to the Power button
  • Vibrates but no display
  • Shows low battery icon only
  • Keeps restarting
  • Stuck on Apple logo
  • Gets hot while charging
  • Charges but won’t boot
  • Screen stays black even though the device makes sounds

Each symptom points toward a different underlying problem.

1. The Battery Is Completely Drained

This is by far the most common reason an iPad appears “dead.” If your battery has been fully discharged for an extended period, it may need longer than usual before it can power on.

Many users assume the device is broken when, in reality, it simply hasn’t received enough power to start.

How to Fix It

  • Plug your iPad into a reliable charger.
  • Use an Apple-certified cable.
  • Leave it charging for at least 30-60 minutes.
  • Don’t press the Power button repeatedly while charging.
  • Try turning it on after one hour.

If the battery icon eventually appears, your iPad was simply deeply discharged.

2. Your Charger or Cable Is Faulty

Sometimes the iPad isn’t the problem at all. Damaged charging cables, worn-out adapters, or counterfeit accessories often fail to deliver sufficient power.

Signs include:

  • No charging sound
  • No battery icon
  • Intermittent charging
  • Charger becoming unusually hot
  • Cable only works at certain angles

What You Should Do

Try:

  • Another Apple-certified cable
  • A different wall adapter
  • Another power socket
  • Charging through a computer USB-C port (if supported)

Avoid very cheap charging accessories, as unstable voltage can damage internal charging circuits over time.

3. The Charging Port Is Dirty

Dust, lint, pocket debris, and dirt commonly build up inside the charging port. Even a small amount of debris can prevent the charging cable from making proper contact.

This is especially common on older Lightning iPads carried in bags or backpacks.

Safe Cleaning Method

Use:

  • Soft anti-static brush
  • Wooden toothpick
  • Compressed air (used carefully)

Never insert:

  • Metal pins
  • Needles
  • Safety pins
  • Screwdrivers

Using metal objects may permanently damage the charging connector. If cleaning doesn’t restore charging, the charging port itself may be damaged and require replacement.

4. Your iPad Has Frozen

Sometimes the display is black because iPadOS has completely frozen. Although the screen appears dead, the device may still be running in the background. Fortunately, a force restart often resolves this.

Force Restart Different iPad Models

iPads with Face ID

  1. Press Volume Up.
  2. Press Volume Down.
  3. Hold the Power button.
  4. Keep holding until the Apple logo appears.

iPads with Home Button

  1. Hold the Home button.
  2. Hold the Power button.
  3. Continue holding both until the Apple logo appears.

Do not release the buttons too early.

5. A Failed iPadOS Update

If your iPad stopped turning on immediately after an update, the operating system may have become corrupted. This can happen because of:

  • Interrupted installation
  • Low battery during update
  • Storage running out
  • Software bugs
  • Corrupted firmware

Symptoms include:

  • Apple logo loop
  • Black screen
  • Endless restart cycle

Try Recovery Mode

Recovery Mode allows you to reinstall iPadOS without replacing hardware. You’ll need:

  • A Mac or Windows PC
  • Finder (macOS) or Apple Devices/iTunes (Windows)
  • A compatible USB cable

If Recovery Mode successfully reinstalls iPadOS, your iPad should boot normally again.

6. Your Battery Has Reached the End of Its Life

Like all rechargeable batteries, iPad batteries wear out over time.

Most batteries begin showing noticeable degradation after 500–800 charge cycles, depending on usage patterns.

Common warning signs include:

  • Rapid battery drain
  • Unexpected shutdowns
  • Extremely slow charging
  • Device only works while plugged in
  • Battery swelling
  • iPad refuses to turn on

A swollen battery is particularly serious because it can place pressure on the display, damage internal components, and create a potential safety risk.

At this stage, continuing to charge or use the device is not recommended. A professional battery replacement is the safest and most reliable solution.

7. Water Damage Can Prevent Your iPad from Turning On

Accidental liquid exposure is one of the most common reasons an iPad suddenly stops working. Even if your device wasn’t completely submerged, small amounts of water from coffee, tea, rain, or other liquids can seep inside and damage sensitive internal components.

Unlike older electronics, modern iPads contain densely packed circuits. Moisture can quickly cause corrosion, short circuits, and power failures.

Common Signs of Water Damage

Your iPad may have liquid damage if you notice:

  • It won’t turn on after getting wet.
  • The screen flickers or stays black.
  • Random restarts.
  • Charging issues after liquid exposure.
  • Speakers sound muffled.
  • Face ID or Touch ID stops working.
  • The device becomes unusually warm.
  • Moisture appears inside the camera lens.

Even if the iPad initially works after getting wet, corrosion can continue developing for days or weeks.

What You Should Do Immediately

If your iPad gets wet:

  • Turn it off immediately if it’s still powered on.
  • Disconnect it from any charger.
  • Remove any accessories.
  • Dry the exterior with a soft microfiber cloth.
  • Leave it in a dry, ventilated area.

Avoid These Common Mistakes

Many online “fixes” can actually make water damage worse. Never:

  • Put your iPad in rice.
  • Use a hair dryer.
  • Place it in an oven.
  • Heat it with a radiator.
  • Continue charging it.

Rice does not remove moisture trapped inside the device. In many cases, charging a wet iPad causes additional internal damage that could otherwise have been avoided.

If your iPad has suffered liquid damage, professional cleaning and diagnostics offer the best chance of saving it.

8. Your Screen May Be Dead – Not the iPad

A completely black display doesn’t always mean your iPad has stopped working. Sometimes the device is powered on, but the display itself has failed.

Signs of a Display Failure

Your screen may be damaged if:

  • You hear notification sounds.
  • Siri still responds.
  • The device vibrates.
  • The charging sound plays.
  • You receive calls or messages.
  • The computer detects the iPad when connected.

These symptoms usually indicate that the logic board is functioning normally while the display is not. Display failures can occur because of:

  • Drop damage.
  • Internal LCD cracks.
  • Pressure damage.
  • Liquid damage.
  • Loose display connectors.
  • Manufacturing defects.

If your iPad suffered a recent impact, a professional screen replacement may be required.

9. Charging Port Damage

Charging ports naturally wear over time. Daily plugging and unplugging gradually weakens the internal connector, while dust and accidental impacts can also damage the port.

Symptoms of a Damaged Charging Port

  • Cable feels loose.
  • Charging only works at certain angles.
  • Slow charging.
  • No charging symbol.
  • Computer fails to recognise the iPad.

Sometimes the port only requires professional cleaning. However, if the internal connector is damaged, replacing the charging port assembly is the only permanent fix.

10. Logic Board Problems

If none of the basic troubleshooting steps work, the fault may lie within the logic board. The logic board is essentially the brain of your iPad, controlling power distribution, storage, processing, and communication between all components.

Logic board failures are usually caused by:

  • Severe drops.
  • Water damage.
  • Power surges.
  • Failed repairs.
  • Component ageing.

Common Symptoms

  • Completely dead device.
  • No charging response.
  • No Apple logo.
  • Boot loops.
  • Random shutdowns.
  • Device becomes hot immediately after connecting the charger.

Logic board repairs require specialist equipment, board-level diagnostics, and microsoldering expertise. DIY attempts often make the damage worse and can significantly increase repair costs.

11. Power Management IC Failure

One of the lesser-known reasons an iPad won’t turn on is a faulty Power Management Integrated Circuit (PMIC). This tiny chip controls how electricity flows throughout the device.

If it fails, your iPad may:

  • Refuse to charge.
  • Turn off unexpectedly.
  • Stay completely unresponsive.
  • Restart continuously.
  • Become hot without powering on.

PMIC failures usually require advanced board-level repair performed by experienced technicians.

12. Storage or Firmware Corruption

Although less common, corrupted storage or firmware can prevent an iPad from booting. Possible causes include:

  • Interrupted software updates.
  • Jailbreaking.
  • Storage failure.
  • Corrupted system files.
  • Unexpected shutdowns during installation.

Symptoms include:

  • Apple logo freezing.
  • Endless restart loops.
  • Recovery Mode repeatedly appearing.
  • Failure to complete startup.

Professional diagnostics can determine whether software restoration or hardware repair is required.

Advanced Troubleshooting Steps

If your iPad still won’t turn on after trying the basic fixes, work through these additional troubleshooting steps.

1. Try a Different Power Source

Sometimes the issue isn’t your charger – it could be the wall socket itself.

Test:

  • Another wall outlet.
  • Another USB-C adapter.
  • Another Lightning cable.
  • Another certified charging brick.

2. Leave It Charging Longer

A completely depleted battery can sometimes require over an hour before showing any signs of life. Leave the device connected for at least:

60-90 minutes – before assuming it’s beyond repair.

3. Connect to a Computer

Connect your iPad to a Mac or Windows PC. If Finder or Apple Devices recognises the device, there’s a good chance the hardware is still functional.

From there, you may be able to:

  • Update iPadOS.
  • Enter Recovery Mode.
  • Restore the software.

Is It Safe to Fix an iPad Yourself?

Many people search YouTube for DIY repair tutorials when their iPad stops turning on. While replacing a phone case is simple, repairing an iPad is a completely different challenge.

Modern iPads use laminated displays, strong industrial adhesives, delicate ribbon cables, and tightly integrated components that require specialist tools. Without the correct equipment, it’s easy to cause additional damage.

Risks of DIY Repairs

Attempting repairs yourself can lead to:

  • Cracked displays during removal.
  • Torn display flex cables.
  • Damaged battery connectors.
  • Punctured lithium batteries.
  • Logic board damage.
  • Lost screws or components.
  • Higher repair costs later.

In many cases, a simple battery replacement turns into a much more expensive repair because of accidental damage during disassembly.

When Should You Seek Professional Repair?

If you’ve tried charging, force restarting, and Recovery Mode without success, it’s time for a professional diagnosis. Professional repair is recommended if:

  • Your iPad has been dropped.
  • It has suffered water damage.
  • It doesn’t charge at all.
  • The battery is swollen.
  • The charging port is damaged.
  • The display remains black despite sounds or vibrations.
  • Recovery Mode doesn’t work.
  • The device repeatedly restarts.
  • You suspect a logic board fault.

At iExpert Repairs, our certified technicians diagnose power issues across all iPad models using professional testing equipment and high-quality replacement parts. Whether it’s a battery replacement, charging port repair, screen replacement, or advanced board-level repair, we aim to restore your iPad quickly and reliably.

We also offer:

  • Same-day repairs for many common issues.
  • UK-wide mail-in repair service.
  • 12-month warranty on repairs.
  • Fix Now, Pay Later with Klarna – Available at Checkout.

iPad Repair Costs in the UK (Estimated)

Repair costs vary depending on your iPad model, the type of damage, and whether genuine or premium-quality replacement parts are used.

Repair Type Estimated UK Price
iPad Screen Replacement £59 – £459
iPad Battery Replacement £59 – £179
iPad Charging Port Repair £59 – £149
iPad Water Damage Repair From £39
Camera Repair £59 – £149
Speaker Repair £49 – £129
Logic Board Repair Quote After Diagnostics

Is It Worth Repairing an iPad That Won’t Turn On?

In many cases, yes. Professional repair is usually worth it if:

  • Your iPad is less than 6-7 years old.
  • The screen is still in good condition.
  • The problem is limited to the battery or charging port.
  • You have important files or photos stored on the device.
  • Buying a replacement would cost significantly more.

However, if your iPad has severe logic board damage and the repair cost approaches the price of a newer model, upgrading may be the better long-term choice.

If you decide to upgrade instead of repairing, consider a professionally refurbished iPad from iExpert Market. Every device is fully tested, factory reset, includes a 12-month warranty, and comes with free UK delivery, offering excellent value compared with buying new.

Why Choose iExpert Repairs?

When your iPad won’t turn on, you need more than a quick fix – you need an accurate diagnosis and a repair you can trust. At iExpert Repairs, we provide:

  • Certified Apple device technicians
  • Same-day repairs for many common issues
  • UK-wide mail-in repair service
  • Premium-quality replacement parts
  • Transparent pricing with no hidden fees
  • Free diagnostics (where applicable)
  • 12-month warranty on repairs
  • Fast turnaround times
  • Thousands of successful Apple device repairs
  • Fix Now, Pay Later with Klarna – Available at Checkout

Whether your iPad has a failed battery, damaged charging port, faulty display, or advanced logic board issue, our experienced technicians are ready to help restore it quickly and professionally.

Book Your iPad Repair Today

A non-responsive iPad doesn’t always mean it’s beyond repair.

Many power issues are caused by worn batteries, charging faults, software corruption, or damaged components that can be repaired without replacing the entire device. At iExpert Repairs, we specialise in diagnosing and repairing all iPad models – from the original iPad to the latest iPad Pro.

Whether you visit our repair centre or use our UK-wide mail-in repair service, you’ll benefit from:

  • Expert diagnostics
  • Premium-quality parts
  • Same-day repairs (for many issues)
  • Competitive UK pricing
  • 12-month warranty
  • Friendly, knowledgeable support

FAQs: Why Is My iPad Not Turning On?

1. Why is my iPad not turning on even after charging for hours?

If your iPad still won’t turn on after charging for several hours, the issue may be more than a flat battery. Common causes include a faulty charging cable, damaged charging port, failed battery, software corruption, display failure, or an internal hardware fault. First, try a different Apple-certified charger and perform a force restart. If the device remains unresponsive, professional diagnostics are recommended.

2. How do I force restart an iPad that won’t turn on?

The method depends on your iPad model.

For iPads with Face ID:

  • Press and quickly release the Volume Up button.
  • Press and quickly release the Volume Down button.
  • Press and hold the Power button until the Apple logo appears.

For iPads with a Home Button:

  • Press and hold both the Home and Power buttons together until the Apple logo appears.

A force restart can resolve temporary software crashes without deleting your data.

3. Why is my iPad showing a black screen but still making sounds?

If your iPad makes notification sounds, vibrates, or Siri responds while the screen stays black, the device is likely powered on but the display has failed. This could be caused by a damaged LCD, faulty display connector, internal screen damage, or liquid exposure. A professional screen diagnostic can confirm the exact issue.

4. Can a completely dead battery stop my iPad from turning on?

Yes. A deeply discharged or worn-out battery can prevent your iPad from powering on altogether. Most iPad batteries begin losing performance after around 500-800 charge cycles. If your iPad only works while plugged in, shuts down unexpectedly, or won’t charge, a battery replacement may be required.

5. Why won’t my iPad charge or turn on?

Several problems can prevent your iPad from charging, including:

  • Faulty charging cable
  • Defective power adapter
  • Dirty charging port
  • Damaged charging connector
  • Battery failure
  • Water damage
  • Logic board issues

Trying another certified charger and cleaning the charging port safely are good first steps before seeking professional repair.

6. How long should I charge my iPad before trying to turn it on?

If your battery is completely drained, leave the iPad connected to a reliable charger for 30–60 minutes before attempting to switch it on. Older batteries may require even longer before showing the charging symbol or Apple logo.

7. Can water damage stop an iPad from turning on?

Yes. Even a small amount of liquid can cause internal corrosion and electrical short circuits. Water damage often affects the charging system, display, battery, or logic board. If your iPad gets wet, switch it off immediately, avoid charging it, and have it professionally inspected as soon as possible.

8. Does putting an iPad in rice fix water damage?

No. Rice is a common myth and is not an effective solution for liquid-damaged electronics. It cannot remove moisture trapped inside the device and may even introduce dust into the charging port. Professional internal cleaning is the safest and most effective option.

9. Can a damaged charging port stop my iPad from turning on?

Absolutely. If the charging port is worn, bent, blocked with debris, or internally damaged, your iPad may not receive enough power to charge the battery. Symptoms include loose charging cables, intermittent charging, or no charging response at all.

10. Why is my iPad stuck on the Apple logo?

An iPad stuck on the Apple logo usually indicates a software or firmware issue. This can happen after a failed iPadOS update, corrupted system files, or storage problems. Entering Recovery Mode and reinstalling iPadOS often resolves the issue without affecting the hardware.

11. Can a software update cause my iPad not to turn on?

Yes. Interrupted software updates, insufficient storage, or corrupted firmware can prevent the operating system from loading correctly. In many cases, restoring the device through Recovery Mode resolves the problem.

12. Is it worth repairing an iPad that won’t turn on?

In most cases, yes. Battery replacements, charging port repairs, and display repairs are generally much cheaper than buying a new iPad. Professional diagnostics can determine whether repairing your existing device offers better value than replacing it.

13. How much does it cost to repair an iPad that won’t turn on?

Repair costs depend on the underlying fault and your iPad model. Battery replacements and charging port repairs are usually among the most affordable solutions, while advanced logic board repairs cost more due to their complexity. A professional diagnostic is the best way to receive an accurate repair quote.

14. Can I fix an iPad that won’t turn on myself?

You can safely try basic troubleshooting such as charging the device, force restarting it, checking the charging accessories, and using Recovery Mode. However, opening an iPad without specialist tools can damage the display, battery, or logic board. Hardware repairs should generally be left to experienced technicians.

Final Thoughts

If your iPad is not turning on, don’t assume it’s permanently damaged. In many cases, the issue is caused by something simple, such as a completely drained battery, a faulty charging cable, a dirty charging port, or a temporary iPadOS software glitch. These problems can often be resolved with basic troubleshooting at home.

However, if your iPad still won’t power on after trying the recommended fixes, or if it has suffered accidental damage, liquid exposure, or internal hardware failure, it’s best to stop troubleshooting and seek professional assistance. Continuing to charge or repeatedly attempting to switch on a damaged iPad can sometimes make the problem worse.

A professional diagnostic can quickly identify whether the issue is related to the battery, charging port, display, logic board, or another internal component, helping you avoid unnecessary repairs and expenses.

Why Choose iExpert Repairs?

When your iPad stops working, choosing the right repair service is just as important as fixing the device itself. At iExpert Repairs, we provide trusted iPad repair services across the UK with a focus on quality, transparency, and fast turnaround times.

Here’s what you can expect:

  • Certified Apple device technicians
  • Same-day repairs for many common iPad issues
  • UK-wide secure mail-in repair service
  • Premium-quality replacement parts
  • Free professional diagnostics (where applicable)
  • Transparent pricing with no hidden charges
  • 12-month warranty on eligible repairs
  • Thousands of successfully repaired Apple devices
  • Fix Now, Pay Later with Klarna – Available at Checkout

Whether your iPad needs a screen replacement, battery replacement, ipad charging port repair, ipad water damage restoration, or advanced logic board repair, our experienced technicians are here to help restore your device quickly and professionally.

Back to posts

Why Is My iPad Screen Black? Causes & Fixes

Quick Answer

Why is my iPad screen black?

An iPad screen can turn black for several reasons, including a completely drained battery, a software crash, a frozen iPadOS update, a damaged display, battery failure, a faulty charging port, water damage, or an internal hardware fault. In many cases, the issue can be fixed by charging the device, performing a force restart, or checking your charging accessories. If the screen remains black, a professional diagnostic can identify the exact cause and determine whether your iPad needs a battery, screen, charging port, or motherboard repair.

Introduction

Has your iPad screen suddenly gone black even though the device was working perfectly a few moments ago? Maybe your iPad won’t turn on, the screen stays black after charging, or you can hear sounds but nothing appears on the display. Whatever the situation, a black screen doesn’t always mean your iPad is beyond repair.

In many cases, the problem can be caused by something as simple as a drained battery, a temporary software crash, or a failed iPadOS update. However, it can also indicate a more serious hardware issue, such as a damaged display, faulty battery, charging port failure, motherboard fault, or even liquid damage.

The good news is that many black screen problems can be diagnosed – and sometimes fixed – without replacing your iPad. Understanding the underlying cause is the first step towards choosing the right solution and avoiding unnecessary repair costs.

Whether you own a standard iPad, iPad Mini, iPad Air, or iPad Pro, this complete UK guide explains everything you need to know about black screen issues, from the most common causes to professional repair options.

Why Is My iPad Screen Black?

A black iPad screen can happen for several different reasons. Sometimes the problem is temporary and can be resolved with a simple restart, while in other cases it may require professional repair.

The cause generally falls into one of two categories:

  • Software-related issues, such as a frozen system, failed iPadOS update, or corrupted apps.
  • Hardware-related issues, including a damaged display, worn-out battery, charging port failure, internal connection problems, or motherboard damage.

Understanding which category your problem belongs to is the key to finding the correct solution without wasting time or money on unnecessary repairs.

In the following sections, we’ll explain the most common causes of an iPad black screen, how to identify each one, and the safest ways to get your iPad working again.

Common Causes of an iPad Black Screen

Seeing your iPad screen suddenly turn black can be worrying, especially if it was working perfectly just moments before. The good news is that a black screen doesn’t always mean your iPad has suffered a serious fault or needs to be replaced.

At iExpert Repairs, we’ve helped thousands of customers with iPad black screen issues, and in many cases the solution has been much simpler than they expected. Sometimes the problem is caused by a software glitch or a completely drained battery, while in other cases it may be linked to the display, charging port, battery, or another internal component.

The table below highlights the most common causes of an iPad black screen and whether the issue can usually be resolved at home or is more likely to require professional repair.

Possible Cause Can You Fix It Yourself? Professional Repair May Be Required
Completely drained battery Yes, in many cases Usually not
Temporary software crash Yes No
Failed or interrupted iPadOS update Sometimes Rarely
Faulty charging cable or power adapter Yes No
Damaged iPad display No Yes
Worn-out or faulty battery Usually not Yes
Charging port damage Usually not Yes
Water or liquid damage No Yes
Logic board or internal hardware fault No Yes

Before assuming the worst, it’s worth carrying out a few basic checks. We’ve seen many iPads that appeared completely dead but only needed a force restart, a proper charge, or a battery replacement to start working again. Identifying the real cause first can save you unnecessary repair costs and help you decide on the best course of action.

Why Is My iPad Screen Black? The Most Common Causes

A black screen can happen for several different reasons, and the right solution depends on what’s causing the problem. In some cases, your iPad may still be switched on but unable to display anything on the screen. In others, the device may not be receiving power at all.

Below are the most common reasons why an iPad screen goes black and what each one means.

1. Your iPad Battery Is Completely Drained

One of the simplest and most common reasons for a black screen is a fully discharged battery. If the battery has been left unused for a long time or has drained completely, your iPad may not have enough power to switch the display on immediately.

This often happens when the device hasn’t been charged for several days or when an ageing battery can no longer hold a charge properly.

Before assuming your iPad has developed a serious fault, connect it to a reliable charger and leave it plugged in for at least 20 to 30 minutes. If the battery is deeply discharged, it may take a little while before the charging icon or Apple logo appears.

If your iPad still doesn’t respond after charging, the issue could be related to the battery itself or the charging system. You may also find our guide “How Much Does an iPad Battery Replacement Cost?” if you suspect the battery has reached the end of its lifespan.

2. A Temporary Software Crash

Not every black screen is caused by faulty hardware. Sometimes iPadOS can freeze unexpectedly, leaving the screen black even though the device is still switched on in the background.

This can happen after:

  • Installing a new app
  • Running several demanding apps at the same time
  • A temporary iPadOS glitch
  • A system process becoming unresponsive

If your iPad is making notification sounds or vibrating but the display stays black, there’s a good chance the software has simply frozen. In many cases, performing a force restart is enough to restore the display without affecting your data.

3. A Failed or Interrupted iPadOS Update

Software updates usually improve your iPad’s performance and security, but occasionally an update may not install correctly. If the update is interrupted because the battery runs out, the internet connection drops, or the installation process encounters an error, your iPad may become stuck on a black screen during startup.

Although this can look alarming, it doesn’t always mean your iPad is permanently damaged. Depending on the situation, the issue may be resolved by restarting the device or restoring iPadOS using recovery mode.

Keeping your iPad connected to a stable Wi-Fi network and ensuring the battery is sufficiently charged before updating can help reduce the chances of this happening.

4. A Faulty Charger or Charging Cable

Sometimes the problem isn’t your iPad at all – it’s the charging equipment.

A damaged charging cable, faulty power adapter, or loose connection can prevent the battery from charging, leaving your iPad with no power to turn on the screen. Before assuming the device needs repairing, try using:

  • A different charging cable
  • A different power adapter
  • Another wall socket
  • A certified charger if available

If none of these work, the issue may be inside the iPad rather than the charging accessories.

If your device refuses to charge altogether, our guide “Why Is My iPad Not Charging?” explains the most common charging problems and how to identify them.

5. Physical Screen Damage

Your iPad may still be working even if the display remains completely black.

A damaged LCD or OLED panel can fail after an accidental drop or impact, even when the outer glass looks perfectly intact. In some cases, you may hear sounds, receive notifications, or even feel vibration when pressing the Home or Power button, but nothing appears on the screen.

Signs that the display may be damaged include:

  • The screen stays black while the iPad still makes sounds.
  • Faint lines or flickering appeared before the display went black.
  • Part of the screen stopped working after being dropped.
  • The display remains black despite charging and restarting the device.

6. A Worn-Out or Faulty Battery

If your iPad is a few years old and the battery has never been replaced, it’s possible that the battery has simply reached the end of its lifespan. Like all lithium-ion batteries, iPad batteries gradually lose their ability to hold a charge over time.

In some cases, an ageing battery may still power the iPad for a short while before shutting down unexpectedly. In more severe cases, the battery may no longer provide enough power for the device to switch on, leaving you with nothing but a black screen.

Other signs of a failing battery include:

  • The battery drains unusually quickly.
  • The iPad switches off even when charge is still showing.
  • Charging takes much longer than it used to.
  • The back of the iPad feels warmer than normal during charging.
  • The battery has started to swell, causing the screen to lift away from the frame.

7. A Damaged Charging Port

A black screen doesn’t always mean there’s a problem with the display or battery. Sometimes, your iPad simply isn’t charging because the charging port has become damaged or blocked.

Dust, lint, moisture, or everyday wear can prevent the charging cable from making a proper connection. As a result, the battery may eventually run flat, leaving the screen completely black.

You might notice:

  • The charging cable feels loose.
  • Charging only works when the cable is held at a certain angle.
  • The iPad charges intermittently.
  • The charging symbol never appears.

Before booking a repair, inspect the charging port carefully for any visible debris. Cleaning should only be carried out gently using suitable tools, as forcing objects into the port can cause further damage.

8. Water or Liquid Damage

Although newer iPads offer better protection than older models, they are not waterproof. Even a small amount of liquid entering the device can damage sensitive internal components.

Water damage doesn’t always cause immediate failure. In some cases, your iPad may continue working for hours or even days before the screen suddenly turns black.

Signs that liquid damage may be responsible include:

  • The black screen appeared after the iPad came into contact with water.
  • The display flickered before turning off.
  • The touchscreen stopped responding.
  • The device feels unusually hot.
  • Charging problems started after exposure to liquid.

If you suspect water damage, avoid repeatedly trying to switch the iPad on or connect it to a charger. Doing so may increase the risk of further internal damage. A professional inspection is the safest way to assess the condition of the device and determine whether repair is possible.

9. Logic Board or Internal Hardware Failure

If none of the common causes apply, the issue may lie with the iPad’s logic board or another internal component.

The logic board controls almost every major function of the device, including power distribution, charging, display output, and communication between hardware components. If it develops a fault, your iPad may appear completely lifeless, even though the display itself isn’t damaged.

Logic board problems can be caused by:

  • A severe drop or impact.
  • Liquid damage.
  • Electrical failure.
  • Failed internal components.
  • Previous poor-quality repairs.

Because these faults require specialist equipment to diagnose, they should only be handled by experienced repair technicians. Attempting to repair the logic board yourself can easily make the damage worse.

Can You Tell What’s Causing the Black Screen?

Without opening the device, it isn’t always possible to know exactly why an iPad screen has gone black. However, paying attention to a few simple signs can help narrow down the cause.

Symptom Most Likely Cause
No response after charging Battery, charging port or logic board
Apple logo appears then disappears Battery or software issue
Notifications or sounds but no picture Display damage
Black screen after a software update iPadOS problem
Black screen after being dropped Display or internal hardware damage
Black screen after contact with water Liquid damage

While these signs can provide useful clues, they don’t always tell the full story. That’s why a professional diagnostic is often the quickest and most reliable way to identify the real fault before any repair work begins.

Before You Pay for a Repair…

The good news is that many black screen issues can be resolved without replacing expensive components. Before assuming your iPad needs a new display or motherboard, there are several simple troubleshooting steps you can safely try at home.

In the next section, we’ll walk you through each step, explaining what to do, what to avoid, and when it’s time to seek professional help.

How to Fix an iPad with a Black Screen?

Before assuming your iPad needs a new screen or an expensive repair, it’s worth trying a few simple troubleshooting steps. In our experience, many black screen issues are caused by temporary software glitches, charging problems, or a battery that’s completely drained.

Work through the steps below in order. If one doesn’t solve the problem, move on to the next.

1. Charge Your iPad Properly

It may sound obvious, but a completely flat battery is one of the most common reasons an iPad won’t turn on.

Connect your iPad to a reliable charger and leave it plugged in for at least 20 to 30 minutes before trying to switch it on. If the battery has been deeply discharged, it can take a while before anything appears on the screen. While you’re waiting, check the following:

  • Make sure the charging cable isn’t damaged.
  • Use a trusted power adapter.
  • Try a different wall socket.
  • If possible, test another charging cable.

If your iPad still doesn’t show any signs of life after half an hour, continue with the next step.

2. Perform a Force Restart

Sometimes your iPad is actually switched on, but iPadOS has frozen, leaving the screen completely black. A force restart refreshes the system without deleting your data and is often enough to resolve the issue.

For iPads Without a Home Button

  1. Quickly press and release the Volume Up button.
  2. Quickly press and release the Volume Down button.
  3. Press and hold the Top (Power) button.
  4. Keep holding it until the Apple logo appears.

For iPads With a Home Button

  1. Press and hold the Home button and the Power button together.
  2. Continue holding both buttons for around 10-15 seconds.
  3. Release them once the Apple logo appears.

If your iPad starts normally, the problem was most likely a temporary software crash.

3. Increase the Screen Brightness

Although it’s less common, the screen brightness may have been turned down so low that the display appears black, especially in a bright room.

If you can hear notification sounds or feel the iPad vibrate but can’t see anything on the screen, try moving to a darker room and increasing the brightness once the display becomes visible. If nothing changes, continue with the next checks.

4. Look for Signs That the Display Is Still Working

A black screen doesn’t always mean the display has stopped working completely. Ask yourself these questions:

  • Does your iPad make notification sounds?
  • Does it vibrate when you press the Power button?
  • Can Siri still respond?
  • Does your computer recognise the iPad when it’s connected?

If you answered yes to any of these, the device is probably still running, but the display may have failed. This is particularly common after the iPad has been dropped or suffered physical impact.

5. Disconnect Any Connected Accessories

Occasionally, an external accessory can interfere with the normal startup process. Disconnect any:

  • USB hubs
  • External keyboards
  • Apple Pencil charger
  • USB-C accessories
  • HDMI adapters
  • Memory devices

Once everything has been disconnected, try restarting the iPad again.

6. Check for Physical Damage

Take a close look at your iPad. Even if the front glass looks fine, look for signs such as:

  • Hairline cracks.
  • A bent frame.
  • Screen lifting around the edges.
  • Dents near the corners.
  • Marks caused by impact.

Sometimes the internal display breaks while the outer glass remains completely intact. If your iPad has recently been dropped, the black screen is much more likely to be caused by hardware damage than by software.

7. Try Recovery Mode

If your iPad became unresponsive after an iPadOS update or keeps showing a black screen during startup, Recovery Mode may allow you to reinstall the operating system.

This process requires a Windows PC or Mac with the latest version of Finder or Apple Devices/iTunes installed. Recovery Mode should generally be considered after you’ve already tried charging the iPad and performing a force restart.

If you’re not confident carrying out this process yourself, it’s usually safer to ask a professional repair technician for assistance to avoid accidental data loss.

8. Know When It’s Time to Stop Troubleshooting

Trying a few basic fixes is sensible, but repeatedly forcing the device to restart or attempting to open it yourself can sometimes make matters worse.

It’s usually best to seek professional help if:

  • The iPad has been dropped.
  • The device has been exposed to water.
  • The battery appears swollen.
  • The screen remains black after charging and a force restart.
  • The Apple logo appears briefly before disappearing again.
  • The iPad becomes unusually hot.
  • The charging port appears damaged.

At this stage, a professional diagnostic can identify the exact fault and help you avoid paying for unnecessary repairs.

What Not to Do If Your iPad Screen Is Black?

When faced with a black screen, many people panic and unintentionally make the problem worse. Avoiding a few common mistakes can help prevent additional damage and may even reduce your repair costs.

Avoid These Common Mistakes

  • Don’t keep pressing the Power button repeatedly.
  • Don’t attempt to force open the iPad without the correct tools.
  • Don’t continue charging a device that has been exposed to water.
  • Don’t ignore signs of a swollen battery or lifting screen.
  • Don’t buy replacement parts before confirming what’s actually causing the fault.

A careful diagnosis is always better than guessing. In many cases, identifying the real cause early can save both time and money.

How Much Does It Cost to Fix an iPad Black Screen in the UK?

One of the first questions people ask after seeing a black screen is, “How much is this going to cost?” The answer depends entirely on what’s causing the problem.

In some cases, the issue may be resolved without replacing any parts, especially if it’s related to software or a temporary system crash. However, if the display, battery, charging port, or another internal component has failed, the repair cost will vary depending on your iPad model and the parts required.

The table below provides a general guide to the most common black screen repairs in the UK.

Repair Type Typical UK Cost
Software Diagnosis & Recovery £29-£69
Battery Replacement £59-£199
Charging Port Repair £69-£159
Screen Replacement £79-£349
Logic Board Repair £99-£299+

Please note: These prices are intended as a general guide. The final repair cost depends on your iPad model, the extent of the damage, and whether additional faults are discovered during the diagnostic process.

If your iPad has more than one issue – for example, a damaged screen and a worn-out battery – it is often more cost-effective to have both repairs completed at the same time.

Can a Black Screen Be Fixed?

In many cases, yes. A black screen doesn’t automatically mean your iPad is beyond repair. We’ve repaired countless iPads that initially appeared completely dead but only required a battery replacement, screen repair, charging port repair, or software recovery.

The chances of a successful repair are generally much higher when the problem is diagnosed early. Waiting too long – especially if the battery is swollen or the device has suffered liquid damage – can sometimes lead to additional faults and higher repair costs.

Apple vs Independent iPad Repair

When your iPad develops a black screen fault, you generally have two options: arrange a repair through Apple or choose an experienced independent repair specialist such as iExpert Repairs.

Both options can restore your device, but the best choice often depends on your budget, turnaround time, and the age of your iPad.

1. Apple Repair

Apple may be the right choice if:

  • Your iPad is still covered by AppleCare+.
  • You prefer using Apple’s official repair service.
  • You’re happy to wait if the repair takes longer.
  • You’re comfortable paying Apple’s standard repair prices.

For older iPads, however, official repairs may not always be the most economical option.

2. Independent Repair Specialists

Professional repair centres like iExpert Repairs offer an excellent alternative for customers looking for a faster and more affordable solution.

Benefits often include:

  • Competitive pricing
  • Same-day repairs on many iPad models
  • Professional diagnostics before any work begins
  • Premium-quality replacement parts
  • Experienced technicians
  • Warranty-backed repairs
  • UK-wide mail-in repair service

For many customers, especially those with older iPads, an independent repair provides excellent value without compromising on quality.

Apple vs iExpert Repairs Comparison

Feature Apple iExpert Repairs
Professional Diagnostics Limited Included
Repair Turnaround Varies Same-day on many models
Competitive Pricing Higher More affordable
Premium-Quality Parts Genuine Apple Parts Premium tested replacement parts
Mail-In Repair Service Selected services UK-wide available
Warranty Apple terms apply 12-month warranty
Personal Customer Support Standard Direct support from experienced technicians

Is It Worth Repairing an iPad with a Black Screen?

For most people, the answer is yes. If your iPad is still in good overall condition and the black screen is caused by a single faulty component, repairing it is usually much cheaper than replacing the entire device.

A repair is often the best option if:

  • The display is the only damaged component.
  • The battery has reached the end of its lifespan.
  • The charging port needs replacing.
  • The iPad still performs well for your everyday needs.
  • The repair costs significantly less than buying a replacement.

Many customers continue using their iPads for several more years after a professional repair.

When Buying a Refurbished iPad Makes More Sense

Although repairs are often worthwhile, there are situations where replacing the device offers better long-term value. You may want to consider upgrading if your iPad has:

  • Severe liquid damage
  • Multiple hardware faults
  • Logic board failure combined with screen damage
  • Several expensive repairs required at the same time
  • An older processor that no longer supports the apps you use

A professionally refurbished iPad can provide excellent performance at a much lower price than buying new.

If you’re thinking about upgrading instead of repairing, it’s worth comparing the total repair cost with the price of a refurbished replacement before making your decision.

Why Customers Across the UK Choose iExpert Repairs

At iExpert Repairs, we understand how important your iPad is for work, study, entertainment, and everyday life. That’s why we focus on providing repairs that are fast, reliable, and carried out to a high professional standard.

Here’s why customers across the UK trust us:

1. Certified Apple Repair Specialists

Our experienced technicians repair Apple devices every day and have extensive hands-on experience diagnosing black screen faults, battery failures, display damage, charging issues, and motherboard problems.

2. Premium-Quality Replacement Parts

The quality of replacement parts plays a major role in the long-term reliability of any repair. That’s why we use carefully tested, premium-quality components that are designed to deliver dependable performance.

3. Fast Turnaround Times

We know how disruptive it can be to lose access to your iPad. Many repairs can be completed on the same day, depending on the model and the nature of the fault.

4. 12-Month Warranty

For added peace of mind, our repairs include a 12-month warranty covering both workmanship and replacement parts, subject to our warranty terms.

5. UK-Wide Mail-In Repair Service

If you can’t visit us in person, our secure mail-in service makes it easy to get your iPad repaired from anywhere in the UK.

Simply:

  1. Book your repair.
  2. Send us your iPad securely.
  3. Our technicians diagnose and repair the device.
  4. Your repaired iPad is returned using tracked delivery.

It’s a convenient option for customers across England, Scotland, Wales, and Northern Ireland.

6. Fix Now, Pay Later with Klarna

Unexpected repairs aren’t always planned. That’s why eligible customers can spread the cost with Klarna, making it easier to get their iPad repaired without unnecessary delays.

Can a Black Screen on an iPad Be Fixed?

The good news is that yes, in many cases, an iPad black screen can be fixed. The right solution depends on what’s causing the problem. Sometimes it’s nothing more than a temporary software glitch that can be resolved in a few minutes. In other cases, the issue may involve the battery, display, charging port, or internal hardware and require professional repair.

Many customers assume a black screen means their iPad has stopped working for good. In reality, we’ve seen plenty of devices that looked completely dead but were restored after a proper diagnosis. That’s why it’s important not to jump straight to replacing your iPad before finding out what’s actually wrong.

1. You May Be Able to Fix It Yourself If:

  • The battery is completely drained.
  • Your iPad has frozen after an iPadOS update.
  • The device needs a force restart.
  • A faulty charger or charging cable is preventing it from powering on.
  • A temporary software issue has caused the display to go black.

These problems are often quick to troubleshoot at home and don’t usually require any replacement parts.

2. Professional Repair Is Usually Needed If:

  • The screen is damaged after being dropped.
  • The battery has failed and no longer powers the device.
  • The charging port is damaged or loose.
  • The iPad has suffered liquid or water damage.
  • An internal component or motherboard has developed a fault.

In these situations, continuing to press buttons or repeatedly trying to charge the device is unlikely to solve the issue and may even make things worse.

3. Don’t Ignore a Black Screen for Too Long

If your iPad occasionally turns on but the screen keeps going black, it’s worth getting it checked sooner rather than later. Problems such as a failing battery or a damaged display often become worse over time, and delaying repairs can sometimes lead to more expensive damage.

At iExpert Repairs, our technicians begin every repair with a professional diagnostic to identify the real cause of the problem before recommending any work. That means you only pay for the repair your iPad actually needs-not unnecessary replacements.

When Should You Seek Professional iPad Repair?

Not every black screen can be fixed at home. If you’ve already tried charging your iPad, using a different charger, and performing a force restart without success, it’s usually a sign that the problem goes beyond a simple software glitch.

A professional inspection can quickly identify whether the issue is related to the battery, display, charging port, or an internal component, saving you from wasting money on unnecessary repairs or even replacing an iPad that could still be repaired.

Here are some situations where it’s best to seek professional help.

1. Your iPad Has Been Dropped

A hard fall can damage more than just the outer glass. Even if the screen doesn’t appear cracked, the display connector or internal screen components may have been damaged, leaving you with a black display while the iPad itself is still running.

If your iPad went black immediately after being dropped, it’s unlikely to be something you can fix yourself.

2. Your iPad Has Water or Liquid Damage

Water damage isn’t always obvious straight away. Sometimes an iPad continues working for hours or even days before the screen suddenly goes black. Liquid can damage the battery, display, charging circuit, or motherboard, and using the device while moisture is still inside may make the problem worse.

If your iPad has been exposed to water, it’s best to stop using it and have it professionally inspected as soon as possible.

3. You’ve Tried All the Basic Fixes

If you’ve already:

  • Charged your iPad for at least 30–60 minutes
  • Used a different charging cable and adapter
  • Performed a force restart
  • Checked for signs of physical damage

…and the screen is still completely black, it’s time for a professional diagnosis. Continuing to repeat the same steps rarely solves hardware-related faults.

4. The Screen Stays Black but You Can Hear Sounds

If your iPad plays notification sounds, vibrates, or Siri responds, the device is probably still powered on. In many cases, this points to a faulty display, loose display connection, or backlight failure rather than a completely dead iPad.

A technician can confirm the exact cause without replacing parts unnecessarily.

5. Your iPad Keeps Showing the Same Problem

Sometimes the screen turns back on after a force restart but goes black again a few hours or days later.

Recurring black screen issues often indicate an underlying hardware problem rather than a one-time software glitch. Getting the issue diagnosed early can prevent further damage and help avoid more expensive repairs later.

Why Professional Diagnostics Matter

A black screen doesn’t always mean you need a new display or battery. At iExpert Repairs, every iPad is carefully diagnosed before any repair begins. This allows our technicians to pinpoint the real cause of the fault and recommend only the repair that’s actually needed.

How to Prevent Your iPad Screen from Going Black Again

While not every black screen issue can be avoided, a few simple habits can reduce the chances of running into the same problem in the future. Taking care of your iPad doesn’t just help prevent unexpected black screens – it can also improve battery life, performance, and the overall lifespan of your device.

1. Keep iPadOS Up to Date

Apple regularly releases iPadOS updates that fix bugs, improve system stability, and address software issues that can sometimes cause display or startup problems.

If your iPad is working normally, installing updates when they’re available is a good way to keep it running smoothly.

2. Always Use a Reliable Charger

Using low-quality or damaged charging accessories can lead to charging problems and, over time, may affect your iPad’s battery health.

For the safest and most consistent charging experience, use a high-quality or certified charger and cable that are compatible with your iPad model.

3. Protect Your iPad from Drops

Many black screen issues begin after an accidental drop, even when there’s no visible crack on the screen. Internal display connectors can become loose or damaged without leaving obvious marks on the outside.

Using a sturdy protective case and handling your iPad carefully can help reduce the risk of accidental damage.

4. Keep Your iPad Away from Water

Although some newer Apple devices offer limited water resistance, iPads are not designed to withstand significant exposure to liquids. Spilled drinks, rain, or accidental drops into water can damage internal components and lead to display, battery, or charging problems.

If your iPad gets wet, switch it off if possible and avoid trying to charge it until it’s been inspected.

5. Avoid Letting the Battery Run Completely Flat Too Often

Occasionally draining your battery isn’t harmful, but repeatedly allowing it to reach 0% can put additional stress on lithium-ion batteries over time. Keeping your battery charged before it becomes completely empty can help maintain healthier long-term battery performance.

6. Don’t Ignore Early Warning Signs

Your iPad often gives clues before a serious problem develops Watch out for signs such as:

  • The screen flickering occasionally
  • Random restarts
  • Slow charging
  • Rapid battery drain
  • The display briefly going black before turning back on

Getting these issues checked early can often prevent more extensive repairs later.

FAQs About iPad Black Screen Issues

1. Why is my iPad screen black but the device is still on?

If your iPad makes sounds, vibrates, or receives notifications while the screen stays black, the problem is often related to the display, backlight, or an internal screen connection rather than the entire device.

2. How do I fix a black screen on my iPad?

Start by charging your iPad for at least 30 minutes, performing a force restart, and trying a different charger and cable. If the screen remains black, a professional diagnostic is recommended.

3. Can a completely dead iPad be repaired?

Yes. Many iPads that appear completely dead can be repaired. The issue may be caused by a faulty battery, damaged charging port, display failure, or motherboard fault rather than the device reaching the end of its life.

4. Why did my iPad screen suddenly go black?

A black screen can happen because of software crashes, battery failure, charging issues, accidental drops, water damage, display faults, or internal hardware problems.

5. Can a software update cause a black screen?

Sometimes. If an iPadOS update is interrupted or freezes during installation, your iPad may temporarily show a black screen. A force restart often resolves the issue.

6. How long should I charge my iPad before assuming there’s a problem?

Leave your iPad connected to a working charger for at least 30-60 minutes before troubleshooting further, especially if the battery may have been completely drained.

7. Can a bad battery cause a black screen?

Yes. If the battery can no longer provide enough power, your iPad may fail to turn on or may show a black screen even when connected to a charger.

8. Will a force restart delete my data?

No. A force restart simply reboots the device and does not erase your apps, photos, or personal data.

9. What should I do if my iPad was dropped and the screen is now black?

Stop trying to force it on repeatedly and have it inspected by a repair specialist. Even if the glass isn’t cracked, internal display components may have been damaged.

10. Can water damage cause an iPad black screen?

Yes. Liquid damage can affect the display, battery, charging circuit, or motherboard, causing the screen to remain black even though the iPad may still have power.

11. Is it safe to keep using an iPad with a black screen?

If the issue is caused by hardware damage or a swollen battery, continuing to use the device could lead to additional problems. It’s best to have it checked if the issue persists.

12. How much does it cost to repair an iPad with a black screen?

The cost depends on the actual fault. A battery replacement, screen repair, charging port repair, or motherboard repair all have different prices. A professional diagnostic is the best way to determine the exact repair cost.

13. Can I repair an iPad black screen myself?

Simple software issues can often be fixed at home, but hardware repairs involving the display, battery, or motherboard should be carried out by experienced technicians.

14. Does a black screen always mean the display needs replacing?

No. A black screen can also be caused by a faulty battery, charging port, software issue, or motherboard problem. That’s why a proper diagnosis is important before replacing any parts.

15. How can I prevent my iPad screen from going black again?

Keeping iPadOS updated, using quality charging accessories, avoiding drops and liquid damage, and addressing battery or charging issues early can reduce the risk of future black screen problems.

Conclusion

If you’re wondering “Why is my iPad screen black?”, the good news is that a black screen doesn’t always mean your iPad is beyond repair. In many cases, the problem is caused by something relatively simple, such as a drained battery, a temporary software issue, or a faulty charging accessory. However, persistent black screen problems can also indicate more serious issues like a damaged display, failing battery, charging port fault, liquid damage, or motherboard failure.

The key is to identify the real cause before spending money on unnecessary repairs or replacing your device. Simple troubleshooting steps such as charging your iPad, performing a force restart, and checking your charging equipment can often resolve minor issues. If the screen remains black after trying these fixes, a professional diagnostic is the safest way to determine exactly what’s wrong.

Acting early can also prevent further damage. Problems like battery failure, liquid damage, or internal component faults often become more expensive to repair if they’re ignored. Whether your iPad is used for work, education, entertainment, or everyday tasks, timely repairs can restore its performance and significantly extend its lifespan.

By understanding the common causes, warning signs, and available repair options, you can make an informed decision about whether your iPad needs a simple fix, a professional repair, or, in some cases, a replacement device.

Professional iPad Black Screen Repair Services in the UK

If your iPad screen is black and won’t turn on, don’t assume your device is beyond repair. At iExpert Repairs, our experienced technicians provide professional diagnostics to identify the exact cause of the problem before recommending any repair. Whether the issue is caused by a faulty battery, damaged display, charging port failure, liquid damage, or motherboard fault, we use premium-quality replacement parts and proven repair techniques to restore your iPad safely and reliably.

We offer fast turnaround times, same-day repairs on many iPad models, a 12-month warranty, transparent pricing, and a secure UK-wide mail-in repair service, making it easy for customers across the UK to get their devices repaired with confidence.

If repairing your current iPad isn’t the most cost-effective solution, iExpert Market offers a wide selection of professionally tested refurbished iPads, iPhones, MacBooksSamsung Galaxy devices, Android tablets, and laptops. Every refurbished device is carefully inspected, fully tested, professionally cleaned, and backed by a warranty, giving you a reliable and affordable alternative to buying brand-new technology.

Whether you choose to repair your existing iPad or upgrade to a high-quality refurbished device, the experts at iExpert Repairs and iExpert Market are committed to helping you find the most reliable, cost-effective solution for your needs.

Get your free repair quote today or explore our range of certified refurbished devices at iExpert Market and keep your technology performing at its best.

Back to posts

How Much Does an iPad Battery Replacement Cost?

Introduction

Has your iPad started losing battery much faster than it used to? Does it switch off unexpectedly, take forever to charge, or struggle to last through a normal day? If so, you’re probably wondering how much does an iPad battery replacement cost in the UK and whether it’s worth repairing your device instead of replacing it.

The good news is that in many cases, a professional iPad battery replacement can restore your tablet’s battery life and performance at a fraction of the cost of buying a new iPad. Whether you own an iPad Pro, iPad Air, iPad Mini, or the standard iPad, replacing a worn-out battery is often one of the most cost-effective repairs available.

However, ipad battery replacement costs aren’t the same for every model. Prices vary depending on factors such as your iPad generation, battery size, repair complexity, replacement part quality, and whether you choose Apple or an independent repair specialist like iExpert Repairs.

In this complete UK guide, we’ll explain:

  • Average iPad battery replacement costs
  • Battery replacement prices by iPad model
  • What affects the cost of replacing an iPad battery
  • Signs your battery needs replacing
  • Whether it’s worth repairing or replacing your iPad
  • Apple vs independent repair comparisons
  • Tips for extending battery life
  • How iExpert Repairs provides fast, reliable, and affordable iPad battery replacement services across the UK.

If your iPad also refuses to charge, you may find our guide on “Why Is My iPad Not Charging?” helpful before booking a battery replacement.

How Much Does an iPad Battery Replacement Cost in the UK?

The average iPad battery replacement cost in the UK typically ranges from £59 to £199, depending on your iPad model, battery capacity, and the complexity of the repair.

Older standard iPads generally cost less to repair because replacement parts are more readily available and the repair process is simpler. Premium models such as the latest iPad Pro or iPad Air may cost more due to larger batteries, laminated displays, and more complex internal designs.

Professional repair centres also include labour, diagnostics, quality-tested replacement batteries, and warranty coverage, making them a safer and more reliable option than attempting a DIY repair.

Average iPad Battery Replacement Cost (UK)

iPad ModelTypical Battery Replacement Cost
iPad£59-£99
iPad Mini64-£119
iPad Air£59-£149
iPad Pro£65-£159

Note: Prices vary depending on the exact iPad generation, battery condition, and whether any additional repairs are required.

If your iPad has multiple issues – such as a cracked display or charging port problem – it may be more cost-effective to have all repairs completed during the same visit. Our professional iPad Repair service can diagnose every issue before any work begins, helping you avoid unnecessary costs.

What Affects the Cost of an iPad Battery Replacement?

Not every iPad battery replacement costs the same. Several factors determine the final repair price, which is why it’s always worth getting a professional diagnostic before committing to a repair.

1. Your iPad Model

The biggest factor is the model you own.

For example:

  • Entry-level iPads are generally the most affordable to repair.
  • iPad Mini models have compact internal layouts that require extra precision.
  • iPad Air models feature slimmer designs and larger batteries.
  • iPad Pro models often include advanced display technology and more complex internal components, increasing repair time and cost.

Generally, newer and higher-spec iPads require more specialised repair techniques, which can affect pricing.

2. Battery Size and Capacity

Larger batteries cost more to replace because they contain more cells and require more complex installation.

For example, an iPad Pro battery is significantly larger than the battery found in a standard iPad, contributing to a higher replacement cost.

3. Quality of Replacement Parts

Battery quality has a major impact on both performance and safety. Professional repair centres use premium-quality replacement batteries designed to meet high performance and safety standards. Low-quality batteries may be cheaper initially but can lead to:

  • Poor battery life
  • Overheating
  • Charging issues
  • Unexpected shutdowns
  • Reduced overall device performance

Choosing a reputable repair provider helps ensure your iPad remains reliable long after the repair.

4. Additional Repairs

Sometimes a failing battery isn’t the only issue. Your technician may also discover:

  • A damaged charging port
  • Liquid damage
  • Display issues
  • Internal connector damage
  • Swollen battery causing screen separation

Addressing these issues during the same repair can often save time and reduce future repair costs.

5. Warranty and Repair Quality

The cheapest repair isn’t always the best value. A reputable repair provider typically includes:

  • Professional diagnostics
  • Experienced technicians
  • High-quality replacement batteries
  • Post-repair testing
  • Warranty protection
  • Ongoing customer support

These factors provide greater peace of mind and reduce the likelihood of repeat repairs.

Signs Your iPad Battery Needs Replacing

Every rechargeable battery gradually loses its ability to hold a full charge. Apple designs iPad batteries to retain a high percentage of their original capacity after hundreds of charge cycles, but over time, all lithium-ion batteries naturally degrade.

If your iPad is more than two or three years old and you’ve noticed a significant drop in battery life, it may be time to consider a professional battery replacement.

Here are the most common warning signs.

1. Your iPad Battery Drains Much Faster Than Before

One of the earliest signs of battery wear is noticeably shorter battery life. If your iPad once lasted all day but now requires charging after only a few hours of light use, the battery may no longer be able to store enough power.

Battery drain can also be caused by software problems or power-hungry apps. Before replacing the battery, it’s worth checking for background apps and updating iPadOS. If the issue persists, a professional battery test can determine whether the battery itself is at fault.

2. Your iPad Randomly Shuts Down

Does your iPad suddenly power off even though the battery indicator still shows 20%, 30%, or even 50% remaining? Unexpected shutdowns are often caused by an ageing battery that can no longer provide stable voltage under load.

This issue usually becomes more noticeable when:

  • Using demanding apps
  • Streaming videos
  • Playing games
  • Editing photos or videos
  • Joining long video calls

If random shutdowns become frequent, replacing the battery is usually the most reliable long-term solution.

3. The Battery Takes Much Longer to Charge

Another common symptom is unusually slow charging. While charging speed also depends on your charger, cable, and charging port, an ageing battery can increase charging times significantly.

Before assuming the battery is faulty, check for:

  • Damaged charging cables
  • Faulty wall adapters
  • Dirt or lint inside the charging port
  • Software updates

4. Your iPad Overheats During Normal Use

Some warmth while charging is perfectly normal.

However, if your iPad becomes excessively hot during everyday activities like browsing, watching videos, or using productivity apps, the battery could be struggling to deliver power efficiently.

Excessive heat may also indicate:

  • Internal battery degradation
  • Background software issues
  • Charging problems
  • Hardware faults

A professional diagnostic can identify the exact cause before unnecessary repairs are carried out.

5. Your Battery Percentage Jumps Up and Down

An unstable battery indicator often suggests the battery is no longer reporting its remaining capacity accurately.

For example:

  • 80% suddenly becomes 45%
  • 30% drops to 5%
  • Battery percentage increases after restarting

These inconsistent readings usually occur as the battery ages and its internal chemistry deteriorates.

6. Your iPad Feels Slower Than It Used To

Many people assume their iPad is simply getting old. In reality, a worn battery can affect overall performance by providing less stable power to internal components.

Replacing the battery often improves:

  • General responsiveness
  • App loading times
  • Multitasking performance
  • Overall reliability

7. The Battery Has Started Swelling

A swollen battery should never be ignored. As lithium-ion batteries age or become damaged, gases can build up inside the battery cells, causing them to expand.

Signs include:

  • The display lifting away from the frame
  • A bulging back panel
  • Gaps around the edges
  • Pressure marks on the screen
  • Difficulty pressing buttons

A swollen battery is a safety risk and should be replaced as soon as possible by qualified technicians. Continuing to use the device may damage the display, internal components, or charging system.

How Long Does an iPad Battery Last?

Apple’s lithium-ion batteries are designed to provide years of reliable performance.

For most users, an iPad battery lasts between 3 and 5 years, depending on usage habits, charging patterns, and environmental conditions. Heavy users who rely on their iPad for work, gaming, video editing, or streaming every day may notice battery degradation sooner than occasional users.

Typical lifespan depends on factors such as:

  • Daily screen time
  • Charge frequency
  • Charging habits
  • Ambient temperature
  • Battery health
  • Overall device age

With proper care, many iPads continue performing well long after the battery has been replaced.

What Are Charge Cycles?

Battery lifespan is measured using charge cycles rather than simply the number of times you plug your iPad in. One charge cycle equals using a total of 100% of the battery’s capacity.

For example:

  • Using 50% today and recharging
  • Then using another 50% tomorrow

equals one complete charge cycle.

Most modern iPad batteries are designed to retain a high percentage of their original capacity after around 1,000 charge cycles, although actual lifespan varies depending on usage and charging habits.

How Can You Make Your iPad Battery Last Longer?

Although every battery eventually wears out, good charging habits can significantly extend its lifespan.

1. Keep Your iPad Updated

Apple regularly releases iPadOS updates that improve battery efficiency, optimise background processes, and fix software bugs affecting power consumption.

Installing the latest updates can help maintain healthy battery performance.

2. Avoid Extreme Temperatures

Heat is one of the biggest enemies of lithium-ion batteries. Avoid leaving your iPad:

  • Inside a hot car
  • In direct sunlight
  • Near heaters
  • In freezing conditions for extended periods

Keeping your device within normal operating temperatures helps preserve long-term battery health.

3. Use High-Quality Chargers

Cheap or uncertified charging accessories may provide unstable power and could shorten battery life over time. Using high-quality or certified chargers and cables helps ensure safe, consistent charging.

4. Don’t Let the Battery Stay at 0% for Long Periods

Leaving an iPad completely discharged for days or weeks can put unnecessary stress on the battery. Whenever possible, recharge the device before it remains fully depleted for an extended period.

5. Reduce Unnecessary Background Activity

Simple adjustments can reduce battery drain, including:

  • Lowering screen brightness
  • Disabling unused location services
  • Closing unnecessary background apps
  • Turning off Bluetooth and AirDrop when not needed
  • Enabling Low Power Mode when appropriate

These small changes won’t stop battery ageing, but they can help maximise the time between charges.

Can You Replace an iPad Battery Yourself?

Technically, yes – but for most people, DIY iPad battery replacement isn’t recommended.

Unlike some older electronics, iPads are built with tightly sealed enclosures, strong adhesive, delicate display cables, and compact internal components. Opening the device without the right tools or experience can easily cause additional damage.

Common risks include:

  • Cracking the display during removal
  • Damaging the touch digitiser or LCD
  • Tearing delicate ribbon cables
  • Puncturing the battery, which can create a fire hazard
  • Causing charging or motherboard issues
  • Losing any remaining warranty coverage

Professional repair technicians use specialist tools, controlled heating equipment, and tested replacement batteries to carry out the repair safely. If your iPad also has a cracked screen or charging issue, repairing everything at the same time can often save both time and money.

Apple vs Independent iPad Battery Replacement

When your iPad battery starts failing, you’ll generally have two options: using Apple’s official repair service or choosing a trusted independent repair specialist such as iExpert Repairs.

Both options have advantages, but the right choice depends on your budget, repair urgency, warranty preferences, and the age of your iPad.

1. Apple Battery Replacement

Apple offers battery replacement services for eligible iPad models using genuine Apple parts.

This option may be suitable if:

  • Your iPad is still covered by AppleCare+.
  • You prefer using Apple’s official repair network.
  • You don’t mind paying premium repair prices.
  • You’re happy to wait for Apple’s repair turnaround.

However, depending on your location and model, repairs may take longer than expected, and older iPads may no longer qualify for official service.

2. Independent iPad Repair Specialists

Professional independent repair centres such as iExpert Repairs offer a practical alternative for many UK customers.

Benefits typically include:

  • Competitive pricing
  • Faster turnaround times
  • Same-day repairs on many models
  • High-quality replacement batteries
  • Professional diagnostics
  • Warranty on repairs
  • Friendly local support

Independent repair specialists are often the preferred choice when repairing older iPads that are no longer covered by Apple’s warranty or when customers want a quicker and more affordable solution.

3. Apple vs Independent Repair Comparison

FeatureApple RepairiExpert Repairs
Genuine or Premium PartsGenuine Apple partsPremium quality replacement parts
Repair SpeedVaries by model and locationSame-day service available on many models
Free DiagnosticsLimitedIncluded before repair
Competitive PricingHigherMore affordable
UK Mail-In ServiceAvailable for selected servicesUK-wide mail-in repair available
WarrantyApple warranty terms apply12-month warranty on repairs
Personal Customer SupportStandardDirect support from experienced technicians

Expert Tip: If your iPad is several years old and no longer covered by AppleCare+, a professional independent repair can often provide excellent value while restoring your device’s battery life and performance.

iPad Battery Replacement Cost by Model

1. Standard iPad Battery Replacement Cost

The standard iPad range is typically the most affordable to repair. Common models include:

Typical battery replacement cost: £59-£99

Older entry-level iPads remain excellent devices for school, streaming, browsing, and everyday use, making battery replacement a worthwhile investment.

2. iPad Mini Battery Replacement Cost

The iPad Mini features a compact internal design that requires additional care during repair. Supported models include:

Typical battery replacement cost: £59-£119

Because many people rely on the Mini for travel, reading, and business use, replacing the battery is often much cheaper than upgrading to a newer model.

3. iPad Air Battery Replacement Cost

The iPad Air combines portability with high performance, making it popular among students, professionals, and creatives. Models include:

Typical battery replacement cost: £59-£119

If the rest of your iPad is in good condition, replacing the battery can easily add several more years of reliable use.

4. iPad Pro Battery Replacement Cost

The iPad Pro is Apple’s most advanced tablet, featuring powerful processors, premium displays, and larger batteries.

Supported models include:

Typical battery replacement cost: £69-£199

Although Pro repairs are generally more expensive, replacing the battery is still considerably cheaper than purchasing a brand-new iPad Pro.

4. iPad Battery Replacement Cost by Series

iPad SeriesEstimated UK Battery Replacement Cost
Standard iPad£59-£99
iPad Mini£69-£119
iPad Air£79-£149
iPad Pro£99-£199

Please note: Actual pricing depends on your exact model, battery condition, and whether additional repairs are required.

Is It Worth Replacing an iPad Battery?

If your iPad still performs well but the battery no longer lasts long enough, replacing the battery is usually one of the most cost-effective repairs you can make.

Battery replacement is often worthwhile when:

  • The screen is still in good condition.
  • The device runs the latest version of iPadOS.
  • Performance remains smooth.
  • Storage capacity still meets your needs.
  • Repair costs are significantly lower than buying a new iPad.

A new battery can restore all-day usability and delay the need for an expensive upgrade.

1. When Replacing the Battery Makes Sense

Battery replacement is usually the best option if:

  • The iPad only has battery-related issues.
  • The display is undamaged.
  • There is no severe liquid damage.
  • The motherboard is functioning correctly.
  • The repair cost is much lower than replacing the device.

Many customers continue using their iPads for several more years after a professional battery replacement.

2. When Buying a Refurbished iPad May Be Better

Sometimes replacing the battery isn’t the most economical solution. You may be better off upgrading if your iPad has:

  • Multiple hardware failures
  • Severe liquid damage
  • Logic board damage
  • An obsolete processor that no longer supports modern apps
  • Several expensive repairs required at the same time

In these situations, choosing a professionally tested refurbished iPad can offer better long-term value. Refurbished devices provide:

  • Lower prices than buying new
  • Fully tested performance
  • Warranty protection
  • Reliable battery performance
  • Excellent value for students, families, and professionals

If you’re considering upgrading instead of repairing, explore our range of professionally refurbished iPads and tablets to compare your options before making a decision.

3. Repair vs Buy a Refurbished iPad

OptionBest For
Replace the BatteryiPad works well apart from battery life
Repair Multiple IssuesDevice is still in good overall condition
Buy a Refurbished iPadRepair costs are too high or the iPad is outdated
Buy a Brand-New iPadYou need the latest features and longest software support

Expert Recommendation

If your repair estimate is only a small fraction of the cost of replacing your device, a battery replacement is usually the smarter financial choice. However, if your iPad also needs a new screen, charging port, and battery, upgrading to a refurbished model may offer better overall value.

Why Customers Across the UK Choose iExpert Repairs

Thousands of customers trust iExpert Repairs because we focus on quality workmanship, transparent pricing, and reliable customer support.

1. Certified Repair Technicians

Our experienced technicians repair Apple devices every day and stay up to date with the latest repair techniques and technologies. Whether you own an older iPad or the latest iPad Pro, your device is repaired by professionals with extensive hands-on experience.

2. Premium-Quality Replacement Batteries

Battery quality makes a significant difference to performance and longevity.

That’s why we use carefully selected replacement batteries that deliver dependable charging performance, excellent battery life, and long-term reliability.

3. Fast Turnaround

We understand how important your iPad is for work, education, and everyday life.

Many battery replacements can be completed on the same day, helping you get back to using your device with minimal disruption. Repair times may vary depending on your iPad model and parts availability.

4. 12-Month Warranty

For added peace of mind, our repairs include a 12-month warranty, covering the replacement battery and workmanship in accordance with our warranty terms.

5. UK-Wide Mail-In Repair Service

Can’t visit our repair centre?

Our secure mail-in repair service allows customers throughout England, Scotland, Wales, and Northern Ireland to access professional iPad repairs without travelling.

Simply:

  1. Book your repair.
  2. Send us your iPad securely.
  3. Our technicians complete the repair.
  4. Your repaired device is returned promptly using tracked delivery.

It’s a convenient option for customers anywhere in the UK.

6. Fix Now, Pay Later with Klarna

Unexpected repairs don’t always come at a convenient time.

That’s why eligible customers can choose Fix Now, Pay Later with Klarna, making it easier to spread the cost of an iPad battery replacement while getting their device repaired without unnecessary delays.

Why Replacing Your Battery Early Can Save Money

Many people continue using an ageing battery long after it begins showing signs of failure. Unfortunately, delaying repairs can sometimes lead to additional problems.

For example, a swollen battery may:

  • Push against the display
  • Damage the screen assembly
  • Affect internal connectors
  • Reduce charging performance
  • Increase overall repair costs

Replacing the battery as soon as symptoms appear can help prevent more expensive repairs later.

If your iPad already has a cracked display as well as poor battery life, repairing both issues together is often more economical than arranging two separate repairs.

1. Expert Tips to Extend Your New iPad Battery’s Life

Once you’ve replaced your battery, a few simple habits can help maximise its lifespan.

Keep iPadOS Updated

Software updates often include battery optimisation improvements, security enhancements, and performance fixes. Keeping your iPad updated helps ensure efficient power management.

2. Avoid Constant Full Discharges

Lithium-ion batteries generally perform best when they’re recharged before becoming completely empty. Frequent deep discharges can increase long-term battery wear.

3. Remove Thick Cases During Heavy Charging

Some protective cases can trap heat while charging. If your iPad becomes unusually warm during charging, removing the case may improve airflow and reduce battery stress.

4. Use Trusted Charging Accessories

Using reliable charging cables and power adapters helps maintain stable charging performance and protects your battery over time.

5. Store Your iPad Correctly

If you won’t be using your iPad for several weeks, avoid storing it with a completely empty battery. A partial charge and cool, dry storage conditions are generally better for long-term battery health.

Common Mistakes to Avoid

Many battery problems become worse because users unknowingly make avoidable mistakes. Here are some of the most common ones.

1. Ignoring Battery Warning Signs

Rapid battery drain, overheating, random shutdowns, or battery swelling shouldn’t be ignored. Early diagnosis often prevents more serious damage.

2. Choosing the Cheapest Repair

An unusually cheap battery replacement may involve low-quality components or inexperienced repair work. Choosing a reputable repair provider can improve reliability, safety, and long-term value.

3. Attempting DIY Repairs

Opening an iPad without the correct tools can easily damage:

  • The display
  • Internal cables
  • The charging port
  • Face ID or Touch ID components (where applicable)
  • The motherboard

Professional repairs significantly reduce these risks.

4. Continuing to Use a Swollen Battery

A swollen battery is a safety concern and should be replaced as soon as possible. Continuing to use the device could cause further internal damage or make the repair more expensive.

5. Waiting Until the Device Stops Working

Many customers wait until their iPad no longer turns on before seeking help.

Arranging a battery replacement when the first symptoms appear is often quicker, cheaper, and more likely to prevent additional faults.

FAQs About iPad Battery Replacement Costs

1. How much does an iPad battery replacement cost in the UK?

Most iPad battery replacements in the UK cost between £59 and £199, depending on the model, battery size, and repair complexity.

2. Is it worth replacing an iPad battery?

Yes. If your iPad is otherwise working well, replacing the battery is usually much cheaper than buying a new device and can extend its usable life by several years.

3. How long does an iPad battery replacement take?

Many battery replacements can be completed on the same day, although turnaround times may vary depending on the model and parts availability.

4. How long does an iPad battery last?

Most iPad batteries last around 3-5 years, depending on usage, charging habits, and the number of charge cycles.

5. Can I replace my iPad battery myself?

While it’s technically possible, DIY battery replacement is not recommended due to the risk of damaging the display, battery, or internal components.

6. What are the signs that my iPad battery needs replacing?

Common signs include rapid battery drain, random shutdowns, overheating, slow charging, battery swelling, and reduced performance.

7. Does replacing the battery improve iPad performance?

If battery degradation is causing power-related issues, a new battery can improve stability, reliability, and everyday usability.

8. Why is my iPad battery draining so quickly?

Battery drain may be caused by an ageing battery, background apps, software issues, high screen brightness, or hardware faults.

9. Can a swollen iPad battery be repaired?

A swollen battery should be replaced immediately by a qualified technician. Continuing to use it may damage the display and other internal components.

10. Will replacing my battery delete my data?

A battery replacement doesn’t normally erase your data, but it’s always recommended to back up your iPad before any repair.

11. Which iPad models can have their batteries replaced?

Professional repair centres can replace batteries in most iPad models, including standard iPads, iPad Mini, iPad Air, and iPad Pro devices.

12. Do battery replacements come with a warranty?

Reputable repair providers usually include a warranty covering the replacement battery and workmanship. Always check the warranty terms before booking.

13. What affects the cost of an iPad battery replacement?

Pricing depends on the iPad model, battery size, repair complexity, replacement part quality, and whether any additional repairs are needed.

Conclusion

If you’ve been asking “How much does an iPad battery replacement cost?”, the answer depends on your iPad model, the condition of your device, and who carries out the repair. In the UK, most iPad battery replacement costs range from £59 to £199, making it a far more affordable option than buying a brand-new iPad in many cases.

A failing battery doesn’t necessarily mean your iPad has reached the end of its life. If your tablet still performs well and only suffers from rapid battery drain, unexpected shutdowns, or poor charging performance, replacing the battery can restore its reliability and extend its lifespan for several more years.

Choosing an experienced repair provider also makes a significant difference. Professional diagnostics, premium-quality replacement batteries, skilled technicians, and warranty-backed repairs help ensure your iPad continues to perform safely and efficiently after the repair.

If your device has additional issues – such as a cracked screen or charging problems – it may be more cost-effective to repair everything at once. On the other hand, if your iPad requires multiple major repairs and is no longer suitable for your needs, upgrading to a professionally refurbished iPad could provide better long-term value.

Whatever you decide, understanding your repair options helps you make an informed decision and avoid spending more than necessary.

Back to posts

iPad Screen Not Responding? Causes & Fixes

Quick Answer

If your iPad screen is not responding to touch, don’t panic. In many cases, the issue is caused by a temporary software glitch, an outdated version of iPadOS, a faulty screen protector, insufficient storage, or a low battery. A simple force restart, software update, or cleaning the display may restore normal touch functionality.

However, if your iPad has been dropped, exposed to water, or has a cracked display, the problem may be caused by a damaged touchscreen digitizer or internal hardware. In these cases, professional diagnosis and repair are usually required.

This guide explains every possible cause, provides step-by-step fixes you can safely try at home, and helps you identify when it’s time to seek expert repair.

Introduction

An iPad with a touch screen that suddenly stops responding can bring your entire day to a halt. Whether you use your device for work, online learning, creative projects, video calls, streaming, or everyday browsing, an unresponsive screen makes even the simplest tasks impossible.

Sometimes the problem affects the entire display, while in other cases only certain areas stop responding. You may notice delayed touch input, random taps (often called ghost touch), frozen apps, or a screen that looks perfectly normal but refuses to react when you tap it.

The good news is that not every unresponsive iPad requires a new screen. Many touchscreen problems are caused by software issues that can be resolved without replacing any hardware. On the other hand, physical damage, liquid exposure, or a failed touchscreen digitizer can prevent the display from recognising touch input and usually require professional repair.

In this complete UK troubleshooting guide, our certified technicians explain exactly why an iPad screen stops responding, how to fix the most common causes, and when repairing the device is the safest and most cost-effective option.

Whether you own an iPad, iPad Mini, iPad Air, or iPad Pro, the troubleshooting steps in this guide apply to most Apple tablet models running recent versions of iPadOS.

We’ll also explain the warning signs that indicate your problem is hardware-related rather than software-related, helping you avoid unnecessary repairs and save both time and money.

Common Signs Your iPad Touch Screen Has Stopped Working

Not every unresponsive iPad behaves the same way. In some cases, the entire touchscreen stops working, while in others only certain areas become unresponsive. Recognising the symptoms can help you determine whether the issue is caused by software, accidental damage, or failing hardware.

Here are the most common signs that indicate your iPad touch screen isn’t working correctly.

1. The Entire Screen Doesn’t Respond to Touch

Your iPad powers on normally, the display looks fine, but tapping, swiping, or typing has no effect. This is often caused by software crashes, severe system glitches, or a failed touchscreen digitizer.

2. Only Part of the Screen Works

Certain areas of the display respond normally while other sections remain completely unresponsive.

This usually indicates physical damage to the touchscreen digitizer, pressure damage, or internal connector issues rather than a software problem.

3. Ghost Touch

Ghost touch occurs when your iPad performs actions without you touching the screen. Apps may open by themselves, random letters may be typed, or icons may move unexpectedly.

This symptom is commonly linked to:

  • Screen damage
  • Liquid damage
  • Faulty replacement screens
  • Digitizer failure
  • Internal motherboard faults

4. Touch Response Is Slow or Delayed

If every tap takes several seconds to register, the issue may be caused by:

  • Low available storage
  • Too many background apps
  • Outdated iPadOS
  • Software bugs
  • Battery performance issues

5. Your iPad Freezes Frequently

The screen may become completely frozen while the device remains powered on. Sometimes the Apple logo appears repeatedly, or apps stop responding altogether.

This usually points to software instability, although hardware faults can produce similar symptoms.

6. Touch Stops Working After a Drop

Even if the glass isn’t badly cracked, a drop can damage the touchscreen digitizer underneath the display. Many users assume the screen is fine because images still appear normally, but the touch layer may already be damaged.

7. Touch Stops Working After Water Exposure

Liquid damage doesn’t always cause immediate failure. Moisture can slowly corrode internal components over several hours or days before the touchscreen eventually stops responding.

If your iPad came into contact with water, avoid charging or using it until it has been professionally inspected.

8. Apple Pencil Works but Finger Touch Doesn’t

This is a classic sign that the touchscreen digitizer has failed while the display itself remains functional. Professional diagnostics are usually required to confirm the fault.

What Causes an iPad Screen to Stop Responding?

An unresponsive iPad screen can result from either software issues or hardware damage. Understanding the difference helps you avoid unnecessary repairs and choose the right solution.

Below are the most common causes our technicians encounter during iPad repairs.

1. Temporary Software Glitches

One of the most common causes is a temporary software crash.

Apps occasionally freeze, background processes fail, or iPadOS experiences a minor bug that prevents the touchscreen from responding correctly. Fortunately, these issues are usually temporary and can often be fixed with a force restart or software update.

Common symptoms include:

  • Frozen apps
  • Delayed touch response
  • Entire screen temporarily unresponsive
  • Device becomes responsive again after restarting

2. Outdated iPadOS

Running an outdated version of iPadOS can introduce compatibility problems, system instability, and touchscreen bugs. Apple regularly releases updates that fix known software issues, improve stability, and enhance touch responsiveness.

If your touchscreen problem started shortly before or after a software update, installing the latest version may resolve the issue.

Expert Tip: Always back up your iPad before installing major iPadOS updates.

3. Insufficient Storage Space

Many users overlook storage, but an almost full iPad can become sluggish and unresponsive.

When available storage is critically low, iPadOS struggles to manage temporary system files, affecting overall performance – including touch responsiveness.

Signs include:

  • Apps crashing
  • Keyboard lag
  • Delayed gestures
  • Slow animations
  • Random freezing

Keeping at least 10-15% of your storage free helps maintain smooth performance.

4. Dirty, Wet or Damaged Screen

Touchscreens rely on detecting electrical changes from your fingers. Oil, dust, moisture, sweat, or certain cleaning chemicals can interfere with this process.

Similarly, a cracked or heavily scratched display may prevent accurate touch detection. Before assuming your iPad needs repair, gently clean the display using a dry microfibre cloth and remove any moisture.

5. Faulty Screen Protector

A poor-quality or incorrectly fitted tempered glass protector can reduce touchscreen sensitivity. Air bubbles, excessive thickness, or misalignment may cause:

  • Missed taps
  • Reduced sensitivity
  • Inaccurate gestures
  • Delayed typing

If the problem began shortly after fitting a new screen protector, remove it and test the display again before considering repairs.

6. Battery or Charging Problems

A failing battery doesn’t just reduce battery life – it can also affect your iPad’s overall performance and touchscreen responsiveness.

Low voltage, battery degradation, or charging faults may cause:

  • Random freezing
  • Lagging touch response
  • Unexpected shutdowns
  • Performance throttling

If your iPad also struggles to charge, charges very slowly, or switches off unexpectedly, the battery or charging system may be contributing to the issue Find out more Why Is My iPad Not Charging? guide.

7. Physical Impact or Accidental Drops

One of the most common reasons an iPad screen stops responding is accidental physical damage. Even if the glass appears intact, the impact from a drop can damage the touchscreen digitizer, loosen internal display connectors, or affect components on the logic board.

Many people assume that because the display still lights up, the screen isn’t damaged. In reality, the LCD and touchscreen digitizer are separate components. Your iPad may continue displaying images perfectly while the touch layer underneath has stopped working.

Signs of impact damage include:

  • Touch works only in certain areas.
  • The display has dead touch zones.
  • Ghost touch occurs after a drop.
  • Cracks appear around the screen edges.
  • The display flickers or shows coloured lines.
  • Touch stops working immediately after the device falls.

If your iPad has visible cracks or touch problems following an impact, professional diagnostics are recommended to prevent the damage from worsening, the guide How Much Does It Cost to Fix an iPad Screen? can help you.

8. Liquid or Water Damage

Although many newer iPads offer better protection against accidental splashes, no iPad is completely waterproof. Water, coffee, soft drinks, rain, or even excessive humidity can seep inside the device and damage sensitive internal components.

One of the biggest risks is corrosion. Liquid damage may not cause immediate failure. Instead, corrosion slowly develops over hours or even days, leading to intermittent touchscreen problems before the screen stops responding altogether.

Common signs of liquid damage include:

  • Random or ghost touches.
  • Parts of the touchscreen stop working.
  • The display flickers unexpectedly.
  • Charging issues begin after exposure to liquid.
  • The iPad powers on but doesn’t respond to touch.

What should you do?

  • Turn the iPad off immediately.
  • Do not charge the device.
  • Avoid using a hairdryer or placing it on a radiator.
  • Do not rely on rice to remove moisture-it won’t stop internal corrosion.
  • Arrange a professional inspection as soon as possible.

The sooner liquid damage is treated, the greater the chance of preventing permanent hardware failure

9. Touchscreen Digitizer Failure

The touchscreen digitizer is the layer responsible for detecting every tap, swipe, pinch, and gesture you make. It sits above the display and converts your touch into commands that the iPad can understand.

If the digitizer fails, your screen may still display images perfectly, but it won’t respond correctly – or at all – to touch.

Digitizer failure is commonly caused by:

  • Repeated drops.
  • Pressure damage.
  • Manufacturing defects.
  • Liquid exposure.
  • Poor-quality previous repairs.

Common symptoms include:

  • No touch response anywhere on the screen.
  • Certain sections become completely unresponsive.
  • Multi-touch gestures stop working.
  • Ghost touch occurs randomly.
  • Apple Pencil works, but finger touch does not.

Unfortunately, a failed digitizer cannot be repaired through software updates or settings changes. In most cases, replacing the damaged screen assembly is the only permanent solution.

10. Logic Board or Touch Controller Damage

Although less common, the problem may lie deeper inside the iPad.

The logic board contains the touch controller and other integrated circuits that process touchscreen input. If these components become damaged due to a severe impact, liquid ingress, electrical faults, or failed repair attempts, your iPad may stop recognising touch commands altogether.

Possible symptoms include:

  • Touch stops working after a major drop.
  • The display functions normally, but there is no touch input.
  • The device randomly freezes despite multiple resets.
  • Touch works briefly before becoming unresponsive again.

Logic board repairs require specialist equipment and should only be carried out by experienced technicians.

Software Problem vs Hardware Problem

One of the most important questions is whether your iPad is suffering from a software issue or a hardware fault. The table below highlights the key differences.

Software Issue Hardware Issue
Started after an iPadOS update Started after a drop or impact
Screen responds after restarting Touch never returns after restart
No visible physical damage Cracked or damaged display
Apps freeze occasionally Dead touch zones on the screen
Improves after updating iPadOS Ghost touch continues regardless of updates
Usually repairable at home Usually requires professional repair

If your iPad only experiences occasional freezes or lag, software troubleshooting is the best place to start. However, if the touchscreen stopped working after accidental damage or liquid exposure, hardware repair is often the safest and most reliable solution.

Expert Tip

Don’t keep force restarting your iPad if the screen stopped responding after a drop or water damage.

Repeated restarts won’t repair damaged hardware and may make data recovery more difficult if the underlying problem worsens. Instead, back up your data if possible and arrange a professional diagnosis as soon as possible.

Before You Pay for a Repair…

The good news is that many touchscreen issues are still caused by simple software glitches, low storage, or outdated system software.

Before replacing your screen, work through the troubleshooting steps below. In many cases, you can restore full touchscreen functionality without spending a penny.

In the next section, we’ll walk you through 12 proven fixes you can safely try at home before booking a repair. These methods are suitable for most iPad, iPad Air, iPad Mini, and iPad Pro models and are arranged from the simplest solutions to more advanced troubleshooting steps.

12 Proven Ways to Fix an Unresponsive iPad Touch Screen

Before assuming your iPad needs a screen replacement, work through the following troubleshooting steps in order. Many touchscreen problems are caused by temporary software glitches, incorrect settings, or minor issues that can be resolved without replacing any hardware.

If your iPad has been dropped, exposed to liquid, or has a visibly cracked display, skip to the When Is It a Hardware Problem? section later in this guide, as hardware damage is less likely to be fixed by software troubleshooting.

1. Force Restart Your iPad

A force restart is one of the quickest and most effective ways to resolve temporary software glitches that prevent the touchscreen from responding.

Unlike a normal restart, a force restart refreshes the operating system without erasing your apps, photos, or personal data.

For iPads without a Home Button

  1. Press and quickly release the Volume Up button.
  2. Press and quickly release the Volume Down button.
  3. Press and hold the Top (Power) button.
  4. Keep holding until the Apple logo appears.
  5. Release the button and allow the iPad to restart.

For iPads with a Home Button

  1. Press and hold the Home button and the Power button together.
  2. Keep holding both buttons until the Apple logo appears.
  3. Release the buttons and allow the device to restart.

If the touchscreen starts working normally after restarting, the issue was most likely caused by a temporary software crash.

2. Clean the Screen Properly

Modern iPad touchscreens rely on tiny electrical changes created by your fingertips. Dirt, grease, moisture, sunscreen, or food residue can interfere with touch sensitivity.

To clean your iPad safely:

  • Turn the device off.
  • Use a clean, dry microfibre cloth.
  • Wipe the display gently using circular motions.
  • Avoid household cleaners, glass sprays, bleach, or abrasive cloths.
  • If needed, slightly dampen the cloth with water – never spray liquid directly onto the screen.

Even a small amount of moisture can affect touchscreen performance, especially around the screen edges.

3. Remove Your Screen Protector or Case

A damaged or poor-quality tempered glass protector can reduce touchscreen sensitivity. Likewise, some heavy-duty protective cases press against the display and interfere with normal touch detection.

If your touchscreen became unreliable after installing a new accessory:

  • Remove the screen protector.
  • Take the iPad out of its case.
  • Test the touchscreen again before purchasing replacement parts.

Many users discover that the accessory – not the iPad – is causing the issue.

4. Charge Your iPad

A critically low battery can cause your iPad to become sluggish, freeze, or stop responding to touch. If your battery is completely drained:

  • Connect the iPad to an original Apple or certified charger.
  • Leave it charging for at least 30-60 minutes.
  • Avoid using the device while it charges.
  • Once sufficient power has been restored, restart the iPad.

If your device refuses to charge, charges very slowly, or disconnects repeatedly, the issue may be related to the battery or charging port rather than the touchscreen itself.

5. Update to the Latest Version of iPadOS

Apple regularly releases software updates that improve stability, fix touchscreen bugs, and resolve known performance issues. To check for updates:

  1. Open Settings.
  2. Tap General.
  3. Select Software Update.
  4. Download and install any available update.

Before updating, make sure:

  • Your battery is above 50%.
  • You’re connected to Wi-Fi.
  • Your data is backed up using iCloud or a computer.

If the issue began after an older software version, updating may restore normal touch functionality.

6. Free Up Storage Space

An iPad with almost no available storage may become slow, unresponsive, or freeze during everyday use. To check your storage:

  • Go to Settings > General > iPad Storage.
  • Remove apps you no longer use.
  • Delete duplicate photos and videos.
  • Clear downloaded files.
  • Offload unused apps while keeping their data.

Apple recommends maintaining free storage to ensure smooth system performance. If your storage is almost full, freeing up space may noticeably improve touchscreen responsiveness.

Expert Tip

If your iPad becomes responsive after completing one of the fixes above, continue using it for a day or two before assuming the problem has been permanently solved.

If the touchscreen freezes repeatedly or the issue returns shortly afterwards, there may be an underlying hardware fault that requires professional diagnosis.

7. Disconnect External Accessories

External accessories can occasionally interfere with your iPad’s normal operation, especially if they’re faulty or not Apple-certified.

If you’re using:

  • A USB-C hub
  • External keyboard
  • Mouse or trackpad
  • Apple Pencil
  • External display
  • USB storage device
  • Card reader

disconnect everything and test the touchscreen again.

A faulty accessory or incompatible adapter can sometimes cause unexpected software conflicts that affect touch responsiveness. After disconnecting all accessories, restart your iPad and check whether the issue has been resolved.

8. Close Frozen Apps

Sometimes the touchscreen appears unresponsive because a single app has crashed rather than the entire operating system. If only one application is frozen:

  • Open the App Switcher.
  • Swipe up on the frozen app to close it.
  • Reopen the application.
  • Check whether touch input returns to normal.

If multiple apps regularly freeze, the issue may be caused by insufficient storage, outdated software, or a deeper system problem.

9. Reset All Settings

If none of the previous fixes work, resetting your iPad’s settings may resolve configuration issues without deleting your personal data.

This option resets:

  • Wi-Fi settings
  • Bluetooth settings
  • Keyboard dictionary
  • Privacy settings
  • Display preferences
  • Accessibility settings

It does not remove your:

  • Photos
  • Videos
  • Apps
  • Documents
  • Messages

To reset all settings:

  1. Open Settings.
  2. Tap General.
  3. Scroll to Transfer or Reset iPad.
  4. Tap Reset.
  5. Select Reset All Settings.
  6. Enter your passcode if prompted.

Your iPad will restart automatically.

10. Restore Your iPad Using Finder or iTunes

If the touchscreen still doesn’t respond, restoring the operating system can eliminate deep software corruption. Before restoring:

  • Back up your important files.
  • Make sure your computer has the latest version of Finder (Mac) or iTunes (Windows).

Once connected:

  1. Put the iPad into Recovery Mode.
  2. Connect it to your computer.
  3. Select Update first.
  4. If updating doesn’t work, choose Restore.

Restoring reinstalls iPadOS and removes corrupted system files that may be preventing the touchscreen from functioning properly. Important: A full restore erases all data unless you’ve created a backup beforehand.

11. Use Recovery Mode or DFU Mode

If your iPad remains frozen, Recovery Mode or Device Firmware Update (DFU) Mode may help restore the operating system. These methods are designed for severe software problems such as:

  • Endless Apple logo loops
  • Failed updates
  • Repeated freezing
  • Boot failures
  • Serious system corruption

Because DFU Mode completely reinstalls the firmware, it should only be attempted if standard troubleshooting has failed. If you’re unsure how to perform these steps safely, it’s best to seek professional assistance.

12. Get Your iPad Professionally Diagnosed

If you’ve completed all the troubleshooting steps in this guide and your touchscreen is still unresponsive, the problem is likely hardware-related.

Professional diagnostics can identify faults such as:

  • Failed touchscreen digitizer
  • Cracked display assembly
  • Loose internal display connectors
  • Battery-related power issues
  • Charging circuit faults
  • Logic board damage
  • Liquid corrosion
  • Touch controller failure

At this stage, continuing to restart or reset your iPad is unlikely to solve the problem. A professional inspection ensures the correct component is repaired or replaced, helping you avoid unnecessary costs.

When Is It a Hardware Problem Instead of Software?

While software issues are common, certain symptoms almost always indicate physical hardware damage. Your iPad is more likely to need professional repair if:

  • The touchscreen stopped working immediately after being dropped.
  • The screen has visible cracks or impact damage.
  • Only part of the display responds to touch.
  • Ghost touch occurs continuously.
  • Vertical lines or screen flickering appear.
  • The display lifts away from the frame.
  • The iPad has been exposed to water or another liquid.
  • Force restarting and restoring iPadOS make no difference.

If you notice one or more of these symptoms, replacing the damaged component is usually more effective than continuing software troubleshooting.

Warning Signs You Shouldn’t Ignore

Book a professional repair as soon as possible if:

  • Your battery appears swollen.
  • The screen is lifting from the frame.
  • Liquid entered the device.
  • The iPad becomes unusually hot.
  • You smell burning or notice smoke.
  • The display is flickering alongside touch problems.
  • The touchscreen becomes progressively worse each day.

Ignoring these warning signs can lead to additional internal damage and significantly increase repair costs.

Expert Advice

One of the biggest mistakes we see is users replacing the screen without confirming what’s actually causing the problem. For example:

  • A failing battery can make an iPad freeze.
  • A damaged charging circuit can cause random shutdowns.
  • A logic board fault can mimic a faulty touchscreen.
  • A loose display connector may stop touch input even though the screen itself is undamaged.

That’s why professional diagnostics should always come before replacing expensive components.

At iExpert Repairs, every iPad undergoes a full diagnostic assessment before any repair is recommended, ensuring you only pay for the repair your device genuinely needs.

How to Force Restart Every iPad Model

A force restart is often the first troubleshooting step recommended when an iPad becomes frozen or stops responding to touch. Unlike a factory reset, it does not erase your apps, photos, documents, or personal data. Instead, it simply forces the operating system to restart and can resolve temporary software glitches.

The steps vary depending on whether your iPad has a Home button or Face ID.

iPad Model How to Force Restart
iPad Pro (2018 and newer) Press and quickly release Volume Up, then Volume Down, then press and hold the Top button until the Apple logo appears.
iPad Air (4th Generation and newer) Press and quickly release Volume Up, then Volume Down, then hold the Top button until you see the Apple logo.
iPad Mini (6th Generation and newer) Press Volume Up, then Volume Down, then hold the Top button until the device restarts.
iPads with a Home Button Press and hold the Home button and the Power button together until the Apple logo appears.

If the touchscreen begins working after a force restart, monitor the device for a few days. If the problem returns, it may indicate an underlying hardware issue rather than a temporary software glitch.

Can You Fix an iPad Touch Screen Yourself?

It depends on what’s causing the problem. If your iPad is experiencing a software-related issue, you can often resolve it by restarting the device, updating iPadOS, freeing up storage, or resetting settings.

However, if the problem is caused by physical damage, liquid exposure, or a failed touchscreen digitizer, DIY repairs become far more challenging and risky.

DIY fixes that are generally safe include:

  • Force restarting the iPad.
  • Cleaning the display.
  • Removing a faulty screen protector.
  • Installing the latest iPadOS update.
  • Freeing up storage space.
  • Resetting system settings.

These troubleshooting steps carry very little risk and are worth trying before seeking professional help.

Why DIY Screen Repairs Can Be Risky

Many online repair videos make replacing an iPad screen look straightforward, but modern iPads are highly complex devices with delicate internal components. Without the correct tools and experience, it’s easy to cause additional damage.

Potential risks include:

  • Damaging the touchscreen digitizer during removal.
  • Cracking the LCD or Liquid Retina display.
  • Tearing fragile flex cables.
  • Damaging Face ID or Touch ID components.
  • Causing battery punctures, which can be dangerous.
  • Breaking internal connectors on the logic board.
  • Losing water-resistant seals on supported models.

In many cases, a simple screen repair turns into a much more expensive repair because of accidental damage during DIY attempts.

When Professional Repair Is the Better Option

Professional repair is usually the safest choice if:

  • Your iPad has been dropped.
  • The display is cracked.
  • Touch only works in certain areas.
  • Ghost touch keeps occurring.
  • The screen flickers or shows lines.
  • The battery is swollen.
  • The iPad has suffered liquid damage.
  • None of the troubleshooting steps in this guide have solved the issue.

At iExpert Repairs, every device is inspected before any repair begins, ensuring that the real fault is identified instead of simply replacing parts unnecessarily.

How Much Does It Cost to Fix an Unresponsive iPad Screen in the UK?

The cost of repairing an iPad depends on several factors, including the model, the extent of the damage, and whether only the touchscreen digitizer or the complete display assembly needs replacing.

Newer devices, such as the iPad Pro and iPad Air, use advanced laminated displays that are generally more expensive to repair than older standard iPad models.

Typical factors that affect repair costs include:

  • iPad model and generation.
  • Screen size.
  • LCD or OLED display technology.
  • Extent of physical damage.
  • Whether additional components are damaged.
  • Quality of replacement parts.
  • Warranty included with the repair.

Is It Worth Repairing an Older iPad?

In many cases, yes.

If your iPad still receives software updates and meets your everyday needs, repairing it is often far more affordable than replacing it with a brand-new device.

A screen replacement or battery replacement can significantly extend the lifespan of your tablet, making repair a cost-effective option for students, professionals, and families.

However, replacement may be the better choice if:

  • The repair cost is close to the value of the device.
  • The logic board has severe damage.
  • Multiple components require replacement.
  • Your iPad is no longer supported by recent versions of iPadOS.

If you’re considering upgrading, a professionally refurbished iPad can offer excellent value while costing significantly less than buying new.

You can also buy Refurbished iPads from iExpert Market for best price.

Why Choose iExpert Repairs?

Choosing the right repair provider is just as important as diagnosing the problem correctly.

At iExpert Repairs, we specialise in repairing Apple devices for customers across the UK, using premium-quality replacement parts and industry-approved repair procedures.

1. Why customers trust us:

  • Certified and experienced repair technicians.
  • Same-day repairs available for many models.
  • UK-wide secure mail-in repair service.
  • Premium-quality replacement parts.
  • Comprehensive device diagnostics before every repair.
  • Transparent pricing with no hidden charges.
  • 12-month warranty on repairs.
  • Thousands of successful repairs completed.
  • Excellent customer reviews and reputation.
  • Friendly advice before and after your repair.

Whether you own an iPad, iPad Air, iPad Mini, or iPad Pro, our team can quickly identify the cause of your touchscreen issue and recommend the most cost-effective solution.

2. Flexible Payment Options

We understand that unexpected repairs aren’t always planned.

That’s why iExpert Repairs offers Fix Now, Pay Later with Klarna, allowing you to spread the cost of eligible repairs into manageable payments.

This means you don’t have to delay repairing your iPad simply because of the upfront cost.

Whether you need a screen replacement, battery replacement, charging port repair, or another hardware repair, flexible payment options make getting your device back to full working order easier than ever.

3. Complete Apple Repair Services

While repairing iPads is one of our specialist services, we also repair a wide range of Apple and Android devices, including:

  • iPhone screen and battery repairs.
  • Samsung Galaxy repairs.
  • Google Pixel repairs.
  • Huawei phone repairs.
  • Samsung tablet repairs.
  • MacBook repairs.
  • HP laptop repairs.
  • Dell laptop repairs.
  • Lenovo laptop repairs.

If you own multiple devices, our technicians can diagnose and repair them all under one roof, helping you save both time and money.

Final Thoughts

An unresponsive iPad screen can be frustrating, but it doesn’t always mean your device needs a new display. In many cases, the problem is caused by a temporary software issue, low storage, an outdated version of iPadOS, or a faulty screen protector – all of which can often be fixed at home.

However, if your iPad stopped responding after being dropped, exposed to water, or shows symptoms such as ghost touch, dead touch zones, screen flickering, or visible cracks, the problem is far more likely to be hardware-related. Continuing to use a damaged device can lead to additional internal damage and potentially higher repair costs.

Working through the troubleshooting steps in this guide will help you identify whether the issue is software or hardware-related. If none of the recommended fixes restore normal touchscreen functionality, a professional diagnosis is the safest and most cost-effective next step.

At iExpert Repairs, we repair thousands of Apple devices every year, including every generation of the iPad, iPad Air, iPad Mini, and iPad Pro. Our experienced technicians use premium-quality replacement parts, advanced diagnostic equipment, and proven repair procedures to restore your device quickly and reliably.

Whether you need a touchscreen repair, battery replacement, charging port repair, or liquid damage restoration, we’re here to help you get your iPad back to full working condition.

FAQs About iPad Screen Not Responding

1. Why is my iPad screen not responding to touch?

The most common causes include software glitches, outdated iPadOS, insufficient storage, a damaged screen protector, battery problems, liquid damage, or a faulty touchscreen digitizer. If restarting your iPad doesn’t resolve the issue, professional diagnostics may be required.

2. How do I force restart my iPad?

For newer iPads without a Home button, press Volume Up, then Volume Down, then hold the Top button until the Apple logo appears. For older iPads with a Home button, press and hold the Home and Power buttons together until the Apple logo appears.

3. Can a cracked iPad screen stop the touchscreen from working?

Yes. Even a small crack can damage the touchscreen digitizer underneath the glass, resulting in dead touch zones, poor responsiveness, or complete touch failure.

4. Why does my iPad display work but the touch screen doesn’t?

This usually indicates a failed touchscreen digitizer rather than a damaged display. The LCD can continue showing images while the touch layer no longer detects your finger movements.

5. Can water damage affect my iPad touchscreen?

Absolutely. Liquid can corrode internal components and damage the touchscreen circuitry, often causing delayed or completely unresponsive touch input.

6. Will a force restart fix an unresponsive iPad?

If the problem is caused by a temporary software crash, a force restart may restore normal operation. However, it won’t repair physical damage, liquid damage, or a failed digitizer.

7. Is it safe to replace an iPad screen yourself?

Basic software troubleshooting is safe, but replacing an iPad screen requires specialist tools and experience. DIY repairs can damage the LCD, flex cables, battery, or logic board, making the repair more expensive.

8. How much does it cost to repair an iPad screen in the UK?

The cost depends on your iPad model, the type of display, and the extent of the damage. Newer models with laminated displays are generally more expensive to repair than older iPads. A professional inspection is the best way to obtain an accurate repair quote.

9. Is it worth repairing an older iPad?

In many cases, yes. If your iPad still performs well and supports your daily needs, repairing the screen or replacing the battery is often far more affordable than buying a brand-new device.

10. How long does an iPad screen repair take?

Many standard repairs can be completed the same day, while more complex repairs or mail-in services may take a little longer depending on the model and availability of replacement parts.

11. Do iExpert Repairs offer a warranty?

Yes. All eligible repairs include a 12-month warranty, giving you added confidence and peace of mind after your repair.

12. Do you repair all iPad models?

Yes. We repair a wide range of Apple tablets, including the latest iPad Pro, iPad Air, iPad Mini, and standard iPad models, as well as many older generations.

Back to posts

Why Is My Phone Not Connecting to Wi-Fi? Causes & Fixes

Why Is My Phone Not Connecting to Wi-Fi?

Few smartphone problems are more frustrating than seeing your Wi-Fi network appear on the screen but being unable to connect. Whether you’re trying to stream videos, attend an online meeting, browse social media, or download apps, a Wi-Fi connection is something most of us rely on every day.

Sometimes your phone simply refuses to join the network. In other cases, it connects briefly before disconnecting, repeatedly asks for the Wi-Fi password, displays an authentication error, or shows “Saved” without actually connecting.

The good news is that not every Wi-Fi problem means your phone is damaged. Many connectivity issues are caused by incorrect network settings, software bugs, router problems, outdated operating systems, or temporary system glitches. However, if the issue started after dropping your phone, exposing it to water, or following a major impact, there may be damage to the internal Wi-Fi antenna or motherboard.

Understanding the real cause before attempting repairs can save both time and money.

In this guide, we’ll explain:

  • Why your phone won’t connect to Wi-Fi
  • The most common software and hardware causes
  • Step-by-step troubleshooting methods you can try at home
  • When professional repair is the safest option
  • How iExpert Repairs helps customers across the UK restore reliable Wi-Fi connectivity

Phone Wi-Fi Problem at a Glance

IssueLikely CauseRecommended Solution
Phone won’t connect to Wi-FiSoftware glitchRestart your phone
Incorrect Wi-Fi passwordWrong credentialsForget the network and reconnect
Wi-Fi connected but no internetRouter or broadband issueRestart your router and check your internet service
Wi-Fi keeps disconnectingWeak signal or faulty routerMove closer to the router and restart it
Authentication errorCorrupted network settingsReset your network settings
Wi-Fi switch is greyed outHardware or motherboard faultSeek professional diagnosis
No Wi-Fi networks detectedDamaged Wi-Fi antenna or wireless chipHave the device inspected by a repair technician
Wi-Fi stopped working after a dropInternal hardware damageArrange a professional repair
Wi-Fi stopped working after water exposureLiquid damagePower off the device and avoid charging it until inspected
Wi-Fi still doesn’t work after trying all fixesAdvanced hardware issueVisit a trusted smartphone repair specialist

Quick Answer:Why Is My Phone Not Connecting to Wi-Fi?

If your phone isn’t connecting to Wi-Fi, the most common causes include:

  • Incorrect Wi-Fi password
  • Router or broadband problems
  • Temporary software bugs
  • Airplane Mode enabled
  • Wi-Fi settings corruption
  • Outdated Android or iOS software
  • VPN or network configuration conflicts
  • Faulty third-party apps
  • Damaged Wi-Fi antenna
  • Water damage
  • Motherboard or wireless chip failure

In many cases, restarting your phone, forgetting and reconnecting to the network, restarting your router, or updating your operating system solves the issue. However, if your phone still won’t connect after basic troubleshooting – or the problem started after a drop or liquid exposure – professional diagnosis may be required.

Warning Signs You Shouldn’t Ignore

Although many Wi-Fi problems are caused by simple software issues, some symptoms can indicate a more serious hardware fault.

If you notice any of the following, it’s best to stop troubleshooting and arrange a professional inspection:

  • Wi-Fi remains greyed out and cannot be switched on.
  • Your phone cannot detect any Wi-Fi networks.
  • Wi-Fi stopped working immediately after the phone was dropped.
  • The problem started after water or liquid exposure.
  • Wi-Fi disconnects every few seconds despite multiple networks being tested.
  • Bluetooth and Wi-Fi both stopped working at the same time.
  • Mobile data works normally, but Wi-Fi never connects.
  • The phone becomes unusually hot whenever Wi-Fi is enabled.

Backing up your important data is also recommended, especially if you suspect internal hardware damage.

Introduction

A phone that won’t connect to Wi-Fi can quickly become more than just an inconvenience. Without a stable wireless connection, everyday activities such as browsing the internet, downloading apps, streaming videos, making video calls, updating software, or backing up your photos become difficult or even impossible.

Sometimes the problem is as simple as entering the wrong password or connecting to a faulty router. In other situations, the issue may involve corrupted network settings, software bugs introduced by recent updates, or damaged internal hardware.

The good news is that many Wi-Fi connection problems can be resolved without replacing any components. By understanding what causes these issues and following the correct troubleshooting steps, you can often restore your connection within minutes.

In this complete UK guide, we’ll explain the most common reasons why your phone isn’t connecting to Wi-Fi, how to diagnose whether the issue is software or hardware related, and when it’s time to seek professional repair.

Who Is This Guide For?

This guide is designed for anyone experiencing Wi-Fi connection problems on their smartphone, whether the issue started suddenly or has gradually become worse over time.

It will be especially helpful if your phone:

  • Won’t connect to Wi-Fi even with the correct password.
  • Keeps disconnecting from your wireless network.
  • Shows an “Authentication Error” or “Obtaining IP Address” message.
  • Connects to Wi-Fi but has no internet access.
  • Can’t detect any available Wi-Fi networks.
  • Has Wi-Fi problems after a software update, accidental drop, or water damage.
  • Has already been restarted, but the issue still persists.

Whether you use an iPhoneSamsung Galaxy, Google PixelHuawei, Xiaomi, OnePlus, Oppo, Motorola, Nokia, or another Android smartphone, the troubleshooting steps in this guide will help you identify the most likely cause and determine whether the problem can be fixed at home or requires professional repair.

What Does It Mean When Your Phone Won’t Connect to Wi-Fi?

When your phone refuses to connect to Wi-Fi, it means your device is unable to establish or maintain communication with a wireless network. The problem doesn’t always look the same.

Some users experience:

  • Wi-Fi connected but no internet access
  • Authentication failed errors
  • Incorrect password messages despite entering the correct password
  • Endless “Connecting…” or “Obtaining IP Address” messages
  • Wi-Fi disconnecting repeatedly
  • Wi-Fi option greyed out
  • The phone failing to detect any available networks
  • Extremely slow Wi-Fi despite strong signal strength

Because these symptoms can have different causes, identifying when the issue started is often more useful than focusing only on what the error message says.

Can Wi-Fi Connection Problems Get Worse?

Yes. In many cases, Wi-Fi issues begin as an occasional inconvenience before becoming a persistent problem. For example, a phone that disconnects once or twice a day may eventually lose the ability to connect to any network at all if the underlying cause is ignored.

If the issue is related to hardware damage – such as a failing Wi-Fi antenna, liquid damage, or motherboard fault – it may gradually affect other wireless functions as well. Ignoring ongoing Wi-Fi problems can sometimes lead to:

  • Complete loss of wireless connectivity
  • Bluetooth connection problems
  • Frequent software crashes
  • Failed system updates
  • Poor battery life due to continuous network searching
  • Increased mobile data usage
  • Difficulty backing up important files

If the problem continues despite basic troubleshooting, arranging a professional diagnosis early can often prevent more expensive repairs later.

What Causes a Phone Not to Connect to Wi-Fi?

There isn’t one single reason why a smartphone refuses to connect to Wi-Fi. Based on our repair experience at iExpert Repairs, the problem usually falls into one of two categories:

  • Software-related issues, which can often be fixed at home.
  • Hardware-related faults, which usually require professional repair.

Understanding which category your phone falls into can save you unnecessary expense and help you choose the correct solution.

Software-Related Causes

Software issues are among the most common reasons smartphones fail to connect to Wi-Fi. Fortunately, they’re also some of the easiest problems to fix.

1. Incorrect Wi-Fi Password

One of the simplest causes is entering the wrong network password. This often happens after:

  • Changing the router password
  • Connecting to a new router
  • Using saved credentials from an old network
  • Typing the password incorrectly

Forgetting the network and reconnecting usually resolves this problem.

2. Temporary Software Glitches

Like any computer, smartphones occasionally experience temporary system errors Background services responsible for managing wireless connections may freeze or stop responding, preventing the phone from connecting to available networks.

In many cases, simply restarting the device restores normal operation.

If your phone is also randomly restarting or freezing, our guide “My Phone Keeps Restarting – How to Fix It?” explains how broader software issues can affect overall device stability.

3. Outdated Operating System

Both Android and iOS manufacturers regularly release updates that improve Wi-Fi stability, security, and compatibility. If your device hasn’t been updated for some time, outdated firmware may be preventing reliable wireless connections.

Installing the latest software update often fixes known connectivity bugs.

4. Corrupted Network Settings

Your phone stores information about every Wi-Fi network you’ve connected to. Over time, these saved configurations can become corrupted, especially after software updates or system changes.

This may cause:

  • Authentication errors
  • Endless connecting loops
  • Saved network problems
  • Failed automatic reconnection

Resetting network settings frequently resolves these issues.

5. VPN or Security App Conflicts

Some VPN applications, firewall apps, or security software interfere with your phone’s ability to communicate with wireless networks.

If the problem began shortly after installing one of these apps, temporarily disabling or uninstalling it can help identify the cause.

6. Airplane Mode Is Enabled

Although it may seem obvious, Airplane Mode is one of the most overlooked reasons a phone won’t connect to Wi-Fi.

Some smartphones automatically disable all wireless connections when Airplane Mode is enabled. While modern devices often allow Wi-Fi to be turned back on manually, temporary software glitches can sometimes prevent this from happening correctly.

If your Wi-Fi suddenly stopped working after travelling or using Flight Mode, check your Quick Settings or Control Centre and ensure Airplane Mode is completely disabled.

7. Router Compatibility Issues

Sometimes the problem isn’t your phone at all. Older smartphones may struggle to connect to newer dual-band or Wi-Fi 6 routers, while some routers may temporarily reject new connections because of firmware bugs or overloaded settings.

Common signs include:

  • Other devices connect normally, but your phone doesn’t.
  • Your phone only connects to certain Wi-Fi networks.
  • The connection fails after entering the correct password.
  • Wi-Fi works at another location but not at home.

Restarting the router or updating its firmware often resolves compatibility issues.

8. Too Many Devices Connected

Every router has a practical limit on how many devices it can handle simultaneously. If dozens of phones, tablets, laptops, smart TVs, cameras, and gaming consoles are connected at once, your phone may struggle to obtain an IP address or may disconnect repeatedly.

Disconnecting unused devices or restarting the router usually restores normal performance.

9. Faulty Third-Party Apps

Some recently installed apps can interfere with network settings without you realising it. Examples include:

  • VPN applications
  • Network management tools
  • Firewall apps
  • Battery optimisation software
  • Security applications

If the problem started immediately after installing a particular app, restarting the phone in Safe Mode can help determine whether a third-party application is responsible.

Hardware-Related Causes

If software troubleshooting doesn’t solve the problem, there may be a physical fault inside the phone. Hardware issues are less common than software problems, but they often require professional diagnosis and repair.

1. Damaged Wi-Fi Antenna

Inside every smartphone is a small Wi-Fi antenna responsible for sending and receiving wireless signals. If your phone has been dropped, bent, or suffered impact damage, the antenna or its connector may become loose or damaged.

Typical symptoms include:

  • Very weak Wi-Fi signal
  • Constant disconnections
  • Only connecting when standing very close to the router
  • Unable to detect nearby Wi-Fi networks

Replacing or reconnecting the antenna usually restores reliable wireless performance.

2. Water or Liquid Damage

Even a small amount of moisture inside your phone can affect sensitive wireless components.

Liquid damage may corrode connectors, damage antenna circuits, or short electronic components responsible for Wi-Fi communication.

Signs of water damage include:

  • Wi-Fi and Bluetooth failing together
  • Random restarts
  • Charging issues
  • Weak wireless signal
  • Phone overheating

If your phone has recently been exposed to water, avoid charging it and have it professionally inspected as soon as possible. For more advice, see our Water Damaged Phone Repair Guide to understand the risks of delayed treatment.

3. Motherboard Problems

The Wi-Fi chip communicates directly with your phone’s motherboard. If the motherboard develops faults due to physical damage, overheating, electrical failure, or manufacturing defects, Wi-Fi may stop functioning altogether.

Common symptoms include:

  • Wi-Fi switch permanently greyed out
  • Bluetooth also stops working
  • No wireless networks detected
  • Frequent freezing or unexpected restarts

Motherboard repairs require specialist diagnostic equipment and should only be carried out by experienced technicians.

4. Faulty Wireless IC (Wi-Fi Chip)

The wireless integrated circuit (IC) controls Wi-Fi communication. If this chip fails, your phone may:

  • Never connect to Wi-Fi
  • Lose connection randomly
  • Detect networks but fail authentication
  • Continuously search for networks without connecting

Chip-level repairs are complex and require microsoldering equipment, making professional repair the safest option.

5. Internal Connector Damage

Modern smartphones contain several delicate flex cables and connectors linking wireless components together.

After a heavy impact or previous poor-quality repair, these connectors may loosen or become damaged. Unlike software issues, connector faults usually worsen over time and rarely resolve on their own.

Software vs Hardware Wi-Fi Problems

Software IssueHardware Issue
Started after a software updateStarted after a phone drop
Restart temporarily fixes itRestart makes no difference
Wi-Fi works on some networksWi-Fi fails on every network
Network reset improves performanceSignal remains weak or unavailable
Usually inexpensive to fixMay require component replacement
Can often be repaired at homeUsually requires professional repair

As a general rule, if your phone connects normally after restarting or resetting network settings, the issue is likely software-related. However, if Wi-Fi remains unavailable regardless of the network you try, internal hardware damage becomes much more likely.

Is It Safe to Keep Using Mobile Data Instead?

If your phone won’t connect to Wi-Fi, relying on mobile data may seem like an easy solution. While this is usually safe in the short term, it doesn’t address the underlying problem.

Continuing to use mobile data instead of fixing the issue can lead to:

  • Higher monthly data charges
  • Faster battery drain
  • Missed software updates
  • Slower downloads in areas with weak mobile coverage
  • Difficulty backing up photos and videos to cloud storage

If the problem is caused by failing hardware, delaying repairs could allow the damage to worsen over time.

Can You Fix a Phone That Won’t Connect to Wi-Fi Yourself?

In many cases, yes. If the problem is caused by a software glitch, incorrect Wi-Fi settings, an outdated operating system, or a temporary router issue, you can often restore your Wi-Fi connection without professional help.

Simple solutions such as restarting your phone, rebooting your router, forgetting and reconnecting to the Wi-Fi network, resetting network settings, or installing the latest software update resolve many common connectivity problems.

However, if your phone still won’t connect to Wi-Fi after trying these troubleshooting steps – or the issue started after a drop, water exposure, or physical impact – the problem is more likely to be hardware-related. In these situations, attempting to repair the device yourself could cause further damage, especially if the Wi-Fi antenna, wireless IC, or motherboard is affected.

If you’re unsure whether the issue is software or hardware related, a professional diagnostic inspection is the safest way to identify the exact cause before replacing any parts.

How to Fix a Phone That Won’t Connect to Wi-Fi

Before assuming your phone needs professional repair, work through these troubleshooting steps in order. Many Wi-Fi issues can be resolved without replacing any hardware.

1. Restart Your Phone

A simple restart clears temporary software glitches that may be preventing your phone from establishing a stable Wi-Fi connection.

Turn your phone off completely, wait around 30 seconds, then switch it back on before trying to reconnect.

2. Restart Your Wi-Fi Router

Sometimes the router – not your phone – is responsible for the connection problem.

Unplug the router from the power source, wait 30-60 seconds, then reconnect it. Once all indicator lights return to normal, try connecting your phone again.

3. Forget the Wi-Fi Network and Reconnect

Saved network settings can occasionally become corrupted. Go to your Wi-Fi settings, select the affected network, tap Forget Network, then reconnect by entering the password again.

This often resolves authentication errors and endless connecting loops.

4. Check the Wi-Fi Password Carefully

An incorrect password remains one of the most common reasons phones fail to connect. Double-check for:

  • Uppercase and lowercase letters
  • Numbers
  • Special characters
  • Recently changed router passwords

If possible, compare the password with another device that is already connected successfully.

5. Turn Airplane Mode Off and On

Occasionally, your phone’s wireless services can become temporarily unresponsive.

Turning Airplane Mode on for around 30 seconds before switching it off again forces your phone to restart its wireless connections, including Wi-Fi, Bluetooth, and mobile data. This simple step often resolves minor connectivity glitches without requiring further troubleshooting.

6. Check for Software Updates

Both Android and iPhone manufacturers regularly release updates that improve network stability and fix known Wi-Fi bugs. To check for updates:

Android

Settings → Software Update → Download and Install

iPhone

Settings → General → Software Update

If an update is available, install it and restart your phone before testing the Wi-Fi connection again.

If your phone is also experiencing freezing, random restarts, or other unusual behaviour after an update, you may also find our guide on “Why Does My Phone Keep Restarting?” guide helpful.

7. Reset Network Settings

If your Wi-Fi settings have become corrupted, resetting your network configuration can often solve persistent connection problems.

This will remove:

  • Saved Wi-Fi networks
  • Bluetooth pairings
  • VPN settings
  • Mobile network preferences

It will not delete your personal files, photos, or apps. After the reset, reconnect to your Wi-Fi network using your password.

8. Disable VPN or Security Apps

VPN services and security applications occasionally interfere with wireless connections. If you recently installed:

  • VPN software
  • Firewall apps
  • Network monitoring tools
  • Battery optimisation applications

temporarily disable them and test your Wi-Fi again. If the connection works normally afterwards, one of these apps is likely causing the issue.

9. Try Another Wi-Fi Network

One of the easiest ways to determine whether the problem lies with your phone or your router is to connect to a different Wi-Fi network.

For example:

  • A friend’s house
  • Your workplace
  • A public hotspot
  • Another router in your home

If your phone connects normally elsewhere, the issue is likely related to your original router rather than your smartphone.

10. Remove Your Phone Case

Although uncommon, some poorly designed or heavily reinforced phone cases can interfere with wireless signals. This is especially true for:

  • Thick metal cases
  • Magnetic cases
  • Rugged protective covers
  • Cases with built-in accessories

Remove the case and test the Wi-Fi signal again to rule out interference.

11. Boot into Safe Mode (Android)

If your Android phone recently stopped connecting to Wi-Fi after installing new apps, Safe Mode can help identify whether a third-party application is responsible. Safe Mode temporarily disables downloaded apps while leaving the operating system untouched.

If Wi-Fi works normally in Safe Mode, one of your installed apps is likely causing the problem. Restart your phone normally and uninstall any recently installed applications one at a time until the issue disappears.

12. Factory Reset (Last Resort)

If you’ve tried every other troubleshooting method without success, performing a factory reset may resolve deep software corruption.

Before resetting your phone:

  • Back up all important photos and files.
  • Save passwords where necessary.
  • Remove your Google or Apple account if required.
  • Ensure your battery has sufficient charge.

A factory reset restores your phone to its original software state. If Wi-Fi still doesn’t work afterwards, the problem is almost certainly hardware-related.

Device-Specific Wi-Fi Fixes

Although most Wi-Fi problems have similar causes, different smartphone manufacturers include unique software features that can affect wireless connectivity.

Below are a few brand-specific troubleshooting tips.

1.iPhone Wi-Fi Problems

If your iPhone won’t connect to Wi-Fi, try the following:

  • Restart your iPhone.
  • Forget the Wi-Fi network and reconnect.
  • Disable Private Wi-Fi Address temporarily for testing.
  • Turn Wi-Fi Assist off if mobile data keeps taking priority.
  • Update to the latest version of iOS.
  • Reset Network Settings.

If Wi-Fi remains greyed out even after resetting the device, internal hardware repair may be required.

2. Samsung Galaxy Wi-Fi Problems

Samsung phones include additional power-saving and intelligent Wi-Fi features that occasionally interfere with connectivity.

Check the following:

  • Disable Adaptive Wi-Fi temporarily.
  • Turn off Power Saving Mode for testing.
  • Update One UI and Android.
  • Clear the system cache after major updates.
  • Reset Network Settings.

Samsung devices that have suffered physical damage may require antenna replacement or motherboard repair.

3. Google Pixel Wi-Fi Problems

Google Pixel devices generally receive software updates first, but occasional firmware bugs can affect network stability.

Try:

  • Installing the latest Pixel update.
  • Restarting in Safe Mode.
  • Resetting Network Settings.
  • Testing another router.

If the issue began immediately after a software update, Google may release a patch in a future update.

4. Huawei Wi-Fi Problems

Huawei smartphones often include aggressive battery management that can interrupt background wireless services. Check:

  • Wi-Fi optimisation settings.
  • Battery optimisation restrictions.
  • EMUI software updates.
  • Network reset.

If problems continue across multiple Wi-Fi networks, professional diagnosis is recommended.

5. OnePlus Wi-Fi Problems

OnePlus smartphones generally offer reliable Wi-Fi performance, but software updates, OxygenOS bugs, or network configuration issues can occasionally cause connection problems.

Try the following:

  • Restart your OnePlus device.
  • Forget the Wi-Fi network and reconnect.
  • Disable Smart Wi-Fi or Intelligent Network Switching if enabled.
  • Install the latest OxygenOS update.
  • Reset Network Settings if the issue continues.

If your OnePlus phone still won’t connect to Wi-Fi after these steps, especially following a drop or liquid exposure, the problem may be related to the internal Wi-Fi antenna or motherboard and should be professionally diagnosed.

6. Xiaomi Wi-Fi Problems

Xiaomi smartphones running MIUI or HyperOS sometimes experience Wi-Fi issues due to aggressive battery management, software bugs, or network optimisation features.

Try these troubleshooting steps:

  • Restart your Xiaomi phone and router.
  • Forget and reconnect to the Wi-Fi network.
  • Disable Battery Saver temporarily.
  • Update MIUI or HyperOS to the latest version.
  • Reset your phone’s network settings.

If Wi-Fi continues disconnecting across multiple networks, the issue may involve damaged wireless hardware that requires professional repair.

7. Oppo Wi-Fi Problems

Oppo phones include several intelligent connectivity features that may occasionally interfere with wireless performance. If your Oppo phone won’t connect to Wi-Fi:

  • Restart the device.
  • Forget the saved Wi-Fi network and reconnect.
  • Disable Wi-Fi Assistant or Smart Network Switching temporarily.
  • Install the latest ColorOS software update.
  • Perform a Network Settings Reset.

If the problem began after physical damage or water exposure, a faulty Wi-Fi antenna or wireless IC may be responsible.

8. Motorola Wi-Fi Problems

Motorola smartphones usually provide stable Wi-Fi connectivity, but software glitches, outdated firmware, or hardware faults can sometimes prevent successful connections.

Try these solutions:

  • Restart your Motorola phone.
  • Restart your Wi-Fi router.
  • Install the latest Android security update.
  • Reset your network settings.
  • Test the phone on another Wi-Fi network.

If your Motorola device cannot detect any Wi-Fi networks or the Wi-Fi switch remains greyed out, professional diagnosis is recommended to check for antenna or motherboard damage.

When Does a Phone That Won’t Connect to Wi-Fi Need Professional Repair?

While many Wi-Fi problems can be fixed by restarting your phone, resetting network settings, or updating the software, some issues require professional attention.

If you’ve already tried the troubleshooting steps in this guide and your phone still refuses to connect to Wi-Fi, there may be an underlying hardware fault that can’t be fixed at home. You should consider professional repair if:

  • Wi-Fi remains permanently greyed out.
  • Your phone cannot detect any Wi-Fi networks.
  • Wi-Fi stopped working immediately after a drop.
  • The problem started after water or liquid damage.
  • Both Wi-Fi and Bluetooth stopped working together.
  • Your phone repeatedly disconnects from every network.
  • A factory reset didn’t solve the problem.
  • The phone overheats whenever Wi-Fi is enabled.

Ignoring these symptoms may allow the damage to worsen, potentially affecting other internal components over time.

How iExpert Repairs Diagnoses Wi-Fi Problems

At iExpert Repairs, we don’t simply replace parts and hope for the best. Every device undergoes a structured diagnostic process to identify the exact cause of the fault before recommending any repair.

Our Wi-Fi diagnostics typically include:

  • Full software health check
  • Network settings inspection
  • Wi-Fi antenna testing
  • Internal connector inspection
  • Wireless IC testing
  • Motherboard diagnostics
  • Liquid damage inspection
  • Signal strength analysis

This systematic approach helps us identify whether the issue is software-related or caused by damaged hardware, ensuring customers only pay for the repairs they actually need.

Common Wi-Fi Repairs We Carry Out

Depending on the diagnosis, our technicians regularly perform repairs such as:

  • Wi-Fi antenna replacement
  • Internal antenna connector repair
  • Wireless IC replacement
  • Motherboard microsoldering
  • Liquid damage cleaning and repair
  • Software recovery
  • Operating system reinstallation
  • Network configuration repair

Every repair is carried out using professional tools and high-quality replacement components to restore reliable wireless connectivity.

How Much Does It Cost to Fix a Phone That Won’t Connect to Wi-Fi in the UK?

The cost of repairing Wi-Fi problems depends entirely on what’s causing the issue.

For example, a simple software fault may only require resetting network settings or reinstalling the operating system. On the other hand, replacing a damaged Wi-Fi antenna or repairing a motherboard requires specialist equipment and additional labour. Several factors affect the final repair cost, including:

  • Your phone’s make and model
  • Whether the issue is software or hardware related
  • Availability of replacement parts
  • The extent of any internal damage
  • Previous repair attempts
  • Whether liquid damage is involved

At iExpert Repairs, we always perform a diagnosis before recommending repairs, ensuring you receive an accurate quote with no unnecessary work.

Phone Not Connecting to Wi-Fi: FAQs

1. Why is my phone not connecting to Wi-Fi even with the correct password?

Even if you’re entering the correct password, your phone may fail to connect because of corrupted network settings, outdated software, router configuration issues, or a hardware problem such as a damaged Wi-Fi antenna. Forgetting the network and reconnecting often resolves the issue.

2. Why does my phone keep disconnecting from Wi-Fi?

Frequent Wi-Fi disconnections are usually caused by weak signal strength, router problems, software bugs, battery optimisation settings, or internal hardware faults. Restarting both your phone and router is a good first step.

3. Why is my phone connected to Wi-Fi but has no internet access?

This usually means your phone is connected to the router, but the router itself doesn’t have an active internet connection. Restarting the router or contacting your broadband provider may solve the problem.

4. Why won’t my Android phone connect to Wi-Fi?

Android phones may fail to connect because of software glitches, incorrect Wi-Fi settings, outdated firmware, VPN conflicts, or damaged wireless hardware. Updating Android and resetting network settings often helps.

5. Why won’t my iPhone connect to Wi-Fi?

An iPhone may refuse to connect due to outdated iOS software, incorrect network settings, router compatibility issues, or internal hardware damage. Restarting the device and resetting network settings usually resolves software-related problems.

6. Can a software update cause Wi-Fi problems?

Yes. Occasionally, a software update may introduce temporary bugs that affect wireless connectivity. Manufacturers usually release follow-up updates to fix these issues.

7. How do I reset Wi-Fi settings on my phone?

Most smartphones allow you to reset network settings through the Settings menu. This removes saved Wi-Fi networks, Bluetooth connections, and VPN settings without deleting your personal data.

8. Why does my phone say “Authentication Error” when connecting to Wi-Fi?

An authentication error usually occurs because of an incorrect password, corrupted saved network settings, router security issues, or incompatible encryption settings.

9. Can a damaged Wi-Fi antenna stop my phone connecting to Wi-Fi?

Yes. If the internal Wi-Fi antenna is damaged after a drop or impact, your phone may detect weak signals, disconnect frequently, or fail to connect altogether.

10. Why is my Wi-Fi switch greyed out?

A greyed-out Wi-Fi button often indicates a hardware fault affecting the wireless chip or motherboard. In some cases, severe software corruption may also cause this issue.

11. Can water damage affect my phone’s Wi-Fi?

Yes. Liquid damage can corrode internal components, including the Wi-Fi antenna, wireless IC, and motherboard, leading to poor or completely lost Wi-Fi connectivity.

12. Why won’t my phone find any Wi-Fi networks?

If your phone cannot detect any nearby Wi-Fi networks, the issue may be caused by disabled Wi-Fi, software failure, antenna damage, or a faulty wireless chip.

13. Should I factory reset my phone if Wi-Fi isn’t working?

A factory reset should only be considered after trying simpler troubleshooting methods, such as restarting your phone, resetting network settings, and updating the operating system.

14. Can Bluetooth problems be related to Wi-Fi issues?

Yes. Many smartphones share wireless components for Wi-Fi and Bluetooth, so a hardware fault can sometimes affect both features at the same time.

15. Why does my phone only connect to certain Wi-Fi networks?

This may happen because of router compatibility issues, outdated software, security settings, or problems with the specific wireless network you’re trying to join.

Final Thoughts

A phone that won’t connect to Wi-Fi can be incredibly frustrating, especially when you rely on a stable internet connection for work, studying, streaming, or staying in touch with family and friends. Fortunately, many Wi-Fi issues are caused by simple software glitches, incorrect network settings, or router problems that can often be fixed without replacing any hardware.

However, if your phone still refuses to connect after restarting the device, resetting network settings, updating the software, and testing multiple Wi-Fi networks, the problem may be caused by internal hardware such as a damaged Wi-Fi antenna, faulty wireless IC, or motherboard fault.

Identifying the real cause early can save both time and money while preventing further damage to your device.

At iExpert Repairs, our experienced technicians diagnose Wi-Fi problems using professional diagnostic equipment to determine whether the issue is software-related or requires hardware repair. From simple software fixes to advanced motherboard repairs, we’re committed to restoring your phone’s wireless connectivity quickly and reliably.

Back to posts

Why Is My Phone Screen Flickering? Causes & Fixes

A flickering phone screen is one of the most frustrating issues smartphone users experience. One moment your display looks perfectly normal, and the next it starts flashing, dimming unexpectedly, or rapidly changing brightness without any input.

Sometimes the problem only appears when you lower the screen brightness. In other cases, the display may flicker constantly, show horizontal lines, flash green, or even become completely unusable.

The good news is that screen flickering doesn’t always mean your phone needs a new display. Many cases are caused by temporary software glitches, problematic apps, outdated operating systems, incorrect display settings, or battery-related power issues. However, if the flickering started after dropping the phone, exposing it to water, or following a strong impact, the issue could involve damaged display components or internal hardware.

Understanding the real cause is important because applying the wrong fix may waste time or even make the problem worse.

In this guide, we’ll explain:

  • Why phone screens flicker
  • How to identify whether it’s a software or hardware issue
  • Step-by-step troubleshooting methods
  • When professional repair is the best solution
  • How iExpert Repairs helps customers across the UK restore damaged smartphone displays quickly and safely

Quick Answer

If your phone screen is flickering, the most common causes include:

  • Software bugs after an update
  • Display settings or adaptive brightness problems
  • Faulty third-party apps
  • OLED display behaviour at low brightness
  • Battery or power management issues
  • Loose display connectors
  • Physical screen damage
  • Water damage
  • Faulty display hardware

If the flickering only started recently, basic troubleshooting such as restarting the phone, updating the operating system, or removing a problematic app may solve the issue. However, if your screen continues flickering after a drop or liquid exposure, professional diagnosis is usually required.

Warning Signs You Shouldn’t Ignore

Although many cases of screen flickering are caused by software issues, some symptoms can indicate a more serious hardware fault that requires immediate attention. Ignoring these warning signs may lead to further damage or complete display failure.

If you notice any of the following, it’s best to stop troubleshooting and arrange a professional inspection:

  • The screen started flickering after your phone was dropped.
  • Green, white, or purple lines appear on the display.
  • The touchscreen has become slow or unresponsive.
  • The screen randomly turns black before coming back on.
  • Flickering becomes more frequent or severe over time.
  • Your phone has recently been exposed to water or moisture.

Backing up your important data as soon as possible is also recommended, especially if the display is becoming increasingly unstable.

Introduction

A flickering phone screen can be frustrating, making it difficult to use your device for everyday tasks such as messaging, browsing, watching videos, or working. Sometimes the screen flashes occasionally, while in other cases it may constantly blink, dim unexpectedly, show coloured lines, or become completely unreadable. The good news is that screen flickering doesn’t always mean you need a new display. In many cases, the problem is caused by software bugs, faulty apps, incorrect display settings, or temporary system glitches that can be fixed without replacing any parts.

However, if the flickering started after a drop, water exposure, or physical impact, it may indicate a damaged display or internal hardware fault. In this complete UK guide, we’ll explain why your phone screen is flickering, the most common causes, step-by-step fixes you can try at home, and when it’s time to seek professional repair from experienced technicians.

What Does Screen Flickering Actually Mean?

Screen flickering happens when the display refreshes incorrectly or receives unstable signals from either the software or the hardware controlling the screen.

Depending on the underlying cause, flickering may look different from one phone to another.

Some users notice:

  • Rapid flashing between bright and dark
  • Green or white screen flickering
  • Horizontal or vertical lines appearing briefly
  • Random brightness changes
  • Display flashing while charging
  • Screen flickering only when unlocking the phone
  • Flickering after installing a software update
  • Display blinking during gaming or video playback

Because these symptoms can point to very different problems, it’s important to identify when the flickering occurs rather than focusing only on what it looks like.

Can Screen Flickering Get Worse?

Yes. In many cases, screen flickering starts as a minor inconvenience before developing into a more serious hardware problem. If the underlying cause is a damaged OLED panel, loose display connector, failing battery, or internal motherboard fault, the issue may gradually become worse over time.

Ignoring persistent flickering can sometimes lead to:

  • Complete display failure
  • Green or purple lines appearing on the screen
  • Black spots or dead pixels
  • Touchscreen responsiveness issues
  • Random black screens
  • Difficulty accessing important data

If the flickering continues despite basic troubleshooting or becomes more severe, arranging a professional diagnosis early can often prevent additional damage and reduce repair costs.

What Causes a Phone Screen to Flicker?

There isn’t a single reason why a phone display starts flickering. In our repair experience, the issue usually falls into one of two categories:

  • Software-related problems, which can often be fixed at home.
  • Hardware-related faults, which usually require professional repair.

Before replacing the screen, it’s worth understanding which category your phone falls into.

Software-Related Causes

Software problems are often temporary and may appear after installing a system update, downloading a faulty app, or changing display settings.

Common software causes include:

1. A Recent Software Update

Operating system updates occasionally introduce display bugs that affect specific phone models. If the flickering started immediately after updating your device, the issue may be software-related rather than physical damage.

This is also why keeping your device updated with future bug-fix releases is important.

2. Faulty or Incompatible Apps

Not every app is fully optimised for every Android version or iOS release.

Some poorly coded applications continuously refresh the display, overload the graphics processor, or conflict with system settings, causing temporary flickering.

If the problem only appears while using one particular app, uninstalling or updating it may resolve the issue.

3. Display Brightness Settings

Modern smartphones automatically adjust brightness using ambient light sensors.

Although this feature improves battery life, incorrect brightness calibration or adaptive brightness bugs may cause noticeable flickering, especially on OLED displays.

Some users only notice the problem at very low brightness levels.

4. Display Driver or GPU Software Errors

The operating system constantly communicates with your display using graphics drivers.

If those drivers become corrupted after an interrupted update or software conflict, your screen may:

  • Flash randomly
  • Refresh incorrectly
  • Blink during animations
  • Freeze before flickering

5. Battery Power Management Issues

A weak battery doesn’t only reduce battery life.

When the battery struggles to deliver stable voltage, especially on older devices, the display may begin flickering during heavy use or when the battery percentage becomes very low.

If you’ve also noticed your battery draining unusually quickly, our guide “Why Is My Phone Battery Draining So Fast?” explains how battery health can affect overall phone performance.

Hardware-Related Causes

If software troubleshooting doesn’t solve the problem, the issue may involve physical damage inside the device. These repairs usually require specialist equipment and replacement parts.

1. Physical Impact or Accidental Drops

One of the most common causes we see at iExpert Repairs is accidental impact damage. Even when the front glass appears intact, the OLED panel underneath can develop invisible damage that causes:

  • Continuous flickering
  • Green lines
  • White flashes
  • Black patches
  • Touchscreen instability

If your display has also become difficult to control, our guide explains how screen damage often affects both the display and touch functionality.

2. Loose Display Connector

Inside every smartphone, delicate ribbon cables connect the display to the motherboard. A heavy drop can partially loosen these connectors without cracking the screen.

Symptoms often include:

  • Flickering when moving the phone
  • Screen randomly turning black
  • Display returning after pressing the frame
  • Intermittent flashing

This type of fault requires internal inspection by an experienced technician.

3. Water or Moisture Damage

Liquid exposure doesn’t always stop a phone from working immediately. Moisture can slowly corrode display connectors and internal circuits over time, causing intermittent flickering days or even weeks after contact with water.

If your phone has recently been exposed to rain, spilled drinks, or humidity, it’s worth reading our guide before attempting further troubleshooting.

4. Display Panel Failure

OLED and AMOLED displays contain millions of tiny pixels. As displays age – or after suffering impact damage -these pixels can begin failing, leading to:

  • Persistent flickering
  • Green tint
  • White flashing
  • Screen burn
  • Dead areas
  • Colour distortion

Unfortunately, display panel failure usually cannot be repaired through software and often requires a complete screen replacement.

Is It More Likely to Be a Software Issue or Hardware Damage?

One of the first questions customers ask our technicians is whether screen flickering is something they can fix themselves. Rather than assuming the worst, compare how and when the problem started.

If this sounds familiar… It’s more likely to be… A sensible next step
The flickering began after a software update Software issue Check for newer updates, restart the device, and install any available bug fixes.
It only happens while using one app App-related problem Update or remove the app to see if the issue disappears.
The screen started flickering after being dropped Hardware damage Avoid putting pressure on the display and arrange a professional inspection.
Flickering appeared after contact with water Internal moisture damage Power off the device if possible and have it checked before corrosion spreads.
The display flickers only at very low brightness Display settings or OLED behaviour Test different brightness levels and disable adaptive brightness temporarily.
The screen flashes alongside coloured lines or touch problems Display or connector fault Back up your data and book a repair as soon as possible.

The way the issue started often tells you more than the flickering itself. Paying attention to recent updates, accidental drops, or exposure to moisture can save time and help you choose the right solution.

Is It Safe to Keep Using a Flickering Phone?

It depends on what’s causing the problem.

If the flickering is linked to a temporary software glitch or an app conflict, you can usually continue using your phone while working through the troubleshooting steps in this guide.

However, if the flickering started after a drop, liquid exposure, or is accompanied by coloured lines, black spots, or touchscreen problems, continuing to use the device could make the damage worse. In these situations, it’s a good idea to back up your data and have the phone professionally inspected as soon as possible.

Acting early can often prevent a small display issue from turning into a more expensive repair.

How to Fix a Flickering Phone Screen

If your phone screen is flickering, don’t assume the display needs replacing straight away. In our experience at iExpert Repairs, many flickering issues are resolved with a few simple troubleshooting steps – especially when the problem is software-related.

Work through the following solutions in order. After each step, use your phone for a few minutes to see whether the flickering has stopped before moving on.

1. Restart Your Phone

It may sound obvious, but restarting your phone is often the quickest way to clear temporary software glitches affecting the display.

During normal use, background processes, apps, and system services can become unstable. A restart refreshes these processes and may restore normal screen behaviour.

To restart your phone:

Android

  • Hold the Power button.
  • Tap Restart.
  • Wait for the phone to reboot.

iPhone

  • Press and hold the Side button with either Volume button.
  • Slide to power off.
  • Turn the device back on after 30 seconds.

If the flickering disappears after restarting but returns later, the cause is likely software rather than hardware.

2. Check for Software Updates

Manufacturers regularly release updates that fix display bugs, graphics driver issues, and compatibility problems. If your screen started flickering shortly after a recent update, it’s worth checking whether a newer patch has already been released.

Android

Go to:

Settings → Software Update → Download and Install

iPhone

Go to:

Settings → General → Software Update

Install any available updates before continuing with further troubleshooting.

3. Restart in Safe Mode (Android)

Safe Mode temporarily disables third-party apps. If your phone stops flickering in Safe Mode, one of your installed apps is almost certainly causing the problem.

Common offenders include:

  • Screen filter apps
  • Battery-saving applications
  • Custom launchers
  • Display enhancement apps
  • Game optimisation tools

Remove recently installed apps one at a time until the issue disappears.

4. Remove Recently Installed Apps

Think back to when the flickering first started. Ask yourself:

  • Did I install a new app?
  • Did I download an APK?
  • Did I install a game?
  • Did I add a battery optimisation app?
  • Did I install a screen recorder?

If the answer is yes, uninstall the newest app first. Many display problems begin after installing poorly optimised software rather than because of hardware failure.

5. Turn Off Adaptive Brightness

Adaptive Brightness constantly changes screen brightness based on surrounding light. Although useful, it occasionally causes flickering on OLED displays.

Try disabling it temporarily.

Android

Settings → Display → Adaptive Brightness → Off

iPhone

Settings → Accessibility → Display & Text Size

Turn off Auto-Brightness. Use the phone for a while afterwards. If the flickering disappears, you’ve likely identified the cause.

6. Increase Screen Brightness

Many OLED and AMOLED displays naturally use Pulse Width Modulation (PWM) to control brightness. Some users notice flickering only when brightness is set very low.

Try increasing brightness to around 60-80%.

If the flickering disappears at higher brightness but returns at lower levels, the behaviour may be linked to OLED dimming rather than a damaged display. However, if the flickering becomes more severe over time, professional inspection is still recommended.

7. Let Your Phone Cool Down

Overheating affects more than just battery performance. Excessive heat can temporarily reduce display stability, causing:

  • Brightness fluctuations
  • Random flashing
  • Display lag
  • Temporary flickering

Allow the phone to cool naturally.

Avoid:

  • Direct sunlight
  • Wireless charging while gaming
  • Heavy gaming sessions
  • Charging under pillows or blankets

8. Check Whether Flickering Happens While Charging

Some users notice screen flickering only when the charger is connected. This can happen because of:

  • A damaged charging cable
  • A faulty charger
  • Poor-quality third-party accessories
  • Charging port damage
  • Battery voltage instability

Try using:

  • The original charger
  • A different charging cable
  • Another wall adapter

9. Look for Signs of Physical Damage

Even a small drop can damage the display beneath the outer glass.

Carefully inspect your phone for:

  • Hairline cracks
  • Bent corners
  • Green lines
  • Purple patches
  • Black spots
  • Loose screen edges
  • Flickering when pressure is applied

If you notice any of these symptoms, the issue is unlikely to be solved with software troubleshooting.

10. Back Up Your Data Before the Screen Gets Worse

If the display is becoming increasingly unstable, don’t wait until it stops working altogether.

Back up:

  • Photos
  • Videos
  • Contacts
  • Documents
  • Messages
  • Authentication apps

A display that flickers today may become completely black tomorrow. Protecting your data early can prevent unnecessary stress later.

Device-Specific Fixes

Although screen flickering affects every smartphone brand, the underlying causes can vary depending on the device. Here are a few brand-specific checks worth trying.

1. iPhone Screen Flickering

Recent iPhone models use advanced OLED displays that occasionally experience software-related display bugs after iOS updates. Try the following:

  • Install the latest version of iOS.
  • Disable Auto-Brightness temporarily.
  • Turn off Reduce White Point (if enabled).
  • Restart the device.
  • Check whether the flickering started after a recent drop.

If Face ID, touch response, or brightness control also behave unusually, the display assembly may have been damaged.

Our iPhone Repairs service covers screen replacements, display diagnostics, battery repairs, charging issues, and water damage using premium-quality replacement parts.

2. Samsung Screen Flickering

Samsung Galaxy devices often use AMOLED displays. Flickering may occur because of:

  • Adaptive Brightness
  • High refresh rate conflicts
  • Software bugs
  • OLED ageing
  • Impact damage

Try:

  • Switching from 120Hz to 60Hz temporarily.
  • Updating One UI.
  • Restarting in Safe Mode.
  • Removing recently installed apps.

If green lines appear alongside flickering, professional diagnosis is strongly recommended.

Our Samsung Repairs service includes genuine-quality display replacements, battery repairs, charging port repairs, and motherboard diagnostics.

3. Google Pixel Screen Flickering

Google Pixel phones occasionally experience display issues after Android updates.

Start by:

  • Installing all available updates.
  • Restarting the phone.
  • Testing Safe Mode.
  • Turning Adaptive Brightness off.
  • Checking whether the issue only occurs at low brightness.

If the display remains unstable after software troubleshooting, the screen or internal connector may require replacement. Our Google Pixel Repairs team regularly repairs Pixel displays, charging ports, batteries, and water-damaged devices.

4. Huawei Screen Flickering

Huawei devices are generally reliable, but older models may develop display issues caused by ageing components or accidental damage.

Recommended checks include:

  • Updating EMUI (if updates are available).
  • Restarting the device.
  • Removing recently installed apps.
  • Testing different brightness levels.

Persistent flickering after a drop or liquid exposure usually indicates hardware damage rather than a software fault.

Our Huawei Phone Repairs service includes screen replacements, battery repairs, charging port repairs, and complete hardware diagnostics.

When Does a Flickering Screen Need Professional Repair?

Not every flickering screen can be fixed at home. If you’ve worked through the troubleshooting steps in this guide and the problem keeps returning, it’s likely that the issue lies inside the phone rather than within its software.

At iExpert Repairs, we regularly diagnose phones that appeared to have a simple display glitch but were actually suffering from internal hardware damage. In many cases, customers delayed getting the device checked, only for the screen to deteriorate further over the following days.

Professional diagnostics become especially important when the flickering is accompanied by other symptoms such as touch issues, coloured lines, black spots, or random screen blackouts.

Common Mistakes That Make Screen Flickering Worse

When trying to fix a flickering phone screen, it’s easy to make mistakes that can worsen the problem. Avoiding these common errors can help protect your device and reduce the risk of more expensive repairs.

Avoid:

  • Continuing to use the phone after a significant drop.
  • Ignoring signs of water or moisture damage.
  • Pressing firmly on the screen to stop the flickering.
  • Using low-quality chargers or charging cables.
  • Installing unofficial apps or software from untrusted sources.
  • Delaying a professional inspection when the flickering becomes more frequent or severe.

If the problem persists after basic troubleshooting, professional diagnosis is usually the safest and most cost-effective solution.

Signs Your Phone Needs Professional Repair

If you notice any of the following, it’s time to stop troubleshooting and arrange a professional inspection.

  • The screen continues to flicker after restarting the device.
  • Flickering began after the phone was dropped.
  • The display flashes green, white, or purple.
  • Horizontal or vertical lines have appeared.
  • The touchscreen is no longer responding correctly.
  • The screen turns black before coming back on.
  • Flickering only gets worse over time.
  • The phone has been exposed to water or excessive moisture.
  • Brightness changes randomly, even after resetting the device.
  • The display occasionally goes completely blank.

These symptoms usually indicate a damaged display panel, loose internal connector, battery-related power issue, or motherboard fault.

How iExpert Repairs Diagnoses Screen Flickering

Finding the real cause of screen flickering isn’t as simple as replacing the display.

Our technicians follow a structured diagnostic process to avoid unnecessary repairs and ensure customers only pay for the work their device actually needs.

A typical inspection includes:

  • Checking for software faults and recent system updates.
  • Testing the display under different brightness levels.
  • Inspecting the OLED or LCD panel for damage.
  • Examining internal display connectors.
  • Looking for signs of liquid damage or corrosion.
  • Testing battery health and power delivery.
  • Running hardware diagnostics on the motherboard where required.

This thorough approach allows us to identify whether a simple software solution is enough or whether a component replacement is the safer long-term option.

Common Screen Flickering Repairs We Carry Out

Depending on the cause, repairing a flickering screen may involve different solutions. Some of the most common repairs we perform include:

Problem identified Typical repair
Corrupted software or firmware Software repair or operating system refresh
Damaged OLED or LCD display Complete screen replacement
Loose display connector Internal reconnection and testing
Water damage Professional cleaning, corrosion removal, and component repair
Battery delivering unstable power Battery replacement
Charging or motherboard fault affecting the display Advanced hardware diagnostics and repair

Because every phone model is different, we always recommend diagnosing the device before replacing any parts.

How Much Does It Cost to Fix a Flickering Phone Screen in the UK?

The cost depends entirely on what is causing the flickering.

For example, a software issue may not require any replacement parts at all, while a damaged OLED display is usually more expensive to repair than a standard LCD screen.

Several factors affect the final repair cost, including:

  • Your phone’s make and model.
  • Whether the device uses an OLED or LCD display.
  • The extent of the damage.
  • Whether additional components have been affected.
  • The quality of the replacement parts required.

Rather than guessing the problem, it’s usually more cost-effective to have the phone professionally diagnosed first. This helps avoid replacing parts unnecessarily and ensures the correct repair is carried out the first time.

We Repair All Major Smartphone Brands

Whether your screen is flickering occasionally or has become almost impossible to use, our technicians repair a wide range of smartphones, including:

We also repair tablets, iPadsMacBooks, and Windows laptops for customers across the UK.

Why Choose iExpert Repairs?

Choosing the right repair centre matters just as much as choosing the right repair. At iExpert Repairs, we focus on quality workmanship, honest advice, and fast turnaround times so you can get back to using your device with confidence.

Here’s what customers can expect:

  • Certified technicians with years of hands-on repair experience.
  • Premium-quality replacement parts.
  • Same-day repairs available for many common faults.
  • UK-wide Mail-in Repair Service.
  • Walk-in repairs for local customers.
  • 12-month warranty on eligible repairs.
  • Transparent pricing with no hidden surprises.
  • Excellent customer reviews and trusted service across the UK.

Whether you’re dealing with a minor display issue or a completely unusable screen, our team will identify the fault and recommend the most appropriate repair.

Tips to Prevent Phone Screen Flickering

While not every display fault can be prevented, a few good habits can significantly reduce the risk of future problems. Try to:

  • Keep your phone updated with the latest software.
  • Avoid installing apps from unknown sources.
  • Use a high-quality protective case and tempered glass.
  • Avoid exposing your phone to excessive heat.
  • Keep the charging port clean and use reliable chargers.
  • Prevent water or moisture from entering the device.
  • Don’t ignore small display issues, as they often become worse over time.
  • Back up important data regularly in case hardware failure develops unexpectedly.

Taking these precautions can help extend the life of both your display and your device.

FAQs About Why Is My Phone Screen Flickering?

1. Why is my phone screen flickering?

A phone screen can flicker due to software bugs, faulty apps, display setting conflicts, battery issues, a damaged screen, loose display connectors, or water damage. Identifying when the flickering started can help determine whether it’s a software or hardware problem.

2. Can a flickering phone screen fix itself?

In some cases, yes. If the flickering is caused by a temporary software glitch, restarting the phone or installing a software update may resolve the issue. However, if the problem is caused by physical damage or a failing display, it usually requires professional repair.

3. Is screen flickering a sign that my phone is broken?

Not always. Screen flickering can be caused by both software and hardware issues. While some cases are easy to fix, persistent flickering after a drop or water exposure often indicates internal damage that should be inspected by a technician.

4. Why does my phone screen flicker after I dropped it?

A drop can damage the display panel or loosen the internal display connector, even if the outer glass isn’t cracked. If the flickering started immediately after an impact, the phone should be professionally diagnosed.

5. Why does my phone screen flicker only at low brightness?

Many OLED and AMOLED displays use Pulse Width Modulation (PWM) to control brightness. Some users notice flickering at lower brightness levels because of this technology. If the flickering becomes more noticeable over time, it could also indicate a developing display fault.

6. Can a software update cause screen flickering?

Yes. Occasionally, operating system updates introduce display bugs that affect certain phone models. Checking for the latest software updates or installing bug-fix releases may resolve the issue.

7. Can a bad battery cause my phone screen to flicker?

Yes. A worn-out or failing battery may struggle to provide stable power to the display, especially on older devices. This can sometimes result in screen flickering, random brightness changes, or unexpected shutdowns.

8. How do I know if my phone screen flickering is caused by hardware?

If the flickering started after a drop, water damage, or physical impact-or if you notice coloured lines, black spots, or touch problems-it is more likely to be a hardware issue than a software problem.

9. Will resetting my phone fix a flickering screen?

A factory reset may help if the flickering is caused by corrupted software or system settings. Before resetting your device, back up your important data. If the problem continues after the reset, professional repair may be required.

10. Why does my phone screen flicker while charging?

Screen flickering during charging can be caused by a faulty charger, damaged charging cable, battery problems, charging port issues, or unstable power delivery. Testing with a genuine charger is a good first step.

11. Can overheating make a phone screen flicker?

Yes. Excessive heat can affect your phone’s performance and temporarily cause the display to flicker or behave unpredictably. Allowing the device to cool down may resolve the issue if overheating is the cause.

12. Is a flickering screen covered under warranty?

It depends on the cause. Manufacturing defects may be covered under the manufacturer’s warranty, while accidental damage, liquid damage, or impact-related faults are usually excluded. Check your warranty terms or speak with your repair provider for guidance.

13. Should I continue using my phone if the screen is flickering?

If the flickering is minor and temporary, you may be able to use the device while troubleshooting. However, if the problem is getting worse or the screen becomes difficult to read or use, back up your data and have the phone inspected as soon as possible.

14. Can water damage cause screen flickering?

Yes. Moisture can corrode internal display connectors and other components, leading to intermittent or persistent flickering. In many cases, the symptoms appear hours or even days after the phone comes into contact with liquid.

15. Do Android and iPhone screens flicker for the same reasons?

Many causes are similar, including software bugs, display damage, battery issues, and water exposure. However, the exact troubleshooting steps may vary depending on the device model and operating system.

16. Can a loose screen connector cause flickering?

Yes. A loose or partially disconnected display cable can interrupt communication between the screen and the motherboard, resulting in intermittent flickering, flashing, or a blank display.

17. When should I seek professional repair for a flickering screen?

If the flickering continues after restarting the phone, installing software updates, and trying the troubleshooting steps in this guide – or if it started after a drop or water damage – it’s best to have the device professionally diagnosed.

18. Where can I get a phone screen repaired in the UK?

If your phone screen continues to flicker despite troubleshooting, iExpert Repairs offers professional diagnostics and repair services for iPhone, Samsung Galaxy, Google Pixel, Huawei, and many other smartphone brands.

Our experienced technicians use premium-quality parts, provide UK-wide mail-in repairs, offer walk-in services for local customers, and back eligible repairs with a 12-month warranty, giving you peace of mind that your device is repaired to a high standard.

Final Thoughts

A flickering phone screen can be worrying, but it doesn’t always mean your device needs an expensive repair. In many cases, the problem is linked to software glitches, display settings, or app conflicts that can be resolved with a few simple troubleshooting steps.

However, if the flickering began after your phone was dropped, exposed to water, or is accompanied by coloured lines, touch issues, or random black screens, it’s important not to ignore the warning signs. Continuing to use a damaged device may cause the problem to worsen over time and could even lead to complete display failure.

The safest approach is to identify whether the issue is software or hardware-related before replacing any parts. Working through the troubleshooting steps in this guide can help you rule out common software causes and decide when professional diagnosis is the best option.

At iExpert Repairs, our experienced technicians diagnose and repair flickering screens on iPhonesSamsung Galaxy devices, Google Pixel phones, Huawei smartphones, and many other brands. Whether the problem is caused by a damaged display, loose internal connector, battery issue, water damage, or motherboard fault, we’ll identify the exact cause and recommend the most appropriate repair.

Back to posts

Tell us what's broken, get a free quote

Older device, rare model, or a fault you can't describe? Send us a message with a photo and we'll come back with a fixed price.

Request a Quote
Request a same-day personalised quote!
×

    Please upload a image showing the back of your device or any visible damage for assessment (optional)