Fix Now, Pay Later with Klarna - Available at Checkout!

How to Fix Phone Bluetooth Not Connecting?

Introduction

Bluetooth is one of the most useful features on modern smartphones. Whether you’re connecting wireless earbuds, smartwatches, speakers, car infotainment systems, keyboards, or fitness trackers, Bluetooth makes everyday tasks quicker and more convenient.

However, it can be incredibly frustrating when your phone Bluetooth is not connecting. Your device may fail to discover nearby accessories, repeatedly disconnect, refuse to pair, or display connection errors without any obvious reason.

The good news is that most Bluetooth problems can be fixed without replacing your phone. In many cases, the issue is caused by a temporary software glitch, incorrect settings, outdated system software, or interference from previously paired devices. In more serious cases, damaged Bluetooth hardware or motherboard faults may require professional repair.

In this comprehensive UK guide, our technicians explain the most common reasons why Bluetooth stops working, the best troubleshooting methods for both Android and iPhone devices, and when it’s time to seek professional assistance from iExpert Repairs.

Quick Answer: How Do You Fix a Phone Bluetooth That Won’t Connect?

If your phone’s Bluetooth isn’t connecting, start by turning Bluetooth off and back on, restarting your phone, ensuring the accessory is in pairing mode, and forgetting then reconnecting the device. Updating your phone’s software, resetting network settings, and checking for hardware damage can also resolve the issue. If Bluetooth still doesn’t work after these steps, the problem may require professional diagnosis and repair.

Why Is My Phone Bluetooth Not Connecting?

Bluetooth problems don’t always mean your phone is faulty. In fact, most connection issues are caused by simple software settings that can be corrected in just a few minutes.

Modern smartphones rely on several components working together to establish a stable Bluetooth connection. If any one of these fails, pairing may become slow, unreliable, or impossible.

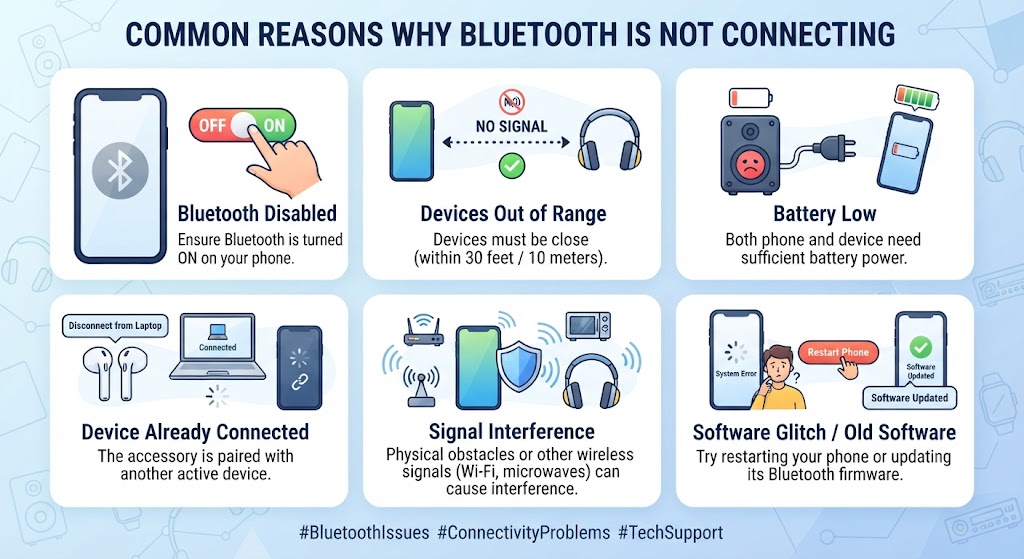
Some of the most common causes include:

  • Bluetooth has been accidentally disabled.
  • The device you’re connecting to isn’t in pairing mode.
  • Too many previously paired devices are stored.
  • Software bugs after a recent system update.
  • Outdated Android or iOS software.
  • Airplane Mode interfering with wireless connections.
  • Low battery on either device.
  • Bluetooth cache corruption (Android).
  • Interference from nearby wireless devices.
  • Physical damage after a drop or water exposure.
  • Faulty Bluetooth antenna or internal hardware.

In our repair centre, we often find that customers assume Bluetooth has failed permanently when the issue is actually caused by incorrect settings or temporary software conflicts. That’s why it’s always worth completing a few simple troubleshooting steps before considering a repair.

Common Signs Your Phone Has Bluetooth Problems

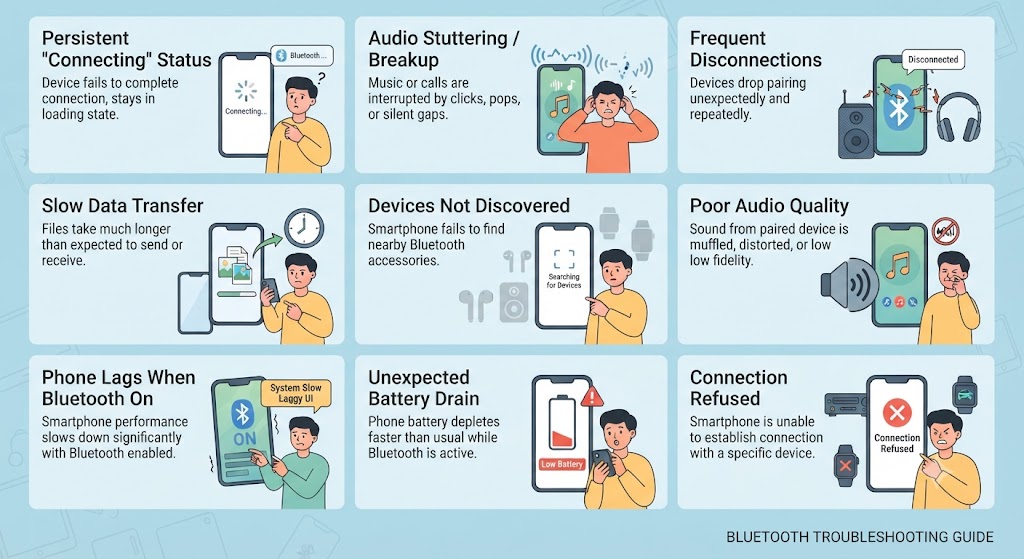
Bluetooth faults don’t always appear the same way. Some phones fail to detect nearby devices, while others connect successfully but disconnect a few seconds later.

You may be dealing with a Bluetooth issue if you notice any of the following symptoms:

  • Your phone cannot find Bluetooth devices.
  • Pairing requests continuously fail.
  • Wireless earbuds connect but produce no sound.
  • Bluetooth disconnects randomly.
  • Your smartwatch frequently loses connection.
  • Your car refuses to recognise your phone.
  • Audio stutters or cuts out during playback.
  • Bluetooth remains stuck on “Connecting…”
  • Previously paired devices suddenly stop working.
  • Bluetooth switches itself off unexpectedly.

If several of these symptoms occur together, the issue is more likely to require deeper troubleshooting rather than simply reconnecting the device.

Real Repair Example from Our Workshop

One customer recently brought in an iPhone that could no longer connect to any Bluetooth devices after being dropped. They had already tried restarting the phone, resetting the network settings, and updating iOS, but the issue remained.

After carrying out a full diagnostic inspection, our technicians found that the impact had damaged the internal Bluetooth antenna. Once the faulty component was replaced and the device was tested, Bluetooth connectivity was fully restored.

Cases like this highlight why it’s important to complete software troubleshooting first. If none of the recommended fixes work, the problem may be caused by damaged internal hardware that requires professional repair.

Is the Problem With Your Phone or the Bluetooth Device?

Before changing settings on your phone, it’s worth confirming where the problem actually lies.

A simple way to identify the cause is to test your phone with another Bluetooth accessory. For example, if your wireless earbuds won’t connect, try pairing your phone with a Bluetooth speaker or smartwatch instead.

Likewise, connect the original accessory to another phone. If it works perfectly with a different device, the issue is likely with your phone. If it still refuses to connect, the accessory itself may be faulty.

This quick comparison can save a lot of unnecessary troubleshooting and helps identify whether the problem is device-specific or phone-related.

Before You Start Troubleshooting

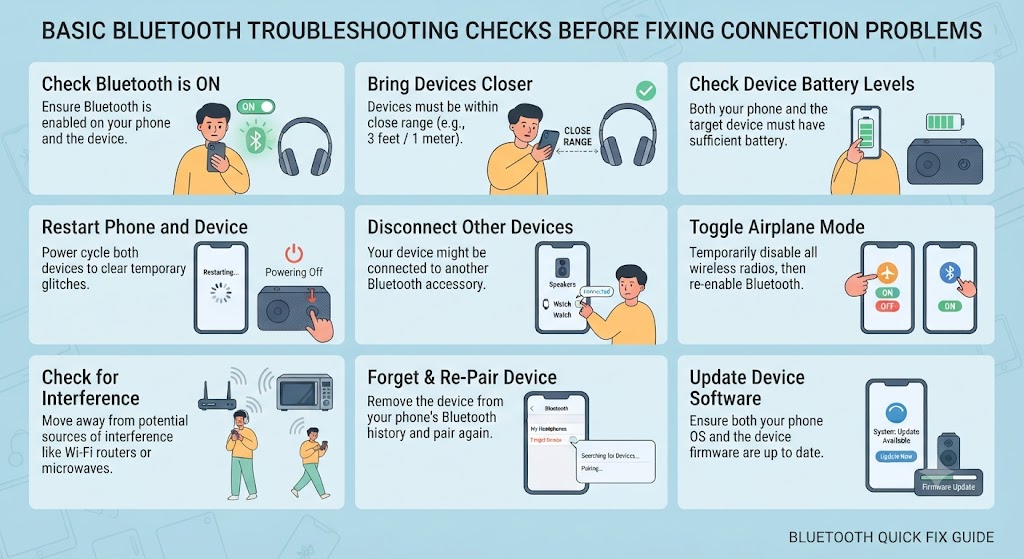
Before moving on to more advanced fixes, check these basic points:

  1. Bluetooth is switched on.
  2. Airplane Mode is turned off.
  3. The accessory has sufficient battery power.
  4. The accessory is in pairing mode.
  5. Your phone is within Bluetooth range.
  6. No other device is currently connected to the accessory.

Many Bluetooth issues are resolved simply by correcting one of these basic settings.

How to Fix Phone Bluetooth Not Connecting: Step-by-Step Solutions

If your phone’s Bluetooth won’t connect, don’t panic. In most cases, the problem can be resolved without professional repair. Start with the simplest solutions first before moving on to more advanced troubleshooting.

Follow the steps below in order. After completing each one, try reconnecting your Bluetooth device to see if the issue has been resolved.

1. Turn Bluetooth Off and Back On

This may sound obvious, but it’s often the quickest fix.

Bluetooth services can occasionally become unresponsive due to temporary software glitches. Restarting Bluetooth refreshes the connection and clears minor communication errors.

How to do it:

On Android

  • Open Settings
  • Tap Bluetooth or Connected Devices
  • Turn Bluetooth Off
  • Wait 10–15 seconds
  • Turn it On again

On iPhone

  • Open Settings
  • Tap Bluetooth
  • Switch Bluetooth Off
  • Wait a few seconds
  • Turn it back On

Now try pairing your device again.

2. Restart Your Phone

A simple restart fixes more Bluetooth issues than many people realise.

Restarting clears temporary system bugs, refreshes wireless services, and restarts background processes that may be preventing Bluetooth from working correctly.

If your phone has also been freezing, slowing down, or restarting unexpectedly, the Bluetooth issue may be part of a wider software problem. In that case, we recommend reading our “My Phone Keeps Restarting – How to Fix It?” before continuing.

How to restart:

  • Hold the Power button.
  • Select Restart.
  • Wait for the phone to reboot completely.
  • Turn Bluetooth back on and reconnect your device.

3. Make Sure the Bluetooth Device Is in Pairing Mode

Many users assume Bluetooth is broken when the accessory simply isn’t ready to pair. Different devices enter pairing mode in different ways.

Examples include:

  • Holding the power button for several seconds.
  • Pressing a dedicated Bluetooth button.
  • Opening the charging case (for many wireless earbuds).
  • Resetting the accessory before pairing again.

If the accessory isn’t discoverable, your phone won’t detect it regardless of its Bluetooth settings. Always check the manufacturer’s instructions if you’re unsure how to activate pairing mode.

4. Forget the Device and Pair Again

Sometimes your phone remembers outdated connection information, preventing a successful Bluetooth connection. Removing the saved device and pairing it again often fixes this issue.

Android

  • Open Settings
  • Bluetooth
  • Tap the connected device
  • Select Forget or Unpair

iPhone

  • Settings
  • Bluetooth
  • Tap the (i) icon
  • Choose Forget This Device

Now reconnect the accessory as though it were new.

5. Check the Distance Between Devices

Bluetooth isn’t designed for long-range communication.

Although many modern devices advertise ranges of up to 10 metres, walls, furniture, metal objects, and wireless interference can significantly reduce signal strength.

For the most reliable connection:

  • Keep both devices within one or two metres.
  • Remove physical obstacles.
  • Avoid crowded areas with many Bluetooth devices.
  • Stay away from Wi-Fi routers when pairing.

If Bluetooth disconnects only when you move away, the issue may simply be signal interference rather than a fault with your phone.

6. Disable Airplane Mode

Airplane Mode disables many wireless communication services, including Bluetooth on some devices. Although certain phones allow Bluetooth to be re-enabled while Airplane Mode is active, this doesn’t always work correctly.

To avoid connection issues:

  • Turn Airplane Mode completely off.
  • Wait a few seconds.
  • Re-enable Bluetooth.
  • Try connecting again.

7. Charge Both Devices

Low battery levels can affect Bluetooth performance more than many people realise.

Some smartphones automatically reduce background activity when battery levels become critically low, while certain Bluetooth accessories enter power-saving modes that limit connectivity.

Before continuing, ensure:

  • Your phone has at least 20% battery.
  • Wireless earbuds or headphones are fully charged.
  • Smartwatches and speakers have sufficient battery power.

If your phone’s battery drains unusually fast, it may indicate a separate issue. You may also find our guide “Why Is My Phone Battery Draining So Fast?” guide helpful.

8. Remove Old Bluetooth Connections

Phones can store dozens of paired Bluetooth devices over time. Although this usually isn’t a problem, an overloaded Bluetooth list may occasionally create pairing conflicts.

If you no longer use older devices, remove them. Examples include:

  • Old headphones
  • Previous car systems
  • Unused smartwatches
  • Bluetooth keyboards
  • Portable speakers

Keeping only the devices you actually use helps your phone manage Bluetooth connections more efficiently.

9. Check for Software Updates

Outdated software is a surprisingly common cause of Bluetooth compatibility issues. Manufacturers regularly release updates that improve Bluetooth stability, security, and compatibility with newer accessories.

Android

Settings → Software Update

iPhone

Settings → General → Software Update

Install any available updates before troubleshooting further.

Bluetooth Version Compatibility Issues

Sometimes the problem isn’t your phone or the Bluetooth accessory itself – it’s a compatibility issue between different Bluetooth versions.

Most modern smartphones support the latest Bluetooth standards and are backward compatible. However, some older accessories may struggle to connect properly, especially if they’re running outdated firmware or have limited compatibility with newer devices.

If you’re having trouble pairing a specific device, try the following:

  • Check whether your phone is running the latest Android or iOS version.
  • Update the accessory’s firmware if the manufacturer provides updates.
  • Test the accessory with another phone to see if the issue is device-specific.
  • Check the manufacturer’s compatibility information if the accessory is several years old.

If the accessory works with other phones but not yours, a software update or compatibility fix may resolve the issue.

10. Restart the Bluetooth Accessory

Sometimes the problem isn’t your phone at all. Wireless earbuds, speakers, car infotainment systems, and fitness trackers can all develop temporary software glitches.

  • Turn the accessory off completely.
  • Wait around 30 seconds.
  • Turn it back on.
  • Place it into pairing mode again.
  • Then reconnect it to your phone.

This simple reset frequently restores normal communication between both devices.

Common Buyer/User Mistake

One of the biggest mistakes people make is repeatedly tapping Connect while the device is already attempting to pair. Doing this can interrupt the pairing process and create additional connection errors.

Instead, allow each pairing attempt to complete before trying again. If it fails, restart both devices and repeat the process calmly rather than making multiple connection attempts in quick succession.

Advanced Bluetooth Troubleshooting

If you’ve already tried the basic fixes and your phone’s Bluetooth still isn’t connecting, it’s time to move on to more advanced troubleshooting. These solutions can resolve deeper software issues and help determine whether the problem is caused by software or faulty hardware.

11. Clear the Bluetooth Cache (Android Only)

Android phones store temporary Bluetooth data (cache) to speed up future connections. Over time, this cached data can become corrupted, causing pairing failures or random disconnections.

Clearing the Bluetooth cache doesn’t delete your personal files, but you may need to reconnect previously paired Bluetooth devices.

How to Clear the Bluetooth Cache

  1. Open Settings.
  2. Go to Apps.
  3. Tap Show System Apps (if available).
  4. Find Bluetooth.
  5. Select Storage & Cache.
  6. Tap Clear Cache.

Restart your phone and try pairing your Bluetooth device again.

Note: Menu names vary slightly between Android manufacturers such as Samsung, Google PixelHuawei, Xiaomi and OnePlus.

12. Reset Network Settings

If Bluetooth still refuses to connect, resetting your network settings can often resolve hidden software conflicts. This process resets:

  • Bluetooth settings
  • Wi-Fi settings
  • Mobile network settings
  • Saved wireless connections

It does not erase your photos, apps or personal files.

Android

Settings → System → Reset Options → Reset Wi-Fi, Mobile & Bluetooth

iPhone

Settings → General → Transfer or Reset iPhone → Reset → Reset Network Settings

After the reset, reconnect your Bluetooth accessories.

13. Check Bluetooth Permissions

Some apps require Bluetooth permissions to communicate with accessories.

If these permissions have been denied, certain devices may fail to pair correctly.

Check that Bluetooth permissions are enabled for apps such as:

  • Smartwatch apps
  • Fitness trackers
  • Wireless printer apps
  • Car connectivity apps
  • Smart home applications

Keeping permissions updated can prevent unnecessary pairing problems.

14. Is the Problem Related to Water Damage?

Bluetooth problems sometimes appear after a phone has been exposed to water or excessive moisture.

Even if the phone seems to work normally, moisture can damage internal Bluetooth components over time.

Common warning signs include:

  • Bluetooth stopped working after rain.
  • The phone was dropped into water.
  • Wireless connections fail after liquid exposure.
  • Other features such as charging or speakers also stopped working.

If your device has recently been exposed to liquid, we recommend reading our “Water Damaged Phone Repair” guide before attempting further troubleshooting.

Water damage should be diagnosed as quickly as possible because corrosion inside the phone can become worse over time.

15. Could It Be a Hardware Problem?

Not every Bluetooth issue is caused by software.

If your phone has been dropped recently or suffered impact damage, internal hardware may be responsible. Possible hardware faults include:

  • Damaged Bluetooth antenna
  • Faulty motherboard
  • Loose internal connectors
  • Damaged wireless communication chip
  • Previous poor-quality repairs
  • Water-damaged internal components

Unlike software issues, these problems usually require professional diagnostic equipment.

16. Factory Reset Your Phone (Last Resort)

If none of the troubleshooting methods have worked, performing a factory reset may help resolve deep software issues affecting Bluetooth connectivity. A factory reset restores your phone to its original settings, removing software conflicts, corrupted system files, and misconfigured settings that may be preventing Bluetooth from working properly.

Before resetting your phone:

  • Back up your important photos, contacts, and files.
  • Make sure you know your Apple ID or Google account credentials.
  • Charge your phone to at least 50% battery.

After the reset, set up your phone as new and test Bluetooth before restoring all your apps and data.

Important: If Bluetooth still doesn’t work after a factory reset, the issue is likely caused by faulty hardware, such as a damaged Bluetooth antenna or motherboard component. In this situation, a professional diagnostic inspection is recommended.

Signs You May Need Professional Repair

If you notice any of the following symptoms, it’s unlikely that restarting your phone will solve the problem:

  • Bluetooth won’t switch on at all.
  • Bluetooth keeps turning itself off.
  • No Bluetooth devices can be detected.
  • Bluetooth stopped working after a phone repair.
  • Bluetooth failed after water damage.
  • Bluetooth disconnects constantly despite resetting everything.
  • Other wireless features such as Wi-Fi are also failing.

When several of these symptoms occur together, professional diagnosis is recommended.

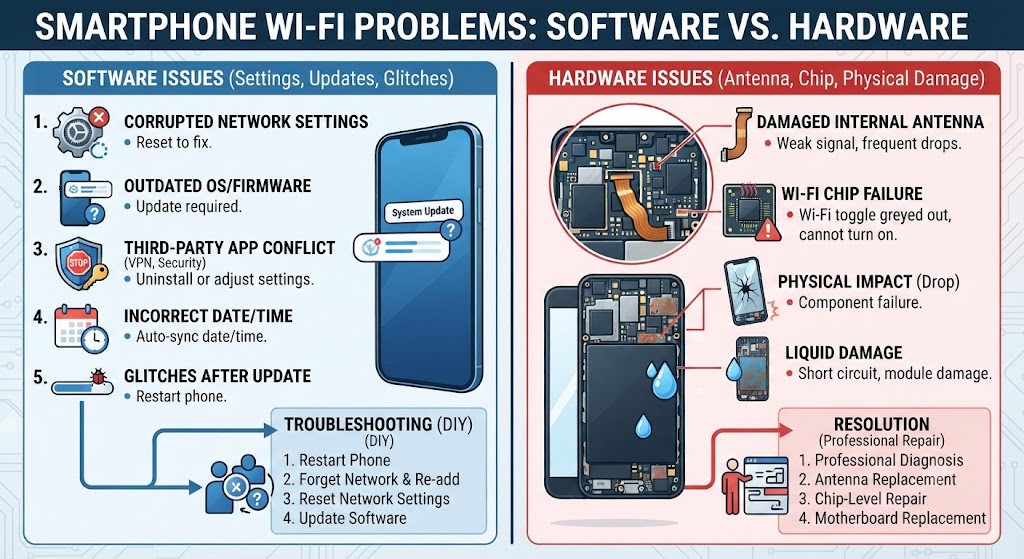
Software Problem vs Hardware Problem

Software ProblemsHardware Problems
Bluetooth settings are not configured correctly.The Bluetooth antenna is damaged and cannot send or receive signals properly.
Your iPhone is running an outdated version of iOS.The motherboard or Bluetooth chip has developed a fault.
Temporary software bugs or corrupted system files are affecting Bluetooth.Water or liquid has damaged the internal Bluetooth components.
A pairing issue is preventing your iPhone from connecting to other devices.The iPhone has been dropped or physically damaged, affecting the Bluetooth hardware.

Understanding the difference helps avoid unnecessary repairs and ensures the correct solution is applied.

Can You Fix Bluetooth Yourself?

Many Bluetooth issues can be resolved at home by following the troubleshooting steps in this guide. However, DIY repairs involving the phone’s internal components are not recommended unless you have the correct tools and technical experience.

Modern smartphones contain delicate components that can be easily damaged during disassembly. Attempting to repair the Bluetooth antenna or motherboard without proper equipment may result in further damage and higher repair costs.

How to Prevent Bluetooth Problems

While many Bluetooth issues can be fixed through troubleshooting, a few simple habits can help prevent them from happening again.

Here are some practical tips to keep your phone’s Bluetooth working reliably:

  • Keep your Android or iPhone updated with the latest software.
  • Remove old or unused paired Bluetooth devices regularly.
  • Keep your Bluetooth accessories updated with the latest firmware, if updates are available.
  • Avoid exposing your phone to water, excessive moisture, or extreme temperatures.
  • Restart your phone occasionally to refresh system services.
  • Keep both your phone and Bluetooth accessories sufficiently charged.
  • Avoid installing apps from untrusted sources that may interfere with system settings.

Following these simple practices can improve Bluetooth performance, reduce connection issues, and help extend the life of your device.

Why Choose iExpert Repairs?

If troubleshooting hasn’t solved the problem, our experienced technicians can perform a full diagnostic assessment to identify the exact cause of the fault. At iExpert Repairs, we repair Bluetooth-related faults on a wide range of devices, including:

Why customers choose us:

  • Certified repair technicians
  • High-quality replacement parts
  • Same-day repairs available on many devices
  • 12-month warranty on eligible repairs
  • Competitive UK pricing
  • Walk-in and UK-wide Mail-In Repair Service
  • Friendly after-sales support

Whether your issue is software-related or caused by damaged internal hardware, our technicians will recommend the most cost-effective repair solution.

FAQs About Phone Bluetooth Not Connecting

1. Why is my phone Bluetooth not connecting?

Your phone’s Bluetooth may not connect due to temporary software glitches, outdated system software, pairing issues, Bluetooth cache problems, low battery, or hardware damage. Restarting your phone, forgetting the Bluetooth device, and reconnecting it usually resolves the problem. If the issue persists, professional diagnostics may be required.

2. How do I fix Bluetooth pairing problems on my phone?

Start by turning Bluetooth off and back on, restarting your phone, placing the accessory in pairing mode, and removing old Bluetooth connections. If that doesn’t work, update your phone’s software or reset your network settings before trying again.

3. Why won’t my phone find Bluetooth devices?

If your phone cannot detect nearby Bluetooth devices, ensure the accessory is in pairing mode, Bluetooth is enabled, Airplane Mode is turned off, and both devices are close together. Software bugs or damaged Bluetooth hardware can also prevent device discovery.

4. Why does my Bluetooth keep disconnecting?

Frequent Bluetooth disconnections are commonly caused by software conflicts, wireless interference, outdated firmware, low battery levels, or damaged Bluetooth components. Updating your phone and reconnecting the device often fixes intermittent connection issues.

5. Can a software update fix Bluetooth issues?

Yes. Manufacturers regularly release Android and iOS updates that improve Bluetooth stability, compatibility, and performance. Installing the latest software update can resolve many Bluetooth connection problems.

6. Should I reset my network settings to fix Bluetooth?

Yes. Resetting network settings can resolve hidden Bluetooth configuration issues without deleting your personal files. However, it will remove saved Wi-Fi passwords and previously paired Bluetooth devices, which you’ll need to reconnect afterwards.

7. How do I know if my phone has a Bluetooth hardware problem?

If Bluetooth won’t switch on, constantly turns itself off, cannot detect any devices after troubleshooting, or stopped working after a drop or water damage, the problem may be hardware-related. A professional diagnostic inspection can confirm the exact cause.

8. Can water damage stop Bluetooth from working?

Yes. Water damage can affect the Bluetooth antenna, motherboard, or other internal components. Even if your phone appears to function normally, corrosion inside the device may gradually cause Bluetooth connectivity problems.

9. Why won’t my Bluetooth headphones connect to my phone?

Your headphones may not be in pairing mode, could already be connected to another device, or your phone may have stored outdated pairing information. Forgetting the device and pairing it again usually resolves the issue.

10. Does restarting my phone fix Bluetooth problems?

In many cases, yes. Restarting your phone refreshes wireless services, clears temporary software glitches, and restarts Bluetooth processes that may have stopped responding correctly.

11. Why is Bluetooth working on other devices but not my phone?

If the same Bluetooth accessory connects successfully to another phone, the issue is likely with your phone rather than the accessory. This may indicate incorrect settings, software corruption, or internal hardware faults.

12. Can Bluetooth problems be repaired?

Yes. If software troubleshooting doesn’t solve the issue, professional technicians can diagnose and repair Bluetooth-related hardware faults, including damaged antennas, faulty wireless chips, or motherboard problems.

13. How much does Bluetooth repair cost in the UK?

The cost depends on the cause of the fault and your phone model. Minor software issues may not require any hardware repair, while motherboard or Bluetooth chip repairs vary in price. A professional diagnostic assessment is the best way to determine the repair cost.

14. Is it safe to repair a phone with Bluetooth issues?

Yes, provided you choose a trusted repair specialist. Experienced technicians can safely diagnose Bluetooth faults and replace damaged components using high-quality parts where required, helping restore reliable wireless connectivity.

15. When should I seek professional phone repair for Bluetooth issues?

If you’ve completed all troubleshooting steps and Bluetooth still won’t connect, repeatedly disconnects, won’t switch on, or stopped working after physical or water damage, it’s time to seek professional repair. Early diagnosis can often prevent further damage and reduce repair costs.

Final Thoughts

Bluetooth connectivity problems can be frustrating, but in most cases, they don’t mean your phone is permanently damaged. Issues such as incorrect settings, software glitches, outdated operating systems, or pairing conflicts are often easy to fix with a few simple troubleshooting steps.

However, if you’ve worked through all the solutions in this guide and your phone still won’t connect to Bluetooth devices, the problem may be hardware-related. Faults such as a damaged Bluetooth antenna, motherboard issues, or water damage require professional diagnosis and repair.

The key is not to ignore persistent Bluetooth problems. Delaying repairs can sometimes lead to additional issues, especially if the fault is caused by liquid damage or internal component failure. Identifying the cause early can save both time and repair costs.

Back to posts

My Phone Keeps Restarting – How to Fix It?

Fixing of Phone Keeps Restarting (Quick Answer)

If your phone keeps restarting unexpectedly, start by restarting it manually, installing the latest Android or iOS updates, checking your battery health, freeing up storage space, removing recently installed apps, and scanning for malware. You should also boot your phone into Safe Mode to identify third-party app conflicts and clear any corrupted system cache where applicable.

If your phone continues restarting after a factory reset or becomes stuck in a boot loop, the issue is likely caused by faulty hardware such as a failing battery, damaged power button, motherboard fault, or liquid damage, and should be professionally diagnosed.

Introduction

A phone that keeps restarting can quickly become one of the most frustrating smartphone problems to deal with. Whether your device reboots every few minutes, gets stuck on the manufacturer logo, or repeatedly turns itself off and back on, it can interrupt calls, close apps unexpectedly, prevent you from accessing important files, and make your phone almost impossible to use.

The good news is that random restarts don’t always mean your phone has suffered a serious hardware failure. In many cases, the issue is caused by temporary software bugs, corrupted apps, outdated operating systems, low storage space, failed updates, or battery-related problems that can often be fixed at home without spending money on repairs. However, if your phone started restarting after being dropped, exposed to water, or following physical damage, the problem may be caused by faulty internal components that require professional attention.

In this comprehensive UK troubleshooting guide, you’ll learn the most common reasons why a phone keeps restarting, discover 15 proven ways to fix restart problems, understand the difference between software and hardware faults, and find out when it’s time to seek expert repair. By the end of this guide, you’ll be able to diagnose the issue more accurately and take the right steps to get your smartphone working reliably again.

Why Does My Phone Keep Restarting?

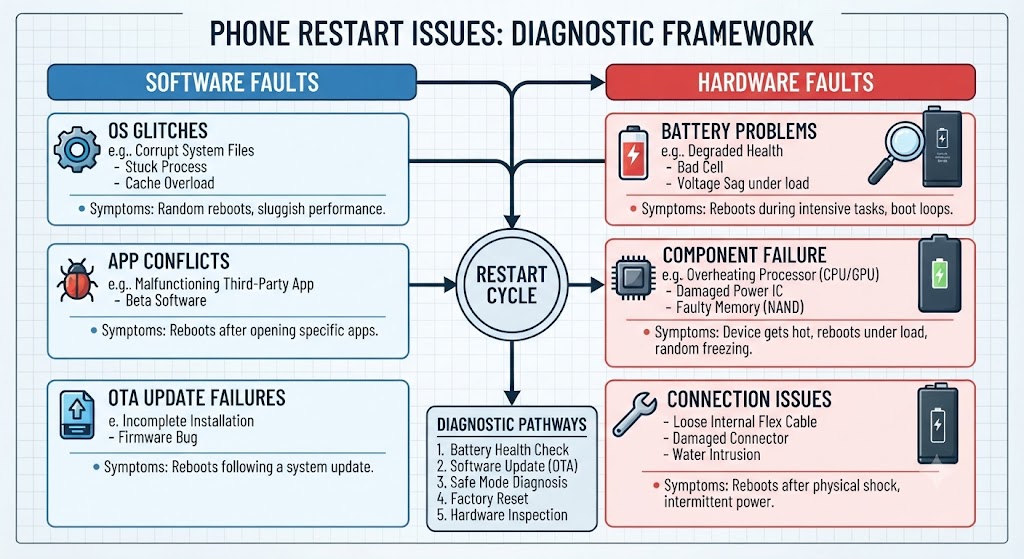
Smartphones are designed to run continuously without restarting on their own. If your device keeps rebooting unexpectedly, it’s a clear sign that something is preventing the operating system from functioning properly.

In many situations, the problem is software-related. Corrupted apps, outdated software, insufficient storage, malware, failed updates, or damaged system files can all trigger random restarts. Fortunately, these issues are often easy to fix using simple troubleshooting steps.

However, not every restart problem is caused by software. A worn-out battery, faulty power button, damaged charging circuit, motherboard failure, or liquid damage can interrupt your phone’s power supply and force it to restart repeatedly. Identifying whether the issue is caused by software or hardware is the first step towards applying the correct solution and avoiding unnecessary repair costs.

Common Signs Your Phone Has a Restart Problem

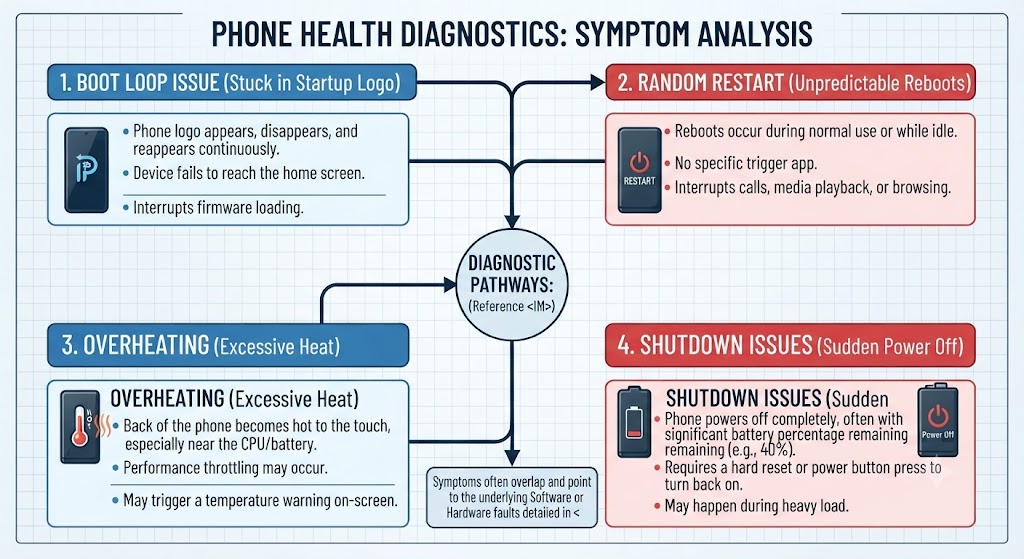
Restart issues don’t always look the same. Some phones reboot only once or twice a day, while others become trapped in an endless restart cycle that prevents them from loading the home screen.

Here are the most common symptoms users experience:

  • Your phone randomly restarts throughout the day.
  • The device gets stuck in a continuous boot loop.
  • Your phone restarts after the manufacturer logo appears.
  • The phone keeps turning off and back on automatically.
  • Your device restarts while charging.
  • The phone freezes before rebooting.
  • Your smartphone restarts whenever you open certain apps.
  • The Apple logo or Android logo repeatedly appears and disappears.
  • The battery percentage suddenly drops before the restart.
  • Your phone becomes unusually hot before restarting.
  • The restart problem began after a software update.
  • The issue started after dropping the phone.
  • The device keeps vibrating but never finishes booting.
  • Your phone only works properly in Safe Mode.
  • The restart issue has gradually become more frequent over time.

Some of these symptoms indicate software-related issues that can often be fixed at home, while others point towards battery failure, motherboard damage, or other hardware faults that require professional diagnosis.

What Causes a Phone to Keep Restarting?

There are several reasons why your phone may keep restarting unexpectedly. Sometimes the problem is as simple as a buggy app or outdated software, while in other cases it can be caused by a failing battery, motherboard fault, or physical damage.

Before trying random fixes, it’s important to identify what’s triggering the restart issue. Understanding the root cause will help you choose the right solution, save time, and avoid unnecessary repair costs.

Below are the most common reasons why smartphones randomly restart or become stuck in a boot loop.

Possible Cause Type of Issue Can You Fix It Yourself?
Software bug or system glitch Software Usually
Outdated Android or iOS version Software Yes
Corrupted system files Software Sometimes
Faulty third-party app Software Yes
Insufficient storage space Software Yes
Malware or harmful apps Software Usually
Corrupted system update Software Sometimes
Battery deterioration Hardware Usually not
Faulty power button Hardware No
Water or liquid damage Hardware No
Phone dropped or impact damage Hardware Usually not
Motherboard or power IC failure Hardware No

15 Proven Ways to Fix a Phone That Keeps Restarting

Before assuming your phone needs repairing, work through the troubleshooting methods below. Most random restart problems are caused by software issues that can often be resolved within a few minutes using these proven fixes.

Fix 1. Restart Your Phone Properly

It may sound obvious, but performing a proper restart is often enough to resolve temporary software glitches that cause random restarts.

When your phone runs continuously for long periods, background processes, system services, and temporary memory files can become unstable. Restarting the device clears temporary errors, refreshes system resources, and allows the operating system to start with a clean memory state.

How to restart your phone

Android

  • Press and hold the Power button.
  • Tap Restart.
  • Wait for the phone to reboot completely.
  • Use your phone normally for a few minutes.

iPhone

  • Press and hold the Side button together with either Volume button.
  • Slide to power off.
  • Wait around 30 seconds.
  • Turn your iPhone back on.

If your phone no longer restarts after a manual reboot, the issue was most likely caused by a temporary software conflict rather than a hardware fault.

Fix 2. Check for Software Updates

Outdated operating systems are one of the most common reasons why smartphones develop stability issues, including random restarts. Manufacturers regularly release Android and iOS updates to fix software bugs, improve security, and enhance overall system performance.

Installing the latest software update may resolve reboot loops, unexpected shutdowns, and other system-related problems without requiring any hardware repairs.

Android

  • Open Settings
  • Tap Software Update
  • Select Download and Install

iPhone

  • Open Settings
  • Tap General
  • Select Software Update

Once the update has finished installing, restart your phone and monitor it for several hours to see whether the restart problem has been resolved.

Fix 3. Remove Recently Installed Apps

If your phone only started restarting after installing a new application, that app could be causing the problem. Poorly optimised apps, incompatible software, or apps downloaded from unofficial sources can interfere with your phone’s operating system and trigger random reboots.

Try uninstalling any apps you installed shortly before the problem began. Once removed, restart your phone and check whether the device continues restarting. If the issue disappears, you’ve likely identified the source of the problem.

Fix 4. Free Up Storage Space

A phone with very little available storage can struggle to run essential system processes, sometimes leading to freezing, crashes, and unexpected restarts.

Delete unnecessary apps, duplicate photos, old videos, downloaded files, and other large items to create additional storage space. Once you’ve freed up storage, restart your phone and check whether system stability has improved.

Fix 5. Boot Your Phone into Safe Mode (Android)

If your phone keeps restarting after installing a new app, the problem may not be your phone at all-it could be caused by a faulty third-party application.

Safe Mode temporarily disables all downloaded apps and allows only the original system apps to run. This makes it one of the best ways to determine whether a recently installed app is triggering the random restarts.

If your phone works normally in Safe Mode, you’ve identified that the issue is software-related rather than a hardware fault.

How to Enter Safe Mode (Android)

Although the exact steps vary slightly between manufacturers, the general process is:

  1. Press and hold the Power button.
  2. Touch and hold Power Off until the Safe Mode option appears.
  3. Tap Safe Mode.
  4. Wait for the phone to restart.

You’ll usually see “Safe Mode” displayed in the corner of the screen once it has successfully loaded.

What to Do Next

Use your phone for a while in Safe Mode. If the restarting problem disappears:

  • A recently installed app is likely causing the issue.
  • Restart your phone normally.
  • Uninstall any apps installed just before the restarting began.
  • Remove suspicious battery optimisation, cleaning, antivirus, or performance booster apps first.

If your phone still keeps restarting in Safe Mode, the problem is much more likely to be related to:

  • Corrupted Android system files
  • A failing battery
  • Faulty hardware
  • Motherboard damage

At that point, continue with the next troubleshooting steps below.

Fix 6. Check Your Battery Health

A worn-out or damaged battery is one of the most common hardware reasons why a phone continuously restarts.

As batteries age, they lose their ability to deliver stable power. During demanding tasks such as opening the camera, gaming, video recording, or charging, voltage can suddenly drop, causing the phone to reboot automatically.

This problem is especially common on older smartphones that have been used for several years.

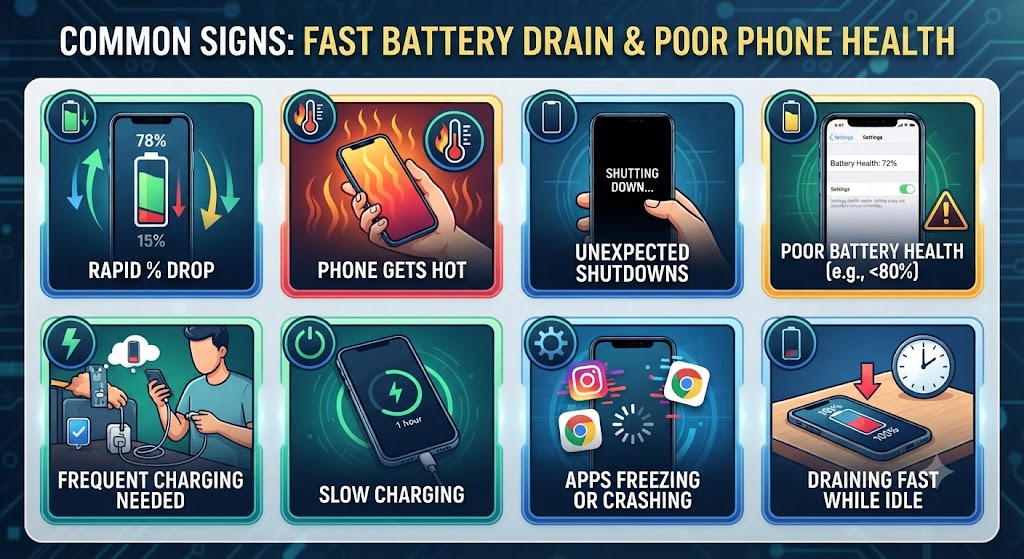
Signs Your Battery May Be Failing

  • Phone restarts when battery reaches 20–40%.
  • Device switches off even though battery percentage appears high.
  • Phone only works properly while plugged into the charger.
  • Battery drains unusually fast.
  • Phone becomes hot during normal use.
  • Battery appears swollen or lifts the screen.

How to Check Battery Health

On iPhone

Go to:

Settings → Battery → Battery Health & Charging

Check the Maximum Capacity.

  • 90-100% – Excellent
  • 80-89% – Battery ageing normally
  • Below 80% – Apple recommends replacement

On Android

Most Android phones don’t display battery health directly. You can:

  • Use the built-in Device Care tool (Samsung).
  • Run the phone’s diagnostic app.
  • Have the battery professionally tested.

Fix 7. Scan Your Phone for Malware

Although it’s less common than software bugs, malware can also cause phones to restart unexpectedly. Malicious apps may consume excessive CPU power, overload memory, interfere with system processes, or repeatedly crash Android services.

This is more common if apps were installed from unofficial websites instead of the Google Play Store or Apple App Store.

Signs of Malware

  • Random pop-up advertisements
  • Unknown apps appearing automatically
  • Phone becomes unusually slow
  • Battery drains rapidly
  • Device overheats
  • Unexpected restarts
  • High data usage

What You Should Do

  • Uninstall suspicious apps.
  • Run Google Play Protect (Android).
  • Update your operating system.
  • Restart the phone.
  • Avoid installing APK files from unknown sources.

If malware has deeply affected system files, a factory reset may eventually be required.

Fix 8. Clear the System Cache (Android)

Android stores temporary system files in a cache partition to improve performance. Over time, these cached files can become corrupted after major Android updates or failed installations, leading to problems such as:

  • Random restarting
  • Freezing
  • Boot loops
  • Slow performance
  • App crashes

Fortunately, clearing the system cache does not delete your personal files.

How to Clear Cache Partition

The exact steps vary by manufacturer, but generally:

  1. Turn off the phone.
  2. Press the required button combination to enter Recovery Mode.
  3. Select Wipe Cache Partition.
  4. Confirm.
  5. Restart the phone.

Don’t confuse Wipe Cache Partition with Factory Reset. Clearing the cache removes temporary system files only, while a factory reset erases all your personal data.

Many users notice improved stability immediately after clearing the cache following a major Android software update.

Fix 9. Remove the SD Card

If your Android phone uses a microSD card, it’s worth checking whether it’s responsible for the restarting problem. A damaged, slow, or corrupted memory card can cause apps to crash repeatedly, resulting in random reboots.

Symptoms of a Faulty SD Card

  • Phone restarts while accessing photos.
  • Gallery crashes frequently.
  • Files disappear unexpectedly.
  • Apps stored on the SD card won’t open.
  • Device freezes before restarting.

What to Do

  1. Power off the phone.
  2. Remove the SD card.
  3. Restart the device.
  4. Use it normally for several hours.

If the restarting stops after removing the card, your SD card is likely corrupted or failing. Back up any recoverable files and replace it with a high-quality memory card.

Fix 10. Check for Overheating

Excessive heat is another major reason smartphones restart unexpectedly. When your phone becomes too hot, the processor automatically reduces performance or forces a restart to protect internal components from permanent damage.

Overheating may occur because of:

  • Gaming for long periods
  • Recording 4K or 8K video
  • Fast charging
  • Faulty batteries
  • Background apps
  • Direct sunlight
  • Internal hardware faults

Signs Your Phone Is Overheating

  • Phone feels extremely hot to touch.
  • Performance becomes noticeably slower.
  • Screen dims automatically.
  • Apps close unexpectedly.
  • Charging slows down.
  • Device restarts by itself.

How to Reduce Overheating

  • Remove the phone case temporarily.
  • Close unused apps.
  • Avoid using the phone while charging.
  • Move out of direct sunlight.
  • Install the latest software updates.
  • Reduce screen brightness.

If your phone regularly becomes hot before restarting, overheating is likely the root cause rather than the restart itself.

Fix 11. Update Android or iOS

Running outdated software is one of the most common reasons a smartphone keeps restarting unexpectedly.

Manufacturers regularly release software updates that fix bugs, improve system stability, patch security vulnerabilities, and resolve known reboot issues. If your phone started restarting after an older update – or you’ve delayed installing recent updates – updating your device may solve the problem immediately.

How to Update Android

  1. Open Settings.
  2. Tap Software Update or System.
  3. Select Download and Install.
  4. Restart your phone after the update finishes.

How to Update iPhone

  1. Open Settings.
  2. Tap General.
  3. Select Software Update.
  4. Download and install the latest version of iOS.

Expert Tip

If your phone started restarting immediately after installing a new update, wait a few days before assuming it’s a hardware problem. Manufacturers often release follow-up patches to fix newly discovered software bugs.

Fix 12. Reset All Settings

If updating your device doesn’t solve the problem, resetting your phone’s settings is the next safe troubleshooting step. Unlike a factory reset, Reset All Settings does not delete your personal files, photos, videos, contacts, or apps.

Instead, it restores system settings such as:

  • Wi-Fi settings
  • Bluetooth connections
  • Network settings
  • Privacy permissions
  • Keyboard preferences
  • Accessibility settings

If an incorrect configuration is causing your phone to restart, this reset often resolves the issue.

On Android

Go to:

Settings → System → Reset Options → Reset Settings

(Menu names may vary depending on the manufacturer.)

On iPhone

Go to:

Settings → General → Transfer or Reset iPhone → Reset → Reset All Settings

After the reset, restart your phone and monitor it for several hours.

Fix 13. Perform a Factory Reset (Last Resort)

If your phone keeps restarting after trying every troubleshooting step in this guide, a factory reset is the final software solution. A factory reset completely reinstalls the operating system and removes:

  • Apps
  • Photos
  • Videos
  • Messages
  • Downloads
  • Personal settings

Because it erases everything, always back up your data before continuing.

Before Performing a Factory Reset

  • Back up photos
  • Save contacts
  • Sync important files
  • Remember passwords
  • Charge the battery above 50%

After resetting the device, do not immediately restore your backup.

Instead, use the phone as a new device for a short period. If the restarting problem disappears, the issue was likely caused by corrupted software or a problematic app.

However, if your phone still keeps restarting after a factory reset, the fault is almost certainly hardware-related.

Fix 14. Check SIM Card or Network-Related Issues

Sometimes a phone keeps restarting due to SIM card errors or network-related system conflicts. A damaged SIM card, improperly inserted SIM tray, or network configuration bug can occasionally cause system instability, especially on Android devices.

When the phone repeatedly tries to reconnect to the mobile network, it can overload system processes and trigger random restarts.

What You Should Do:

  • Turn off your phone completely
  • Remove the SIM card and reinsert it properly
  • Try using a different SIM card
  • Reset network settings (Wi-Fi, Mobile Data, Bluetooth)
  • Test the phone without SIM for a few hours

When This Fix Works:

If your phone stops restarting after removing the SIM card, the issue may be related to:

  • Faulty SIM card
  • Damaged SIM tray
  • Network carrier configuration issue

In this case, replacing the SIM or contacting your network provider may resolve the issue without any repair cost.

Fix 15. Inspect for Internal Hardware Loose Connections (Advanced Issue)

If your phone has been dropped, repaired before, or exposed to pressure, internal components may become slightly loose. Even a small disconnection between the battery, motherboard, or power IC can cause continuous restarting.

This is one of the most overlooked but serious causes of reboot loops.

Common Internal Issues:

  • Loose battery connector
  • Partially detached power button flex cable
  • Unstable motherboard connection
  • Damaged charging IC connection

Warning Signs:

  • Phone restarts when slightly moved
  • Device works only in certain positions
  • Restarting started after physical impact or repair
  • Random shutdowns with no pattern

What You Should Do:

  • Avoid pressing or bending the phone
  • Do not open the device yourself (risk of damage)
  • Get professional diagnostic inspection

At this stage, software fixes will not help. A technician must open the device and properly inspect internal connections using diagnostic tools.

Is It a Software Problem or a Hardware Fault?

One of the biggest questions users ask is whether random restarting is caused by software or damaged hardware.

The table below makes it easier to identify the most likely cause.

Signs of a Software Problem Signs of a Hardware Problem
Restarting began after an app installation Restarting started after the phone was dropped
Problem appeared after a software update Phone suffered water damage
Safe Mode fixes the issue Phone restarts even in Safe Mode
Factory Reset solves the problem Factory Reset doesn’t help
Restarting happens occasionally Phone restarts continuously
Apps crash before restarting Battery swelling or overheating
Device works normally after clearing cache Random shutdowns even with full battery
No visible physical damage Cracked housing or damaged internal components

Average UK Repair Costs for Phones That Keep Restarting

If the issue turns out to be hardware-related, repair costs vary depending on the faulty component and your phone model.

Repair Type Average UK Price
Battery Replacement £39-£99
Charging Port Repair £49-£99
Power Button Repair £49-£89
Software Recovery £29-£69
Motherboard Repair £89-£249

Note: Prices vary depending on the phone model, parts required, and the complexity of the repair.

Android Phone Keeps Restarting

If your Android phone keeps restarting, the issue is often caused by software glitches, corrupted cache files, incompatible apps, low storage, or a failing battery. Popular brands including SamsungGoogle Pixel, Huawei, OnePlus, Xiaomi, Oppo, Motorola, and Sony can all experience unexpected reboot problems.

Start by restarting your device, updating Android, removing recently installed apps, clearing the system cache, and booting into Safe Mode. If your phone continues restarting even after a factory reset, the problem is likely hardware-related, such as a faulty battery, damaged charging circuit, or motherboard issue.

iPhone Keeps Restarting

If your iPhone keeps restarting unexpectedly, don’t assume the device needs replacing. In many cases, random rebooting is caused by iOS bugs, incomplete software updates, battery degradation, low storage space, corrupted system files, or incompatible applications. Whether you own an iPhone 11iPhone 12iPhone 13iPhone 14iPhone 15, or the latest iPhone models, the troubleshooting process is generally the same.

Start by updating to the latest version of iOS, checking Battery Health, freeing up storage, removing recently installed apps, and resetting all settings. If the problem continues, back up your data and perform a factory reset to rule out software corruption.

If your iPhone still keeps restarting after a factory reset – or the issue started after being dropped, exposed to water, or fitted with a non-genuine replacement part – the fault is likely hardware-related. Common causes include a worn-out battery, faulty charging IC, damaged logic board, power management IC (PMIC) failure, or internal motherboard damage.

At iExpert Repairs, our experienced technicians use professional diagnostic equipment to accurately identify the root cause before recommending any repair. This ensures your iPhone receives the correct solution without unnecessary part replacements, saving both time and money.

When Should You Seek Professional Repair?

If you’ve completed every troubleshooting step in this guide and your phone still keeps restarting, the problem is unlikely to be something you can fix at home.

Professional diagnosis is recommended if:

  • Your phone keeps restarting after a factory reset.
  • The device won’t stay on long enough to use normally.
  • The restarting began after being dropped.
  • The phone has been exposed to water.
  • The battery is swollen or overheating.
  • The phone only works while connected to the charger.
  • The device is stuck in a continuous boot loop.
  • The restarting problem is becoming more frequent.

At iExpert Repairs, our certified technicians carry out comprehensive diagnostics to determine whether the issue is caused by software, battery failure, charging components, or motherboard damage. We repair iPhones, Samsung Galaxy devices, Google Pixel phones, Huawei, OnePlus, Xiaomi, and many other leading smartphone brands using premium-quality replacement parts. Most repairs are completed with a fast turnaround and are backed by a 12-month warranty, giving you confidence that your device is repaired correctly the first time.

FAQs About a Phone That Keeps Restarting

1. Why does my phone keep restarting randomly?

If your phone keeps restarting randomly, it’s usually caused by software bugs, a faulty app, insufficient storage, battery degradation, overheating, corrupted system files, or hardware damage. If the problem started after a software update, restarting the device and installing the latest update may resolve it. However, if your phone continues rebooting after a factory reset or following a drop or water damage, the issue is likely hardware-related and should be professionally diagnosed.

2. How do I stop my phone from constantly restarting?

Start by restarting your device manually, updating Android or iOS, removing recently installed apps, checking battery health, freeing up storage, and scanning for malware. If the issue continues, reset all settings or perform a factory reset after backing up your data. If none of these solutions work, professional repair may be required.

3. Why does my Android phone keep restarting?

Android phones may restart because of corrupted cache files, outdated software, app conflicts, malware, overheating, battery problems, or motherboard faults. Booting into Safe Mode can help determine whether a third-party app is causing the issue. If the problem persists after a factory reset, hardware diagnostics are recommended.

4. Why does my iPhone keep restarting?

An iPhone may keep restarting due to iOS bugs, battery degradation, failed software updates, low storage, damaged charging components, or logic board faults. Updating iOS, checking Battery Health, and resetting all settings often resolve software-related problems. Persistent rebooting after these steps usually indicates a hardware issue.

5. Why does my Samsung phone keep restarting?

Samsung Galaxy phones can restart unexpectedly because of One UI software bugs, corrupted cache files, faulty applications, overheating, battery deterioration, or hardware damage. Clearing the system cache, updating the software, and testing the device in Safe Mode are recommended before seeking professional repair.

6. Can a bad battery cause a phone to keep restarting?

Yes. A failing battery is one of the most common causes of random restarts, especially on older smartphones. As batteries wear out, they may no longer supply stable voltage, causing the phone to reboot unexpectedly. Replacing the battery often resolves this issue.

7. Can overheating make my phone restart?

Yes. Smartphones are designed to protect internal components from excessive heat. If the processor or battery reaches unsafe temperatures, the phone may automatically restart or shut down. Allow the device to cool down and identify what’s causing the overheating before using it again.

8. Why does my phone keep restarting after a software update?

Sometimes a software update may install incorrectly or create compatibility issues with existing apps. Restarting the phone, installing any additional updates, clearing the system cache (Android), or resetting all settings can often resolve update-related restart problems.

9. Can malware cause a phone to restart repeatedly?

Yes. Although uncommon, malicious apps or malware can cause random restarts, freezing, excessive battery drain, and poor performance. Installing apps only from trusted sources and running a reputable security scan can help eliminate malware-related issues.

10. Will a factory reset fix a phone that keeps restarting?

A factory reset can resolve restart issues caused by corrupted software, system errors, or damaged settings. However, if your phone continues restarting after the reset, the fault is likely hardware-related, such as a defective battery, charging IC, or motherboard problem.

11. Why does my phone keep restarting while charging?

If your phone restarts only while charging, the problem may be caused by a damaged charging cable, faulty charger, dirty charging port, worn battery, or charging circuit failure. Try using a certified charger first. If the issue continues, professional diagnosis is recommended.

12. Why does my phone keep restarting after being dropped?

A drop can damage internal components such as the battery connector, motherboard, charging IC, or power management circuit. Even if there is no visible external damage, internal hardware faults can cause continuous restart loops that require professional repair.

13. Can water damage cause my phone to keep restarting?

Yes. Water or moisture can damage internal circuits, create short circuits, and affect the battery or motherboard. A phone that keeps restarting after liquid exposure should be switched off immediately and inspected by a qualified technician as soon as possible.

14. Why does my phone keep restarting when the battery is low?

A weak or worn-out battery may struggle to provide enough power when the charge level drops, causing unexpected shutdowns or restarts. Replacing an ageing battery is often the most effective solution if this only happens at low battery percentages.

15. How do I know if my phone restart issue is software or hardware related?

If your phone works normally after updating the software, removing apps, or performing a factory reset, the issue was likely software-related. However, if the restart loop continues after a factory reset or started following physical damage or water exposure, the fault is most likely hardware-related.

16. What is a boot loop on a smartphone?

A boot loop occurs when a phone repeatedly displays the startup logo, restarts, and never reaches the home screen. Boot loops are commonly caused by corrupted software, failed updates, damaged firmware, battery issues, or motherboard faults.

17. Is it safe to use a phone that keeps restarting?

No. Frequent restarting can indicate serious software corruption or hardware failure. Continuing to use the device may increase the risk of data loss or further internal damage. It’s best to back up your data and diagnose the issue as soon as possible.

18. How much does it cost to repair a phone that keeps restarting in the UK?

The repair cost depends on the underlying cause. Software repairs are generally less expensive than hardware repairs. Battery replacements, charging circuit repairs, or motherboard repairs vary depending on the phone model and the complexity of the repair.

19. How long does it take to repair a phone that keeps restarting?

Many software issues can be resolved within an hour, while battery replacements are often completed the same day. More complex motherboard or power management repairs may take between one and three working days, depending on the device and parts availability.

20. Can iExpert Repairs fix phones that keep restarting?

Yes. At iExpert Repairs, our certified technicians diagnose and repair restart issues affecting iPhone, Samsung Galaxy, Google Pixel, Huawei, OnePlus, Xiaomi, Oppo, Motorola, and many other smartphone brands.

Conclusion

A phone that keeps restarting doesn’t always mean your device has reached the end of its life. In many cases, the issue can be resolved by updating your software, removing faulty apps, clearing cache files, checking battery health, freeing up storage, or resetting your phone’s settings.

However, if your smartphone continues rebooting after completing all the troubleshooting steps – or the problem began after accidental damage or water exposure – the fault is likely hardware-related. Acting quickly can help prevent additional damage, protect your data, and reduce repair costs.

By following the solutions in this guide, you’ll be able to identify whether your phone’s restart issue is caused by software or hardware and decide the most effective next step.

Back to posts

How to Fix a Phone Camera Not Working?

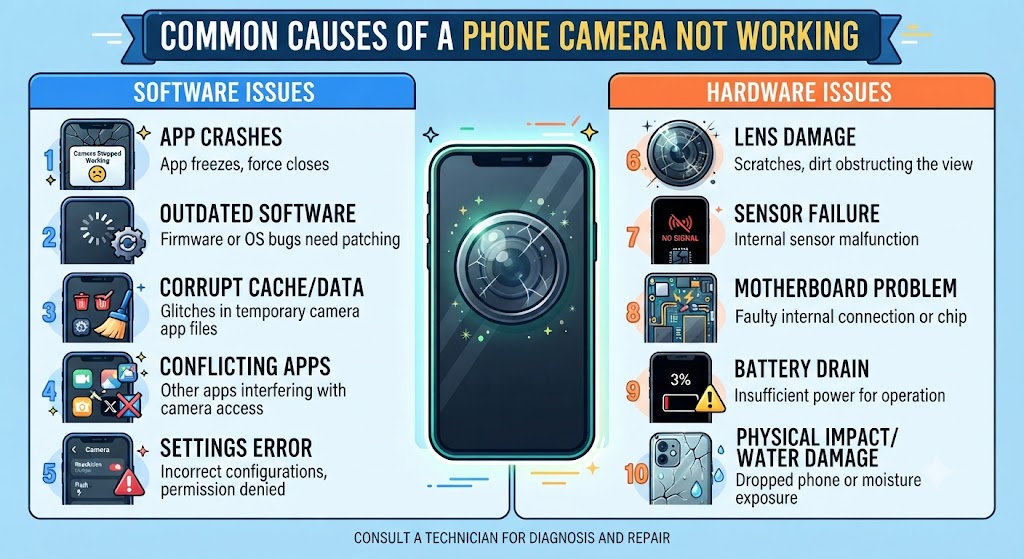
If your phone camera isn’t working, start by restarting your device, force closing the Camera app, checking camera permissions, updating your software, cleaning the camera lens, and removing any third-party camera apps that may be causing conflicts. If the camera still shows a black screen, crashes repeatedly, won’t focus, or displays a “Camera Failed” error after these steps, the issue is likely hardware-related and should be diagnosed by a professional repair technician.

Introduction

A phone camera that suddenly stops working can be incredibly frustrating, especially when you rely on it for everyday tasks like taking photos, scanning QR codes, joining video calls, or capturing important moments. Whether you’re using an iPhone, Samsung Galaxy, Google Pixel, Huawei, or another Android device, camera problems can happen unexpectedly and range from minor software glitches to more serious hardware faults.

The good news is that not every camera issue requires a costly repair. In many cases, simple troubleshooting steps – such as restarting your phone, checking app permissions, updating your software, or clearing the camera app’s cache – can restore normal functionality within minutes. However, if your camera displays a black screen, won’t focus, keeps crashing, or stopped working after a drop or water exposure, the problem may require professional attention.

In this comprehensive UK guide, we’ll explain the most common reasons why a phone camera stops working, walk you through proven step-by-step fixes, and help you determine when it’s time to seek expert repair. By the end, you’ll have a clear understanding of how to diagnose the issue and get your phone camera working again as quickly as possible.

Why Is My Phone Camera Not Working?

Smartphone cameras have become one of the most important features of modern devices. Whether you’re capturing family moments, scanning QR codes, attending video meetings, or creating social media content, a faulty camera can quickly become frustrating.

Fortunately, not every camera problem means your phone needs an expensive repair. Many issues are caused by temporary software glitches, outdated operating systems, insufficient storage, incorrect app permissions, or conflicts created by third-party applications. In many cases, these problems can be fixed in just a few minutes without any technical knowledge.

However, cameras can also fail because of physical damage. A dropped phone, water exposure, internal connector damage, or a defective camera module may require professional repair to restore full functionality.

Understanding the difference between a software issue and a hardware fault is the first step towards fixing your device efficiently and avoiding unnecessary costs.

Common Signs Your Phone Camera Has a Problem

Camera issues don’t always look the same. Some problems appear suddenly, while others develop gradually over time. Here are the most common symptoms users experience:

  • Camera app won’t open.
  • Camera app keeps crashing.
  • Black screen when opening the camera.
  • “Camera Failed” or “Cannot Connect to Camera” error.
  • Rear camera isn’t working.
  • Front camera isn’t working.
  • Photos appear blurry.
  • Camera refuses to focus.
  • Flash isn’t working correctly.
  • Camera freezes during use.
  • Phone becomes hot whenever the camera is opened.
  • Video recording suddenly stops.
  • Camera shakes or vibrates continuously.
  • Lens appears foggy after water exposure.
  • Camera quality has become noticeably worse.

Some of these symptoms indicate software problems, while others point towards damaged hardware that requires professional diagnosis.

What Causes a Phone Camera to Stop Working?

There are several reasons why your phone camera might suddenly stop working. In many cases, the problem is something simple, such as a software glitch or an app conflict, which can often be fixed at home in just a few minutes. However, if your phone has recently been dropped, exposed to water, or suffered physical damage, the issue could be related to the camera hardware itself.

Before attempting any repairs, it’s helpful to understand what’s causing the problem. Identifying the root cause will save you time and help you avoid unnecessary troubleshooting.

Here are some of the most common reasons a smartphone camera stops working:

Possible CauseType of IssueCan You Fix It Yourself?
Camera app glitchSoftwareUsually
Outdated operating systemSoftwareYes
Corrupted camera app cacheSoftwareYes
Camera permissions disabledSoftwareYes
Insufficient or full storageSoftwareYes
Conflict with a third-party camera appSoftwareYes
Water or liquid damageHardwareUsually not
Phone dropped or suffered impact damageHardwareUsually not
Loose or damaged camera connectorHardwareNo
Faulty camera moduleHardwareNo
Motherboard or internal circuit damageHardwareNo

Expert Tip: If your camera stopped working immediately after your phone was dropped or came into contact with water, there’s a strong chance the problem is hardware-related. While basic troubleshooting is still worth trying, repeated restarts or reinstalling apps won’t fix physical damage. In these situations, it’s best to have the device professionally diagnosed to prevent further issues.

15 Proven Ways to Fix a Phone Camera That Isn’t Working

Before assuming your phone needs a repair, work through the troubleshooting steps below. These solutions resolve the majority of software-related camera problems and can often restore normal functionality within minutes.

1. Restart Your Phone

It may sound simple, but restarting your device is often the quickest and most effective fix for temporary camera issues.

Modern smartphones run dozens of background processes simultaneously. Occasionally, the Camera app can freeze due to a temporary software conflict or memory error. A restart clears active processes, refreshes system resources, and allows the camera service to load correctly.

How to restart your phone

Android

  1. Press and hold the Power button.
  2. Tap Restart.
  3. Wait for the device to reboot.
  4. Open the Camera app again.

iPhone

  1. Press and hold the Side button with either Volume button.
  2. Slide to power off.
  3. Wait around 30 seconds.
  4. Turn the phone back on and test the camera.

If the camera works normally after restarting, the problem was most likely a temporary software glitch rather than a hardware failure.

2. Force Close the Camera App

Sometimes the Camera app remains partially active in the background even after you’ve closed it. This can prevent it from launching properly the next time you open it.

Force closing the app completely resets its current session without affecting your photos or settings.

Android

  • Open Settings
  • Tap Apps
  • Select Camera
  • Tap Force Stop
  • Reopen the Camera app

iPhone

  • Swipe up from the bottom (or double-press the Home button on older models).
  • Swipe the Camera app away.
  • Launch the Camera app again.

This simple step often resolves issues such as:

  • Camera freezing
  • Camera opening to a black screen
  • App crashing immediately after launch
  • Camera becoming unresponsive

3. Check Camera Permissions

One of the most overlooked reasons why a phone camera stops working is that camera permissions have been accidentally disabled.

Many apps – including WhatsApp, Instagram, Snapchat, TikTok, Zoom, Microsoft Teams, and even the default Camera app – require permission to access your phone’s camera.

If these permissions are turned off, the camera may fail to launch or display a blank screen.

On Android

  • Open Settings
  • Go to Apps
  • Select Camera
  • Tap Permissions
  • Ensure Camera permission is enabled

On iPhone

  • Open Settings
  • Scroll down to the affected app
  • Tap Camera
  • Toggle camera access on

After enabling permissions, restart the app and check whether the camera functions normally.

4. Clear the Camera App Cache (Android)

Over time, the Camera app stores temporary files, known as cache, to help it load faster and improve performance. However, these files can sometimes become corrupted, leading to problems such as camera crashes, freezing, or a black screen. Clearing the cache is a safe troubleshooting step that often resolves these issues without deleting your photos or videos.

How to Clear the Camera App Cache

  1. Open Settings.
  2. Tap Apps.
  3. Select Camera.
  4. Tap Storage.
  5. Choose Clear Cache.

Once you’ve cleared the cache, reopen the Camera app and check whether the issue has been resolved.

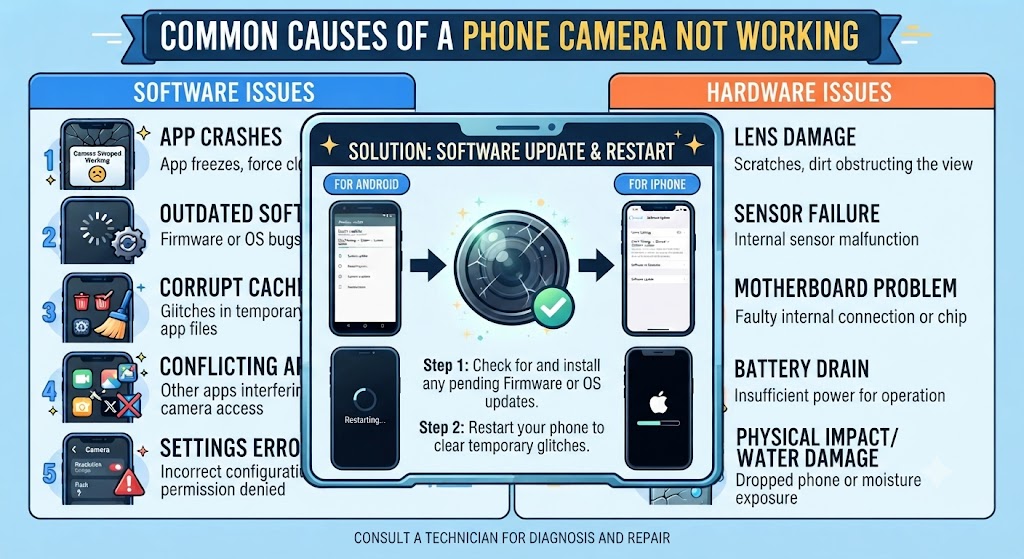
5. Update Your Phone’s Software

Software updates don’t just introduce new features – they also fix bugs, improve system stability, and resolve compatibility issues that may affect your phone’s camera. If you’re running an outdated version of Android or iOS, installing the latest update could restore your camera’s functionality.

On Android

  1. Open Settings.
  2. Tap Software Update.
  3. Select Download and Install.

On iPhone

  1. Open Settings.
  2. Tap General.
  3. Select Software Update.

After installing the update, restart your phone and test the Camera app again.

6. Update the Camera App

If you’re using a third-party camera application or your phone’s camera app receives updates through the app store, keeping it up to date is essential. Developers regularly release updates to fix bugs, improve compatibility, and enhance overall performance.

Visit the Google Play Store or Apple App Store, search for your Camera app, and install any available updates before testing the camera again.

7. Check Your Phone Storage

A phone with very little available storage may struggle to save photos, record videos, or even launch the Camera app properly. When storage is almost full, your device can experience performance issues that affect multiple apps, including the camera.

Check Available Storage

Android

  • Settings → Storage

iPhone

  • Settings → General → iPhone Storage

Delete unnecessary apps, duplicate photos, old videos, or downloaded files to free up space.

If you also notice that your phone becomes hot or the battery drains unusually fast while using the camera, the problem may not be limited to the camera itself. 

8. Remove Third-Party Camera Apps

Some third-party camera apps, beauty filters, or QR scanner applications can interfere with your phone’s default Camera app. If the problem started after installing a new app, it’s worth checking whether that app is causing a conflict.

Uninstall any recently installed camera-related apps, restart your phone, and then open the default Camera app to see if the issue has been resolved.

9. Restart Your Phone in Safe Mode (Android)

Safe Mode temporarily disables all third-party applications, allowing you to determine whether another app is interfering with the Camera app. If your camera works normally in Safe Mode, it’s a strong indication that a recently installed app is causing the problem.

How to Enter Safe Mode

  1. Press and hold the Power button.
  2. Press and hold Power Off.
  3. Tap Safe Mode.

Open the Camera app while in Safe Mode and check if it functions correctly.

10. Remove Your Phone Case or Lens Protector

Phone cases and camera lens protectors are designed to protect your device, but if they’re damaged, poorly fitted, or misaligned, they can affect photo quality and autofocus performance. Dust trapped around the camera lens can also interfere with image clarity.

Remove both the case and any lens protector, clean the camera area, and test the camera again.

Physical damage around the camera housing can impact image quality and autofocus performance. If your device has a cracked rear panel, our “How to Fix a Cracked Phone Back Glass?” guide explains how this type of damage can affect your phone and when a repair is recommended.

11. Clean the Camera Lens

A dirty camera lens is one of the simplest – and most commonly overlooked – causes of blurry photos. Fingerprints, dust, and pocket lint can all reduce image quality, making your camera appear faulty when it simply needs cleaning.

Use a clean microfibre cloth and gently wipe the lens in circular motions. Avoid using tissues, abrasive materials, or household cleaning products, as these may scratch the lens coating.

12. Test Both Front and Rear Cameras

Testing both cameras helps you determine whether the problem affects the entire camera system or just one camera module. This information can also help identify whether the issue is software-related or caused by damaged hardware.

Switch between the front and rear cameras using the Camera app.

  • If only one camera doesn’t work, the camera module may be faulty.
  • If both cameras fail, the issue is more likely related to software or the motherboard.

13. Reset Camera Settings

Incorrect camera settings can sometimes cause unexpected issues, especially after software updates or accidental configuration changes. Resetting the Camera app restores all settings to their default values without deleting your photos or videos.

Open the Camera Settings menu and select Reset Settings if the option is available on your device.

14. Reset All Phone Settings

If you’ve tried the previous troubleshooting steps and your phone camera still isn’t working, resetting your phone’s settings may help. Sometimes, incorrect system configurations, disabled permissions, or changes made after a software update can interfere with the Camera app. Resetting your settings restores these system preferences to their default values without deleting your personal data, such as photos, videos, contacts, or apps.

Keep in mind that this process will reset settings like Wi-Fi passwords, Bluetooth connections, privacy permissions, keyboard preferences, and network settings, so you’ll need to configure them again afterwards.

Once the reset is complete, restart your phone and open the Camera app to check whether the issue has been resolved. If the camera still doesn’t work, the problem is more likely to be hardware-related rather than caused by your phone’s settings.

15. Perform a Factory Reset (Last Resort)

A factory reset should only be used as a last resort after you’ve tried all other troubleshooting methods and your phone camera still isn’t working. This process completely erases your device and reinstalls the operating system, making it one of the most effective ways to rule out serious software problems that may be causing the camera to crash, show a black screen, freeze, or fail to open.

Before performing a factory reset, back up all important data, including photos, videos, contacts, messages, and documents. Once the reset begins, everything stored on the phone will be removed and cannot be recovered unless it has been backed up.

After the reset is complete, set up the phone as new and test the Camera app before restoring your backup. If the camera works normally, the issue was likely caused by corrupted software or system settings. However, if the camera still doesn’t work after a factory reset, the problem is likely hardware-related, such as a faulty camera module, damaged connector, or motherboard issue, and the device should be professionally diagnosed by a qualified repair technician.

Android Camera Not Working

If your Android phone camera isn’t working, the problem could be related to software, app conflicts, corrupted cache files, or, in some cases, faulty hardware. Brands such as SamsungGoogle PixelHuawei, OnePlus, Xiaomi, Oppo, and Motorola may experience camera issues for different reasons, but the troubleshooting process is generally the same.

Start by restarting your phone, clearing the Camera app cache, checking for software updates, and ensuring the Camera app has the necessary permissions. If the issue persists, try opening the camera in Safe Mode to determine whether a third-party app is causing the problem.

If your Android phone still displays a black screen or shows a “Camera Failed” error after completing these steps, the issue may require professional diagnosis.

iPhone Camera Not Working

If your iPhone camera is not working, there’s no need to assume the camera module has failed straight away. In many cases, the problem is caused by a temporary iOS bug, incorrect camera settings, outdated software, or an app conflict that can be resolved without replacing any hardware. Whether you’re using an iPhone 13, iPhone 14, iPhone 15, or a newer model, many camera-related issues can be fixed by following a few simple troubleshooting steps.

Start by closing the Camera app completely and restarting your iPhone. Next, check whether a new iOS update is available, as Apple frequently releases software updates to fix camera bugs, improve stability, and enhance overall device performance. You should also confirm that camera permissions are enabled for any apps that need access to the camera, such as FaceTime, WhatsApp, Instagram, Snapchat, or Zoom.

It’s also a good idea to test both the front (selfie) camera and the rear camera separately. If only one camera isn’t working while the other functions normally, the issue may be limited to a specific camera module. However, if neither camera opens or both display a black screen, the problem could be related to iOS, system software, or internal hardware.

If your iPhone camera stopped working after being dropped or exposed to water, carefully inspect the area around the rear camera for cracks, dents, or signs of impact damage. Even if the back glass appears only slightly damaged, the force of the impact may have affected the camera module, image stabilisation system, or internal connectors.

Samsung Camera Not Working

If your Samsung phone camera is not working, you’re not alone. Many Samsung Galaxy users occasionally experience issues such as a black camera screen, the “Camera Failed” error, blurry photos, or the Camera app crashing unexpectedly. These problems can affect popular models, including the Galaxy S series, Galaxy A series, Galaxy Z Fold, and Galaxy Z Flip devices.

In many cases, the issue is caused by a temporary software glitch, corrupted camera cache, outdated One UI software, or a conflict with another app. Start by restarting your Samsung phone, clearing the Camera app cache, checking for the latest software update, and ensuring the Camera app has all the required permissions.

If the problem continues, try opening your phone in Safe Mode. If the camera works normally in Safe Mode, a third-party application is likely interfering with the Camera app. You should also check whether your phone has sufficient storage available, as low storage space can sometimes prevent the camera from functioning correctly.

If your Samsung phone was recently dropped or exposed to water, inspect the camera housing for any visible signs of damage. Physical impact can damage the camera module, image stabilisation system, or internal connectors, leading to issues that software troubleshooting cannot resolve.

If your Samsung camera still isn’t working after trying these steps, a professional diagnosis is recommended. Our technicians can identify whether the issue is caused by a faulty camera module, damaged flex cable, charging board, or motherboard, ensuring the correct repair is carried out.

Why Does My Phone Camera Show a Black Screen?

A black screen is one of the most common camera problems reported by smartphone users. Instead of displaying the camera preview, the Camera app opens to a completely black screen or freezes indefinitely.

This issue is usually caused by one of the following:

  • A temporary software glitch
  • Corrupted Camera app data
  • Outdated system software
  • A third-party app conflict
  • A failed camera module
  • Internal hardware damage

How to Fix a Black Camera Screen

  • Restart your phone.
  • Force close the Camera app.
  • Clear the Camera app cache (Android).
  • Update your operating system.
  • Remove recently installed camera apps.
  • Restart in Safe Mode (Android).
  • Test both front and rear cameras.

If none of these solutions work, the camera hardware may need replacing.

Why Does My Camera App Keep Crashing?

If your Camera app opens and immediately closes, freezes while taking photos, or crashes every time you launch it, the problem is often software-related. Corrupted app data, low storage space, outdated software, or conflicts with other applications can all cause the Camera app to become unstable.

Start by updating your phone and clearing the Camera app cache. If the crashes continue, uninstall any recently installed camera or photo editing apps and restart your device.

If your phone has also become noticeably slower or begins overheating while using the camera, it may indicate a wider system issue. In that case, you may also find our Why Is My Phone Overheating? Causes & Fixes Explained guide helpful for identifying the underlying cause.

Why Is My Phone Camera Blurry?

Blurry photos don’t always mean your camera is damaged. In many cases, poor image quality is caused by a dirty lens, an incorrectly fitted lens protector, or the camera struggling to focus properly.

Start by cleaning the lens with a clean microfibre cloth and removing any protective film or damaged lens protector. If photos remain blurry after cleaning, test the camera in good lighting and compare both the front and rear cameras.

If only one camera produces blurry images, the camera module may have been damaged by a previous drop or impact.

Why Won’t My Phone Camera Focus?

If your camera struggles to focus or constantly switches between blurry and sharp images, the issue may be caused by dirt on the lens, a faulty autofocus system, or physical damage to the camera module.

Try these quick fixes:

  • Clean the camera lens.
  • Remove the phone case or lens protector.
  • Tap the screen to manually focus.
  • Move closer or further away from the subject.
  • Restart the Camera app.
  • Test the camera in bright lighting.

If autofocus still doesn’t work after trying these steps, the camera module may need replacing.

What Does “Camera Failed” Mean?

The “Camera Failed” error is commonly seen on Android devices, particularly Samsung phones, although it can appear on other brands as well. This message usually indicates that the Camera app was unable to communicate with the camera hardware or complete the startup process.

Possible causes include:

  • Corrupted Camera app files
  • Software bugs
  • System update issues
  • Faulty camera hardware
  • Loose internal camera connector
  • Motherboard faults

If the error continues after restarting your phone, clearing the cache, and installing the latest software update, it’s likely that the problem requires professional repair.

Is It a Software Problem or a Hardware Fault?

One of the most common questions people ask is whether their phone camera issue is caused by software or damaged hardware. Understanding the difference can save you time and help you decide whether you can fix the problem yourself or need professional assistance.

Signs of a Software IssueSigns of a Hardware Issue
Camera works after restartingCamera stopped working after a drop
Camera app crashes occasionallyBlack screen all the time
Issue started after a software updateCracked camera glass or back panel
Camera works in Safe ModeCamera rattles or makes unusual noises
Clearing cache fixes the issueAutofocus never works
Factory reset resolves the problemCamera still doesn’t work after a factory reset

If your troubleshooting points towards a hardware fault, continuing to repeat software fixes is unlikely to solve the problem. At that stage, a professional diagnosis is the safest and most effective option.

Average Phone Camera Repair Costs in the UK

If your phone camera issue turns out to be hardware-related, the repair cost will depend on your device model and the component that needs replacing. Premium smartphones such as the latest iPhones and Samsung Galaxy models generally cost more to repair than older or mid-range devices. The prices below provide a general estimate of what you can expect to pay for common phone camera repairs in the UK.

Repair TypeAverage UK Price
Camera Glass Replacement£29-£69
Rear Camera Module Replacement£59-£149
Front (Selfie) Camera Replacement£49-£119
Camera Flex Cable Repair£39-£89
Camera Connector Repair£49-£99
Motherboard Camera Circuit Repair£89-£249
Water Damage Camera Repair£69-£199
Professional Camera DiagnosticFree-£30

Please Note: These prices are approximate and may vary depending on your phone model, the extent of the damage, and the replacement parts required. At iExpert Repairs, every device undergoes a full diagnostic assessment before any repair is carried out, ensuring you receive an accurate quotation with no hidden costs.

FAQs About Phone Camera Problems

1. Why is my phone camera not working?

Your phone camera may stop working due to software glitches, outdated operating system, corrupted app cache, disabled camera permissions, insufficient storage, or physical damage caused by drops or water exposure. Identifying the underlying cause is the first step towards fixing the problem.

2. How do I fix a phone camera that won’t open?

Start by restarting your phone, force closing the Camera app, checking camera permissions, clearing the app cache (Android), updating your software, and freeing up storage space. If the camera still won’t open, the issue may require professional diagnosis.

3. Why is my phone camera showing a black screen?

A black camera screen is commonly caused by a software bug, corrupted app data, outdated software, or a faulty camera module. If basic troubleshooting doesn’t resolve the issue, the problem may be hardware-related.

4. Why does my Camera app keep crashing?

The Camera app may crash because of corrupted cache files, insufficient storage, outdated software, or conflicts with third-party apps. Updating your device and clearing the Camera app cache usually resolves software-related crashes.

5. How do I fix a blurry phone camera?

Clean the camera lens with a microfibre cloth, remove any damaged lens protector, and test the camera in good lighting. If photos remain blurry after cleaning, the autofocus system or camera module may require repair.

6. Why won’t my phone camera focus?

Autofocus problems can be caused by dirt on the lens, a damaged camera module, software glitches, or an obstructed lens protector. Cleaning the lens and restarting the Camera app are good places to start.

7. What does the “Camera Failed” error mean?

The “Camera Failed” error usually means your phone cannot communicate with the camera hardware. It may be caused by corrupted software, failed updates, a damaged camera module, or an internal hardware fault.

8. Why is my Android camera not working?

An Android camera may stop working because of corrupted cache files, outdated software, disabled permissions, third-party app conflicts, or hardware damage. Clearing the Camera app cache and checking for software updates are recommended first steps.

9. Why is my iPhone camera not working?

An iPhone camera can stop working due to iOS bugs, incorrect settings, app conflicts, or physical damage. Restarting the device, updating iOS, and testing both the front and rear cameras can help identify the cause.

10. Why is my Samsung camera not working?

Samsung camera problems are often caused by software issues, corrupted cache files, outdated One UI software, or physical damage. Restarting the device, clearing the Camera app cache, and installing the latest software updates can often resolve the issue.

11. Can a software update fix camera problems?

Yes. Software updates often include bug fixes, security improvements, and camera performance enhancements. Installing the latest Android or iOS update can resolve many camera-related issues.

12. Can low storage stop my phone camera from working?

Yes. If your phone’s storage is almost full, the Camera app may struggle to save photos or videos, and in some cases it may fail to open or crash unexpectedly.

13. Can water damage affect my phone camera?

Yes. Even if the screen looks fine, a hard impact can damage the camera module, autofocus system, image stabilisation components, or internal connectors, causing the camera to stop working.

15. Should I perform a factory reset if my camera isn’t working?

A factory reset should only be considered after you’ve tried all other troubleshooting methods. Always back up your data first, as the process will erase everything stored on your phone.

16. How do I know if my phone camera has a hardware problem?

If the camera stopped working after a drop, water damage, or continues to show a black screen or “Camera Failed” error even after a factory reset, the issue is likely hardware-related.

17. Is it safe to clear the Camera app cache?

Yes. Clearing the Camera app cache only removes temporary files and does not delete your photos, videos, or personal data. It’s one of the safest troubleshooting steps for Android devices.

18. When should I seek professional phone camera repair?

If you’ve completed all recommended troubleshooting steps and your camera still doesn’t work, or if your phone has suffered physical or liquid damage, it’s best to have it professionally diagnosed to prevent further damage.

19. How long does a phone camera repair usually take?

Most camera repairs can be completed within the same day or within 24-48 hours, depending on your phone model and whether replacement parts are readily available.

20. Can iExpert Repairs fix phone camera problems?

Yes. At iExpert Repairs, our certified technicians diagnose and repair a wide range of smartphone camera issues, including faulty camera modules, autofocus problems, black screen errors, water damage, and software-related faults. We repair major brands including Apple, Samsung, Google Pixel, Huawei, OnePlus, and many other Android devices using high-quality replacement parts, with every repair backed by a 12-month warranty.

Why Choose iExpert Repairs for Phone Camera Repairs?

Choosing the right repair provider is just as important as identifying the problem itself. At iExpert Repairs, we combine experienced technicians, premium-quality replacement parts, and a customer-focused service to deliver reliable repairs across the UK.

Here’s why customers trust us:

  • Over 10 years of smartphone repair experience.
  • Certified technicians trained to repair all major phone brands.
  • High-quality replacement parts.
  • Comprehensive diagnostics before every repair.
  • Most repairs completed with a fast turnaround.
  • 12-month warranty on repairs.
  • Nationwide UK mail-in repair service.
  • Transparent pricing with no hidden costs.

Whether you own an iPhoneSamsung GalaxyGoogle Pixel, Huawei, OnePlus, or another Android device, our team has the expertise to diagnose and repair a wide range of camera-related issues.

Conclusion

A phone camera that isn’t working doesn’t always mean an expensive repair is necessary. In many cases, the problem can be resolved by restarting your device, clearing the Camera app cache, updating your software, checking permissions, or freeing up storage space. These simple troubleshooting steps often fix temporary software issues and restore normal camera functionality.

However, if your phone camera stopped working after being dropped, exposed to water, or continues to display a black screen, blurry images, autofocus problems, or a “Camera Failed” error even after completing all the recommended fixes, the issue is likely hardware-related. In these situations, professional diagnosis is the safest and most effective solution.

By following the troubleshooting methods outlined in this guide, you can identify whether the problem is software or hardware-related and take the appropriate next step. Acting quickly can also help prevent further damage and increase the chances of a successful repair.

Back to posts

Why Is My Phone Battery Draining So Fast? Causes & Fixes

Introduction

If your phone battery is draining faster than usual, you’re not alone. Rapid battery drain is one of the most common smartphone problems affecting both iPhone and Android users across the UK. Whether your battery drops from 100% to 20% within a few hours, loses charge overnight, or your phone becomes unusually hot during normal use, these symptoms often indicate an underlying software, hardware, or battery health issue. Common causes include background apps, high screen brightness, poor mobile signal, 5G connectivity, location services, software updates, overheating, or a worn-out lithium-ion battery.

At iExpert Repairs, our certified technicians diagnose and repair battery-related faults every day on Apple, Samsung, Google Pixel, Huawei, OnePlus, and many other devices. Drawing on real repair experience, this guide explains why your phone battery drains so fast, how to identify the exact cause, proven battery-saving tips, and when a professional battery replacement is the most reliable and cost-effective solution. By the end, you’ll know how to improve battery life and keep your phone performing at its best.

Why Is My Phone Battery Draining So Fast?

If your phone battery suddenly starts draining much faster than usual, you’re not alone. Battery drain is one of the most common smartphone problems affecting both Android devices and iPhones.

In many cases, the cause is relatively simple. A background app may be consuming excessive power, your screen brightness could be set too high, or recent software updates may have introduced temporary battery optimisation issues. However, rapid battery loss can also indicate a worn-out battery, charging problems, overheating, water damage, or even hardware failure.

The good news is that many battery problems can be resolved without replacing your device.

In this guide, you’ll learn:

  • Why your phone battery drains so quickly
  • The most common battery-draining habits
  • How to identify software and hardware issues
  • Step-by-step ways to improve battery life
  • When replacing the battery is the best solution
  • When to seek professional repair

By the end of this guide, you’ll know exactly why your battery is draining and what you can do to fix it.

Quick Answer

If your phone battery is draining unusually fast, the most common reasons include:

  • Battery health has deteriorated with age
  • Screen brightness is too high
  • Background apps continue running
  • Poor mobile signal
  • Location services constantly active
  • 5G or mobile data usage
  • High-performance gaming
  • Camera and video recording
  • Software bugs after updates
  • Phone overheating
  • Charging issues
  • Faulty battery hardware

If your battery drains from 100% to below 20% within only a few hours of normal use, even after enabling battery-saving settings, the battery itself may have reached the end of its lifespan.

Likewise, if your device struggles to charge or loses power even while plugged in, our Why Is My Phone Not Charging? Guide explains how charging faults can contribute to battery problems.

Common Signs Your Phone Battery Is Draining Too Fast

Not every phone loses battery at the same rate. Heavy users naturally consume more power than occasional users, but there are clear warning signs that indicate abnormal battery drain.

Common symptoms include:

  • Battery drops several percentage points within minutes.
  • Your phone requires charging more than once per day.
  • The device becomes unusually warm during light use.
  • Battery percentage changes suddenly.
  • The phone switches off before reaching 0%.
  • Charging takes much longer than before.
  • Battery drains overnight despite not being used.
  • Battery saver no longer improves battery life.
  • The phone loses power while idle.

If you’re experiencing several of these symptoms together, the issue is likely more than normal battery ageing.

What Causes Phone Batteries to Drain So Quickly?

Modern smartphones are incredibly powerful, but that power comes with increased energy demands. Fast processors, high-refresh-rate displays, AI-powered cameras, 5G connectivity, and constantly syncing apps all place additional strain on the battery.

Battery drain usually falls into one of three categories:

1. Software Issues

Apps running in the background, operating system bugs, outdated software, and excessive syncing can consume significant power without you noticing.

2. User Settings

High brightness, Always-On Display, GPS, Bluetooth, mobile hotspot, and continuous notifications all increase battery usage.

3. Hardware Problems

An ageing lithium-ion battery, charging port faults, overheating, water damage, or damaged internal components may prevent the battery from holding charge effectively.

Understanding which category your issue falls into makes troubleshooting much easier.

1. Your Battery Has Naturally Worn Out

The most common reason for rapid battery drain is simply battery ageing. Smartphones use rechargeable lithium-ion batteries that gradually lose their ability to hold charge over time. Every complete charge cycle causes a small amount of wear, and after hundreds of cycles, the battery’s capacity decreases noticeably.

Most smartphone batteries are designed to retain around 80% of their original capacity after approximately 500 complete charge cycles, although actual performance varies depending on usage habits and charging conditions.

Signs of battery wear include:

  • Battery percentage drops rapidly
  • Frequent charging throughout the day
  • Unexpected shutdowns
  • Slow charging
  • Reduced screen-on time
  • Battery becoming warm more often

If your phone is more than two to three years old and you’ve noticed steadily worsening battery life, battery ageing is likely the primary cause.

2. Too Many Apps Are Running in the Background

Many apps continue working even after you’ve closed them. They may:

  • Refresh content
  • Check emails
  • Update your location
  • Upload photos
  • Sync cloud storage
  • Receive notifications
  • Download updates

Popular battery-intensive apps include:

  • Social media platforms
  • Navigation apps
  • Fitness trackers
  • Streaming services
  • Video calling apps
  • Messaging applications
  • Cloud backup services

Although each app may only use a small amount of power, several apps running together can significantly reduce battery life throughout the day.

Checking your battery usage statistics in Settings can quickly reveal which apps are consuming the most power.

3. Screen Brightness Is Too High

Your display is usually the single biggest consumer of battery power. Keeping brightness at maximum throughout the day dramatically increases energy consumption, particularly on devices with large OLED or AMOLED displays.

Other display features that can contribute to battery drain include:

  • High refresh rate (120Hz)
  • Always-On Display
  • Long screen timeout
  • HDR video playback
  • Live wallpapers
  • Maximum resolution settings

Reducing brightness slightly or enabling Adaptive Brightness can noticeably extend battery life without affecting everyday usability.

4. Poor Mobile Signal Constantly Drains the Battery

Many people overlook weak network coverage as a major cause of battery drain. When your phone struggles to maintain a connection, it continuously searches for stronger mobile towers. This process forces the modem to work harder, increasing power consumption.

You may notice this when:

  • Travelling by train
  • Working in underground offices
  • Visiting rural areas
  • Entering buildings with thick concrete walls
  • Staying in locations with inconsistent 4G or 5G coverage

Switching to Wi-Fi when available or enabling Airplane Mode in areas with no signal can help conserve battery life.

5. Location Services (GPS) Running All the Time

Location Services are incredibly useful for navigation, food delivery, ride-sharing apps, weather forecasts, and finding nearby places. However, they are also one of the biggest hidden causes of battery drain.

Many apps request location access even when you’re not actively using them. If dozens of apps continuously check your location throughout the day, your phone’s GPS chip never gets much opportunity to rest.

Common apps that frequently use GPS include:

  • Google Maps
  • Apple Maps
  • Uber
  • Deliveroo
  • Just Eat
  • Fitness tracking apps
  • Weather apps
  • Social media platforms
  • Camera apps with location tagging

How to reduce battery drain from GPS

  • Allow location access only while using the app
  • Turn off Precise Location for apps that don’t need it
  • Disable location permissions for unused apps
  • Switch off location services when travelling isn’t required

These small adjustments often improve battery life without affecting your everyday experience.

6. 5G Connectivity Can Use More Power

While 5G offers impressive download speeds and lower latency, it can consume more battery than 4G-particularly in areas where coverage is inconsistent.

If your phone constantly switches between 5G and 4G networks, the modem works harder to maintain a stable connection, leading to increased power consumption.

This is especially noticeable when:

  • Travelling by car or train
  • Working in buildings with weak 5G reception
  • Living in areas where 5G coverage is still expanding

What you can do

If battery life is more important than maximum internet speed, consider switching your preferred network mode to 4G/LTE when high-speed connectivity isn’t essential.

Many users notice a meaningful improvement in battery performance after making this simple change.

7. Software Updates May Temporarily Increase Battery Usage

Many people assume a software update has “ruined” their battery. In reality, this is often only temporary.

After installing a major Android or iOS update, your phone may spend several hours – or even a couple of days – performing background tasks such as:

  • Re-indexing files
  • Optimising apps
  • Syncing photos
  • Rebuilding search databases
  • Updating cloud backups

During this period, increased battery usage is completely normal. However, if poor battery life continues for more than a week after updating, there could be:

  • A software bug
  • An incompatible app
  • Corrupted system files
  • Battery health issues

Installing future software patches usually resolves known battery optimisation problems.

8. Your Phone May Be Overheating

Heat is one of the biggest enemies of lithium-ion batteries. When a smartphone becomes too hot, it not only drains power more quickly but can also permanently reduce the battery’s lifespan.

Common causes of overheating include:

  • Gaming for long periods
  • Recording 4K or 8K video
  • Charging while using the phone
  • Fast charging
  • Direct sunlight
  • Poor ventilation
  • Background apps consuming excessive CPU resources

If your phone regularly feels hot during normal use, don’t ignore the warning signs.

Overheating and battery drain often occur together because higher temperatures force the processor and battery management system to work harder.

9. Bluetooth, Wi-Fi and NFC Left Enabled

Wireless features consume relatively little power individually, but together they can gradually reduce battery life throughout the day. If your phone is constantly searching for:

  • Bluetooth devices
  • Wi-Fi networks
  • Smart watches
  • Wireless earbuds
  • NFC payment terminals
  • Smart home accessories

…the battery drains faster than necessary.

Battery-saving tips

Switch off wireless features when you aren’t using them, particularly:

  • Bluetooth
  • NFC
  • Personal Hotspot
  • Nearby Device Scanning
  • Wi-Fi scanning

Modern smartphones manage these features efficiently, but disabling unnecessary connections can still provide noticeable battery improvements.

10. Push Notifications and Constant Syncing

Every notification wakes your phone. Whether it’s an email, social media alert, banking notification or messaging app, each notification briefly activates:

  • The processor
  • The screen
  • Internet connectivity
  • Background services

Multiply this by hundreds of notifications every day, and the battery impact becomes significant. Cloud services also sync continuously, including:

  • Google Drive
  • iCloud
  • OneDrive
  • Dropbox
  • Google Photos

Reducing unnecessary notifications and increasing sync intervals can noticeably extend battery life.

11. Gaming and High-Performance Apps

Mobile games are among the most demanding applications your smartphone can run. Games require:

  • Maximum processor performance
  • Powerful graphics processing
  • High screen brightness
  • Fast refresh rates
  • Constant internet connectivity
  • Audio processing
  • Continuous touch input

The same applies to video editing apps, augmented reality applications, and professional photography software. If your battery drains quickly only while gaming, your battery may actually be functioning normally.

To reduce power consumption:

  • Lower graphics settings
  • Reduce frame rate
  • Limit screen brightness
  • Close background apps before playing
  • Avoid charging while gaming, as this increases heat generation.

12. Malware or Faulty Apps

Although uncommon, malicious software or poorly optimised apps can significantly reduce battery life. Warning signs include:

  • Battery draining unusually fast overnight
  • Phone becoming hot while idle
  • Unexpected adverts
  • Random app installations
  • Increased mobile data usage
  • Slower overall performance

If you suspect an app is responsible:

  1. Check battery usage statistics.
  2. Uninstall recently downloaded apps.
  3. Update all installed apps.
  4. Run a trusted security scan.
  5. Restart the device.

Removing a single problematic app can often restore normal battery performance.

13. Charging Problems Can Affect Battery Performance

Sometimes the battery isn’t actually the problem. Instead, your phone may not be charging properly. Common causes include:

  • Damaged charging cables
  • Faulty charging adapters
  • Dirty charging ports
  • Loose charging connectors
  • Moisture inside the charging port
  • Internal charging circuit faults

Many users assume their battery is failing when the real issue is incomplete charging.

14. Water Damage Can Cause Battery Drain

Even if your phone appears to work normally after getting wet, internal moisture can continue causing problems long afterwards. Corrosion on internal components may lead to:

  • Increased power consumption
  • Charging faults
  • Random shutdowns
  • Battery overheating
  • Short circuits
  • Component failure

Water damage doesn’t always cause immediate failure. In many cases, symptoms appear days or even weeks later. If your phone has recently been exposed to water, spills or heavy rain, it’s advisable to have it professionally inspected before the damage worsens.

Our “Water Damaged Phone Repair” explains what steps to take immediately and what to avoid.

15. Your Battery May Need Professional Replacement

Sometimes, no amount of troubleshooting can restore a worn-out battery. If you’ve already:

  • Reduced screen brightness
  • Updated your software
  • Closed background apps
  • Checked battery usage
  • Reset settings
  • Replaced your charger

yet your phone still loses charge rapidly, the battery itself may simply have reached the end of its service life.

Professional battery replacement is often far more cost-effective than replacing the entire phone. At iExpert Repairs, our certified technicians replace batteries for:

Every replacement uses high-quality parts and undergoes comprehensive testing to ensure safe charging, reliable performance and long-lasting battery life.

How to Check What’s Draining Your Phone Battery

Before replacing your battery or booking a repair, it’s worth identifying exactly what’s using the most power. Both Android and iPhone devices include built-in battery usage tools that show which apps and system features consume the most energy.

On an iPhone

  1. Open Settings.
  2. Tap Battery.
  3. Scroll down to Battery Usage by App.
  4. Review activity over the last 24 Hours or 10 Days.

Pay attention to apps showing unusually high battery usage, especially if you haven’t used them much.

On an Android Phone

The exact steps vary slightly by manufacturer, but generally:

  1. Open Settings.
  2. Select Battery.
  3. Tap Battery Usage or Battery Activity.
  4. Review which apps and services are using the most power.

Some manufacturers also display background activity, helping you identify apps that continue running when you’re not using them.

How to Fix Fast Battery Drain

If your phone battery isn’t physically damaged, these troubleshooting steps often resolve the problem.

1. Restart Your Phone

A simple restart clears temporary software glitches, stops frozen background processes, and refreshes system memory. If you haven’t restarted your phone for several days, this should always be your first step.

2. Update Your Operating System

Manufacturers regularly release updates that improve battery optimisation, fix software bugs, and enhance overall performance. Keeping your device updated ensures you’re running the latest battery management improvements.

3. Update All Apps

Outdated apps can become incompatible with newer operating systems, causing excessive background activity and unnecessary battery consumption.

Visit the App Store or Google Play Store and install any available updates.

4. Enable Battery Saver Mode

Both Android and iPhone devices include built-in battery-saving features. Battery Saver typically:

  • Reduces background activity
  • Limits visual effects
  • Slows processor performance slightly
  • Delays automatic syncing
  • Restricts unnecessary app refreshes

While performance may be slightly reduced, battery life often improves significantly.

5. Lower Screen Brightness

Your display is usually the largest power consumer. Instead of using maximum brightness all day:

  • Enable Auto Brightness
  • Reduce manual brightness indoors
  • Shorten screen timeout
  • Use Dark Mode where available

OLED displays benefit particularly well from Dark Mode because black pixels consume less power.

6. Close or Restrict Battery-Hungry Apps

If battery usage statistics show one or two apps consuming far more power than expected:

  • Force close the app
  • Disable background activity
  • Remove unnecessary permissions
  • Reinstall the app if problems continue

Apps that constantly refresh data, stream media, or track location are often responsible for excessive battery drain.

7. Reduce Background App Refresh

Many applications continue downloading content even when you’re not actively using them. Disabling background refresh for non-essential apps reduces unnecessary battery consumption.

Consider limiting background activity for:

  • Social media
  • Shopping apps
  • News applications
  • Travel apps
  • Games

Leave background refresh enabled only for apps that genuinely need real-time updates.

8. Turn Off Features You Don’t Need

Many users leave multiple wireless features enabled throughout the day. If you’re not actively using them, consider switching off:

  • Bluetooth
  • NFC
  • Mobile Hotspot
  • AirDrop (when not required)
  • Nearby Device Scanning
  • Wi-Fi Calling (where appropriate)

These features use relatively little power individually but can collectively contribute to battery drain.

9. Optimise Charging Habits

Healthy charging habits can significantly extend battery lifespan. Good practices include:

  • Avoid letting the battery regularly reach 0%
  • Try to keep the battery between 20% and 80% when possible
  • Use quality chargers and cables
  • Avoid charging in direct sunlight
  • Remove thick cases if your phone becomes excessively hot while charging

Heat remains one of the biggest contributors to long-term battery degradation.

10. Reset Settings if Necessary

If battery drain started immediately after changing system settings or installing new software, resetting your settings may help. This restores:

  • Network settings
  • Privacy permissions
  • Display preferences
  • Battery optimisation settings

Your personal data remains intact, although you’ll need to reconnect Wi-Fi networks afterwards.

iPhone Battery Drain Fixes

Apple devices include several battery management features that many users overlook. If your iPhone battery drains quickly, try the following:

  • Enable Optimised Battery Charging
  • Disable unnecessary Background App Refresh
  • Turn off Live Activities if not needed
  • Reduce widget usage
  • Limit Location Services
  • Disable Always-On Display (supported models)
  • Check Battery Health under Settings > Battery > Battery Health & Charging

If your battery health is below 80%, Apple generally considers the battery significantly worn, and replacement may noticeably improve performance.

Android Battery Drain Fixes

Android manufacturers offer slightly different battery optimisation features, but most devices include:

  • Adaptive Battery
  • Adaptive Brightness
  • Battery Saver
  • Sleeping Apps
  • Deep Sleeping Apps
  • Performance Profiles

Using these tools helps reduce unnecessary background activity without affecting essential functions.

If you’re using a Samsung, Google Pixel, Huawei, or OnePlus device, battery optimisation settings may be found in different menus, but the principles remain the same.

When Should You Replace Your Phone Battery?

Software fixes won’t solve every battery problem. Battery replacement becomes the better option when you notice:

  • Battery percentage dropping rapidly
  • Unexpected shutdowns
  • Charging several times every day
  • Battery swelling
  • Phone becoming unusually hot
  • Battery health significantly reduced
  • Charging no longer lasting a full day despite light use

Most smartphone batteries naturally lose capacity after several years of daily charging. If these symptoms sound familiar, replacing the battery is usually far more affordable than purchasing a new phone.

Professional Battery Diagnostics at iExpert Repairs

At iExpert Repairs, we don’t simply replace batteries – we first identify the underlying cause of the problem. Our certified technicians perform comprehensive diagnostics to determine whether the issue is related to:

  • Battery health
  • Charging components
  • Software faults
  • Water damage
  • Internal hardware
  • Power management systems

We repair a wide range of devices, including:

Whether you visit us in Essex or use our secure UK-wide mail-in repair service, every repair is carried out using premium-quality replacement parts and backed by a 12-month warranty for added peace of mind.

If the diagnostic shows that only the battery needs replacing, we’ll recommend the most cost-effective solution rather than suggesting unnecessary repairs.

How to Make Your Phone Battery Last Longer

Although all rechargeable batteries degrade over time, good charging and usage habits can significantly slow the process and help you get the most out of your device.

Here are some practical ways to maximise battery life.

1. Keep Your Software Up to Date

Software updates don’t just introduce new features – they also include security patches, bug fixes, and battery optimisation improvements.

Installing updates promptly helps your phone run more efficiently and may resolve unexpected battery drain caused by software issues.

2. Avoid Extreme Temperatures

Lithium-ion batteries perform best at moderate temperatures. To protect your battery:

  • Avoid leaving your phone in direct sunlight.
  • Don’t keep it inside a hot car.
  • Avoid charging under pillows or blankets.
  • Remove thick protective cases if your device becomes excessively warm while charging.

Excessive heat is one of the leading causes of permanent battery degradation.

3. Use High-Quality Chargers

Low-quality or damaged charging accessories can affect charging efficiency and, in some cases, damage internal components. For the safest charging experience:

  • Use the original charger whenever possible.
  • Replace damaged charging cables.
  • Choose reputable accessories that meet your phone manufacturer’s specifications.

4. Reduce Unnecessary Background Activity

The fewer apps working in the background, the less power your phone consumes.

Review installed applications regularly and uninstall anything you no longer use.This not only improves battery life but can also enhance overall performance and free up storage space.

5. Charge Before the Battery Is Completely Empty

Modern lithium-ion batteries generally last longer when they aren’t repeatedly discharged to 0%. Whenever practical, recharge your phone before the battery becomes critically low.

Frequent deep discharges place additional stress on the battery and may shorten its overall lifespan.

Common Myths About Phone Batteries

There is plenty of outdated advice about smartphone batteries. Here are some of the most common myths.

1. Myth: You Must Fully Drain the Battery Before Charging

False.

Modern smartphones use lithium-ion batteries, which do not require complete discharge before recharging. In fact, regularly allowing the battery to reach 0% may contribute to faster wear over time.

2. Myth: Charging Overnight Always Damages the Battery

Mostly False.

Today’s smartphones include intelligent charging systems that stop charging once the battery reaches full capacity.

However, leaving your phone charging in a hot environment every night may still expose it to unnecessary heat, which can affect long-term battery health.

3. Myth: Closing Every App Saves Battery

Not Always.

Force-closing apps repeatedly can sometimes use more power because the system has to reload them each time they’re opened. Instead, close only apps that are frozen, malfunctioning, or consuming excessive battery according to your battery usage statistics.

4. Myth: Fast Charging Always Ruins Batteries

False.

Modern fast-charging technology is designed with multiple safety protections. Using manufacturer-approved or high-quality compatible chargers is generally safe.

The greater concern is excessive heat rather than fast charging itself.

FAQs About Phone Battery Draining Fast

1. Why is my phone battery draining so fast all of a sudden?

Sudden battery drain is usually caused by a recent software update, a power-hungry app running in the background, poor network signal, increased screen brightness, or a battery that’s beginning to wear out. Checking your battery usage settings can help identify the cause.

2. How do I stop my phone battery from draining so quickly?

Reduce screen brightness, enable Battery Saver mode, close unnecessary background apps, disable unused features like Bluetooth and GPS, update your software, and keep your battery between 20% and 80% when possible.

3. Why does my phone battery drain even when I’m not using it?

Your phone continues running background processes such as app syncing, notifications, location tracking, and software updates even when the screen is off. Faulty apps or poor mobile signal can also increase idle battery drain.

4. Is it normal for my phone battery to lose charge overnight?

A small amount of battery drain overnight is normal. However, losing more than 10-15% while the phone is idle may indicate excessive background activity, poor signal strength, or battery health issues.

5. Why is my iPhone battery draining so fast?

An iPhone may experience rapid battery drain due to background app refresh, high screen brightness, location services, software updates, ageing battery health, or intensive apps such as gaming and video streaming.

6. Why is my Android phone battery draining so fast?

Android phones can lose battery quickly because of background apps, Adaptive Display settings, GPS, 5G connectivity, poor signal, outdated software, or a battery that’s reached the end of its lifespan.

7. Does 5G use more battery than 4G?

Yes. In areas with weak or inconsistent 5G coverage, your phone works harder to maintain a connection, which can lead to faster battery drain compared to using a stable 4G network.

8. Can a software update cause battery drain?

Yes. Major Android and iOS updates may temporarily increase battery usage while the system optimises apps and files. If the issue continues for more than a few days, check for further updates or problematic apps.

9. How can I check what’s draining my phone battery?

Go to your phone’s Battery settings to view battery usage by app. This feature shows which apps and system services consume the most power, helping you identify any unusual battery usage.

10. When should I replace my phone battery?

You should consider replacing your battery if it drains rapidly, causes unexpected shutdowns, overheats, swells, or no longer lasts through a normal day despite following battery-saving tips.

Final Thoughts

A phone battery that drains quickly doesn’t always mean it’s time to replace your device. In many cases, simple changes – such as reducing background app activity, lowering screen brightness, updating your software, or adjusting your charging habits – can significantly improve battery life.

However, if you’ve tried the troubleshooting steps in this guide and your battery still loses charge rapidly, the issue may be more than just a software setting. An ageing battery, charging port fault, overheating, or internal hardware problem can all affect your phone’s ability to hold a charge.

Identifying the real cause early can help you avoid unnecessary frustration and prevent more expensive repairs later. If your phone is also experiencing charging issues, overheating, or unexpected shutdowns, it’s worth addressing the problem before it worsens.

Back to posts

How to Fix a Cracked Phone Back Glass? Repair Guide

Introduction

Few things are more frustrating than picking up your phone after a drop and finding the back covered in cracks. The display might still work perfectly, your camera may seem unaffected, and the phone might continue charging as normal. Because everything appears to be working, it’s easy to assume the damage is purely cosmetic.

Unfortunately, that’s not always the case.

The back glass on modern smartphones does much more than improve the phone’s appearance. It helps protect delicate internal components, supports wireless charging on many devices, and works with adhesive seals that improve resistance against dust and moisture. Once that glass cracks, your phone becomes more vulnerable to everyday wear, accidental knocks, and environmental damage.

At iExpert Repairs, we’ve seen countless customers delay repairing cracked back glass because the phone still seemed usable. In many cases, the repair remained straightforward. In others, the original impact had also damaged internal components, leading to more expensive repairs that could have been avoided with earlier inspection.

If your phone developed other problems after being dropped – such as charging issues, poor speaker performance, or an unresponsive touchscreen – the cracked back glass may only be one part of the problem. It’s always worth checking the device thoroughly before deciding on the most suitable repair.

The good news is that a cracked phone back glass can usually be repaired without replacing the entire handset. Whether you own an iPhone, Samsung Galaxy, Google Pixel, or another smartphone, the best solution depends on the extent of the damage, the model of your device, and whether any additional components were affected during the impact.

In this complete guide, you’ll learn what causes phone back glass to crack, whether it’s safe to continue using your device, how professional back glass replacement works, typical repair costs, when DIY repairs are worth considering, and how to prevent the same problem from happening again.

Quick Answer: How to Fix a Cracked Phone Back Glass?

The safest and most effective way to fix a cracked phone back glass is to replace the damaged rear panel with a professionally fitted replacement. While temporary solutions such as applying clear protective film or using a sturdy phone case may prevent the damage from getting worse, they won’t repair the cracked glass itself.

If the damage is limited to a small hairline crack and your phone is working normally, you can usually continue using it for a short period. However, if the rear glass is shattered, lifting away from the frame, or exposing internal components, arranging a professional repair as soon as possible is strongly recommended.

Modern smartphones are designed with wireless charging coils, precision adhesives, camera modules, and waterproof seals located directly beneath the rear glass. Replacing the back glass without the correct tools or experience can easily damage these components, making DIY repairs riskier than many people realise.

What Is a Cracked Phone Back Glass?

A phone’s back glass is the rear panel fitted to many modern smartphones. Unlike older devices that used plastic or aluminium backs, today’s premium smartphones use strengthened glass to support features such as wireless charging, improved signal performance, and premium design.

Although manufacturers use durable materials, no glass is completely resistant to accidental drops or heavy impacts.

A cracked phone back glass can range from a tiny hairline fracture to severe shattering across the entire rear of the device. Some cracks only affect the appearance of the phone, while others weaken its overall structure and increase the risk of additional internal damage.

Many people focus only on whether the screen still works. However, the rear panel also protects several important components inside the device, making it an essential part of the phone rather than simply a decorative cover.

Why Do Modern Smartphones Use Glass Backs?

Glass-backed smartphones have become the industry standard because they provide several practical advantages over metal designs.

FeatureBenefit
Wireless charging supportGlass allows wireless charging to work efficiently.
Better antenna performanceRadio signals pass through glass more effectively than metal.
Premium finishCreates the sleek design found on most flagship smartphones.
Easier heat distributionHelps manufacturers balance internal component layouts.
Higher resale appealDevices in good cosmetic condition generally retain more value.

Although these advantages improve the overall user experience, they also mean that repairing damaged rear glass has become more specialised than it was a few years ago.

Can You Still Use a Phone with a Cracked Back Glass?

Yes – but whether you should continue using it depends on how severe the damage is.

Many smartphones remain fully functional after the rear glass cracks because the display, battery, cameras, and motherboard haven’t been directly affected. If the damage is only cosmetic, you may be able to use the device temporarily while arranging a repair.

However, a cracked back panel should never be ignored for long. Even small fractures can spread with everyday use, making the phone more vulnerable to moisture, dust, and additional internal damage.

If your phone was dropped hard enough to crack the rear glass, it’s also worth checking whether other components have been affected. Some users later notice charging issues, speaker problems, camera faults, or touch screen problems that weren’t obvious immediately after the impact.

If you experience any of these symptoms, our guides on Why Is My Phone Not Charging?How to Fix Phone Speaker Issues, and Phone Touch Screen Not Responding can help identify whether the damage extends beyond the back glass.

1. When It’s Usually Safe to Keep Using Your Phone

If all of the following apply, you can normally continue using the phone for a short period until the repair is arranged:

  • The crack is small and not spreading rapidly.
  • No glass pieces are falling away.
  • The display works normally.
  • The phone charges correctly.
  • Cameras, buttons and speakers function as expected.
  • The phone doesn’t become unusually hot after the drop.

Although the device may still be usable, fitting a protective case can help prevent the damage from becoming worse before the repair is completed.

2. When You Should Stop Using It

Some situations require immediate professional attention because continuing to use the phone may increase the damage.

ConditionRecommendation
Rear glass is badly shatteredArrange repair as soon as possible.
Sharp glass edges are exposedAvoid handling without a protective case.
Internal components are visibleStop using the phone until it’s repaired.
Battery appears swollenStop using the device immediately.
Wireless charging has stopped working after the dropHave the phone professionally inspected.
Phone no longer charges properlyInternal damage may have occurred.

These symptoms often indicate that the impact affected more than just the rear glass.

3. Can a Cracked Back Glass Damage the Battery?

Indirectly, yes. The rear glass helps protect the battery from external impacts. While the crack itself doesn’t usually damage the battery, a severe drop can.

If the battery begins swelling, overheating, draining unusually quickly, or the phone unexpectedly shuts down after being dropped, the battery should be inspected immediately.

You may also find our guide on How to Know If Your Phone Battery Needs Replacement useful if you’re unsure whether the battery has been affected.

4. Does a Cracked Back Glass Affect Water Resistance?

In many cases, yes.

Modern smartphones rely on adhesive seals around both the display and rear glass to achieve their water-resistant rating. Once the rear glass cracks, those seals may no longer provide the same level of protection – even if the damage appears minor.

This means your phone may become more vulnerable to:

  • Rain
  • Humidity
  • Steam
  • Dust
  • Small amounts of liquid

For this reason, it’s best to keep the phone away from water until the damaged glass has been professionally replaced.

5. Can Wireless Charging Still Work?

Usually, yes. Wireless charging coils sit beneath the rear glass, so a small crack doesn’t always prevent charging.

However, if the glass is badly shattered or the impact has damaged the charging coil or internal connectors, wireless charging may become unreliable or stop working altogether.

If both wired and wireless charging become problematic after the drop, this may indicate internal damage rather than a simple cracked rear panel.

Common Causes of Phone Back Glass Damage

Understanding what caused the damage can help prevent the same problem from happening again. Although accidental drops remain the most common cause, technicians regularly see cracked back glass resulting from several different situations.

In the next section, we’ll explain the most common reasons phone back glass breaks and which types of damage are most likely to require professional repair.

1. Accidental Drops

Dropping a phone onto a hard surface remains the most common cause of cracked back glass.

The severity of the damage depends on several factors, including the height of the fall, the angle of impact, the type of surface, and whether the phone was protected by a quality case.

Even a short drop onto concrete, tiles, or asphalt can create hairline fractures or completely shatter the rear panel.

2. Heavy Impact or Pressure

Not every cracked back glass is caused by dropping the phone.

Sitting on a phone that’s in your back pocket, placing heavy objects on top of it, or trapping it between furniture can place enough pressure on the rear panel to crack the glass.

This type of damage often develops gradually before becoming clearly visible.

3. Repeated Minor Knocks

Small knocks that seem harmless can weaken the glass over time.

Regularly placing your phone on hard surfaces, bumping it against tables, or carrying it alongside keys and other hard objects may create tiny stress fractures that eventually spread.

4. Previous Damage That Was Never Repaired

A phone with an existing hairline crack becomes much more vulnerable to further damage.

Once the structural integrity of the rear glass has been weakened, even a relatively minor impact can cause the crack to spread across the entire back of the device.

Delaying repairs often increases both the extent of the damage and the eventual repair cost.

5. Poor-Quality Protective Accessories

A low-quality phone case may provide little protection during an impact. Cases that don’t properly cover the phone’s corners or raised edges are less effective at absorbing shock, leaving the back glass more exposed if the device is dropped.

Using a well-designed protective case together with a tempered glass camera protector can significantly reduce the risk of damage.

6. Manufacturing Defects (Less Common)

Although uncommon, some devices develop cracks without a major impact. This can happen due to manufacturing defects, weakened glass from previous repairs, or internal pressure caused by a swollen battery.

If your phone develops a crack unexpectedly, especially without being dropped, it’s worth having the device professionally inspected to rule out an underlying hardware issue.

7. Common Causes at a Glance

CauseLikelihoodCan It Usually Be Prevented?
Accidental dropVery HighYes, with a quality protective case
Heavy pressureHighYes
Repeated knocksMediumYes
Existing unrepaired crackHighYes
Poor-quality phone caseMediumYes
Manufacturing defectLowNot always

Not every cracked back glass results in internal damage. However, if the impact was severe enough to crack the rear panel, it’s important to check whether the rest of the phone is still functioning correctly.

How to Check Whether Only the Back Glass Is Broken

Before arranging a repair, it’s worth checking whether the damage is limited to the rear glass or if the impact has affected other parts of the phone.

In many cases, a cracked back glass is only cosmetic. However, a heavy drop can also damage internal components such as the battery, charging port, cameras, speakers, or wireless charging coil. Identifying these issues early can prevent more expensive repairs later.

1. Inspect the Rear Glass Carefully

Start by examining the back of the phone under good lighting. Look for:

  • Hairline cracks
  • Spiderweb-style fractures
  • Missing pieces of glass
  • Loose or lifting sections
  • Sharp edges

If the glass is lifting away from the frame or pieces are missing, avoid pressing on the damaged area, as this could allow dust or moisture to enter the phone.

2. Check the Phone Frame

The metal or aluminium frame absorbs much of the force during a drop. Inspect the edges for:

  • Dents
  • Bends
  • Deep scratches
  • Gaps between the frame and rear glass

A bent frame can prevent a replacement back glass from fitting correctly and may require additional repair work.

3. Test the Display and Touchscreen

Even if the screen isn’t cracked, the impact may still have affected the display.

Check whether:

  • The touchscreen responds across the entire screen.
  • Brightness is normal.
  • Colours appear correct.
  • There are no black spots or flickering.
  • No coloured lines have appeared.

If you notice any display or touch issues, it’s possible the impact damaged more than just the rear glass. Our Phone Touch Screen Not Responding guide explains common causes and troubleshooting steps.

4. Test Charging and Wireless Charging

Connect the phone to its charger and confirm that charging starts normally.

If your phone supports wireless charging, test that as well.

Look out for:

  • Slow charging
  • Charging that repeatedly disconnects
  • Wireless charging no longer working
  • Phone becoming unusually warm while charging

These symptoms could indicate damage to the charging coil, charging port, or internal connectors. If you’re experiencing charging problems after the drop, our Why Is My Phone Not Charging? guide can help you understand the possible causes.

5. Check the Cameras

Open both the front and rear cameras. Make sure:

  • Images are clear.
  • Autofocus works properly.
  • Camera lenses aren’t cracked.
  • There are no dark spots or blurry areas.

If the camera shakes excessively or refuses to focus, the impact may have damaged the camera module.

6. Test Speakers and Microphones

Play music or make a phone call to check that:

  • The loudspeaker sounds clear.
  • The earpiece works normally.
  • The microphone picks up your voice.
  • There are no crackling or distorted sounds.

Drops can sometimes loosen internal speaker connections even when the rear glass is the only visible damage. If necessary, you can also refer to our How to Fix Phone Speaker Issues guide.

7. Watch for Battery Problems

A damaged battery isn’t always visible immediately after a drop. Monitor your phone over the next few days for signs such as:

  • Rapid battery drain
  • Unexpected shutdowns
  • Overheating
  • Battery swelling
  • Phone restarting randomly

If you notice any of these symptoms, stop using the device and have it inspected as soon as possible. A damaged lithium-ion battery can become a safety risk if left unchecked.

8. Quick Inspection Checklist

CheckWhat You’re Looking For
Rear glassCracks, loose pieces, missing glass
Phone frameBends, dents or gaps
DisplayTouch response, flickering, lines
ChargingWired and wireless charging working correctly
CamerasClear images and proper focus
Speakers & microphoneClear sound during calls and media
BatteryNo overheating, swelling or rapid drain

After completing these checks, you’ll have a much better idea whether only the back glass needs replacing or if the phone requires more extensive repairs.

DIY vs Professional Back Glass Repair

Once you’ve confirmed that the damage is limited to the rear panel, the next decision is whether to repair the phone yourself or use a professional repair service.

While DIY repair kits are widely available online, replacing a cracked phone back glass is far more complicated than many people expect. Modern smartphones use strong industrial adhesives, delicate internal components, and, in many cases, laser-separated rear glass that requires specialist equipment to remove safely.

For most users, professional repair is the safer and more reliable option.

1. When DIY Repair May Be Possible

DIY replacement may be suitable if:

  • You have previous smartphone repair experience.
  • You own the correct repair tools.
  • The phone model is designed for easier rear panel replacement.
  • You’re prepared to accept the risk of accidental damage.
  • You’re not concerned about preserving the device’s water resistance.

Even in these situations, care is essential. Removing the rear glass incorrectly can damage internal components and increase the overall repair cost.

2. Challenges of DIY Back Glass Repair

Many people assume replacing the back glass is simply a matter of removing the broken panel and attaching a new one. In reality, modern smartphones often require:

  • Controlled heating to soften industrial adhesive.
  • Precision tools to separate the glass safely.
  • Careful removal of broken glass fragments.
  • Cleaning old adhesive before fitting the replacement.
  • Accurate alignment of the new rear panel.
  • Replacing waterproof adhesive seals where applicable.

Without specialist equipment, it’s easy to damage nearby components such as the battery, wireless charging coil, camera module, or NFC antenna.

3. Benefits of Professional Repair

Professional repair centres use specialised equipment and follow manufacturer-recommended repair procedures where applicable.

A qualified technician can:

  • Remove the damaged glass safely.
  • Inspect the phone for hidden impact damage.
  • Replace damaged adhesive correctly.
  • Test charging, cameras, speakers and other functions.
  • Ensure the replacement glass fits securely.

Professional repair also reduces the risk of accidental damage during the repair process.

4. DIY vs Professional Repair Comparison

FactorDIY RepairProfessional Repair
Upfront costUsually lowerHigher initial cost
Risk of damaging the phoneHighLow
Specialist tools requiredYesIncluded
Repair qualityDepends on experienceConsistently high
Water-resistant sealingDifficult to restoreMore likely to be restored
Time requiredSeveral hours for beginnersUsually much faster
Suitable for most usersNoYes

5. Is DIY Repair Worth the Risk?

For older or low-value smartphones, some users choose DIY repair because the financial risk is relatively small.

However, for newer devices – especially premium iPhones back glassSamsung Galaxy models, Google Pixel phones, and other flagship smartphones – the cost of accidentally damaging the battery, cameras, or internal flex cables can quickly exceed the price of a professional repair.

In many cases, paying for expert repair is the more cost-effective option in the long run.

6. Should You Repair the Back Glass or Replace the Entire Phone?

If the rear glass is the only damaged component, replacing it is usually far more affordable than replacing the entire device.

However, if the phone has suffered extensive impact damage affecting multiple components, it may be worth comparing the repair cost with the value of the device.

Our guide on Should You Repair or Replace Your Phone? explains how to decide which option offers the best value based on your phone’s condition, age, and repair costs.

How Professionals Replace Phone Back Glass

Replacing a cracked phone back glass involves much more than simply removing the broken panel and sticking on a new one. Modern smartphones are built with tightly fitted components, strong industrial adhesives, and delicate internal hardware that require careful handling.

Professional technicians follow a structured repair process to minimise the risk of further damage and ensure the replacement back glass fits securely. Although the exact procedure varies between manufacturers and models, the overall process is similar for most modern smartphones.

1. Initial Device Inspection

Before starting the repair, the technician performs a full inspection of the device. This usually includes checking:

  • The severity of the back glass damage
  • The condition of the phone’s frame
  • The display and touchscreen
  • Cameras and camera lenses
  • Charging functions
  • Wireless charging (where supported)
  • Battery condition
  • Speakers and microphones

This inspection helps identify any hidden damage caused by the original impact.

2. Safely Removing the Broken Back Glass

The damaged rear glass is then removed using specialist tools.

Depending on the phone model, technicians may use controlled heat or laser equipment to soften the adhesive holding the glass in place. The broken glass is carefully lifted away without damaging nearby components.

Removing shattered glass requires patience, as small fragments can remain firmly attached to the adhesive.

3. Cleaning the Device

Once the broken glass has been removed, the frame is thoroughly cleaned. Technicians remove:

  • Old adhesive
  • Small glass fragments
  • Dust and debris
  • Residue left behind after the original panel is removed

A clean surface is essential for the new back glass to bond correctly.

4. Fitting the Replacement Back Glass

After cleaning, a high-quality replacement back glass is installed using the correct adhesive for the specific phone model. The replacement panel must be positioned accurately to ensure:

  • A secure fit
  • Proper alignment with the frame
  • Correct positioning around the cameras
  • Reliable wireless charging performance (where supported)

Incorrect alignment can affect both the appearance and functionality of the phone.

5. Testing the Phone After Repair

Before returning the phone, professional repair centres typically test key functions to confirm everything is working correctly.

These checks often include:

Component TestedPurpose
Display and touchscreenConfirm normal operation
Battery and chargingVerify stable charging performance
Wireless chargingEnsure charging coil functions correctly
CamerasCheck image quality and autofocus
Speakers and microphonesTest sound quality during calls and media
ButtonsConfirm proper operation
Face ID or fingerprint sensor (where applicable)Verify security features still work

These final checks help ensure the repair hasn’t affected any other part of the device.

6. How Long Does Back Glass Replacement Take?

Repair times vary depending on the phone model and the extent of the damage. As a general guide:

Repair TypeTypical Time
Minor back glass replacement1–2 hours
Premium smartphones requiring specialist equipment2–4 hours
Devices with additional internal damageLonger, depending on repairs needed

Some repair centres offer same-day service for popular smartphone models, while others may require additional time if replacement parts need to be ordered.

7. Will the Phone Be Water-Resistant Again?

Professional technicians replace the adhesive seals during the repair whenever possible. However, it’s important to understand that repairing a phone doesn’t always restore the exact factory water-resistance rating.

For this reason, it’s still advisable to avoid exposing the repaired device to water, particularly if it was originally damaged by a heavy impact. With the repair process complete, the next question most people ask is how much it will cost.

How Much Does Back Glass Repair Cost in the UK?

The cost of repairing a cracked phone back glass in the UK can vary considerably. There isn’t a fixed price because every repair depends on the phone model, the type of damage, the replacement parts required, and the repair method used.

Generally, replacing only the back glass is significantly cheaper than replacing the entire phone, especially if the internal components remain undamaged.

If the drop has also affected the display, battery, camera, or charging system, the total repair cost will naturally be higher.

1. What Affects the Cost of Back Glass Repair?

Several factors influence how much you’ll pay for a repair. These include:

  • Phone manufacturer and model
  • Availability of replacement parts
  • Whether only the rear glass is damaged
  • Frame damage following the impact
  • Wireless charging compatibility
  • Labour involved in removing the damaged glass
  • Whether genuine or premium-quality replacement parts are used

Flagship smartphones usually cost more to repair because they require more complex repair procedures and higher-value replacement parts.

2. Typical UK Back Glass Repair Costs

The figures below are approximate ranges and may vary between repair providers.

Device TypeTypical UK Repair Cost
Older smartphones£40-£80
Mid-range smartphones£60-£120
Premium smartphones£100-£220+
Foldable smartphones£200-£500+

Actual prices depend on the make, model, and overall condition of the device.

3. Is It Worth Repairing a Cracked Back Glass?

In many cases, yes. Repairing the rear glass is usually worthwhile when:

  • The phone is otherwise working normally.
  • The display isn’t damaged.
  • The battery is in good condition.
  • The repair cost is much lower than replacing the phone.
  • You want to maintain the phone’s resale or trade-in value.

Replacing the damaged back glass early can also help prevent additional repairs caused by dust, moisture, or further impacts.

4. When Repairs May Cost More

A cracked rear panel doesn’t always tell the whole story. If the phone experienced a heavy impact, technicians may also discover damage to:

  • The battery
  • Camera module
  • Charging port
  • Wireless charging coil
  • Internal flex cables
  • Phone frame

In these situations, repairing multiple components will increase the overall cost.

If your phone also has charging problems after the drop, it’s worth reading our Why Is My Phone Not Charging? guide before deciding on repairs.

5. Repair or Replace?

Sometimes replacing the back glass is clearly the best option. In other cases, especially if the phone has multiple faults or is several years old, replacing the device may offer better long-term value.

The table below provides a general guide.

SituationUsually the Better Choice
Only the back glass is crackedRepair
Back glass and screen both damagedCompare repair costs with phone value
Multiple internal components damagedDepends on total repair cost
Older phone with expensive repairsConsider replacement
Newer flagship phone in good conditionRepair is usually worthwhile

If you’re unsure which option makes the most financial sense, our Should You Repair or Replace Your Phone? guide explains how to compare repair costs against the value and expected lifespan of your device.

Now that we’ve covered repair costs, the next step is deciding whether repairing your phone is actually the right choice for your situation.

How to Prevent Your Phone Back Glass from Cracking Again

Once you’ve repaired your phone, taking a few simple precautions can greatly reduce the chances of damaging the back glass again. While no smartphone is completely drop-proof, the right accessories and everyday habits can make a significant difference.

Prevention is almost always cheaper than paying for another repair.

1. Use a High-Quality Protective Case

A well-designed protective case is one of the best ways to reduce the risk of back glass damage. Look for a case that offers:

  • Raised edges around the screen and cameras
  • Shock-absorbing corners
  • A secure fit around the entire phone
  • Durable materials that can withstand everyday impacts

Cheap or poorly fitted cases may offer limited protection during a fall.

2. Avoid Placing Your Phone on Hard Surfaces

Putting your phone directly onto concrete, tiles, stone worktops, or other hard surfaces increases the risk of scratches and accidental damage.

Whenever possible, place it on a softer surface or keep it inside a protective case.

3. Keep Your Phone Away from Back Pockets

Many cracked back glass repairs result from phones being carried in back pockets. Sitting down with a phone in your pocket places pressure on the rear panel, particularly on larger smartphones with glass backs.

Using a front pocket, jacket pocket, or bag is usually a safer option.

4. Don’t Ignore Small Cracks

A tiny crack may seem harmless, but it rarely stays that way. Daily use, temperature changes, and minor knocks can quickly cause small fractures to spread across the rear panel.

Repairing minor damage early is often less expensive than waiting until the glass is completely shattered.

5. Handle Your Phone Carefully Around Water

If your phone already has a cracked back glass, avoid exposing it to water until it’s been repaired. Even if the device was originally water-resistant, a damaged rear panel can weaken the protective seals, allowing moisture to reach internal components.

If your phone has already been exposed to liquid after the glass cracked, our “Water Damaged Phone Repair” guide explains the immediate steps you should take.

6. Consider a Camera Lens Protector

Many modern smartphones have raised camera modules that are vulnerable during drops.

A good-quality camera lens protector can help reduce the risk of scratching or cracking the camera glass if the phone lands on its back.

7. Prevention Tips at a Glance

TipWhy It Helps
Use a shock-absorbing protective caseReduces impact damage during accidental drops.
Avoid carrying the phone in your back pocketHelps prevent pressure cracks.
Repair small cracks promptlyStops damage from spreading further.
Keep the phone away from water after the glass cracksReduces the risk of internal moisture damage.
Place the phone carefully on hard surfacesMinimises everyday wear and accidental impacts.
Protect the camera lensesHelps prevent costly camera repairs after a fall.

Although accidents can’t always be avoided, following these simple habits can significantly reduce the likelihood of another cracked back glass and help keep your phone in good condition for longer.

FAQs About Cracked Phone Back Glass Repair

1. Can a cracked phone back glass be repaired?

Yes. In most cases, a cracked phone back glass can be repaired by replacing the damaged rear glass panel. Professional repair restores the phone’s appearance and helps protect internal components from further damage.

2. Is it safe to use a phone with a cracked back glass?

If the crack is small and the phone is functioning normally, it is usually safe to continue using it temporarily. However, if the glass is shattered, loose, or exposing internal parts, you should arrange a repair as soon as possible to reduce the risk of additional damage.

3. Will a cracked back glass affect my phone’s performance?

Not always. A cracked rear glass often causes only cosmetic damage. However, if the impact also affected internal components, you may experience issues with wireless charging, cameras, speakers, or other hardware.

4. Can I replace my phone’s back glass myself?

DIY replacement is possible on some older smartphones, but modern devices often use strong adhesives, waterproof seals, and delicate internal components. Without the correct tools and experience, there is a higher risk of causing further damage.

5. How much does phone back glass repair cost in the UK?

Repair costs vary depending on the phone model, the availability of replacement parts, and the repair method. Premium smartphones generally cost more to repair than budget or mid-range devices.

6. How long does a back glass repair take?

Many professional repair centres can replace a phone’s back glass within a few hours, although some models may require additional time if specialist equipment or replacement parts are needed.

7. Will repairing the back glass erase my data?

No. Replacing the rear glass normally does not affect your photos, apps, contacts, or other personal data. Even so, creating a backup before any repair is always recommended.

8. Does replacing the back glass restore water resistance?

Professional technicians replace the damaged glass using new adhesive seals, but the original factory level of water resistance cannot always be guaranteed after any smartphone repair.

9. Can a cracked back glass cause battery problems?

The crack itself does not usually damage the battery. However, if the phone experienced a heavy impact, internal components – including the battery – should be inspected to rule out hidden damage.

10. Does a cracked back glass affect wireless charging?

It can. Minor cracks may not interfere with wireless charging, but severe damage or movement of the charging coil after a drop can reduce charging performance or stop it working altogether.

11. Will a phone case stop the crack from spreading?

A quality protective case can help reduce further stress on the damaged glass and lower the risk of additional cracking. However, it does not repair the existing damage.

12. Should I repair the back glass or replace my phone?

If only the rear glass is damaged and the rest of the phone works correctly, repairing it is usually the more cost-effective option. Replacing the entire phone is generally worth considering only if there is extensive internal damage or the repair cost is close to the device’s value.

13. Can dust and moisture enter through a cracked back glass?

Yes. Even small cracks can weaken the phone’s protective seals, making it easier for dust, moisture, and debris to enter the device over time.

14. Which smartphones most commonly have glass backs?

Many modern smartphones feature glass rear panels, including premium models from Apple, Samsung, Google, Huawei, Xiaomi, OnePlus, Motorola, Oppo, and other leading manufacturers.

15. Does a cracked back glass reduce my phone’s resale value?

Yes. Visible damage usually lowers resale or trade-in value because buyers often expect additional repair costs. Repairing the back glass before selling the phone may help you achieve a better price.

16. Can a cracked back glass get worse over time?

Yes. Hairline cracks often spread with everyday use, especially if the phone is carried in a pocket, dropped again, or placed on hard surfaces without adequate protection.

17. Should I repair the back glass immediately after it cracks?

If the damage is severe, the glass is loose, or internal components are visible, immediate repair is strongly recommended. Minor cracks can sometimes wait a short time, but delaying repairs increases the risk of further damage.

18. Can professional repair make my phone look like new again?

In most cases, yes. A professionally installed replacement back glass restores the phone’s appearance, improves protection, and helps maintain its overall value, provided no other components were damaged during the original impact.

Conclusion

A cracked phone back glass may seem like a minor cosmetic issue, but ignoring it can lead to bigger problems over time. Even a small crack can spread with everyday use, weaken the phone’s protection against dust and moisture, and increase the risk of damage to internal components.

In many cases, replacing the damaged rear glass is far more affordable than replacing the entire smartphone. If the display, battery, cameras, and other essential components are still working correctly, professional back glass replacement can restore both the appearance and structural protection of your device while extending its lifespan.

Although temporary solutions such as protective cases or tape may help prevent the crack from worsening, they are not permanent repairs. Modern smartphones are built with precision-fitted glass panels, industrial adhesives, wireless charging systems, and water-resistant seals, making professional repair the safest and most reliable option for most devices.

The sooner a cracked back glass is assessed, the lower the chance of the damage leading to more expensive repairs in the future. Understanding the condition of your device and choosing the right repair solution can help you protect your investment and keep your smartphone performing reliably.

Why Choose iExpert Repairs for Back Glass Repair?

At iExpert Repairs, we specialise in professional smartphone repairs for a wide range of leading brands, including Apple, Samsung, Google, Huawei, Xiaomi, OnePlus, Motorola, Oppo, and many others.

Our certified technicians carefully inspect every device to identify both visible and hidden damage before recommending the most appropriate repair. Whether your phone has a cracked back glass, screen damage, charging issues, battery problems, or other hardware faults, every repair is carried out using professional equipment and quality replacement parts where required.

We believe in transparent advice, reliable workmanship, and helping customers make informed decisions based on the actual condition of their devices rather than recommending unnecessary repairs.

Back to posts

How to Fix Laptop Overheating: Causes & Fixes

Introduction

Laptop overheating is one of the most common issues affecting both Windows laptops and MacBooks. While it’s normal for a laptop to become warm during demanding tasks such as gaming, video editing, or running multiple applications, excessive heat is never something you should ignore. If left unresolved, overheating can reduce performance, shorten the lifespan of internal components, trigger unexpected shutdowns, and in severe cases, cause permanent hardware damage.

Many users first notice the problem when the laptop feels unusually hot, the cooling fan becomes loud, or the system starts running much slower than usual. These symptoms are often linked to thermal throttling, a safety feature that reduces processor speed to protect critical components from excessive temperatures. If you’ve already experienced poor performance alongside overheating, our guide on How to Fix a Slow Laptop? Complete Troubleshooting & Performance Guide explains how heat and system performance are often closely connected.

Fortunately, most overheating problems can be resolved without replacing your laptop. Dust blocking the cooling vents, worn thermal paste, excessive background applications, outdated software, or a failing cooling fan are among the most common causes. Simple maintenance and targeted troubleshooting can often restore normal temperatures and improve overall performance.

Based on our experience completing more than 2,500 laptop repairs across the UK, overheating is one of the most common issues we diagnose. In many cases, the problem is caused by dust build-up, ageing thermal paste, or restricted airflow-issues that can often be resolved before they lead to permanent hardware damage when addressed early.

Whether you own a Dell, HP, Lenovo, ASUS, Acer, Microsoft Surface, Samsung, MSI, Toshiba, or Apple MacBook, this guide explains why laptops overheat, how to fix the problem safely, when professional repair is recommended, and how to prevent overheating from happening again.

Tools You May Need

Before opening your laptop or performing any internal maintenance, it’s helpful to have the correct tools. Using suitable equipment reduces the risk of damaging sensitive components and makes the repair process much safer.

You may need:

  • Compressed air can
  • Soft anti-static brush
  • Precision screwdriver set
  • High-quality thermal paste
  • Microfibre cloth
  • Laptop cooling pad (optional)
  • Anti-static wrist strap (recommended)

If you are not comfortable opening your laptop, it’s best to seek professional assistance to avoid accidental damage.

Why Is My Laptop Overheating?

A laptop overheats when its cooling system can no longer remove heat as quickly as the processor (CPU), graphics chip (GPU), and other internal components generate it. Every laptop produces heat during normal operation, but modern devices are designed to keep temperatures within a safe operating range using cooling fans, heat pipes, heatsinks, ventilation systems, and thermal interface materials.

Overheating occurs when this balance is disrupted. Dust accumulation, blocked air vents, failing cooling fans, ageing thermal paste, demanding software, malware, or even high room temperatures can prevent heat from escaping efficiently. As temperatures continue to rise, the laptop automatically slows down the processor through thermal throttling to reduce heat output and protect sensitive hardware.

This is why an overheating laptop often becomes noticeably slower, applications begin freezing, games lose performance, and the cooling fan runs at maximum speed for extended periods. If these warning signs are ignored, excessive heat may eventually damage the motherboard, battery, SSD, graphics chip, or processor, resulting in far more expensive repairs.

The good news is that overheating is usually a symptom of an underlying problem rather than a fault itself. Identifying the root cause allows you to apply the correct solution instead of relying on temporary fixes that only reduce temperatures for a short time.

Quick Answer: How Can You Stop a Laptop from Overheating?

Most laptop overheating problems can be resolved by improving airflow, reducing unnecessary system load, cleaning the cooling system, and ensuring all hardware and software are functioning correctly.

Solution Difficulty Effectiveness
Restart your laptop Easy Moderate
Close unnecessary background applications Easy High
Clean dust from cooling vents Easy High
Place the laptop on a hard, flat surface Easy Moderate
Update Windows or macOS Easy Moderate
Update device drivers Medium Moderate
Scan for malware and viruses Easy High
Replace dried thermal paste Advanced Excellent
Replace a faulty cooling fan Advanced Excellent
Use a laptop cooling pad Easy Moderate
Reduce CPU and GPU workload Easy Moderate
Book a professional laptop repair Professional Best Long-Term Solution

If your laptop continues overheating after following these steps, the problem may involve worn cooling components, internal hardware failure, or motherboard-related issues. In these situations, arranging a professional Laptop Repair service is usually the safest and most cost-effective solution.

Common Signs Your Laptop Is Overheating

Laptop overheating rarely happens without warning. In most cases, your device shows several symptoms before the problem becomes serious. Recognising these early warning signs allows you to fix the issue before it causes permanent hardware damage or expensive repairs.

Some users notice only a warm keyboard or louder fan noise, while others experience random shutdowns, severe lag, or even blue screen errors. If your laptop regularly displays several of the following symptoms, excessive heat is likely affecting its performance.

Typical signs of an overheating laptop include:

  • The bottom of the laptop becomes extremely hot.
  • Cooling fans run constantly at high speed.
  • The laptop feels much slower than normal.
  • Games lose FPS or begin stuttering.
  • Programs freeze or stop responding.
  • Unexpected shutdowns or automatic restarts.
  • Blue Screen of Death (Windows) or kernel panic (Mac).
  • Battery drains faster than usual.
  • Keyboard area becomes uncomfortably warm.
  • Loud fan noise even during light tasks.
  • Performance drops after only a few minutes of use.

Many of these symptoms are also associated with poor system performance. If your laptop has become slow as well as hot, our “How to Fix a Slow Laptop?” explains additional optimisation techniques that may help improve overall performance.

Is Laptop Overheating Dangerous?

Yes. Occasional warmth is completely normal, but persistent overheating should never be ignored.

Modern laptops contain sensitive electronic components designed to operate within safe temperature limits. When these temperatures are exceeded for prolonged periods, the system automatically activates protective mechanisms to reduce heat output. This process, known as thermal throttling, lowers CPU and GPU performance to prevent permanent damage.

Although thermal throttling protects the hardware, it also makes your laptop noticeably slower.

Ignoring overheating for weeks or months may eventually lead to:

  • Permanent motherboard damage
  • CPU or GPU degradation
  • SSD or hard drive failure
  • Battery swelling or reduced battery lifespan
  • Cooling fan failure
  • Unexpected data loss
  • Frequent crashes and system instability

The earlier overheating is diagnosed, the lower the risk of expensive hardware repairs.

What Temperature Is Too Hot for a Laptop?

Laptop temperatures vary depending on the model, workload, and cooling design. Gaming laptops naturally run hotter than office laptops, while thin ultrabooks often have less cooling capacity than larger models.

The following temperature ranges provide a useful general guide.

Laptop Temperature Status
30°C-50°C Normal when idle
50°C-70°C Normal during everyday use
70°C-85°C High but acceptable during heavy workloads
85°C-95°C Very hot – investigate cooling
Above 95°C Potentially dangerous if sustained

If your CPU regularly exceeds 90-95°C, the cooling system should be inspected as soon as possible.

What Causes a Laptop to Overheat?

Laptop overheating is rarely caused by a single fault. In most cases, several smaller issues combine to reduce cooling efficiency until temperatures rise beyond safe operating limits.

Understanding the real cause helps you choose the correct solution instead of relying on temporary fixes.

1. Dust Build-up Inside the Laptop

Dust is one of the biggest causes of laptop overheating. As the cooling fan pulls air into the laptop, it also draws in tiny particles of dust, pet hair, and other debris. Over time these particles accumulate around the cooling fan, heat sink, and ventilation channels.

Eventually airflow becomes restricted, preventing hot air from escaping efficiently. Common symptoms include:

  • Constant fan noise
  • High temperatures
  • Reduced performance
  • Sudden shutdowns

Professional internal cleaning usually restores proper airflow and significantly reduces operating temperatures.

2. Blocked Air Vents

Every laptop relies on intake and exhaust vents to circulate cool air. Using the laptop on a bed, sofa, blanket, pillow, or even your lap can block these vents almost completely.

Without sufficient airflow, internal temperatures increase rapidly. For the best cooling performance:

  • Always place the laptop on a hard surface.
  • Keep side and rear vents unobstructed.
  • Leave enough space around the laptop for airflow.

A simple change in usage habits often reduces overheating considerably.

3. Faulty or Failing Cooling Fan

Cooling fans wear out over time. A damaged fan may:

  • Spin slowly
  • Produce grinding noises
  • Stop spinning completely
  • Fail intermittently

Without adequate airflow, heat remains trapped inside the chassis, causing temperatures to rise very quickly. If your fan sounds unusually loud, makes clicking noises, or stops unexpectedly, replacement is usually recommended.

4. Old or Dried Thermal Paste

Thermal paste sits between the processor and the heatsink. Its purpose is to transfer heat efficiently away from the CPU and GPU. After several years, thermal paste gradually dries out and loses effectiveness.

Poor heat transfer causes:

  • Higher processor temperatures
  • Constant thermal throttling
  • Reduced performance
  • Frequent overheating

Replacing old thermal paste is one of the most effective professional maintenance procedures for older laptops.

5. High CPU or GPU Usage

Running demanding software naturally generates more heat. Common examples include:

  • Video editing
  • 3D rendering
  • CAD software
  • Gaming
  • Programming environments
  • Virtual machines
  • AI software
  • Large spreadsheets

The harder the processor works, the more heat it produces. Monitoring CPU usage helps identify applications consuming excessive resources unnecessarily.

6. Too Many Background Applications

Many users don’t realise dozens of applications continue running even after they’re closed. Cloud storage, messaging apps, update services, browser processes, and unnecessary utilities all consume CPU time and memory.

This constant background activity increases heat production while reducing battery life and overall performance. Closing unnecessary applications helps reduce processor load immediately.

7. Gaming and Heavy Workloads

Gaming pushes both the CPU and graphics processor close to their maximum capacity. Even modern gaming laptops often reach temperatures above 80°C during intensive sessions.

If the cooling system is dirty or the thermal paste has deteriorated, temperatures may rise beyond safe operating limits. Reducing graphics settings, limiting frame rates, and improving airflow often lowers temperatures without affecting gameplay significantly.

8. Malware or Virus Activity

Malware doesn’t only compromise security. Some malicious software secretly uses processor resources for activities such as cryptocurrency mining, spam distribution, or unauthorised background processes.

This hidden workload generates continuous heat even when the laptop appears idle.Running a full malware scan is recommended whenever overheating begins suddenly without an obvious explanation.

9. Outdated Drivers or BIOS

Many people overlook software when investigating overheating. Updated graphics drivers, chipset software, firmware, and BIOS releases often include:

  • Improved fan control
  • Better power management
  • Enhanced thermal optimisation
  • Stability improvements

Keeping your laptop fully updated helps the cooling system operate more efficiently. Always download drivers directly from your laptop manufacturer’s official support page.

10. Hot Room Temperatures

Your laptop can only cool itself if the surrounding air is cooler than its internal components. Using a laptop in:

  • Direct sunlight
  • Hot vehicles
  • Poorly ventilated rooms
  • Heatwaves
  • Warm offices

makes cooling much more difficult. Whenever possible:

  • Keep the room well ventilated.
  • Avoid direct sunlight.
  • Use air conditioning or a fan during hot weather.

Lower ambient temperatures improve cooling performance immediately.

What Happens If You Ignore Laptop Overheating?

Many people continue using an overheating laptop because it still appears to function normally. However, excessive heat causes gradual wear that becomes more expensive to repair over time.

Ignoring overheating can result in:

  • Reduced processor lifespan
  • Graphics chip failure
  • Motherboard damage
  • Battery swelling
  • SSD corruption
  • Data loss
  • Random shutdowns
  • Slower overall performance
  • Shorter laptop lifespan

Addressing overheating early is almost always cheaper than repairing the damage caused by prolonged excessive temperatures.

How to Fix Laptop Overheating: Step-by-Step Solutions

Laptop overheating can usually be resolved without replacing the device. In many cases, a combination of routine maintenance, software optimisation, and improved airflow is enough to restore safe operating temperatures.

The following troubleshooting methods are arranged from the simplest solutions to more advanced repairs. Working through them in order helps identify the root cause while avoiding unnecessary expense.

1. Restart Your Laptop

Many users leave their laptops running for several days without performing a full restart. During this time, background services, temporary files, and memory usage continue to build up, placing additional strain on the processor.

Restarting your laptop:

  • Clears temporary memory
  • Stops unnecessary background tasks
  • Resets CPU usage
  • Refreshes Windows or macOS services

Although a restart will not fix hardware-related overheating, it often reduces temperatures caused by excessive software activity.

If the laptop continues running hot after restarting, continue with the following troubleshooting steps.

2. Close Unnecessary Background Programs

Background applications are one of the most common causes of unnecessary CPU usage.

Programs such as:

  • Google Chrome with dozens of tabs
  • Microsoft Teams
  • Discord
  • Dropbox
  • OneDrive
  • Adobe Creative Cloud
  • Steam
  • Spotify

continue consuming processor resources even when you’re not actively using them.

Windows

Open Task Manager (Ctrl + Shift + Esc) and sort applications by CPU usage.

macOS

Open Activity Monitor and identify processes consuming unusually high resources. Close software you don’t currently need. Reducing processor workload immediately lowers heat generation while improving battery life and overall system responsiveness.

3. Improve Airflow Around Your Laptop

Even a perfectly functioning cooling system cannot work efficiently if airflow is restricted. For the best cooling performance:

  • Place the laptop on a flat, solid desk.
  • Avoid beds, cushions, sofas, or blankets.
  • Leave space around side and rear air vents.
  • Keep the room well ventilated.

Using your laptop on soft surfaces blocks cooling vents and traps hot air inside the chassis, causing temperatures to rise rapidly. Sometimes simply moving the laptop onto a desk can reduce temperatures by several degrees.

4. Clean Dust from Cooling Vents

Dust gradually blocks ventilation channels, reducing airflow and forcing cooling fans to work harder. If dust is visible around the vents:

  • Switch off the laptop.
  • Disconnect the charger.
  • Use compressed air to remove loose dust.
  • Blow air through both intake and exhaust vents.

Avoid inserting sharp objects into ventilation openings, as they may damage internal components. If the laptop has not been cleaned internally for several years, professional servicing is recommended.

5. Reduce CPU Usage

A processor operating continuously near 100% utilisation naturally produces large amounts of heat. Common causes include:

  • Software updates
  • Video editing
  • Browser tabs
  • Background synchronisation
  • Malware
  • Faulty applications

Identify which programs consume the most CPU resources and close any unnecessary processes. If CPU usage remains abnormally high while the laptop is idle, further investigation may be required.

6. Scan for Malware and Viruses

Malicious software often runs silently in the background while consuming processor power and system memory. Some malware even performs cryptocurrency mining without the user’s knowledge, causing laptops to become unusually hot.

Run a complete system scan using trusted antivirus software. Removing malware not only improves security but often restores normal temperatures and better overall performance.

7. Update Windows or macOS

Operating system updates frequently include:

  • Better power management
  • Improved fan control
  • Bug fixes
  • Security improvements
  • Performance optimisation

Installing the latest Windows or macOS updates helps your laptop manage processor workloads more efficiently. Restart the laptop after installing updates to ensure all system improvements are applied correctly.

8. Update Device Drivers

Outdated drivers can increase processor workload and prevent hardware from operating efficiently. Pay particular attention to:

  • Graphics drivers
  • Chipset drivers
  • Storage drivers
  • BIOS firmware
  • Power management drivers

Always download drivers from your laptop manufacturer’s official support website rather than third-party sources. Updated drivers often improve thermal management while reducing system instability.

9. Clean Temporary Files

Temporary files occupy storage space and contribute to unnecessary background activity. Use:

Windows

  • Disk Cleanup
  • Storage Sense

macOS

  • Storage Management

Regular maintenance helps Windows and macOS operate more efficiently while reducing unnecessary processor activity.

10. Adjust Power Settings

Many laptops operate using maximum performance profiles even when high performance isn’t required. Switching to a balanced power plan can reduce processor heat considerably.

Windows

Settings → Power & Battery → Power Mode → Balanced

macOS

Enable Low Power Mode when performing light everyday tasks. This reduces unnecessary processor boost behaviour while improving battery life.

11. Use a Laptop Cooling Pad

A quality cooling pad improves airflow underneath the laptop by supplying additional cool air. Cooling pads are particularly useful for:

  • Gaming laptops
  • Video editing
  • Graphic design
  • Long working sessions

While a cooling pad will not repair faulty hardware, it can reduce operating temperatures by several degrees during demanding workloads.

12. Reduce Gaming Graphics Settings

Gaming places extreme demands on both the processor and graphics card. Lowering:

  • Resolution
  • Shadow quality
  • Texture quality
  • Ray tracing
  • Maximum FPS

reduces heat generation significantly. Limiting frame rates often lowers temperatures without noticeably affecting gameplay.

13. Check Cooling Fan Operation

If your cooling fan:

  • Stops spinning
  • Spins slowly
  • Makes grinding noises
  • Produces rattling sounds

it may no longer be cooling the laptop effectively. Fan failure should be addressed quickly because continued overheating may damage expensive internal components. Professional replacement is recommended if the fan is physically damaged.

14. Replace Old Thermal Paste

Thermal paste gradually dries out after several years of use. Once it loses effectiveness, heat can no longer transfer efficiently between the processor and heatsink.

Replacing thermal paste typically:

  • Reduces CPU temperatures
  • Improves sustained performance
  • Minimises thermal throttling
  • Extends hardware lifespan

Because incorrect application may damage components, this procedure is generally recommended for experienced technicians.

15. Update Your BIOS (Advanced Users)

Laptop manufacturers occasionally release BIOS updates that improve:

  • Fan control
  • Thermal management
  • Processor efficiency
  • Hardware compatibility

Only install BIOS updates supplied by your laptop manufacturer. Interrupting a BIOS update may permanently damage the motherboard. If you’re unsure, seek professional assistance.

16. Monitor Laptop Temperatures

Monitoring software allows you to determine whether overheating has actually been resolved. Normal temperatures vary depending on workload.

As a general guide:

Usage Typical Temperature
Idle 30-50°C
Web Browsing 45–65°C
Office Work 50-70°C
Gaming 70-85°C
Heavy Rendering 75-90°C

Consistently exceeding 90-95°C indicates further investigation is required.

When DIY Fixes Are Not Enough

While many overheating issues can be resolved through routine maintenance, some problems require specialist tools and technical expertise.

Professional diagnosis is recommended if your laptop:

  • Continues overheating after completing all troubleshooting steps
  • Shuts down unexpectedly
  • Produces burning smells
  • Displays screen artefacts
  • Makes loud grinding fan noises
  • Has liquid damage
  • Frequently crashes during gaming
  • Shows motherboard-related faults
  • Has a swollen battery
  • Suffers from repeated thermal throttling

Attempting complex repairs without the proper equipment can cause additional damage and increase repair costs.

At iExpert Repairs, our certified technicians diagnose overheating issues affecting MacbooksDell, HP, Lenovo, ASUS, Acer, Microsoft Surface, Samsung, MSI, Toshiba, and Apple MacBook devices. We provide professional Laptop Repair services across the UK, including cooling system cleaning, fan replacement, thermal paste renewal, motherboard diagnostics, SSD upgrades, RAM upgrades, battery replacement, and advanced board-level repairs using premium OEM-grade parts backed by a comprehensive warranty.

Professional Laptop Repair Services in the UK

While many overheating issues can be resolved through routine maintenance and software optimisation, some problems require professional diagnosis and repair. If your laptop continues overheating despite following the troubleshooting steps in this guide, the underlying issue may involve failing hardware rather than software.

At iExpert Repairs, our certified technicians diagnose and repair overheating issues affecting all major laptop brands, including Dell, HP, Lenovo, ASUS, Acer, Microsoft Surface, Samsung, MSI, Toshiba, and Apple MacBook.

Our professional laptop overheating repair services include:

  • Internal cooling system cleaning
  • Cooling fan replacement
  • Thermal paste replacement
  • Heat sink repair and replacement
  • SSD upgrades
  • RAM upgrades
  • Motherboard diagnostics and repair
  • Battery replacement
  • Charging port repairs
  • Windows and macOS optimisation
  • Virus and malware removal
  • Data recovery

Using professional diagnostic equipment allows us to identify the exact cause of overheating, ensuring only the necessary repairs are completed. Every qualifying repair is carried out using premium OEM-grade replacement parts and is backed by a 12-month warranty for complete peace of mind.

Whether you visit our repair centre or use our secure nationwide UK mail-in service, our goal is to restore your laptop to safe operating temperatures and reliable long-term performance.

Laptop Overheating Repair Cost in the UK

The cost of repairing an overheating laptop depends on the underlying fault. Simple maintenance is generally less expensive than replacing damaged hardware components.

Repair Service Estimated UK Cost
Internal Cooling System Cleaning £40-£80
Virus & Malware Removal £50-£90
Thermal Paste Replacement £60-£120
Cooling Fan Replacement £70-£150+
SSD Upgrade £80-£200+
RAM Upgrade £60-£180+
Battery Replacement £70-£180+
Motherboard Diagnostics Varies by fault

For an accurate quotation, iExpert Repairs provides professional diagnostics before recommending the most suitable repair solution, ensuring you only pay for the repairs your laptop genuinely requires.

How to Prevent Laptop Overheating

Preventing overheating is far easier and less expensive than repairing heat-related hardware damage. Regular maintenance and sensible usage habits help keep your laptop running cooler, quieter, and more efficiently.

Follow these best practices:

  • Keep air vents free from dust and debris.
  • Use your laptop on a hard, flat surface.
  • Avoid blocking ventilation openings.
  • Clean the cooling system every 12–24 months.
  • Keep Windows or macOS fully updated.
  • Install the latest device drivers.
  • Close unnecessary background applications.
  • Scan for malware regularly.
  • Avoid filling your SSD or hard drive completely.
  • Restart your laptop regularly.
  • Replace thermal paste on older laptops when necessary.
  • Consider using a cooling pad during heavy workloads.
  • Avoid exposing your laptop to direct sunlight or excessively hot environments.

Following these maintenance habits can significantly reduce the risk of overheating while extending the lifespan of your laptop.

Common Mistakes to Avoid When Fixing an Overheating Laptop

Many overheating issues become worse because users unknowingly make simple mistakes during troubleshooting. Avoiding these common errors can help protect your laptop from unnecessary damage.

  • Blocking the air vents by using the laptop on a bed or sofa.
  • Using a household vacuum cleaner to clean internal components.
  • Applying too much thermal paste.
  • Ignoring loud or unusual fan noises.
  • Delaying internal cleaning for several years.
  • Installing BIOS updates incorrectly.
  • Continuing to use the laptop after repeated thermal shutdowns.
  • Covering ventilation openings while gaming or charging.

Following safe maintenance practices helps extend your laptop’s lifespan and reduces the risk of costly repairs.

FAQs About Laptop Overheating

1. Why is my laptop overheating even when I’m not gaming?

Overheating during light use is often caused by dust build-up, excessive background applications, malware, failing cooling fans, outdated drivers, or deteriorated thermal paste rather than demanding software.

2. Is it normal for a laptop to get hot?

Yes. It’s completely normal for a laptop to become warm while charging, streaming videos, gaming, or running demanding software. However, excessive heat, loud fan noise, or unexpected shutdowns indicate a problem that should be investigated.

3. Can overheating permanently damage a laptop?

Yes. Prolonged overheating may damage the motherboard, processor, graphics chip, SSD, battery, or other internal components if left unresolved.

4. How do I know if my laptop fan is failing?

Common signs include grinding noises, rattling sounds, unusually loud operation, intermittent fan activity, or a fan that stops spinning altogether.

5. Can dust really cause overheating?

Absolutely. Dust restricts airflow through the cooling system, preventing heat from escaping efficiently and forcing internal temperatures to rise.

6. Should I replace the thermal paste?

If your laptop is several years old and continues overheating despite cleaning, replacing the thermal paste may significantly improve cooling performance.

7. Is a cooling pad worth buying?

Cooling pads improve airflow and can lower temperatures during demanding workloads, particularly on gaming laptops. However, they should not be considered a replacement for repairing faulty cooling hardware.

8. Can malware cause laptop overheating?

Yes. Malware often consumes processor resources in the background, increasing CPU usage and generating unnecessary heat.

9. Why does my laptop become slow when it gets hot?

Modern processors automatically reduce their speed through thermal throttling to prevent hardware damage, resulting in noticeably slower performance.

For additional performance optimisation tips, see our How to Fix a Slow Laptop? Complete Troubleshooting & Performance Guide.

10. What temperature is too hot for a laptop?

Sustained temperatures above 90-95°C generally indicate that the cooling system requires inspection or repair.

11. Can a full SSD or hard drive cause overheating?

A nearly full storage drive doesn’t directly generate heat, but it can slow system performance and increase overall workload, indirectly contributing to higher operating temperatures.

12. Does replacing an HDD with an SSD reduce heat?

Yes. SSDs consume less power and produce less heat than traditional mechanical hard drives, improving both performance and cooling efficiency.

13. Why is my laptop fan so loud?

The cooling fan works harder when internal temperatures increase. Dust build-up, demanding applications, poor airflow, or failing cooling components are the most common causes.

14. How often should I clean my laptop?

External vents should be cleaned regularly, while professional internal cleaning is generally recommended every 12 to 24 months, depending on usage and environment.

15. Should I repair or replace an overheating laptop?

If your laptop is only a few years old, repairing the cooling system or upgrading components is usually far more cost-effective than replacing the entire device.

16. Can overheating reduce battery life?

Yes. High temperatures accelerate battery degradation and may eventually lead to swelling or reduced battery capacity.

17. Which laptop brands does iExpert Repairs repair?

We repair all major brands, including MacBook, Dell, HP, Lenovo, ASUS, Acer, Microsoft Surface, Samsung, MSI, Toshiba, and many other Windows and macOS laptops.

18. Do you provide a warranty on laptop repairs?

Yes. All qualifying repairs completed by iExpert Repairs include a 12-month warranty covering both replacement parts and workmanship.

19. How long does laptop overheating repair take?

Repair times depend on the fault. Internal cleaning and thermal paste replacement are often completed on the same day, while more complex hardware repairs may require 24-48 hours.

Conclusion

Laptop overheating is a common problem, but it should never be ignored. While it’s normal for laptops to become warm during demanding tasks, excessive temperatures can reduce performance, shorten component lifespan, and eventually lead to costly hardware failures.

Fortunately, many overheating issues can be resolved through simple maintenance such as cleaning dust from the cooling system, improving airflow, closing unnecessary background applications, updating Windows or macOS, scanning for malware, and replacing ageing thermal paste when required.

However, if your laptop continues overheating despite following these troubleshooting steps, the issue may involve failing cooling components, motherboard faults, or other hardware problems that require professional diagnosis.

At iExpert Repairs, we provide trusted Laptop Repair services throughout the UK for all major laptop brands. From cooling fan replacement and thermal paste renewal to SSD upgrades, RAM upgrades, motherboard repairs, battery replacement, software optimisation, and data recovery, our certified technicians use premium OEM-grade parts backed by a comprehensive 12-month warranty to restore reliable performance and safe operating temperatures.

Back to posts

How to Fix a Slow Laptop: Causes & Fixes

Introduction

A slow laptop can interrupt work, online meetings, studying, gaming, and everyday browsing. Tasks that once opened instantly may begin taking several minutes, applications may freeze unexpectedly, and even simple activities like opening a web browser can become frustrating. Fortunately, a sluggish laptop does not always mean it needs replacing.

Performance problems usually develop gradually due to software clutter, limited storage, ageing hardware, malware, or overheating. Identifying the underlying cause is the first step towards restoring speed and improving overall reliability. Many issues can be resolved with simple maintenance, while others may require professional diagnosis or hardware upgrades.

This guide explains the most common reasons laptops become slow, provides practical troubleshooting steps, and highlights situations where expert assistance is the better option. Whether you own a Dell, HP, Lenovo, MacBook, ASUS, Acer, Microsoft Surface, or another model, these recommendations apply to most modern laptops used across the UK.

If your device continues performing poorly after following these steps, our Laptop Repair specialists at iExpert Repairs can diagnose hardware faults, replace failing components, and restore your laptop to peak performance using premium-quality parts backed by a comprehensive warranty.

Why Trust This Guide?

Unlike general online tutorials, this guide is based on real-world laptop repair experience from certified technicians at iExpert Repairs. Every recommendation reflects practical repair procedures used daily in our UK repair centre.

  • Over 2,500 laptops repaired
  • Certified repair technicians
  • Premium OEM-grade replacement parts
  • 12-month warranty on qualifying repairs
  • Repairs for all major laptop brands
  • Nationwide UK mail-in repair service
  • Regularly reviewed and updated using current repair standards

Why Is My Laptop So Slow?

Laptop performance naturally declines over time as software becomes more demanding and storage fills with files, updates, and temporary data. However, age alone is rarely the only reason behind noticeable slowdowns. In many cases, several smaller issues combine to create significant performance problems.

Running dozens of startup programs, outdated drivers, insufficient memory, malware infections, overheating, and failing storage devices all reduce system responsiveness. Even a laptop with good specifications can feel slow when these problems are left unresolved.

Understanding what’s causing the slowdown allows you to apply the correct solution instead of wasting time on unnecessary fixes. Some problems can be solved within minutes, while others require component replacement or professional repair.

Quick Answer: How Can You Speed Up a Slow Laptop?

Most slow laptops can be improved by following these essential maintenance steps:

SolutionDifficultyPerformance Improvement
Restart the laptopEasyModerate
Close unnecessary programsEasyModerate
Disable startup appsEasyHigh
Free up storage spaceEasyHigh
Delete temporary filesEasyModerate
Scan for malwareEasyHigh
Install system updatesEasyModerate
Update device driversMediumModerate
Replace HDD with SSDAdvancedExcellent
Upgrade RAMAdvancedExcellent

If your laptop remains slow after completing these steps, the issue could involve hardware failure, overheating, motherboard faults, or a failing storage drive. In these situations, booking a professional Laptop Repair service is usually the fastest and most cost-effective solution.

Common Signs Your Laptop Is Running Slowly

A slow laptop rarely develops only one symptom. Most users notice several performance issues occurring together before realising the device requires attention.

Typical warning signs include:

  • Long boot times before Windows or macOS loads.
  • Applications taking several minutes to open.
  • Frequent freezing while multitasking.
  • Delayed keyboard or mouse response.
  • Web browsers becoming unresponsive with multiple tabs.
  • Loud cooling fans running continuously.
  • Random system crashes or blue screen errors.
  • High disk usage even when the laptop appears idle.
  • Videos buffering despite a stable internet connection.
  • Slow file transfers and delayed software installations.

If several of these symptoms appear together, the problem is likely more than routine ageing and should be investigated before permanent hardware damage occurs.

What Causes a Laptop to Slow Down?

There isn’t a single reason every laptop becomes slow. Performance issues usually result from a combination of software inefficiencies, hardware wear, and inadequate maintenance.

1. Too Many Startup Programs

Many applications automatically launch every time the laptop starts. Although each program may consume only a small amount of memory, dozens running together can significantly increase boot times and reduce available system resources.

Over time, unnecessary startup applications continue operating in the background without the user realising it, affecting overall responsiveness throughout the day.

2. Low Available Storage

When the internal drive approaches full capacity, the operating system has less room to manage temporary files and virtual memory efficiently. This causes slower loading times, reduced application performance, and delayed file operations.

Keeping at least 15-20% of your storage free helps maintain smooth performance and prevents unnecessary slowdowns.

3. Malware or Virus Infections

Malicious software often runs silently in the background while consuming processor power, memory, and internet bandwidth. Besides reducing performance, malware may compromise personal information and system security.

A complete antivirus scan should always be performed if your laptop suddenly becomes unusually slow without an obvious explanation.

4. Ageing Hard Drive

Traditional mechanical hard drives naturally become slower over time due to wear and repeated read/write operations. A failing HDD often causes long loading times, clicking noises, and frequent freezing.

Replacing an older hard drive with a modern SSD is one of the most effective ways to improve laptop performance.

5. Insufficient RAM

Running multiple browser tabs, office applications, video editing software, or games requires adequate memory. When RAM is limited, the operating system relies heavily on storage as virtual memory, which dramatically reduces speed.

Adding more RAM can significantly improve multitasking and everyday productivity on compatible laptops.

6. Overheating Components

Dust accumulation, blocked vents, ageing thermal paste, or failing cooling fans can cause internal temperatures to rise beyond safe operating limits. To protect critical components, the processor automatically reduces its speed, making the laptop feel noticeably slower.

If your laptop becomes hot, noisy, or slows down after a short period of use, overheating could be the primary cause. Related issues are explained further in our guide on Why Is My Phone Overheating? Causes & Fixes Explained, where similar cooling principles apply to electronic devices.

7. Outdated Software and Drivers

Operating system updates and hardware drivers include important performance improvements, security patches, and compatibility fixes. Delaying these updates may result in slower performance, software conflicts, and reduced stability.

Keeping Windows, macOS, graphics drivers, and chipset software up to date helps your laptop perform more efficiently while reducing unexpected system errors.

How to Fix a Slow Laptop: Step-by-Step Solutions

The following troubleshooting methods are arranged from the simplest fixes to more advanced performance improvements. Completing each step systematically helps identify the exact cause while avoiding unnecessary repairs or hardware replacements.

1. Restart Your Laptop

Many people leave their laptops running for days or even weeks without performing a proper restart. During this time, background processes, temporary files, and memory usage continue to build up, reducing overall performance.

Restarting your laptop clears temporary system memory, closes unnecessary background tasks, and allows Windows or macOS to reload essential services correctly. It’s often the quickest way to resolve minor lag, freezing, and application slowdowns.

If your laptop still feels sluggish after restarting, continue with the following troubleshooting steps.

2. Close Unnecessary Background Programs

Applications running in the background consume valuable RAM, processor power, and battery life, even when you’re not actively using them. Video conferencing software, cloud storage apps, browsers with multiple tabs, and unnecessary utilities are common examples.

Open Task Manager (Windows) or Activity Monitor (Mac) to identify programs consuming excessive CPU or memory. Closing unused applications immediately frees up system resources and improves responsiveness, especially on laptops with limited RAM.

Regularly checking background processes also helps identify software that may be causing abnormal resource usage.

3. Disable Startup Applications

Many programs automatically launch every time your laptop starts. Although convenient for some applications, too many startup items can dramatically increase boot times and leave your laptop feeling slow before you even begin working.

Review your startup applications and disable anything that isn’t essential. Focus on software you rarely use rather than security applications or system services.

Reducing startup programs not only shortens boot times but also improves overall performance throughout the day.

4. Free Up Storage Space

Low storage space is one of the most common reasons laptops become slow. Operating systems require free space for updates, temporary files, virtual memory, and application caching. When storage is almost full, overall performance begins to decline.

Delete large downloads, duplicate files, old videos, and applications you no longer need. If possible, move important files to cloud storage or an external drive to free additional capacity.

Aim to keep at least 15-20% of your storage drive free for optimal performance.

5. Delete Temporary Files

Temporary files accumulate every time you browse the internet, install software, or update your operating system. Over time, these files can occupy several gigabytes of storage without providing any ongoing benefit.

Using Windows Disk Cleanup, Storage Sense, or macOS storage management tools helps remove unnecessary temporary files safely. Performing this simple maintenance every few months keeps your laptop running more efficiently and prevents unnecessary storage clutter.

6. Scan for Malware and Viruses

Malware often operates silently in the background, consuming processor resources while slowing down the entire system. Some malicious software also installs unwanted applications, displays intrusive advertisements, or attempts to steal personal information.

Run a complete scan using a trusted antivirus solution and remove any detected threats. Keeping your antivirus software updated also provides better protection against newly discovered security risks.

If your laptop suddenly becomes slow without any obvious explanation, malware should always be ruled out early in the troubleshooting process.

7. Update Windows or macOS

Operating system updates include important security improvements, performance enhancements, and bug fixes. Delaying these updates can lead to compatibility issues, reduced stability, and slower overall performance.

Check for available Windows or macOS updates and install any pending releases. Once installation is complete, restart your laptop to ensure all improvements are applied correctly.

Keeping your operating system current helps maintain long-term reliability while improving compatibility with modern applications.

8. Update Device Drivers

Hardware drivers allow Windows and macOS to communicate correctly with components such as graphics cards, storage devices, Wi-Fi adapters, and processors. Outdated drivers may cause slow performance, crashes, or unexpected system errors.

Visit your laptop manufacturer’s support page or use Windows Update to install the latest certified drivers. Updating graphics, chipset, and storage drivers often improves both performance and system stability.

Avoid downloading drivers from unknown websites, as unofficial versions may introduce additional problems.

9. Uninstall Unused Software

Many laptops contain applications that are rarely used but continue consuming storage space and system resources. Older programs may also run background services that affect overall performance.

Review your installed software regularly and remove applications you no longer need. This not only frees storage but also reduces background activity and simplifies future system maintenance.

If you are unsure whether a program is essential, research it before uninstalling to avoid removing important system components.

10. Optimise Your Web Browser

Web browsers are among the most resource-intensive applications on modern laptops. Running dozens of tabs, installing unnecessary extensions, or allowing excessive cached data to accumulate can noticeably reduce performance.

Close unused tabs, remove browser extensions you no longer require, and clear cached files periodically. Using fewer browser extensions also improves startup speed and reduces memory usage.

If browser performance remains poor after optimisation, resetting browser settings or trying an alternative browser may help.

11. Check Your Hard Drive Health

Your laptop’s storage drive plays a major role in overall performance. If the hard drive begins to fail, you may notice slow boot times, delayed file access, frequent freezing, or unusual clicking noises. Ignoring these warning signs can eventually lead to data loss and complete drive failure.

Windows users can check drive health using built-in diagnostic tools or the Command Prompt, while macOS users can use Disk Utility to verify storage integrity. Running these checks helps identify potential problems before they become more serious.

If your hard drive reports bad sectors or health warnings, replacing it as soon as possible is recommended. At iExpert Repairs, our technicians can diagnose storage issues and safely replace faulty drives while helping protect your important files.

12. Upgrade from HDD to SSD

If your laptop still uses a traditional Hard Disk Drive (HDD), upgrading to a Solid State Drive (SSD) is one of the best ways to improve performance. SSDs have no moving parts, allowing them to load Windows, applications, and files significantly faster than older mechanical drives.

Many users notice dramatic improvements immediately after upgrading, including quicker startup times, faster software launches, and smoother multitasking. An SSD also consumes less power, helping to improve battery efficiency on many laptops.

If you’re unsure which SSD is compatible with your device, our Laptop Repair specialists can recommend and install the right upgrade for your laptop model.

13. Add More RAM

Random Access Memory (RAM) allows your laptop to handle multiple applications simultaneously. If your laptop frequently slows down while multitasking, upgrading the memory may provide a noticeable improvement in everyday performance.

More RAM is especially beneficial for users who edit photos, attend video meetings, browse with multiple tabs open, or run professional software. Instead of relying heavily on virtual memory, the laptop can process tasks more efficiently using physical RAM.

Before upgrading, check your laptop’s maximum supported memory capacity and ensure compatible modules are installed for the best results.

14. Prevent Laptop Overheating

Heat is one of the most common reasons laptops lose performance over time. When internal temperatures rise, the processor automatically reduces its speed to prevent damage, making the entire system feel slower.

Keeping air vents clean, using the laptop on a hard surface, and ensuring cooling fans operate correctly all help maintain safe operating temperatures. Professional internal cleaning and thermal paste replacement can also improve cooling efficiency, particularly on older laptops.

If your device frequently becomes hot, shuts down unexpectedly, or the cooling fan runs constantly, professional servicing may be required to restore normal performance.

15. Run Built-in Performance Troubleshooters

Both Windows and macOS include diagnostic utilities that can identify software conflicts, storage errors, and performance-related issues automatically. Running these built-in tools is a simple way to detect problems that may not be immediately obvious.

Windows users can use System Maintenance, Storage Sense, and Performance Monitor, while macOS users can rely on Activity Monitor and Disk Utility to investigate system health.

Although these utilities cannot fix every problem, they often highlight resource-intensive processes or storage issues that require further attention.

When DIY Fixes Are Not Enough

While many software-related issues can be resolved at home, some performance problems are caused by failing hardware that requires specialist equipment and technical expertise. If your laptop continues running slowly after completing all troubleshooting steps, there may be an underlying component failure.

Professional diagnostics can identify issues such as damaged motherboards, failing SSDs or hard drives, faulty RAM modules, charging circuit faults, overheating processors, and other hardware-related problems that basic troubleshooting cannot resolve.

Attempting advanced repairs without the proper knowledge may result in further damage, making professional assistance the safer and more cost-effective option.

Professional Laptop Repair Services in the UK

If your laptop remains slow despite software optimisation, iExpert Repairs provides comprehensive Laptop Repair services for customers throughout the UK. Our experienced technicians repair all major brands, including MacBookDellHPLenovo, ASUS, Acer, Microsoft Surface, Samsung, and many others.

Whether your laptop requires an SSD upgrade, RAM replacement, cooling system repair, motherboard diagnostics, charging port repair, battery replacement, or software recovery, we use premium OEM-grade parts and professional repair procedures to restore reliable performance.

Customers can visit our repair centre or use our secure nationwide mail-in repair service, with every repair backed by a 12-month warranty for complete peace of mind.

Slow Laptop Repair Cost in the UK

The cost of repairing a slow laptop depends on the underlying issue. Software optimisation is generally less expensive than replacing hardware components such as SSDs, RAM, or motherboards.

Repair ServiceEstimated UK Cost
Software Optimisation£40-£80
Virus & Malware Removal£50-£90
SSD Upgrade£80-£200+
RAM Upgrade£60-£180+
Cooling System Cleaning£50-£100
Laptop Battery Replacement£70-£180+
Motherboard DiagnosticsVaries by fault

For an accurate quotation, iExpert Repairs offers professional diagnostics before recommending the most suitable repair solution.

How to Prevent Your Laptop from Becoming Slow Again

Maintaining good performance is much easier than fixing a severely slow laptop. Simple maintenance habits help reduce wear on internal components and keep your operating system running efficiently over the long term.

Follow these best practices:

  • Keep Windows or macOS updated.
  • Install driver updates regularly.
  • Remove unused software every few months.
  • Avoid filling your storage drive completely.
  • Scan for malware routinely.
  • Clean dust from air vents.
  • Restart your laptop regularly instead of leaving it running continuously.
  • Back up important files before major updates.
  • Consider upgrading to an SSD if you still use a traditional hard drive.

Following these maintenance steps can significantly extend the lifespan of your laptop while reducing the likelihood of future performance issues.

FAQs About Fixing a Slow Laptop

1. Why is my laptop running so slow all of a sudden?

A laptop can suddenly become slow due to Windows or macOS updates, malware infections, insufficient storage space, overheating, outdated drivers, or background applications consuming system resources. Running a full system check and following basic troubleshooting steps usually helps identify the root cause.

2. How can I make my laptop faster without spending money?

You can improve your laptop’s performance by restarting it regularly, disabling unnecessary startup programs, deleting temporary files, uninstalling unused software, updating your operating system, scanning for malware, and freeing up storage space. These simple maintenance tasks often provide noticeable performance improvements.

3. Can a full hard drive slow down my laptop?

Yes. When your storage drive is almost full, Windows or macOS has less space to manage temporary files and virtual memory efficiently. Keeping at least 15–20% of your storage free helps maintain smooth performance.

4. Does restarting a laptop improve performance?

Yes. Restarting clears temporary memory, stops unnecessary background processes, and refreshes system resources. If your laptop has been running continuously for several days, a restart can often resolve minor performance issues.

5. How much RAM do I need for a fast laptop?

For everyday tasks such as browsing, office work, and streaming, 8GB of RAM is generally sufficient. If you regularly edit videos, play games, or multitask heavily, upgrading to 16GB or more will provide a smoother experience.

6. Is upgrading to an SSD worth it?

Absolutely. Replacing a traditional HDD with an SSD is one of the most effective ways to speed up a slow laptop. Boot times, application loading, and overall responsiveness improve significantly after upgrading.

7. How do I know if my hard drive is failing?

Common signs include slow boot times, frequent freezing, clicking noises, missing files, failed software installations, and repeated disk errors. If you notice these symptoms, it’s advisable to back up your data and have the drive professionally tested.

8. Can viruses make my laptop slow?

Yes. Malware and viruses consume system resources while running in the background. They may also install unwanted software, display advertisements, or compromise personal data, all of which can affect performance.

9. Why does my laptop freeze while multitasking?

Freezing during multitasking is usually caused by insufficient RAM, excessive CPU usage, outdated software, or background applications consuming too many resources. Upgrading memory and closing unnecessary programs often resolves the issue.

10. Why is my laptop slow when browsing the internet?

A slow browser may be caused by too many open tabs, excessive browser extensions, cached data, malware, or insufficient system memory. Clearing the browser cache and removing unnecessary extensions can improve browsing speed.

11. Can overheating slow down a laptop?

Yes. High temperatures force the processor to reduce its speed to prevent hardware damage, a process known as thermal throttling. Cleaning the cooling system and improving airflow can restore normal performance.

12. Should I repair or replace my slow laptop?

If your laptop is only a few years old, repairing or upgrading it is often more cost-effective than purchasing a new device. SSD upgrades, RAM upgrades, and professional servicing can extend its lifespan considerably.

13. How often should I clean my laptop to keep it running fast?

It’s recommended to clean temporary files every month, remove unused software every few months, and have the internal cooling system professionally cleaned every 12 to 24 months, depending on usage.

14. Do Windows updates slow down laptops?

Immediately after a major update, your laptop may temporarily feel slower while background optimisation completes. Once the process finishes, updates generally improve performance, security, and stability.

15. Can too many startup programs slow down my laptop?

Yes. Every startup application uses memory and processor resources during boot. Disabling unnecessary startup programs helps reduce boot time and improves overall responsiveness.

16. How long does it take to repair a slow laptop?

The repair time depends on the cause. Software optimisation can often be completed on the same day, while SSD upgrades, RAM installations, or hardware repairs may take between 24 and 48 hours.

17. How much does it cost to fix a slow laptop in the UK?

The cost varies depending on the fault. Software optimisation is generally less expensive than replacing hardware components. A professional diagnosis helps determine the most suitable and cost-effective repair.

18. Which laptop brands does iExpert Repairs service?

iExpert Repairs works on a wide range of laptop brands, including MacBook, Dell, HP, Lenovo, ASUS, Acer, Microsoft Surface, Samsung, MSI, Toshiba, and many other Windows and macOS devices.

19. Do you offer a warranty on laptop repairs?

Yes. All qualifying repairs completed by iExpert Repairs are backed by a 12-month warranty, giving customers confidence that replacement parts and workmanship meet high-quality standards.

20. Where can I get professional laptop repair in the UK?

If your laptop remains slow after following the troubleshooting steps in this guide, iExpert Repairs offers professional Laptop Repair services across the UK. Our certified technicians provide expert diagnostics, SSD and RAM upgrades, software optimisation, motherboard repairs, battery replacements, and many other services using premium OEM-grade parts.

Conclusion

A slow laptop doesn’t always mean it’s time to replace your device. In many cases, performance issues are caused by software clutter, insufficient storage, outdated drivers, malware, overheating, or ageing hardware. By following the troubleshooting steps in this guide, you can often restore your laptop’s speed, improve system performance, and extend its lifespan without the expense of purchasing a new device.

If your laptop continues to freeze, crash, overheat, or perform slowly after trying these solutions, the issue may be related to failing hardware such as the SSD, RAM, battery, charging port, cooling system, or motherboard. A professional diagnosis can identify the exact cause and ensure the correct repair is completed before the problem becomes more serious.

At iExpert Repairs, we provide trusted Laptop Repair services across the UK for all major brands, including MacBook, Dell, HP, Lenovo, ASUS, Acer, Microsoft Surface, Samsung, MSI, and Toshiba. From software optimisation and SSD upgrades to RAM upgrades, laptop screen repairs, battery replacements, motherboard diagnostics, and data recovery, our certified technicians use premium OEM-grade parts backed by a 12-month warranty to restore your laptop’s performance.

Back to posts

Why Is My iPad Not Charging? Common Causes & Fixes

Introduction

Few things are more frustrating than plugging in your iPad only to discover that it isn’t charging. Whether you’re trying to work, attend an online class, watch videos, or simply keep your device ready for everyday use, a charging problem can quickly become a major inconvenience. The good news is that an iPad failing to charge doesn’t always mean there’s a serious hardware fault. In many cases, the issue can be traced back to a damaged charging cable, a blocked charging port, outdated software, or even temporary system glitches.

However, if your iPad still refuses to charge after basic troubleshooting, the problem may involve the battery, charging port, or internal charging circuit. In this guide, we’ll explain the most common reasons why an iPad won’t charge, walk you through practical troubleshooting steps, and help you understand when professional repair is the best option. We’ll also briefly compare similar charging issues found on Android tablets, including Samsung Galaxy Tab devices, to give you a complete picture of tablet charging problems.

Why Is My iPad Not Charging? Quick Answer

If your iPad isn’t charging, the problem is usually caused by a faulty charging cable, damaged power adapter, dirty charging port, software issue, battery wear, overheating, or internal hardware failure. While many charging problems can be fixed at home, persistent issues often require professional diagnosis to prevent further damage.

Common Reasons Why an iPad Won’t Charge

Your iPad relies on several hardware and software components working together to charge correctly. If just one of these components develops a fault, charging may stop completely or become unreliable. Before assuming your battery has failed, it’s important to identify the actual cause, as many charging issues are surprisingly easy to fix.

The most common reasons include:

  • Damaged charging cable
  • Faulty power adapter
  • Dirty charging port
  • Software glitches
  • Battery deterioration
  • Overheating
  • Water damage
  • Internal charging circuit faults

Understanding these causes will help you troubleshoot your iPad more effectively and avoid replacing parts unnecessarily.

1. Faulty Charging Cable or Adapter

One of the most common reasons an iPad won’t charge is a damaged charging cable or power adapter. Charging accessories experience daily wear and tear, and even small signs of damage can interrupt the flow of power to your device. Frayed cables, bent connectors, loose USB ends, or damaged charging bricks can all prevent your iPad from charging properly.

If your iPad suddenly stops charging, begin by carefully inspecting your charging accessories. Look for exposed wires, cracked insulation, bent Lightning or USB-C connectors, and signs of overheating. If possible, try another Apple-certified or high-quality charger to see whether the problem disappears.

It’s also worth testing a different wall socket, as power outlets can occasionally develop faults too. Avoid using extremely cheap third-party chargers, as they may deliver unstable power and even damage your iPad’s battery over time.

2. Dirty or Damaged Charging Port

Even if your charging cable is in perfect condition, your iPad may still refuse to charge if the charging port is blocked. Dust, lint, pocket debris, and other small particles gradually collect inside the charging port, preventing the connector from making proper contact with the internal charging pins.

Common signs of a blocked or damaged charging port include:

  • The charging cable feels loose.
  • Charging starts and stops repeatedly.
  • You have to hold the cable at a certain angle.
  • The charging icon appears briefly before disappearing.

Use a flashlight to inspect the charging port carefully. If you notice dust or lint, gently remove it using a soft plastic tool or compressed air. Never use sharp metal objects such as needles or pins, as they can permanently damage the delicate connectors inside the port.

If cleaning the port doesn’t solve the problem, the charging connector itself may be worn or physically damaged. In these situations, professional repair is usually the safest option.

3. Software Glitches and iPadOS Bugs

Not every charging issue is caused by faulty hardware. Occasionally, software glitches can prevent your iPad from recognising that it’s connected to a charger. A temporary system error may cause the charging icon to disappear, stop the battery percentage from increasing, or interrupt charging unexpectedly.

Restarting your iPad is often enough to resolve these temporary issues. If the problem continues, check whether you’re running the latest version of iPadOS. Apple regularly releases updates that improve power management, battery performance, and charging reliability.

You should also close unnecessary background applications if your iPad becomes unusually warm while charging. Heavy processing loads can increase battery temperature and make charging appear much slower than normal.

Keeping your software up to date is one of the easiest ways to prevent future charging-related problems.

4. Battery Health and Ageing

Every rechargeable battery gradually loses its ability to hold a charge as it gets older. While iPad batteries are designed to last for many years, heavy daily use eventually reduces their overall capacity. If your iPad is several years old, battery wear may be contributing to charging problems.

Signs of a worn battery include:

  • Charging takes much longer than before.
  • Battery drains unusually fast.
  • Random shutdowns.
  • Device won’t charge beyond a certain percentage.
  • iPad switches off despite showing battery remaining.

If you’ve already ruled out charger and charging port issues, a degraded battery becomes much more likely. Replacing the battery is often more affordable than replacing the entire device and can significantly improve battery life and performance.

4. Overheating Can Stop Your iPad Charging

Many users are surprised to learn that overheating can temporarily stop an iPad from charging. Apple includes built-in temperature protection that automatically pauses charging whenever the device becomes too hot. This safety feature protects the battery from long-term damage.

Your iPad may overheat if it’s left in direct sunlight, used for gaming while charging, or kept inside a hot car. Charging under pillows, blankets, or other surfaces that trap heat can also cause temperatures to rise.

If your iPad feels unusually warm, disconnect it from the charger and allow it to cool naturally before trying again. Avoid placing it in a refrigerator or using external cooling methods, as sudden temperature changes can create condensation and lead to additional damage.

5. iPad is Water or Liquid Damage

Liquid damage is another common reason an iPad refuses to charge. Even a small amount of moisture inside the charging port can interfere with electrical connections or trigger built-in safety mechanisms that temporarily disable charging.

Common symptoms of liquid damage include:

  • Moisture detection warnings.
  • Charging stops after exposure to water.
  • Corrosion around the charging connector.
  • Intermittent charging behaviour.

If your iPad has recently come into contact with water, disconnect the charger immediately and allow the device to dry completely before attempting to charge it again. Never use a hairdryer or place the device near direct heat, as excessive temperatures can cause further internal damage.

If charging problems continue after drying, professional inspection is strongly recommended because corrosion can spread inside the device over time.

6. Force Restart Your iPad

If your iPad has completely frozen or the display remains black, performing a force restart may restore normal charging functionality. This process refreshes the operating system without deleting your personal data and can often resolve temporary software crashes that interfere with charging.

For newer iPads with Face ID, quickly press and release the Volume Up button, then the Volume Down button, and finally press and hold the Top button until the Apple logo appears. On models with a Home button, press and hold both the Home and Power buttons together until the Apple logo is displayed.

If your iPad begins charging normally after restarting, the issue was likely software-related rather than a hardware fault.

How to Fix an iPad That Won’t Charge

If you’ve identified that your iPad isn’t charging, don’t panic just yet. Many charging issues can be resolved without replacing any parts. By following the troubleshooting methods below, you can often identify whether the problem is caused by your charger, charging port, software, battery, or another hardware component. Start with the simplest fixes before considering professional repair.

1. Check Your Power Source

Sometimes the problem isn’t your iPad at all – it’s the power source you’re using. A faulty wall socket, damaged extension lead, or low-powered USB port can prevent your iPad from receiving enough power to charge correctly.

Try plugging your charger into a different wall outlet rather than charging through a computer’s USB port. If you’re using an extension lead, connect the charger directly to the wall socket. You should also test another Apple-certified charger if available. If your iPad begins charging normally, the issue was likely with the power source rather than the device itself.

2. Use the Correct Charger for Your iPad

Not every charger delivers enough power for every iPad model. Newer USB-C iPads generally require higher-wattage power adapters, while older Lightning models can work with lower-powered chargers. Using an incompatible or underpowered charger may result in slow charging or no charging at all.

Whenever possible, use the original Apple charger or a reputable replacement from a trusted manufacturer. Avoid extremely cheap third-party chargers, as they may provide unstable power output, affecting charging performance and potentially reducing your battery’s lifespan over time.

3. Clean the Charging Port Safely

Dust and lint can build up inside your iPad’s charging port over time, preventing the charging cable from connecting properly. Even a small amount of debris can stop electricity from reaching the battery, making it appear as though the iPad has stopped charging completely.

Inspect the charging port carefully under good lighting. If you notice dust or debris, gently remove it using compressed air or a non-metallic cleaning tool. Never use sharp objects like needles or paper clips, as they can damage the charging pins. If the cable still feels loose after cleaning, the charging port itself may need professional repair.

Common iPad Charging Problems and Their Solutions

Before moving on to more advanced troubleshooting steps, it’s helpful to understand the most common charging issues iPad users experience. The table below highlights the typical symptoms, their likely causes, and the recommended solutions. Use it as a quick reference to identify what may be preventing your iPad from charging properly.

ProblemPossible CauseRecommended Solution
iPad won’t charge at allFaulty charger, damaged charging port, or completely discharged batteryTest another charger, clean the charging port, and seek professional repair if the issue persists.
Charging is very slowLow-power adapter, background apps, or overheatingUse the correct Apple-compatible charger, close unnecessary apps, and allow the iPad to cool down.
Charging repeatedly stops and startsLoose charging cable or damaged charging portReplace the charging cable and inspect the charging port for damage or debris.
Charging cable only works at one angleBent connector or worn charging portHave the charging port professionally inspected and repaired if necessary.
iPad charges but the battery drains quicklyBattery degradation or ageingCheck the battery’s condition and consider a battery replacement if performance has significantly declined.
“Accessory Not Supported” message appearsNon-certified charger or damaged charging cableUse an Apple-certified charging cable and power adapter to ensure safe and reliable charging.

The table above covers the most common iPad charging problems, but every device is different. If you’ve checked these symptoms and your iPad still won’t charge, continue with the troubleshooting steps below to identify the exact cause and determine whether a simple fix or professional repair is required.

1. Update iPadOS to the Latest Version

Software problems can occasionally interfere with charging, particularly if your iPad is running an outdated version of iPadOS. Apple frequently releases updates that improve battery management, charging performance, and overall system stability.

If your iPad still has enough battery power, open Settings > General > Software Update and install any available updates. Before updating, make sure your internet connection is stable and avoid interrupting the installation process. Keeping your software up to date helps reduce the risk of future charging-related issues.

If your iPad becomes too hot, it may temporarily stop charging to protect the battery. This built-in safety feature prevents excessive heat from damaging internal components and is completely normal.

Move your iPad to a cooler environment, remove any thick protective case, and stop using demanding apps while it charges. Avoid leaving the device in direct sunlight or inside a hot car. Once it has cooled down, reconnect the charger and check whether charging resumes normally.

2. Test Another Charging Cable

Charging cables naturally wear out over time, especially if they’re frequently bent or tightly wrapped. Even if the cable appears undamaged on the outside, broken internal wires can prevent your iPad from charging consistently.

Try another Apple-certified Lightning or USB-C cable to rule out cable failure. If your iPad charges normally with a different cable, replacing the faulty accessory is a quick and inexpensive solution compared to repairing the device itself.

3. USB-C vs Lightning Charging Problems

Apple now uses both Lightning and USB-C connectors across different iPad models, and each connector type has its own common charging issues. Older Lightning ports are more likely to collect dust and lint, while USB-C ports can become loose or develop damaged internal pins after prolonged use.

Knowing which charging port your iPad uses can help narrow down the cause of the problem more quickly. If multiple chargers fail to work and the connector feels loose, professional inspection is recommended to determine whether the charging port requires replacement.

When Does an iPad Need Professional Repair?

If you’ve already tested multiple chargers, cleaned the charging port, restarted your iPad, and updated iPadOS without success, the issue is likely hardware-related. Continuing to force the charger into a damaged port can sometimes make the problem worse.

A qualified technician can inspect your battery, charging port, charging IC, motherboard, and internal power circuits using specialist diagnostic equipment. This ensures the correct component is repaired or replaced, saving you from unnecessary costs and helping restore your iPad to full working order.

How Much Does It Cost to Repair an iPad Charging Port in the UK?

One of the most common questions iPad owners ask is, “How much does it cost to repair an iPad charging port?” The answer depends on your iPad model, the type of charging connector (Lightning or USB-C), and whether the issue is limited to the charging port or involves additional internal components such as the charging IC or motherboard.

For most iPad models in the UK, a charging port replacement typically costs between £65 and £150. Older iPads with Lightning connectors are generally less expensive to repair, while newer USB-C models, such as the iPad Air, iPad Pro, and recent iPad generations, may cost more due to the complexity of the repair and the higher price of replacement parts. If the fault is caused by liquid damage or motherboard failure rather than the charging port itself, additional repair costs may apply.

Typical iPad Charging Port Repair Costs in the UK

iPad Repair TypeTypical UK Price
Charging Port Cleaning£20-£40
Lightning Charging Port Replacement£65-£100
USB-C Charging Port Replacement£79-£150
iPad Battery Replacement£60-£130
Charging IC Repair£120-£220
Motherboard Charging Repair£150-£300+

These prices are intended as a general guide and may vary depending on your iPad model, the availability of replacement parts, and the repair provider you choose. Before booking a repair, it’s always worth requesting a diagnostic assessment so the technician can confirm the exact cause of the charging issue and provide an accurate quotation.

How Long Does an iPad Charging Repair Take?

Many customers also ask, “How long does an iPad charging repair take?” The answer depends on the type of fault, your iPad model, and whether replacement parts are readily available. Fortunately, most common charging repairs can be completed much faster than people expect.

Simple repairs, such as charging port cleaning or battery replacement, are often completed on the same day. However, more complex faults involving the charging IC, motherboard, or liquid damage require additional diagnostic testing and microsoldering, which can increase repair times. Choosing an experienced repair specialist helps ensure your iPad is repaired accurately without unnecessary delays.

Typical iPad Charging Repair Times

Repair TypeTypical Turnaround Time
Charging Port Cleaning30-60 minutes
Charging Port Replacement1-3 hours
Battery Replacement1-2 hours
Charging IC Repair1-3 working days
Motherboard Repair2-5 working days
Liquid Damage Diagnosis1-3 working days
Full Diagnostic Inspection30-90 minutes

While many iPad charging repairs can be completed on the same day, the exact turnaround time depends on the availability of replacement parts and the complexity of the fault. If your device requires motherboard-level repairs or extensive liquid damage treatment, additional time may be needed to ensure the repair is completed safely and thoroughly. A professional diagnostic assessment is the best way to receive an accurate repair estimate and expected completion time.

iPad Charging Problems by Model

Charging faults can affect nearly every iPad model, regardless of its age. Older iPads are more likely to experience battery wear or Lightning port issues, while newer USB-C models can develop connector damage or charging circuit faults through everyday use.

If you’re looking for repair options for a specific device, you can explore dedicated repair services for models including the iPad 10th Gen (2022)iPad 9th Gen (2021)iPad Air 5 (2022), iPad Air 4 (2020)iPad Mini 6iPad Mini 5iPad Pro 11-inchiPad Pro 12.9-inch, and many other iPad generations.

Troubleshooting Checklist Before Booking a Repair

Before booking an iPad repair, it’s worth carrying out a few basic troubleshooting steps. Many charging problems are caused by faulty accessories, software glitches, or minor charging port blockages that can be resolved without replacing any parts. Use the checklist below to ensure you’ve ruled out the most common causes before seeking professional assistance.

Troubleshooting StepWhy It MattersExpected Result
Try a different charging cableRules out a faulty or damaged cable.iPad begins charging normally if the cable was the issue.
Test another power adapterConfirms whether the charger is supplying enough power.Charging resumes with a working adapter.
Plug into a different wall socketEliminates problems with the power source.Confirms the electrical outlet isn’t faulty.
Clean the charging port carefullyRemoves dust and lint blocking the connector.Charging connection becomes stable and secure.
Restart or force restart your iPadFixes temporary software glitches affecting charging.Charging may resume after the device restarts.
Update to the latest version of iPadOSResolves known software bugs and charging issues.Improves charging stability and overall performance.
Allow the iPad to cool downCharging automatically pauses if the device overheats.Charging resumes once the device reaches a safe temperature.
Check for signs of liquid damageMoisture or corrosion can prevent normal charging.Helps determine whether professional repair is required.

If you’ve completed all of the troubleshooting steps above and your iPad still won’t charge, the problem is likely related to the battery, charging port, or internal charging circuitry. In this situation, a professional diagnostic inspection is the safest and most cost-effective way to identify the fault and restore normal charging.

Charging Port vs Battery Problems: How to Identify the Real Cause

If your iPad isn’t charging properly, it can be difficult to tell whether the issue is caused by a faulty charging port or a worn-out battery. Although both problems can prevent your iPad from charging, they often present different symptoms. The comparison table below will help you identify the most likely cause, making it easier to decide whether your device may need a charging port repair or a battery replacement.

SymptomLikely Charging Port IssueLikely Battery Issue
Charging cable feels loose or wobblyYesNo
iPad only charges when the cable is held at a certain angleYesNo
Charging repeatedly disconnects and reconnectsYesRare
Visible dirt, lint, or physical damage inside the charging portYesNo
Battery drains unusually fast after a full chargeNoYes
iPad shuts down unexpectedly despite showing battery lifeNoYes
Charging stops at a certain battery percentageRareCommon
iPad becomes unusually hot while chargingPossiblePossible
Device won’t charge even after trying multiple chargersPossiblePossible
Battery percentage jumps or behaves unpredictablyRareCommon

Although this comparison can help narrow down the source of the problem, it should only be used as a general guide. In some cases, both the charging port and battery may contribute to charging issues. If you’ve already tested different chargers, cleaned the charging port, restarted your iPad, and updated iPadOS without success, a professional diagnostic inspection is recommended. An experienced technician can accurately identify the faulty component and advise whether your iPad requires a charging port repair, battery replacement, or another hardware repair.

Tips to Prevent Future Charging Problems

While some hardware failures are unavoidable, good charging habits can significantly extend your iPad’s lifespan. Always use high-quality charging accessories, keep the charging port free from dust, and avoid exposing your device to excessive heat or moisture.

You should also unplug the charger carefully instead of pulling on the cable and replace damaged charging accessories as soon as you notice signs of wear. Taking these simple precautions can reduce the risk of future charging problems and help keep your iPad performing reliably for years.

FAQs – Why Is My iPad Not Charging?

1. Why is my iPad not charging even when it’s plugged in?

If your iPad isn’t charging when plugged in, the most common causes include a faulty charging cable, damaged power adapter, dirty charging port, software glitches, or a worn-out battery. Start by testing another Apple-certified charger, cleaning the charging port, and restarting your iPad. If the problem continues after trying these steps, the device may require professional repair.

2. Why is my iPad charging very slowly?

Slow charging is often caused by using a low-power charger, running multiple apps while charging, or charging the iPad in a hot environment. Using the correct Apple-compatible power adapter and allowing the device to charge without heavy usage can significantly improve charging speed.

3. How do I know if my iPad charging port is damaged?

A damaged charging port usually causes the charging cable to feel loose, disconnect frequently, or only work when held at a certain angle. You may also notice visible dirt, bent pins, or physical damage inside the port. If cleaning the port doesn’t solve the problem, it should be inspected by a qualified technician.

4. Can a dirty charging port stop my iPad from charging?

Yes. Dust, lint, and other debris can build up inside the charging port over time, preventing the charging cable from making proper contact. Carefully cleaning the port with compressed air or a non-metallic tool often restores normal charging without requiring any repairs.

5. Why does my iPad say “Accessory Not Supported”?

This message usually appears when you’re using a damaged, low-quality, or non-certified charging cable or power adapter. Switching to an Apple-certified charging accessory often resolves the issue. In some cases, a dirty or damaged charging port may also trigger this warning.

6. Can an outdated version of iPadOS affect charging?

Yes. Although it’s less common, software bugs in older versions of iPadOS can occasionally interfere with charging performance. Installing the latest software update helps improve battery management, charging reliability, and overall system stability.

7. Why does my iPad stop charging when it gets hot?

Apple devices include built-in temperature protection to prevent battery damage. If your iPad becomes too hot while charging, it may temporarily pause charging until the temperature returns to a safe level. Allow the device to cool naturally before reconnecting the charger.

8. How can I tell if my iPad battery needs replacing?

Common signs of a worn battery include rapid battery drain, unexpected shutdowns, slow charging, overheating, and poor battery life even after a full charge. If your iPad is several years old and these symptoms continue, a battery replacement may be the most effective solution.

9. Is it safe to use a third-party charger with my iPad?

Yes, but only if it’s from a reputable manufacturer and meets Apple’s charging standards. Cheap, uncertified chargers can provide unstable power, reduce charging efficiency, and may even damage your battery or charging circuit over time.

10. Can I fix an iPad that won’t charge myself?

Many charging issues can be resolved at home by replacing the charging cable, testing another adapter, cleaning the charging port, restarting the device, or updating iPadOS. However, if the problem is caused by internal hardware such as the charging port, battery, or motherboard, professional repair is recommended.

11. Why is my iPad charging on and off repeatedly?

Intermittent charging usually indicates a loose charging cable, damaged charging port, worn connector, or faulty charger. If the charging icon repeatedly appears and disappears, try another cable and inspect the charging port for debris or physical damage.

12. Does using my iPad while charging affect battery life?

Using your iPad for demanding activities such as gaming or video editing while charging generates additional heat, which can slow charging and increase long-term battery wear. For the fastest and safest charging, it’s best to minimise heavy usage until the battery has recharged.

13. What should I do if my iPad won’t charge after water damage?

Immediately disconnect the charger and turn off the device if possible. Allow the iPad to dry completely before attempting to charge it again. If charging problems continue after drying, internal corrosion may be present, and professional inspection is strongly recommended.

14. How long should an iPad battery last?

Most iPad batteries are designed to provide several years of reliable performance under normal usage. Battery lifespan depends on charging habits, usage patterns, and environmental conditions. As the battery ages, charging performance and battery capacity gradually decline.

15. Can a faulty charging cable damage my iPad?

A damaged or poor-quality charging cable may not only prevent proper charging but can also deliver unstable power to your device. Using Apple-certified or high-quality replacement cables helps protect both the battery and internal charging components.

16. Why won’t my iPad charge past a certain percentage?

If your iPad consistently stops charging at the same battery percentage, the problem may be related to battery degradation, software issues, overheating, or battery management features. Restarting the device, updating iPadOS, and testing another charger are good first steps before seeking professional diagnosis.

17. Do older iPads experience charging problems more often?

Yes. Older iPads are generally more likely to develop charging issues due to battery ageing, worn charging ports, and years of daily use. Regular maintenance and timely battery replacement can help extend the life of an older device.

18. Can wireless charging solve iPad charging problems?

Currently, iPads do not support standard wireless charging like many smartphones. Charging relies on the Lightning or USB-C port, making the condition of the charging accessories and connector especially important.

19. When should I seek professional iPad repair?

If you’ve already tried different chargers, cleaned the charging port, updated iPadOS, and restarted your iPad without success, it’s time to seek professional repair. A qualified technician can accurately diagnose whether the fault lies with the battery, charging port, or internal charging circuitry.

20. How can I prevent future iPad charging problems?

To reduce the risk of charging issues, always use certified charging accessories, keep the charging port clean, avoid exposing your iPad to excessive heat or moisture, unplug the charger carefully, and replace damaged cables as soon as signs of wear appear. These simple habits can help extend the lifespan of both your battery and charging port.

Conclusion

If you’ve been asking yourself, “Why is my iPad not charging?”, the good news is that many charging problems can be diagnosed and resolved without immediately replacing your device. In many cases, the issue is caused by something simple, such as a faulty charging cable, a damaged power adapter, dust inside the charging port, an outdated version of iPadOS, or temporary software glitches. Following the troubleshooting steps outlined in this guide can often help restore normal charging and save you the cost of unnecessary repairs.

However, if your iPad still won’t charge after testing different chargers, cleaning the charging port, updating the software, and restarting the device, the problem may be related to the battery, charging port, charging IC, or another internal hardware component. Continuing to use a faulty charger or forcing the charging cable into a damaged port may worsen the issue and lead to more expensive repairs.

Whether you own an iPadiPad Air, iPad mini, or iPad Pro, diagnosing charging issues early can help extend the life of your device and reduce repair costs. If you’re unsure what’s causing the problem, a professional diagnostic service is the safest way to identify the fault and restore your iPad to full working order.

Why Choose iExpert Repairs?

At iExpert Repairs, we specialise in diagnosing and repairing charging problems across a wide range of Apple devices. Our experienced technicians use professional diagnostic equipment to accurately identify faults, ensuring that only the necessary components are repaired or replaced.

When you choose iExpert Repairs, you benefit from:

  • Experienced technicians with years of tablet repair expertise.
  • Professional diagnostics to identify the exact cause of charging issues.
  • High-quality replacement parts for reliable, long-lasting repairs.
  • Fast turnaround times to minimise downtime.
  • Competitive pricing with no hidden costs.
  • Repairs available for iPad, iPad Air, iPad mini, iPad Pro, and many Samsung Galaxy Tab models.
  • Friendly customer support before, during, and after your repair.

Our goal is to provide reliable, affordable, and professional tablet repair services, helping you get back to using your device as quickly as possible.

Back to posts

How Much to Fix iPad Screen? Complete Repair Cost Guide

Introduction

If you’re wondering how much to fix an iPad screen, you’re not alone. A cracked or damaged iPad display is one of the most common tablet repairs, and the cost depends on several factors, including your iPad model, the type of screen damage, and whether only the front glass or the entire display needs replacing. Understanding these factors can help you estimate repair costs before choosing a repair service.

Older iPad models are generally less expensive to repair because the glass and display can sometimes be replaced separately. In contrast, newer iPad Air Models and iPad Pro models often require a complete display assembly replacement, making repairs more expensive. The final price can also vary depending on whether you choose Apple or a reputable independent repair specialist and the quality of replacement parts used.

This guide provides accurate, up-to-date information based on current UK repair pricing and industry best practices. You’ll learn how iPad screen repair costs vary by model, what affects the overall price, the difference between glass-only repairs and full display replacements, and whether repairing your iPad is the most cost-effective option.

How Much Does It Cost to Fix an iPad Screen?

The cost of fixing an iPad screen in the UK typically ranges from £50 to over £500, depending on the model and the extent of the damage.

Older entry-level iPads usually have a separate glass digitiser, allowing technicians to replace only the cracked glass if the LCD underneath remains undamaged. This keeps repair costs relatively low.

On newer iPad Air and iPad Pro models, however, Apple uses fully laminated displays where the glass, digitiser, and LCD or OLED panel are bonded together. Even a small crack in the front glass may require replacing the entire display assembly, making repairs considerably more expensive.

Below is a general guide to typical UK repair costs.

iPad TypeTypical UK Repair Cost
Older iPad£50-£120
iPad 7th-10th Generation£70-£180
iPad Mini Models£70-£220
iPad Air Models£90-£320
iPad Pro Models£99-£550+

Please note: These are estimated market prices. The final cost depends on your specific iPad model, the severity of the damage, and the quality of replacement parts chosen.

What Determines the Cost of an iPad Screen Repair?

Several factors influence how much you’ll pay to repair an iPad screen.

1. Your iPad Model

The biggest factor is the model itself.

Entry-level iPads generally cost less to repair because replacement components are widely available. Premium models such as the iPad Pro feature advanced display technologies that significantly increase repair costs.

For example:

This is one reason why obtaining an accurate quote based on your exact model is important.

2. Type of Screen Damage

Not every cracked screen requires the same repair. Common types of damage include:

  • Cracked outer glass
  • Broken digitiser
  • Dead pixels
  • Black screen
  • Flickering display
  • Touch not responding
  • LCD bleeding
  • Display lines
  • Complete display failure

If your touchscreen has stopped responding after being dropped, it’s worth reading our guide on Phone Touch Screen Not Responding? before deciding whether a replacement is necessary.

3. Glass-Only Repair vs Full Display Replacement

Many customers assume every cracked screen needs a complete replacement. In reality, some older iPads allow technicians to replace only the front glass, which is considerably cheaper. However, many newer iPads require replacing:

  • Glass
  • Touch digitiser
  • LCD or OLED panel

as one complete display assembly. This is why two iPads with similar cracks may have very different repair costs.

4. Replacement Part Quality

The quality of replacement parts also affects pricing. Generally, repair providers offer:

  • Genuine Apple parts (where available)
  • OEM-quality components
  • High-quality aftermarket displays
  • Budget replacement screens

Lower-cost parts may reduce the repair price but can sometimes affect brightness, colour accuracy, touch responsiveness, or long-term durability. Choosing a trusted repair specialist that uses high-quality components is often the better long-term investment.

5. Repair Provider

Where you choose to have your iPad repaired can significantly affect the final bill. Options include:

  • Apple
  • Apple Authorised Service Providers
  • Independent repair specialists
  • Local repair shops
  • Mail-in repair services

Independent repair centres often provide competitive pricing, faster turnaround times, and warranties while maintaining high repair standards.

Key Takeaways

Before requesting a repair quote, make sure you know:

  • Your exact iPad model
  • Whether only the glass is cracked or the display is damaged
  • If the touchscreen still works
  • Whether there are black spots, coloured lines, or flickering
  • The type of replacement parts being offered
  • The warranty included with the repair

Having this information helps you compare repair options more accurately and avoid unexpected costs.

Average iPad Screen Repair Costs by Model

One of the biggest factors affecting the cost of an iPad screen repair is the model you own. Apple has released numerous iPad generations, each with different display technologies and repair requirements. Older iPads often feature a separate glass digitiser, while many newer iPad Air and iPad Pro models use fully laminated displays, making repairs more complex and expensive.

The prices below are general estimates for the UK repair market in 2026. Actual costs may vary depending on the repair provider, the quality of replacement parts used, and the extent of the damage.

Standard iPad Models

Standard iPads are generally the most affordable to repair because replacement parts are widely available and many older models allow glass-only repairs.

iPad ModelEstimated Screen Repair Cost (UK)
iPad 5th Generation£50-£90
iPad 6th Generation£55-£95
iPad 7th Generation£70-£120
iPad 8th Generation£75-£130
iPad 9th Generation£80-£140
iPad 10th Generation£120-£220

If you own one of these devices, choosing a specialist repair centre can often provide a quicker and more cost-effective solution than replacing the entire tablet.

iPad Mini Models

The compact design of the iPad Mini makes screen repairs slightly more expensive than some standard iPads, particularly on newer generations with laminated displays.

iPad Mini ModelEstimated Repair Cost
iPad Mini 2£60-£100
iPad Mini 3£60-£105
iPad Mini 4£90-£160
iPad Mini 5£120-£220
iPad Mini 6£180-£320

Owners of newer Mini models should expect higher repair costs due to the advanced display assembly and increased labour involved.

iPad Air Models

The iPad Air range combines premium performance with thinner, more advanced displays. As a result, screen repairs are usually more expensive than standard iPads.

iPad Air ModelEstimated Repair Cost
iPad Air (1st Gen)£70-£110
iPad Air 2£89-£180
iPad Air 3£89-£190
iPad Air 4£110-£300
iPad Air 5£119-£290

If you’re using a newer Air model, professional installation is strongly recommended, as these displays require specialised tools and careful handling.

iPad Pro Models

The iPad Pro range features Apple’s most advanced displays, including high refresh rates and premium laminated screen technology. Consequently, these models are usually the most expensive to repair.

iPad Pro ModelEstimated Repair Cost
9.7-inch£140-£220
10.5-inch£170-£260
11-inch£220-£420
12.9-inch£250-£550+

For newer Pro models, replacing the display often involves changing the entire screen assembly rather than just the front glass, significantly increasing repair costs.

If you own an iPad Pro, using an experienced repair specialist with high-quality replacement parts can help maintain display performance and touch responsiveness.

Apple vs Independent iPad Screen Repair Costs

When your iPad screen breaks, you’ll generally have two repair options: Apple or an independent repair specialist. Both have advantages, but the overall cost, turnaround time, and flexibility can differ considerably.

Apple Repair Services

Apple repairs are carried out using genuine components and follow the company’s official repair procedures. If your iPad is covered by AppleCare+, your repair cost may be significantly reduced.

However, if your device is out of warranty or accidental damage isn’t covered, official repair prices can be substantially higher than those offered by independent repair providers.

Apple repairs may also involve replacing the entire display assembly, even when only the outer glass is cracked.

Independent Repair Specialists

A reputable independent repair centre can often provide:

  • Competitive pricing
  • Faster turnaround times
  • High-quality replacement parts
  • Warranty on repairs
  • Repairs for older iPad models that Apple may no longer support

Many customers choose independent repair specialists because they offer excellent value while restoring the device to full working order. When selecting a repair provider, always check customer reviews, warranty terms, and the quality of the replacement components being used.

What Else Can Affect the Final Repair Price?

Even if two people own the same iPad model, the repair cost may not be identical. Several additional factors can influence the final quote.

Extent of the Damage

A small crack in the corner of the screen may require less work than an iPad with severe impact damage affecting the display, frame, and internal components.

Technicians will normally inspect the device to determine whether the damage is limited to the screen or if additional repairs are required.

Frame Damage

If the aluminium frame has become bent after a drop, fitting a new screen safely can be more difficult.

In some cases, technicians must straighten or repair the frame before installing the replacement display, increasing both labour time and repair costs.

Internal Component Damage

A heavy impact can damage more than just the screen. Your repair technician may also find issues with:

  • The touchscreen digitiser
  • Display connectors
  • Front camera
  • Face ID components (where applicable)
  • Internal flex cables
  • Battery

Identifying these problems early helps prevent repeat repairs later.

Replacement Part Quality

Not all replacement screens are manufactured to the same standard. Higher-quality components generally provide:

  • Better brightness
  • More accurate colours
  • Smoother touch response
  • Greater durability
  • Improved long-term reliability

Although premium parts may cost slightly more initially, they often deliver better value over the lifespan of the device.

Labour Costs

Repair prices also reflect the skill and experience required to complete the job safely. Modern iPads use strong adhesives and delicate internal components, meaning professional repairs require specialist equipment and technical expertise.

For this reason, choosing the cheapest repair option isn’t always the best decision if it compromises quality or reliability.

Glass Repair vs Full Display Replacement

Many people assume that every cracked iPad screen requires a complete display replacement. In reality, the type of repair depends on your iPad model and the extent of the damage.

Older iPads often have a separate front glass (digitiser) and LCD, allowing technicians to replace only the cracked glass if the display underneath is still working correctly. This type of repair is generally more affordable.

Newer iPad Air and iPad Pro models, however, feature fully laminated displays where the glass, touch digitiser, and LCD or OLED panel are bonded together. Even a minor crack can require replacing the entire display assembly, which increases both the complexity and the overall repair cost.

When Is Glass-Only Repair Possible?

A glass-only repair may be suitable if:

  • The LCD shows a clear image.
  • The touchscreen responds normally.
  • There are no black spots or dead pixels.
  • No coloured lines appear on the display.
  • The screen brightness remains consistent.
  • The damage is limited to the outer glass.

Replacing only the glass is usually the most cost-effective option for compatible iPad models.

When Do You Need a Full Display Replacement?

A complete display replacement is normally required if your iPad has:

  • A black or blank screen.
  • Flickering or flashing display.
  • Vertical or horizontal lines.
  • Dead pixels.
  • Ink-like black patches.
  • An unresponsive touchscreen.
  • Display discolouration.
  • Internal screen damage caused by a heavy impact.

A qualified technician can inspect your iPad and recommend the most appropriate repair based on the condition of the display.

Signs Your iPad Screen Needs Immediate Repair

Not every cracked iPad screen requires immediate replacement, but some warning signs indicate that your device should be inspected by a professional as soon as possible. Ignoring these symptoms can lead to further damage, higher repair costs, and even permanent display failure.

Common signs include:

  • A touchscreen that no longer responds accurately.
  • Flickering or flashing display.
  • Black spots or coloured lines on the screen.
  • A shattered screen with sharp or loose glass.
  • A black display even though the iPad is powered on.
  • The screen lifting away from the frame.
  • Dust or moisture entering through cracked glass.
  • Ghost touches or random screen inputs.

If you notice any of these issues, arranging a professional inspection promptly can help prevent additional damage and reduce the likelihood of more expensive repairs.

Is It Worth Repairing a Cracked iPad Screen?

In most cases, yes. Repairing a cracked iPad screen is often much more affordable than replacing the entire device, especially if the iPad is otherwise in good working condition.

Professional screen repairs can restore:

  • Touchscreen functionality
  • Display clarity
  • Device safety
  • Resale value
  • Everyday usability

If the battery, charging port, cameras, and internal hardware are all functioning correctly, investing in a quality screen repair is usually the most economical solution.

However, if your iPad has multiple faults – such as severe ipad water damage, motherboard issues, or extensive structural damage – you may want to compare the repair cost with the price of purchasing a newer model.

How Long Does an iPad Screen Repair Take?

The repair time depends on the iPad model, the availability of replacement parts, and the complexity of the repair. In general:

Repair TypeTypical Turnaround Time
Glass-only repair1-3 hours
Full display replacement2-4 hours
Advanced repairs with additional damageSame day to 3 working days

Many independent repair centres can complete common iPad screen repairs on the same day, provided the required parts are in stock. If additional components need replacing, such as the battery or charging connector, the repair may take slightly longer.

Can You Repair an iPad Screen Yourself?

While DIY repair kits are available online, replacing an iPad screen is considerably more difficult than many people expect.

Modern iPads are assembled using strong adhesives, delicate flex cables, and tightly packed internal components. Opening the device without the correct tools or experience can easily lead to further damage.

DIY repairs also carry the risk of:

  • Damaging the LCD.
  • Tearing internal flex cables.
  • Cracking the replacement screen during installation.
  • Reducing water and dust resistance.
  • Voiding any remaining warranty.
  • Increasing the overall repair cost if professional assistance is needed afterwards.

For most users, having the repair carried out by an experienced technician is the safer and more reliable option.

How to Prevent Future iPad Screen Damage

Although accidents can’t always be avoided, taking a few preventative measures can significantly reduce the risk of damaging your iPad screen and help extend the life of your device.

To better protect your iPad:

  • Use a high-quality protective case designed for your iPad model.
  • Install a tempered glass screen protector for added impact resistance.
  • Avoid placing heavy objects on top of your iPad.
  • Keep your device away from the edges of tables and desks.
  • Store your iPad safely when travelling.
  • Avoid exposing it to extreme heat or cold.
  • Clean the display regularly using a soft microfibre cloth.
  • Keep liquids away from your device whenever possible.

These simple precautions can help minimise accidental damage, reduce future repair costs, and keep your iPad performing at its best.

How to Choose a Reliable iPad Repair Service

Not all repair providers offer the same level of quality. Choosing a trusted repair specialist helps ensure your iPad is repaired correctly and continues to perform as expected.

Before booking a repair, consider the following:

Check Customer Reviews

Look for consistently positive reviews that mention repair quality, turnaround times, customer service, and aftercare.

Ask About Replacement Parts

A reputable repair centre should clearly explain whether they use genuine, OEM-quality, or premium aftermarket components.

Confirm the Warranty

Most professional repair providers include a warranty covering replacement parts and workmanship, giving you additional peace of mind after the repair.

Compare More Than Just Price

The cheapest repair isn’t always the best value. Experienced technicians, quality components, and reliable aftercare often justify paying slightly more for a repair that lasts.

Choose Specialists With Experience

Repairing modern iPads requires specialist knowledge and equipment. An experienced technician is more likely to diagnose hidden damage and complete the repair safely.

FAQs About iPad Screen Repair Costs

. How much does it cost to fix an iPad screen in the UK?

The cost of repairing an iPad screen in the UK typically ranges from £50 to £550+, depending on the iPad model, the extent of the damage, and whether only the glass or the entire display needs replacing.

2. Why are some iPad screen repairs more expensive than others?

Repair costs vary because different iPad models use different display technologies. Newer iPad Air and iPad Pro models have laminated displays that are more expensive to replace than the separate glass and LCD used in many older iPads.

3. Can a cracked iPad screen be repaired without replacing the display?

Yes. If only the outer glass is damaged and the LCD and touchscreen are still functioning correctly, some older iPad models can have a glass-only repair. Newer models usually require a complete display replacement.

4. Is it cheaper to repair an iPad screen than buy a new iPad?

In most cases, yes. Screen repairs are usually far more affordable than replacing the entire device, especially if the iPad is otherwise in good working condition.

5. How long does an iPad screen repair usually take?

Many iPad screen repairs can be completed on the same day. Depending on the model and the repair required, the process typically takes between 1 and 4 hours.

6. Does Apple repair cracked iPad screens?

Yes. Apple offers screen repair services for eligible iPad models. If your device is covered by AppleCare+, the repair cost may be reduced. Out-of-warranty repairs are generally more expensive.

7. Is an independent repair shop a good alternative to Apple?

A reputable independent repair specialist can provide high-quality repairs, competitive pricing, faster turnaround times, and warranties, making them a popular choice for many iPad owners.

8. Can I continue using my iPad with a cracked screen?

Although your iPad may still function, using it with a cracked screen isn’t recommended. Cracks can spread, reduce touch sensitivity, and allow dust or moisture to enter the device.

9. Will repairing my iPad screen erase my data?

A standard screen replacement shouldn’t affect your data. However, it’s always advisable to back up your iPad before any repair as a precaution.

10. What is the difference between glass replacement and display replacement?

Glass replacement involves replacing only the outer glass when the LCD is still working. Display replacement includes replacing the glass, digitiser, and LCD or OLED assembly together.

11. Can Face ID or Touch ID stop working after a screen repair?

When repairs are performed correctly using compatible parts and proper procedures, Face ID or Touch ID should continue to work. However, severe impact damage before the repair can sometimes affect these components.

12. Are aftermarket iPad screens reliable?

High-quality aftermarket screens can provide excellent performance and value. The quality varies between suppliers, so it’s important to choose a trusted repair provider that uses premium replacement parts.

13. How do I know if my iPad needs a full screen replacement?

Signs include black spots, coloured lines, flickering, dead pixels, an unresponsive touchscreen, or a completely blank display. A technician can confirm the exact repair required after inspecting the device.

14. Is it worth repairing an older iPad?

If your iPad still meets your daily needs and only the screen is damaged, repairing it is often a cost-effective option compared with purchasing a new device.

15. Can I repair my iPad screen myself?

DIY repair kits are available, but iPad screen replacements require specialist tools and experience. Attempting the repair yourself may cause additional damage and increase the overall repair cost.

16. What should I do immediately after cracking my iPad screen?

Stop using the device if the glass is badly shattered, apply a temporary screen protector or clear tape if necessary to prevent further cracking, back up your data, and arrange a professional inspection as soon as possible.

17. Does AppleCare+ cover accidental screen damage?

AppleCare+ can reduce the cost of accidental damage repairs, although a service fee usually applies. Coverage depends on your plan and the terms in effect at the time of the repair.

18. Can a cracked iPad screen get worse over time?

Yes. Even a small crack can spread with daily use, pressure, or further impacts. Delaying repairs may also increase the risk of damage to the LCD or internal components.

19. How can I protect my iPad screen after it has been repaired?

Using a high-quality tempered glass screen protector and a durable protective case can help reduce the risk of future screen damage caused by accidental drops or impacts.

20. How do I choose the best iPad screen repair service?

Look for a repair provider with experienced technicians, positive customer reviews, high-quality replacement parts, transparent pricing, and a warranty on both parts and workmanship. Choosing a trusted ipad repair specialist helps ensure a reliable and long-lasting repair.

Conclusion

If you’re wondering how much to fix an iPad screen, the cost will depend on several factors, including your iPad model, the severity of the damage, and the type of replacement parts used. In the UK, most iPad screen repairs typically range from £50 for older models to £550 or more for premium iPad Pro devices with advanced laminated displays.

While it may be tempting to delay a repair, even a small crack can become more serious over time. Continued use of a damaged screen can lead to reduced touch sensitivity, display failure, or further internal damage, ultimately increasing the overall repair cost.

Before making a decision, it’s always advisable to have your iPad inspected by an experienced repair technician. A professional assessment can determine whether your device requires a simple glass replacement or a complete display assembly, helping you avoid paying for unnecessary repairs.

Choosing a trusted repair specialist who uses high-quality replacement parts and offers a warranty on both parts and workmanship can help restore your iPad’s performance, preserve its value, and extend its lifespan. Whether you own an iPad, iPad Mini, iPad Air, or iPad Pro, a timely repair is often the most cost-effective way to keep your device performing at its best.

Need a Professional iPad Screen Repair?

If your iPad screen is cracked, unresponsive, flickering, or completely damaged, don’t wait until the problem gets worse. A professional repair can restore your device quickly, protect it from further damage, and save you the expense of buying a new iPad.

At iExpert Repairs, our experienced technicians specialise in repairing all major iPad models using high-quality replacement parts, advanced repair techniques, and thorough post-repair testing. We offer fast turnaround times, competitive pricing, and warranty-backed repairs, giving you complete confidence that your device is in safe hands.

If, after a professional assessment, repairing your iPad is no longer the most cost-effective option, we’ve got you covered. iExpert Market offers a wide range of professionally tested refurbished iPhones, iPads, Samsung devices, and other smartphones, all carefully inspected, quality-checked, and backed by strict testing standards. It’s an affordable and reliable way to upgrade your device while saving significantly compared to buying new.

Whether you need an expert iPad screen repair or you’re looking for a high-quality refurbished device, iExpert Repairs and iExpert Market provide trusted, affordable solutions to help you get the best value for your money.

Back to posts
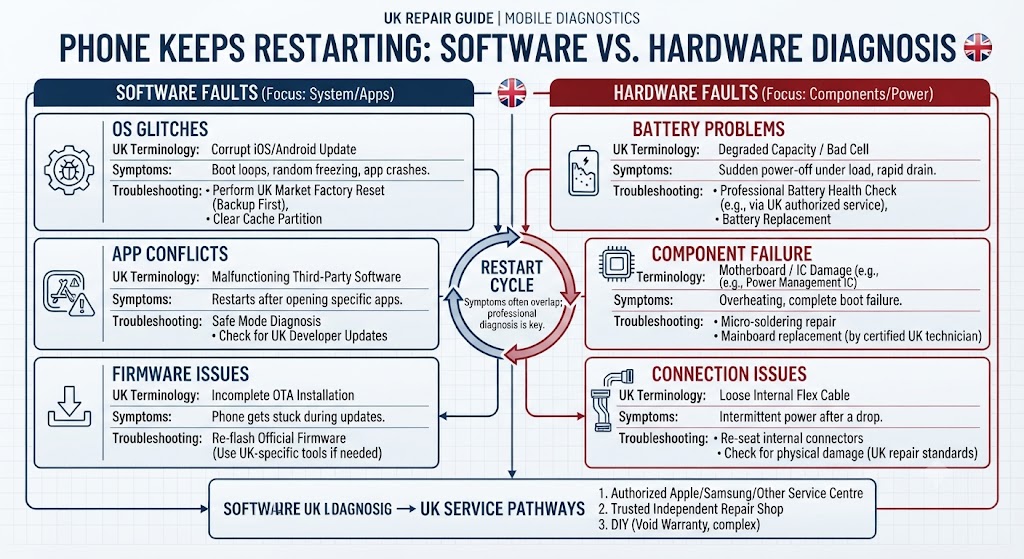
How to Fix Phone Not Ringing: Causes, Fixes & Guide

Introduction

Is your phone not ringing when someone calls? This is one of the most common smartphone problems we diagnose at our repair centres – and in most cases, it’s caused by a simple settings issue that takes less than 5 minutes to fix.

After repairing over 2,000 smartphones across the UK, our senior technician has identified the exact causes behind this problem and put together this step-by-step guide to help you fix it yourself – without spending money on unnecessary repairs.

Whether you use an iPhone, Samsung Galaxy, Google Pixel, or another Android device, this guide covers every possible cause – from Silent Mode and Do Not Disturb settings to Bluetooth conflicts, SIM card issues, and hardware faults.

Quick Answer: Why Is My Phone Not Ringing?

If your phone is not ringing when someone calls, the most common causes include:

  • Silent mode enabled
  • Do Not Disturb activated
  • Ringtone volume turned down
  • Bluetooth devices connected
  • Airplane mode enabled
  • Software glitches
  • Damaged phone speaker
  • Call forwarding settings
  • Network or SIM card issues
  • Third-party app conflicts

Fortunately, most of these issues can be resolved in just a few minutes.

Common Reasons a Phone Is Not Ringing

If your phone is not ringing during incoming calls, several different factors could be responsible. Some issues can be fixed within seconds, while others may require more advanced troubleshooting or professional repair. The table below highlights the most common causes of phone ringing problems, along with the difficulty level and typical time needed to resolve them.

CauseDifficulty LevelTypical Fix Time
Silent Mode EnabledEasy1 Minute
Do Not Disturb Mode ActiveEasy1 Minute
Low Ringtone VolumeEasy1 Minute
Bluetooth Device ConnectedEasy2 Minutes
Airplane Mode EnabledEasy1 Minute
SIM Card or Network IssueMedium5 Minutes
Incorrect Call SettingsMedium5 Minutes
Software Glitch or BugMedium10 Minutes
Damaged Phone SpeakerDifficultProfessional Repair Required
Water Damage or Hardware FaultDifficultProfessional Diagnosis Required

Signs Your Phone Has a Ringing Problem

Before troubleshooting, it helps to identify exactly how the issue is occurring.

Common symptoms include:

  • Incoming calls appear on screen but no ringtone plays
  • Phone only vibrates during calls
  • Certain contacts cannot trigger a ringtone
  • Notification sounds work but calls remain silent
  • Calls go directly to voicemail
  • Ringtone sounds distorted or unusually quiet
  • Phone rings intermittently
  • No sound comes from the speaker during incoming calls

Understanding these symptoms can help narrow down the root cause much faster.

1. Check Whether Your Phone Is in Silent Mode

One of the simplest explanations is also one of the most overlooked.

Modern smartphones allow users to quickly switch between ring, vibrate, and silent modes. It is surprisingly easy to activate silent mode accidentally while carrying your phone in a pocket or bag.

For iPhone Users

Most iPhones include a physical Ring/Silent switch on the side of the device.

To check:

  1. Locate the switch above the volume buttons.
  2. If you see an orange indicator, silent mode is active.
  3. Move the switch toward the display.
  4. Test incoming calls.

For Android Users

Android devices use software controls instead of a physical switch.

To verify:

  1. Open Settings.
  2. Tap Sound & Vibration.
  3. Ensure Ring Mode is selected.
  4. Disable Vibrate or Silent settings.

Many users discover that their phone simply switched into silent mode without them noticing.

2. Increase Your Ringtone Volume

Another extremely common cause is ringtone volume being set too low.

Many smartphone users accidentally reduce ringtone volume while adjusting media playback or notification settings.

How to Check Ringtone Volume

On iPhone

  • Open Settings
  • Tap Sounds & Haptics
  • Locate Ringtone and Alerts
  • Move the slider to increase volume

On Android

  • Open Settings
  • Select Sound & Vibration
  • Tap Volume
  • Increase Ring Volume

Once adjusted, ask someone to call your number to verify whether the ringtone is now audible.

Why This Happens

Some phones separate:

  • Media volume
  • Notification volume
  • Alarm volume
  • Ring volume

Users often increase media volume while leaving ring volume muted.

3. Turn Off Do Not Disturb Mode

Do Not Disturb (DND) is designed to silence calls, alerts, notifications, and messages. Many users enable it temporarily and later forget that it remains active.

How to Disable Do Not Disturb on iPhone

  1. Open Settings
  2. Select Focus
  3. Tap Do Not Disturb
  4. Turn the feature off

How to Disable Do Not Disturb on Android

  1. Open Settings
  2. Select Notifications
  3. Tap Do Not Disturb
  4. Disable the setting

Check Scheduled DND Settings

Many phones automatically activate Do Not Disturb during:

  • Night-time hours
  • Work schedules
  • Driving mode
  • Sleep mode

Review your schedules carefully to ensure calls are not being silenced automatically.

4. Disconnect Bluetooth Devices

Bluetooth accessories can redirect incoming call audio away from your phone.

If your smartphone is connected to:

  • Wireless earbuds
  • Bluetooth headphones
  • Smart speakers
  • Vehicle infotainment systems

your ringtone may be playing through that device instead of the phone speaker.

How to Check Bluetooth Connections

  1. Open Bluetooth Settings
  2. Review connected devices
  3. Disconnect active accessories
  4. Call your phone from another number

If the ringtone returns, the Bluetooth connection was likely causing the issue.

5. Restart Your Smartphone

Restarting your device remains one of the most effective troubleshooting methods for smartphone issues.

Temporary software bugs can affect:

  • Audio services
  • Notification systems
  • Call handling processes
  • Background applications

A simple restart clears temporary system errors and often restores normal functionality.

How to Restart Your Phone

iPhone

  • Press and hold the side button and volume button
  • Slide to power off
  • Wait 30 seconds
  • Turn the device back on

Android

  • Hold the power button
  • Tap Restart
  • Wait for the phone to reboot

If your phone has recently shown other unusual behaviour, such as charging problems, our guide on Why Is My Phone Not Charging? Common Causes, Fixes, and iExpert Repairs Guide may help identify related software issues.

6. Check Airplane Mode Settings

Airplane Mode disables your phone’s ability to connect to mobile networks. While this feature is useful during flights, accidentally enabling it can prevent incoming calls from reaching your device.

How to Check Airplane Mode

On iPhone

  1. Open Control Center.
  2. Look for the airplane icon.
  3. If highlighted, tap it to disable Airplane Mode.

On Android

  1. Swipe down from the top of the screen.
  2. Locate the Airplane Mode icon.
  3. Turn it off if enabled.

After disabling Airplane Mode, wait a few moments for your phone to reconnect to the network and then test incoming calls.

7. Inspect SIM Card and Mobile Network Connection

Your smartphone relies on a stable network connection to receive calls. If your SIM card is damaged, loose, or experiencing network registration issues, your phone may not ring when someone tries to contact you.

Signs of SIM or Network Problems

  • Calls go straight to voicemail
  • No signal bars displayed
  • Frequent network disconnections
  • “No Service” message appears
  • Incoming calls fail intermittently

Basic SIM Troubleshooting

  • Power off your device
  • Remove the SIM card
  • Check for dirt or visible damage
  • Reinsert the SIM correctly
  • Restart the phone

If network problems continue, contact your mobile provider for further assistance.

Related Reading

If your device has recently suffered liquid exposure, network-related problems can sometimes develop alongside other hardware faults. Our Water Damaged Phone Repair – What To Do and How To Fix It guide explains the warning signs to watch for.

8. Check for Blocked Numbers and Call Settings

Many smartphones allow users to block specific contacts or filter suspected spam calls. In some cases, legitimate callers may accidentally be added to blocked lists.

Review Blocked Contacts

Check your settings for:

  • Blocked numbers
  • Call screening features
  • Spam protection filters
  • Contact-specific notification settings

Removing incorrect restrictions may immediately restore normal incoming call alerts.

Call Forwarding Issues

If call forwarding has been enabled, incoming calls may be redirected to another number before your phone has a chance to ring.

Verify that:

  • Call forwarding is disabled
  • Conditional forwarding settings are correct
  • Voicemail forwarding is functioning properly

9. Update Your Phone Software

Software updates frequently include bug fixes that resolve call, notification, and audio-related issues.

Using outdated software may cause:

  • Incoming call glitches
  • Notification failures
  • Audio service errors
  • Network communication problems

How to Check for Updates

iPhone

  • Settings
  • General
  • Software Update

Android

  • Settings
  • System
  • Software Update

Installing the latest updates can often resolve ringing problems without additional troubleshooting.

10. Check for Third-Party App Conflicts

Certain applications can interfere with your phone’s ability to handle calls and notifications correctly.

Apps that commonly cause issues include:

  • Call blockers
  • Battery-saving apps
  • Security software
  • Notification management tools
  • Device optimization applications

What to Do

If the problem started after installing a new app:

  1. Uninstall the app.
  2. Restart your phone.
  3. Test incoming calls.

You can also boot your device into Safe Mode to determine whether a third-party application is responsible.

11. Test the Phone Speaker

If all settings appear correct but no ringtone is audible, the problem may involve the speaker itself.

Speaker failures are more common than many users realise and can occur due to:

  • Accidental drops
  • Water damage
  • Dust accumulation
  • Internal component failure
  • Long-term wear

Signs of Speaker Damage

  • No ringtone sound
  • Distorted audio
  • Crackling noises
  • Low call volume
  • Speakerphone issues

If you notice any of these symptoms, you may benefit from reading our How to Fix Phone Speaker Issues: Complete Troubleshooting & Repair Guide for more detailed diagnostics.

Quick Speaker Test

Try:

  • Playing music
  • Watching a video
  • Using speakerphone during calls

If all audio functions are affected, professional speaker repair may be necessary.

12. Perform a Factory Reset

If you have exhausted every troubleshooting option and your phone still does not ring, a factory reset may resolve deep software corruption.

Before You Reset

Always back up:

  • Photos
  • Videos
  • Contacts
  • Messages
  • Documents
  • App data

Why Factory Resets Work

A factory reset removes:

  • Corrupted settings
  • Software conflicts
  • Persistent system bugs
  • Misconfigured applications

However, because it erases all user data, it should only be attempted after all other solutions have failed.

13. How to Fix Phone Not Ringing on iPhone

At iExpert Repairs, we regularly help customers whose iPhones fail to ring during incoming calls. In our experience, the most common causes include Silent Mode being enabled, Focus or Do Not Disturb settings, low ringtone volume, Bluetooth connections, and software-related issues.

Start by checking the Ring/Silent switch on the side of your iPhone. If the orange indicator is visible, silent mode is active. Next, go to Settings > Focus and ensure that no Focus Mode is blocking incoming call alerts. You should also verify your ringtone volume under Settings > Sounds & Haptics and disconnect any Bluetooth devices that may be redirecting audio.

If your iPhone is still not ringing, install the latest iOS updates and restart the device. Based on our repair experience, persistent ringing issues that remain after troubleshooting may indicate speaker damage, water-related audio faults, or internal hardware problems that require professional diagnosis.

14. How to Fix Phone Not Ringing on Android

Android phone ringing problems are among the most common issues our technicians diagnose. Whether you own a Samsung Galaxy, Google Pixel, Huawei, or another Android device, the cause is often related to sound settings, software conflicts, network issues, or audio hardware faults.

Begin by checking whether Silent Mode, Vibrate Mode, or Do Not Disturb settings are enabled. Then open Settings > Sound & Vibration and confirm that ringtone volume is turned up and Ring Mode is selected. You should also disconnect Bluetooth accessories, review blocked number settings, and ensure Airplane Mode is turned off.

If your Android phone is not ringing after completing these checks, restart the device and install any available software updates. From our experience repairing smartphones, unresolved ringing issues are often linked to faulty speakers, water damage, SIM card problems, or motherboard-related faults. Professional diagnostics can help identify the exact cause and prevent unnecessary repairs.

15. When a Phone Not Ringing Problem Indicates Hardware Damage?

Sometimes the issue extends beyond software settings. Professional diagnostics may reveal faults involving:

  • Internal speakers
  • Audio IC chips
  • Motherboard components
  • Charging circuits
  • Water damage corrosion
  • Power management systems

If your phone is also experiencing charging issues, overheating, or touch-screen problems, these symptoms may indicate a deeper hardware fault.

You may also find these guides helpful:

16. Why Choose iExpert Repairs?

At iExpert Repairs, we help customers across the UK diagnose and repair a wide range of smartphone faults, including incoming call and audio problems.

Our technicians regularly repair:

Our Repair Services Include

  • Speaker replacement
  • Audio diagnostics
  • Water damage assessment
  • Software troubleshooting
  • Battery replacement
  • Charging port repairs
  • Device health checks

Whether the issue is caused by a faulty speaker, damaged motherboard component, or software malfunction, our experienced technicians can identify the problem quickly and recommend the most effective solution.

17. What Our Technicians Commonly Find

After diagnosing hundreds of “phone not ringing” cases at our UK repair centres, here is what we actually find:

Root Cause% of CasesDIY Fix?Avg Fix Time
Silent Mode / DND / Volume45%✅ YesUnder 2 min
Bluetooth audio redirect15%✅ YesUnder 2 min
Software bug or glitch10%✅ Yes5–10 min
SIM / Network issue10%⚠️ Sometimes5–15 min
Third-party app conflict5%✅ Yes10–15 min
Speaker hardware damage25%❌ NoProfessional repair
Water damage (audio circuit)15%❌ NoProfessional repair
Motherboard / IC fault5%❌ NoProfessional repair

Key finding: 7 out of 10 phones that come to us with a “not ringing” complaint are fixed completely free – just by adjusting settings.

The remaining 3 in 10 require professional repair, most commonly due to speaker damage or water corrosion that developed silently over time.

James Mitchell, Senior Technician: “Most people assume their phone is broken. In reality, the majority of ringing problems are settings issues that take less than 2 minutes to fix. Always check Silent Mode and Bluetooth first.”

Frequently Asked Questions

1. Why is my phone not ringing even though the volume is turned up?

If your ringtone volume is already set to maximum, the problem may be caused by Silent Mode, Do Not Disturb settings, Bluetooth devices, call forwarding, software glitches, or a faulty speaker. It is important to check all sound-related settings before assuming there is a hardware problem.

2. Why does my phone vibrate but not ring?

This usually happens when the device is set to Vibrate Only mode. Some smartphones automatically switch to vibration mode through Focus Modes, scheduled Do Not Disturb settings, or custom sound profiles. Checking your sound settings can often resolve the issue quickly.

3. Can a damaged phone speaker stop my ringtone from working?

Yes. A damaged speaker can prevent your phone from playing ringtones, notifications, alarms, videos, and speakerphone audio. If multiple sound functions are affected, the speaker may require professional repair or replacement.

4. Why do incoming calls go straight to voicemail without ringing?

Calls may go directly to voicemail if your phone has no network signal, Airplane Mode is enabled, Do Not Disturb is active, call forwarding is configured incorrectly, or your carrier is experiencing network issues.

5. Can Bluetooth headphones stop my phone from ringing?

Yes. When Bluetooth devices are connected, incoming call audio may be routed through wireless headphones, earbuds, speakers, or your vehicle’s infotainment system. Disconnecting Bluetooth accessories can help determine whether they are causing the issue.

6. Why is my iPhone not ringing when someone calls?

Common reasons include the Ring/Silent switch being enabled, Focus Mode settings, low ringtone volume, Bluetooth connections, software bugs, or speaker damage. Reviewing these settings often resolves the problem.

7. Why is my Android phone not ringing?

Android phones may stop ringing because of Silent Mode, Do Not Disturb settings, app conflicts, notification restrictions, Bluetooth devices, or operating system glitches. A full settings review can help identify the cause.

8. Can software updates fix phone ringing problems?

Yes. Software updates frequently include bug fixes that address issues affecting calls, notifications, audio services, and network communication. Installing the latest operating system version is always recommended.

9. How do I know if a third-party app is causing my phone not to ring?

If the problem started after installing a new application, the app may be interfering with notifications or call settings. Booting the device into Safe Mode can help determine whether a third-party application is responsible.

10. Can water damage affect my phone’s ringtone?

Yes. Water damage can impact speakers, microphones, audio circuits, and motherboard components. Even if the phone appears functional, hidden corrosion may cause sound-related issues over time.

11. Why does my phone ring for some contacts but not others?

Certain contacts may have custom ringtone settings, notification preferences, call screening restrictions, or may accidentally be blocked. Reviewing contact-specific settings can often solve the problem.

12. Can a faulty SIM card stop my phone from ringing?

A damaged or improperly inserted SIM card can prevent your device from connecting correctly to the mobile network. This may result in missed calls, poor signal strength, or calls going directly to voicemail.

13. Why is my phone not ringing after a software update?

Although updates are designed to improve performance, occasional software bugs can cause unexpected issues. Restarting the device, checking sound settings, and installing any available patches may resolve the problem.

14. Does Airplane Mode stop incoming calls?

Yes. Airplane Mode disables cellular communication, preventing your phone from receiving calls, text messages, and mobile data connections until the feature is turned off.

15. Can low battery mode affect my ringtone?

In most cases, Low Power Mode does not disable ringtones. However, some battery-saving applications and aggressive power management settings may interfere with notifications and call alerts.

16. Should I factory reset my phone if it is not ringing?

A factory reset should only be considered after all other troubleshooting methods have failed. Since this process erases all data and settings, backing up important files beforehand is essential.

17. How can I test whether my phone speaker is working?

You can test your speaker by playing music, watching videos, using speakerphone during calls, or listening to notification sounds. If no audio is heard, the speaker may be damaged.

18. Can overheating cause a phone not to ring?

Yes. Excessive heat can affect smartphone performance, including audio systems and background processes. Severe overheating may also indicate deeper hardware issues requiring professional attention.

19. When should I seek professional phone repair?

If you have checked all settings, updated the software, tested the speaker, verified the SIM card, and restarted the device without success, professional diagnostics are recommended. Hardware faults often require specialist tools and expertise to identify accurately.

20. How can iExpert Repairs help with phone not ringing issues?

iExpert Repairs provides professional diagnostics and repair services for a wide range of smartphone problems, including speaker failures, audio faults, software issues, water damage, charging problems, and motherboard repairs. Our technicians can quickly identify the root cause and recommend the most effective solution.

Final Thoughts

Understanding how to fix phone not ringing issues starts with identifying the underlying cause. In many cases, simple troubleshooting steps such as checking ringtone settings, disabling Do Not Disturb mode, disconnecting Bluetooth devices, reviewing network settings, or updating your software can restore normal call alerts within minutes.

However, if your phone continues to miss calls after trying all recommended solutions, the issue may be related to speaker failure, SIM card problems, software corruption, water damage, or more complex hardware faults. Ignoring these symptoms can lead to additional performance issues and may result in more expensive repairs if left unresolved.

Regular maintenance, software updates, and prompt attention to audio-related problems can help keep your device operating reliably and ensure you never miss important calls from family, friends, customers, or colleagues.

Get Your Phone Ringing Again with iExpert Repairs

If you have followed every troubleshooting step in this guide and your phone still is not ringing, professional diagnostics may be the fastest and most cost-effective solution.

At iExpert Repairs, our experienced technicians specialise in diagnosing and repairing a wide range of smartphone issues, including:

  • Speaker and audio system faults
  • Software and notification problems
  • Water-damaged devices
  • SIM and network-related issues
  • Motherboard-level repairs
  • Battery and charging faults

We repair all major smartphone brands, including iPhone, Samsung Galaxy, Google Pixel, Huawei, and many others. Using professional diagnostic tools and years of hands-on repair experience, our team can accurately identify the cause of the problem and recommend the most effective repair solution.

Whether your device requires a simple software fix or an advanced hardware repair, iExpert Repairs is committed to providing expert advice, transparent pricing, and high-quality workmanship.

Book your repair today or contact the iExpert Repairs team for a professional diagnosis and reliable smartphone repair service anywhere in the UK.

Back to posts
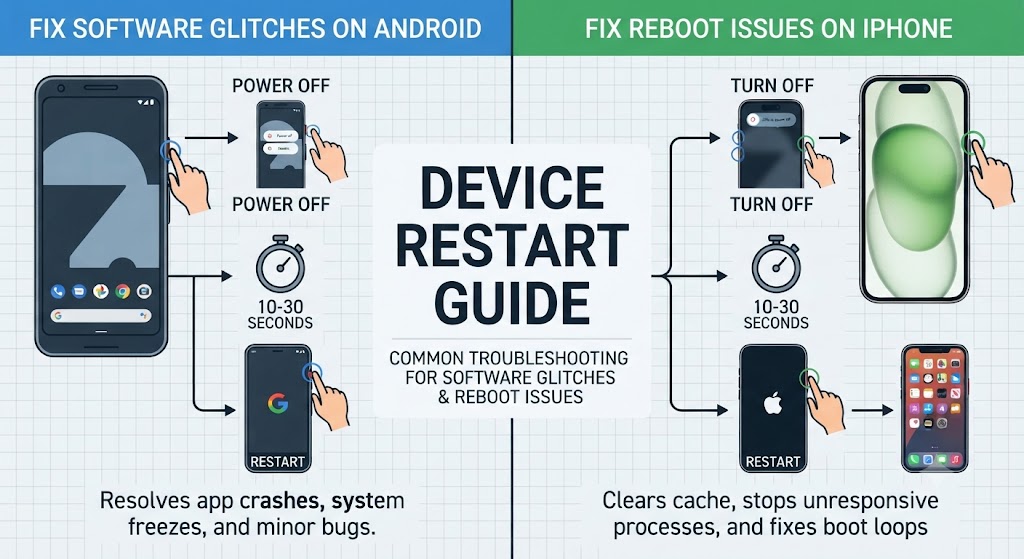
Tell us what's broken, get a free quote
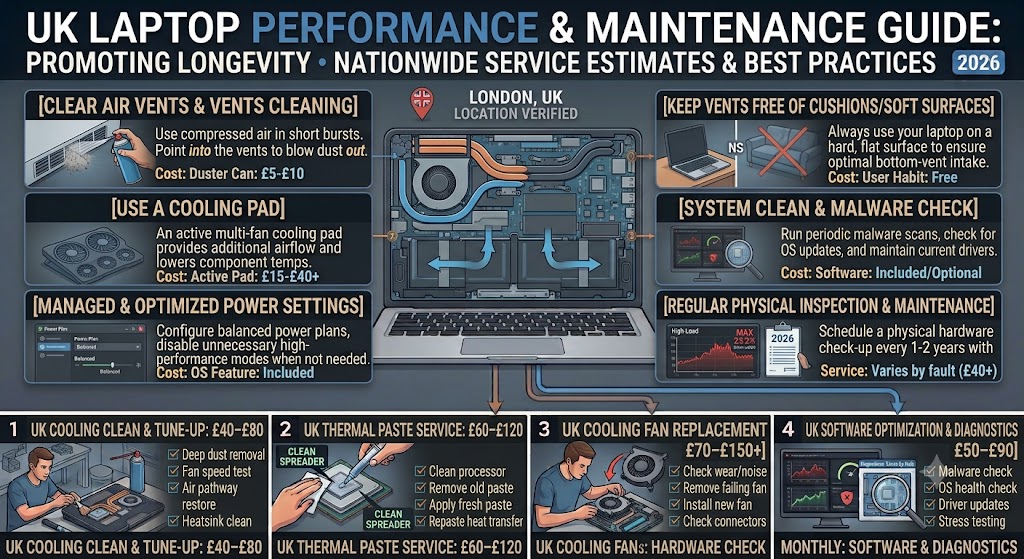
Older device, rare model, or a fault you can't describe? Send us a message with a photo and we'll come back with a fixed price.

Request a Quote
Request a same-day personalised quote!
×

    Please upload a image showing the back of your device or any visible damage for assessment (optional)