Fix Now, Pay Later with Klarna - Available at Checkout!

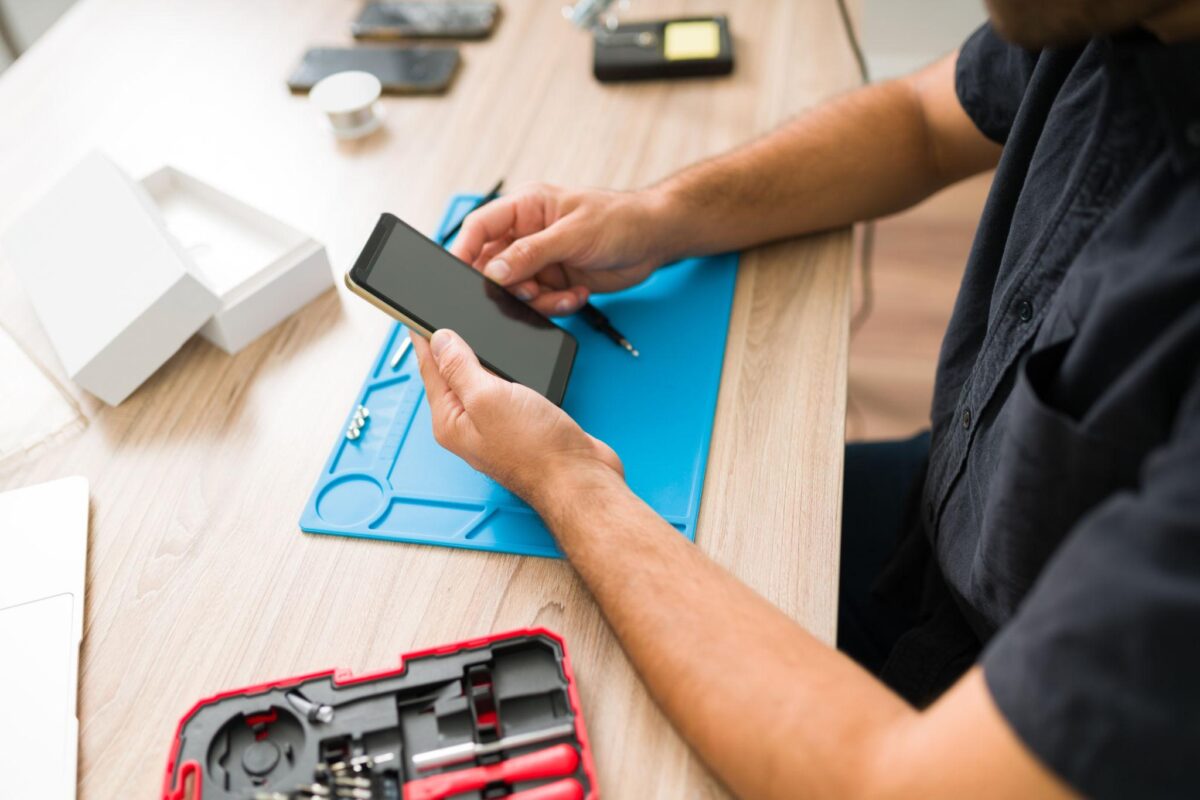
Why Does My Phone Keep Opening Apps on Its Own?

A phone that taps buttons, types letters, opens apps or scrolls by itself is unsettling, and it is also more common than most people realise. The cause ranges from something as simple as a dirty screen protector to a genuinely damaged screen that needs replacing. Here is how to work out which one you have, in order from the quickest checks to the ones that mean you need a repair.

Quick answer

  • Check your screen protector and case first. A cracked or poorly fitted screen protector is one of the most common causes, and the easiest to fix.
  • Clean the screen and your hands. Moisture, oil, sweat or dirt can confuse a touchscreen into registering phantom touches.
  • Only happens while charging? A cheap or faulty cable and charger is a very common and often overlooked cause.
  • Happens everywhere, on any charger, with a bare screen? This points to a hardware fault in the screen itself, often called ghost touch, and usually needs a screen replacement.
  • Started right after a drop or crack? That is a strong sign the digitiser, the layer that senses your touch, has been damaged.

Check the obvious causes first

Before assuming the worst, rule out the simplest and most common causes, which are responsible for a large share of cases.

  • Screen protector. A cracked tempered glass protector, or one with a bubble or piece of trapped dust or hair underneath, can create pressure points that a sensitive touchscreen misreads as a tap. Remove it entirely for a few minutes and see if the problem stops.
  • Case interference. A case that is slightly too tight, or has a raised edge that presses lightly on the very edge of the screen, can cause the same issue, particularly on phones with curved edge displays.
  • Dirt, moisture, oil or sweat on the screen. Touchscreens work by detecting small changes in electrical charge. Anything that changes the charge across the surface unevenly, including a greasy screen or condensation, can trigger touches you did not make. Clean the screen with a dry microfibre cloth and dry your hands before testing again.
  • Static or electromagnetic interference. Being placed very close to certain wireless chargers, powerful speakers, or other electronics can occasionally interfere with a touchscreen. Move the phone away from other devices and see if it settles.

Does it only happen while charging?

This is one of the most overlooked causes. Cheap, damaged or poorly shielded charging cables and chargers can leak small amounts of electrical noise into the phone while charging, which interferes with how the touchscreen reads input. If the phantom touches only happen while plugged in, try a different, ideally original or certified cable and charger before assuming anything is wrong with the phone itself. If it stops with a different charger, the problem was never the phone.

Software causes worth ruling out

  • A buggy app or a recent update. If it started right after installing or updating a specific app, uninstall it and see if the problem stops. Restart the phone fully either way, since this clears a lot of temporary software glitches.
  • Accessibility features left on by accident. Both iPhone and Android have accessibility settings, such as AssistiveTouch or Accessibility Menu, that can create an on-screen button or altered touch behaviour if enabled without you realising. Check Settings, then Accessibility, on iPhone, or Settings, then Accessibility, on Android.
  • Touch sensitivity settings. Some Android phones let you adjust touch sensitivity for use with gloves or screen protectors. An overly sensitive setting can register touches too easily. Check your display settings for anything related to touch sensitivity.
  • A full software update. If none of the above helps, make sure the phone is fully up to date, since manufacturers do periodically fix touchscreen driver bugs in software updates.

How to test whether it is actually a hardware fault

  1. Remove the case and screen protector completely.
  2. Clean the screen thoroughly and dry your hands.
  3. Unplug it from any charger and move it away from other electronics.
  4. Restart the phone fully.
  5. Watch the screen on a plain background, such as the home screen, without touching it, for a few minutes.

If the phantom touches still happen under these conditions, bare screen, clean, dry, no charger, freshly restarted, the cause is almost certainly the screen hardware itself rather than anything external.

When it is a damaged screen (the most common hardware cause)

The layer of your screen that senses touch is called the digitiser, and it sits just beneath the glass. A crack, even a small hairline one you can barely see, can damage this layer or let in tiny amounts of moisture over time, both of which cause it to send false touch signals to the phone. This is often called ghost touch or phantom touch, and it explains why the problem frequently starts right after a drop, even if the glass does not look badly cracked.

Once the digitiser itself is damaged, no software fix, cleaning or new screen protector will resolve it permanently. It may come and go, or seem to improve temporarily, but a genuinely damaged digitiser gets worse rather than better over time. A screen replacement, which includes a new digitiser, is the only reliable fix at that point.

If you are wondering whether a cheaper replacement screen is likely to have the same problem, our guide on OEM vs aftermarket phone parts explains why digitiser quality varies so much between repairers, and why the cheapest option is not always the safest one to trust with this exact fault.

Why you should not ignore this

Beyond the annoyance, a phone tapping on its own is a genuine security and financial risk. It can open apps, send messages, dial numbers, or in rare cases even interact with a payment app or confirm a purchase, all without you touching it. If this is happening to your phone, it is worth treating it as more urgent than a simple inconvenience, particularly if you have contactless payment apps or banking apps installed.

What a professional diagnostic checks for this specific fault

If you bring a phone in specifically for this problem, a proper diagnostic goes further than just looking for cracks. A technician will typically test the screen with no case or protector fitted, check touch accuracy and consistency across every part of the screen including the very edges, inspect closely for hairline cracks that are not visible under normal lighting, and check for any sign of moisture or corrosion around the display connector, since a knock or splash can cause this fault without any visible external damage at all. This is exactly why bringing the phone in, rather than trying to diagnose it entirely yourself, is worthwhile once you have ruled out the simple causes above. Our full guide on what happens during a phone repair covers this diagnostic process in detail.

Does this happen more on some phones than others?

Any phone can develop this fault after a drop or with a low quality screen protector, but it is reported more often on devices with curved edge displays, since the curved area is more sensitive to case and protector pressure than a flat screen. It is also more common on phones that have already had one screen replacement using a lower quality part, which is another reason part quality matters beyond how the display simply looks.

Frequently asked questions

Is a phone tapping by itself dangerous?

Not physically, but it carries a real risk of unwanted purchases, messages being sent, or apps being opened without your knowledge, particularly if payment or banking apps are installed. It is worth addressing promptly rather than living with it.

Can a screen protector really cause this?

Yes. A cracked, bubbled, or poorly fitted screen protector is one of the single most common causes, and removing it to test is one of the fastest ways to rule the problem in or out.

Why does it only happen when my phone is charging?

This usually points to a cheap or faulty charging cable or adapter leaking electrical interference into the touchscreen, rather than a fault with the phone. Try a different, certified cable and charger before assuming anything else is wrong.

Will a factory reset fix ghost touch?

Only if the cause is genuinely software, such as a corrupted setting or buggy app. If the digitiser itself is physically damaged, a factory reset will not help, since the fault is in the hardware, not anything stored on the device.

Does this always mean I need a new screen?

No. Many cases are solved by removing a faulty screen protector, cleaning the screen, or switching charging cables. It only points to a screen replacement once you have ruled out these simpler causes and the phone still misbehaves on a clean, bare screen with no charger connected.

Still happening after checking everything?

If you have ruled out screen protectors, cases, dirt, charging cables and software settings, and your phone still taps or types on its own, a damaged digitiser is the most likely explanation, and it is worth getting looked at before it gets worse or leads to an unwanted purchase or message.

Related reading: why is my phone screen unresponsive, the opposite problem to this one, and how to fix a cracked phone back glass. Or get in touch on our contact us page for a free diagnostic.

Back to posts
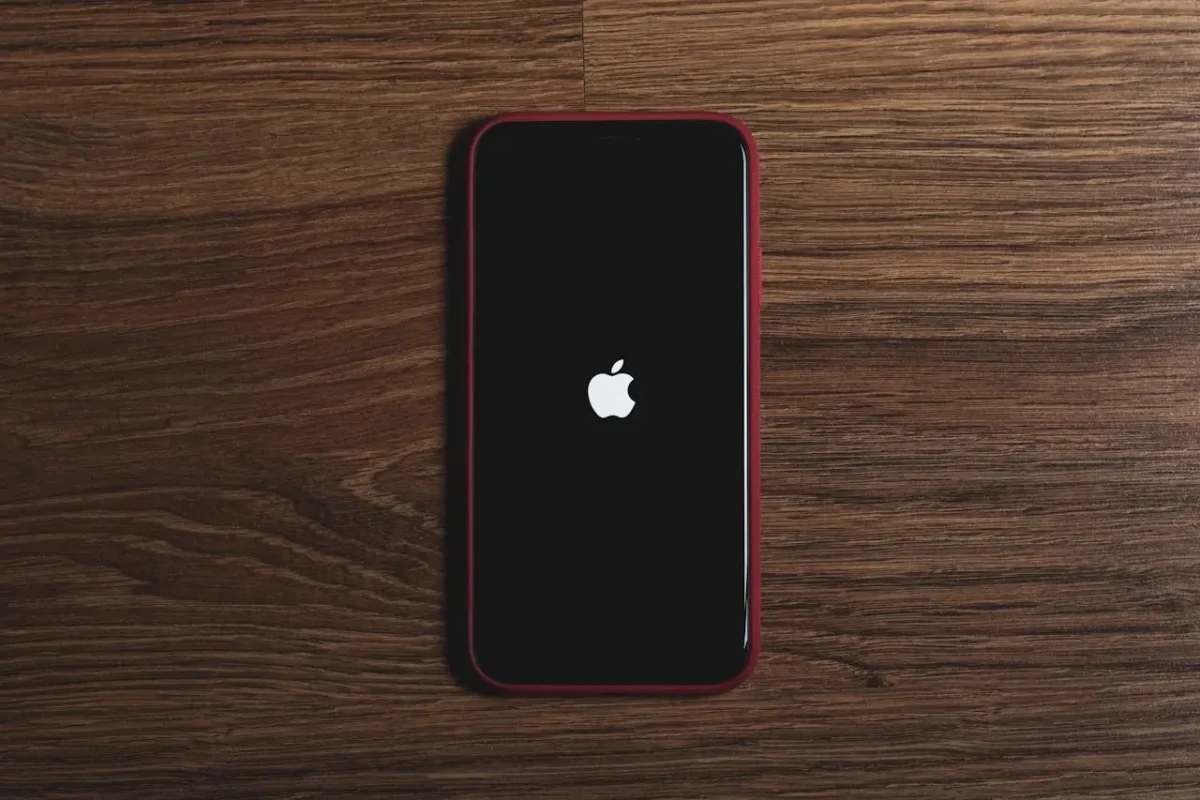
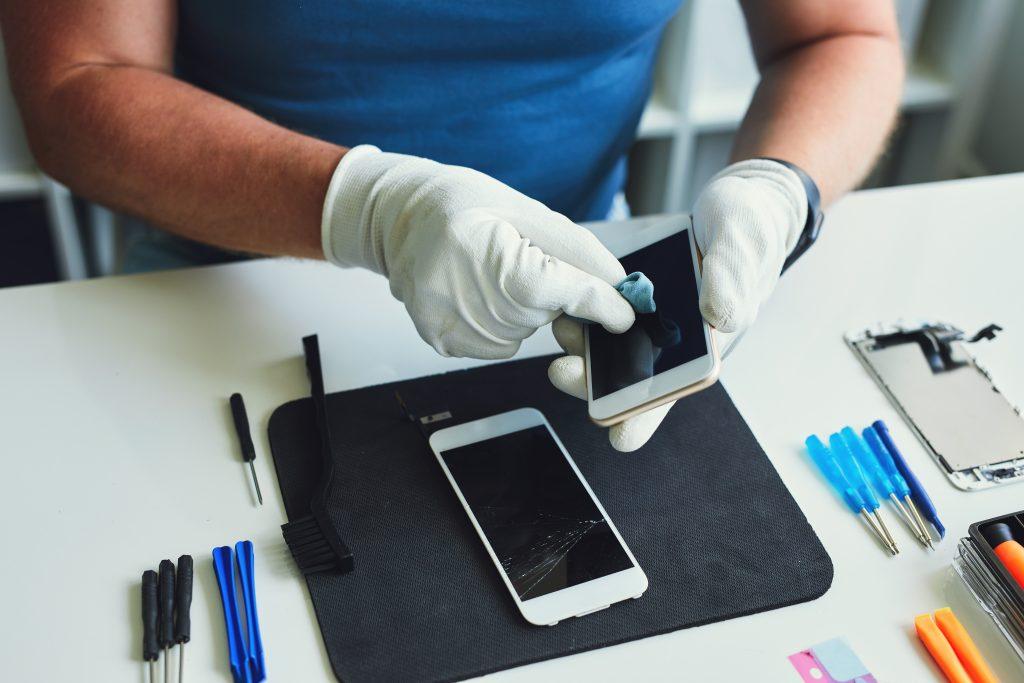
Why Does My iPhone Keep Showing the Apple Logo and Turning Off?

An iPhone stuck showing the Apple logo, sometimes going black and showing it again on a loop, is one of the most alarming things it can do, mostly because there is no error message telling you what is actually wrong. The good news is that most of the time this is a software problem with a real fix, not a dead phone. Here is exactly what to try, in the right order, and how to tell if it has moved from a quick fix into something that needs a professional.

Quick answer

  • Try a force restart first. This fixes the majority of cases and does not touch your data.
  • Charge it for at least 30 minutes before trying anything else, in case the battery is simply too low to complete starting up.
  • If it keeps looping, use Recovery Mode to reinstall iOS without erasing your data.
  • A factory restore is the last software option, but it erases everything, so only use it once you have exhausted the others.
  • If it started right after a drop or water exposure, skip straight to a professional diagnostic rather than repeatedly power cycling it.

What is actually happening when this occurs

Your iPhone shows the Apple logo briefly every time it starts up, while iOS loads in the background. If iOS fails to finish loading properly, the phone restarts and tries again, which is why you see the logo appear, disappear, and reappear, sometimes for several minutes at a time. This is commonly called a boot loop. It almost always points to a software fault, most often a corrupted update, a failed restore from backup, or a full storage drive that stops iOS finishing its startup checks, rather than a hardware failure.

Step 1: Force restart your iPhone

This clears a frozen state without touching any of your data, and fixes this problem more often than people expect. The exact button combination depends on your model.

  • iPhone 8 and later, including all Face ID models: quickly press and release Volume Up, then quickly press and release Volume Down, then press and hold the Side button until the Apple logo appears.
  • iPhone 7 and 7 Plus: press and hold both the Side button and the Volume Down button together until the Apple logo appears.
  • iPhone 6s and earlier, with a Home button: press and hold both the Home button and the Side or Top button together until the Apple logo appears.

If the logo loop stops after this, you are done. If it starts again after a few minutes, move on to the next step.

Step 2: Charge it properly before trying anything else

A battery that is nearly empty, or a battery that has degraded and can no longer deliver power quickly enough, can cause exactly this symptom during the power-hungry startup process. Plug into a wall outlet with an original or certified cable and charger, not a laptop USB port, and leave it for at least 30 minutes before trying to force restart again. If it starts up fine once charged but the problem keeps coming back on a healthy-looking charge, an ageing battery is worth checking, which we cover in our iPhone battery replacement guide.

Step 3: Use Recovery Mode to reinstall iOS without losing data

If a force restart and a proper charge do not fix it, Recovery Mode lets you reinstall iOS while keeping your data intact, since it repairs the operating system rather than wiping the device.

  1. Connect your iPhone to a computer with a cable, and open Finder on a Mac or iTunes on a Windows PC.
  2. Force restart using the steps above, but this time keep holding the final button instead of releasing it when the Apple logo appears. Keep holding until you see the Recovery Mode screen, which shows a cable pointing to a computer icon.
  3. Your computer should show a prompt with the option to Update or Restore. Choose Update.
  4. This downloads and reinstalls the current version of iOS without erasing your photos, messages or apps. It can take a while on a slow connection, so let it run without disconnecting the cable.

If Update fails or is not available, your computer may only offer Restore, which brings us to the next step.

Step 4: Factory restore, as a last resort

If Recovery Mode’s Update option does not fix it, Restore is the final software option. This erases everything on the device and reinstalls iOS completely fresh, after which you can set it up as new or restore from your most recent iCloud or computer backup.

This is exactly why it matters whether your last backup is recent. If you are not sure when your device last backed up, or the phone has been stuck like this since before you could check, our guide on how to get data off a broken phone covers what your options are before you erase anything, including whether the data can still be recovered afterwards if you go ahead without a backup.

When it is a hardware problem, not software

Software steps fix the large majority of Apple logo loops, but not all of them. It is worth suspecting hardware, not software, if any of the following apply.

  • It started immediately after a drop. A knock can dislodge an internal connector or damage the logic board, which no software restore will fix. See our iPhone repairs page for a full diagnostic.
  • It started after water or liquid exposure. Do not keep power cycling it. Repeated attempts on a wet board risk turning a repairable fault into a dead one. Our water damaged phone guide covers what to do instead, or go straight to iPhone water damage repair.
  • A full Restore in Recovery Mode still does not fix it. Once you have wiped the device completely fresh and the loop continues, the fault is very unlikely to be software, since a fresh install rules out corrupted files or a bad update almost entirely.
  • The battery will not hold enough charge to get through starting up, even after a long time plugged in. This points to a failing battery rather than a software fault.

Common causes of the Apple logo loop

Likely causeWhat usually fixes it
Failed or interrupted iOS updateForce restart, then Recovery Mode Update
Corrupted backup restoreRecovery Mode Update, or Restore and set up as new instead of restoring the same backup
Storage almost completely fullRecovery Mode Update, since the phone cannot complete startup checks with no free space
Battery too low or failingCharge for 30+ minutes, or a battery replacement if it keeps recurring
Drop or impact damageProfessional diagnostic, not a software fix
Water or liquid exposureStop power cycling it, book a water damage diagnostic

What if Recovery Mode will not even connect?

Occasionally a phone is stuck badly enough that your computer will not recognise it in Recovery Mode at all. In this situation, DFU (Device Firmware Update) mode is one further step beyond Recovery Mode, sometimes able to reach a phone that Recovery Mode cannot, since it bypasses the boot loader entirely rather than working through it. DFU mode is more fiddly to enter correctly and easier to get wrong, so if you are not confident following exact timed button presses, this is a reasonable point to hand the phone to a professional rather than risk repeated failed attempts.

How to stop this happening again

  • Keep at least a few gigabytes of storage free. A completely full phone struggles with more than just speed, it can genuinely interfere with updates completing properly. Our guide on why your phone is running slow covers how to check and free up space.
  • Let major iOS updates install on Wi-Fi and charge, uninterrupted. Most update-related boot loops happen when an update is interrupted partway through, often because someone unplugged the phone or it ran out of battery mid-install.
  • Keep a current backup regardless. Even if this never happens to you, a recent backup means any future serious fault is an inconvenience rather than a genuine loss.
  • Get a failing battery replaced before it fails completely, rather than waiting for it to cause a starting-up problem like this one.

What about an iPad or Apple Watch stuck on the logo?

The same underlying idea applies across Apple devices, though the exact button combinations differ. An iPad follows the same force restart and Recovery Mode process as an iPhone. An Apple Watch stuck on its logo generally needs a force restart directly on the watch, which our Apple Watch reset guide covers in full, including when a factory reset becomes necessary. If either device continues looping after a proper software attempt, the same rule applies: it is worth a professional diagnostic rather than repeated attempts. See our iPad repair and Apple Watch repair pages for next steps.

Frequently asked questions

Will I lose my photos if my iPhone is stuck on the Apple logo?

Not necessarily. A force restart and the Update option in Recovery Mode both fix the problem without erasing anything. Data loss only becomes a risk if you need to use the Restore option, or if the fault turns out to be hardware related.

How long is too long to be stuck on the Apple logo?

A logo that appears for a few minutes during a genuine software update is normal. If it has been looping, restarting and reappearing, for more than 15 to 20 minutes without progress, treat it as stuck rather than simply updating.

Can a bad app cause this?

Rarely on its own, but a corrupted app update installed right before the phone got stuck can occasionally be a contributing factor, particularly if the crash occurred during a background app refresh at the same time as an iOS update.

Does this happen more on older iPhones?

Yes, slightly. Older devices are more likely to have a battery that struggles with the power demands of starting up, and are more likely to be running close to their storage limit, both of which are common triggers for this exact problem.

Is it safe to keep force restarting it over and over?

A handful of attempts is completely safe on a dry, undamaged phone. If it has been dropped or exposed to liquid, stop, since repeated power cycling is one of the most common ways a recoverable fault turns into a genuinely dead board.

Still stuck after trying all of this?

If you have been through a force restart, a proper charge, and Recovery Mode without success, or the cause is a drop or liquid exposure, it is time for a proper diagnostic rather than more guesswork.

Or get in touch on our contact us page for a free diagnostic.

Back to posts
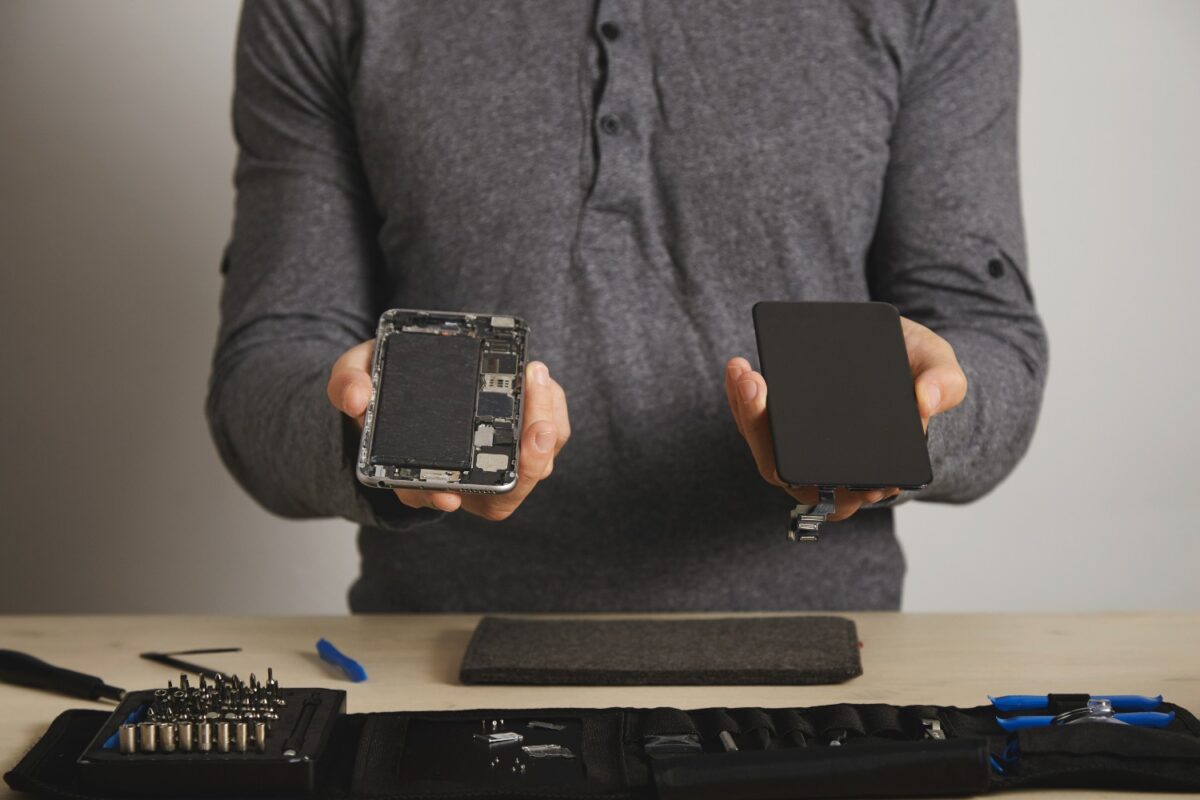
What Happens During a Phone Repair? A Step-by-Step Guide

Handing over a phone you use every day, with every photo, message and password on it, to a stranger is not a comfortable feeling, especially the first time. Most of that discomfort comes from not knowing what actually happens once the device leaves your hands. This guide walks through the entire process, from the first quote to getting your phone back, exactly as it happens for a screen, battery, charging port or water damage repair, so there are no surprises either way.

Quick answer: the repair process in short

  1. You describe the fault and get a quote, either online, by phone or in person.
  2. A technician runs a full diagnostic to confirm the fault before any work starts.
  3. You confirm the price and the repair goes ahead, or you back out at no cost if you decide not to proceed.
  4. The device is opened, the faulty part is replaced, and the repair is tested before reassembly is finished.
  5. A final quality check confirms everything works, and you get your device back with a warranty on the work.

Most single-component repairs, a screen, a battery or a charging port, take between 30 minutes and a couple of hours. Water damage and board-level faults take longer, usually 24 to 48 hours, since they involve cleaning, drying and testing rather than a straight swap.

Step 1: Getting a quote

The process starts with a quote based on your device’s exact model and the fault you are describing. This is why the prices on our iPhone repairs, Samsung repairs, Google Pixel repairs and Huawei repairs pages are broken down by individual model rather than shown as a single flat rate. A Galaxy S24 screen and a Galaxy A14 screen are entirely different parts with different costs, so an accurate quote always needs your specific model.

At this stage, be as specific as possible about what is wrong. “Screen cracked in one corner but still works” and “screen completely black” often point to different underlying faults and can affect the quote. If you are not sure what is actually wrong, that is fine too. That is exactly what the next step is for.

Step 2: The diagnostic check

Before any repair begins, a proper technician runs a full diagnostic rather than taking your description of the fault at face value. This matters because symptoms often overlap. A phone that will not charge could be a battery, a charging port, or a cable, and the wrong assumption means paying for the wrong repair. A thorough diagnostic on a phone typically checks:

  • Screen and digitiser: testing touch response across the entire surface, checking for dead pixels, discolouration, or backlight bleed.
  • Battery health: checking maximum capacity and charge cycles against the original specification, and inspecting for swelling.
  • Charging port and cable: testing with multiple known-working cables and chargers to rule out an external cause.
  • Camera, speaker and microphone: running each in turn to confirm whether a fault is isolated or part of a wider problem.
  • Liquid contact indicators: checking whether the device shows signs of past water or liquid exposure, even if it appears to be working normally.
  • Physical structure: checking the frame and back glass for damage that might affect water resistance or indicate a harder drop than described.

This is also the point where a genuinely honest repairer tells you if something is not worth fixing, rather than quoting for a repair that will not solve the actual problem. If you are unsure whether repair makes sense at all on an older device, our guide on repair vs replace covers how to weigh that decision up properly.

In-store, mail-in or on-site: how you can get a device repaired

The steps above apply whichever way you get your device to us, but the practical details differ slightly.

  • In-store drop-off. The most straightforward route for most repairs. You get a diagnostic and quote on the spot, and for common repairs like a screen or battery, you can often wait for it or come back within the hour.
  • Mail-in repair. Useful if there is no convenient branch nearby. You describe the fault when arranging the send-in, package the device securely, and receive a confirmed quote once it arrives and is diagnosed, before any work begins.
  • On-site or callout repair. For simpler jobs like a screen or battery on some models, a technician can sometimes carry out the repair at your home or workplace, with the same diagnostic and quality checks carried out on site.

Whichever route you choose, the diagnostic, confirmed pricing and quality testing steps stay exactly the same. The only thing that changes is how the device physically gets to and from the person doing the work.

Step 3: Confirming the price and backing up your data

Once the diagnostic confirms the actual fault, you get a final price before anything is opened up. If it matches the original quote, which it usually does for straightforward faults, you simply confirm and the repair proceeds. If the diagnostic uncovered something additional, you decide whether to go ahead, and you are never charged for a repair you have not approved.

This is also the point to make sure your data is backed up, particularly for repairs that involve opening the device fully, such as a battery, charging port or motherboard-level fault. Most screen and simple battery repairs do not touch your data at all, but it is good practice regardless. If your phone is not fully working and you are not sure how to back it up, our guide on how to get data off a broken phone covers every scenario, from a cracked but working screen through to a phone that will not turn on.

Step 4: The repair itself

What actually happens here depends entirely on the fault. Here is what each of the most common repairs genuinely involves.

Screen replacement

The device is powered off and the battery is disconnected first, as a safety step to avoid any risk of a short circuit while the screen assembly is out. The old, damaged screen is then carefully separated from the frame, usually with gentle heat to soften the adhesive holding it in place. Small components are transferred across to the new screen where the design requires it, such as the earpiece speaker mesh, front camera bracket or home button on older iPhones. The new screen is connected, and the device is powered back on to test touch response, colour accuracy and brightness before the adhesive is finally resealed and the device is closed up.

Battery replacement

The back panel or screen assembly, depending on the device, is opened to access the battery. Old batteries are usually held in with strong adhesive strips, which are removed carefully to avoid flexing or puncturing the cell, since a damaged lithium battery is a genuine fire risk. The new battery is fitted, reconnected, and the device is left charging briefly to confirm it registers correctly and reports accurate percentages before the case is closed.

Charging port repair

Charging port faults vary more than people expect. Sometimes the fix is as simple as clearing out compacted lint and debris that is physically blocking a good connection. Other times the port itself, or the small flex cable it sits on, needs replacing entirely. On some devices this is a straightforward connector swap, while on others it is soldered directly to the logic board and needs more advanced micro-soldering work, which is why charging port repairs can vary more in time and cost than a screen or battery.

Water damage treatment

This is the one repair that is not a simple swap. The device is opened fully and the logic board is removed and inspected under magnification for corrosion, particularly around the charging port, battery connector and any exposed connectors. It is then cleaned using an ultrasonic cleaner and specialist solutions designed to remove mineral deposits and corrosion without damaging delicate components, and thoroughly dried before any power is reapplied. Only once it is confirmed clean and dry is the device carefully powered on and tested. This is also why water damage repairs take longer than other faults, and why we never simply plug in and test a wet phone straight away. Doing so risks turning a repairable fault into a genuinely dead board. Our full water damaged phone guide covers what to do, and what not to do, in the meantime.

What happens if something unexpected turns up mid-repair

Occasionally, opening a device reveals something the original diagnostic could not have caught from the outside, a cracked LCD hiding underneath an intact top layer of glass, a previous repair using low-quality adhesive that has damaged surrounding components, or corrosion from a spill nobody realised had happened. When this occurs, the right approach is simple: the work pauses, you are contacted with an explanation and a revised quote, and nothing further happens until you decide how you want to proceed. You are never presented with a finished repair and a surprise invoice for work you did not agree to.

This is also true in reverse. Sometimes a diagnostic quote turns out to be higher than necessary once the device is actually open, for example if a fault turns out to be a simple loose connector rather than a part that needs replacing. In that case, you are charged for what was actually needed, not the original worst-case estimate.

Step 5: Quality testing and calibration

A repair is not finished the moment the new part is fitted. Before your device is handed back, a proper quality check confirms the fault is actually gone and that the repair has not introduced any new problem.

  • Touch and display testing across every corner and edge of a new screen, not just the centre, since poor quality installs often show up first at the very edges.
  • Face ID or fingerprint sensor checks where the repair involved a component near those sensors, since a careless screen swap can occasionally disrupt Face ID on iPhone if a cable is not seated properly.
  • Charging and battery reporting checks to confirm the device charges at a normal speed and reports an accurate percentage.
  • Camera, speaker and microphone tests to catch anything that might have been disturbed while the device was open.

One honest caveat worth knowing: on newer iPhones with a factory-fitted True Tone display, a screen replacement can sometimes disable True Tone colour adjustment unless specialist reprogramming tools are used to re-pair the new screen with the device, since Apple ties this feature to the original screen’s serial number. Similarly, opening any modern water-resistant phone breaks its factory adhesive seal, and while a good repair reseals it properly, the device is unlikely to be tested to the original manufacturer’s exact water resistance rating afterwards. A reputable repairer should tell you this upfront rather than let you assume nothing has changed.

Step 6: Warranty and aftercare

A repair should come with its own warranty on the parts and labour involved, separate from anything left on your original manufacturer warranty. This typically covers the specific fault that was fixed and the part that was fitted, for a set period, commonly around 12 months for reputable independent repairers. It will not usually cover unrelated new damage, such as a fresh crack from a drop after the repair, but it should cover a genuine fault with the part or the installation itself. If you are unsure how independent repair affects any remaining manufacturer warranty on your device, our guide on right to repair in the UK covers this in detail, including when a manufacturer can and cannot refuse to honour a warranty because of a third-party repair.

How long does each type of repair actually take?

Repair typeTypical time
Screen replacement30 to 60 minutes
Battery replacement30 to 45 minutes
Charging port (connector swap)45 to 90 minutes
Charging port (micro-soldering required)Same day to 24 hours
Back glass replacement45 to 90 minutes
Water damage treatment24 to 48 hours
Motherboard or logic board diagnosis24 to 72 hours

These are typical times for a device in stock parts availability. Rarer or older models can occasionally take longer if a part needs to be specially sourced, which is always communicated upfront rather than discovered as a surprise delay.

Common repair myths, and what actually happens

A lot of hesitation around getting a phone repaired comes from myths that do not hold up once you understand the actual process.

“Opening my phone will void everything, including my statutory rights.” Not true. Your statutory consumer rights and any independent repairer’s own warranty are entirely separate from whether a manufacturer chooses to honour its own warranty. Genuine faults with independent repair work are still covered by the repairer, regardless of what a manufacturer’s own policy says.

“A screen replacement completely ruins water resistance.” It changes it, rather than completely ruining it. Any repair that opens the case breaks the factory adhesive seal, and while a proper repair reseals it carefully, it is honest to say the device is unlikely to be tested to its original IP rating afterwards. A splash of rain is very different from full submersion, and most everyday use is unaffected in practice.

“If something looks fine on the outside, nothing else can be wrong.” Not necessarily. This is exactly why a proper diagnostic checks components that have nothing to do with the reported fault. A phone brought in for a cracked screen occasionally reveals a battery that is already swelling, which is far safer to catch during a planned repair than to discover later.

“All replacement parts are basically the same.” They genuinely are not, and the difference shows up in touch sensitivity, colour accuracy, and how long a battery holds its charge after a few months. This is covered in full in our guide to OEM vs aftermarket phone parts.

How to tell a repairer is actually following this process

Not every repair shop operates this thoroughly, and it is worth knowing what to look for before you hand your device over anywhere.

  • They quote by your exact model, not a vague “phone screen repair” price. A shop that gives you a single flat price before knowing your exact model, or without asking at all, is not pricing the actual part you need.
  • They offer a warranty on the repair itself. No warranty at all is a clear sign the shop is not confident in the parts or workmanship involved.
  • They tell you about trade-offs upfront, such as water resistance or True Tone, rather than letting you find out later.
  • They test the device in front of you, or at least explain what was tested, rather than just handing it back and saying it is fixed.
  • Their price is not dramatically below everyone else’s for the same part. A price far below the rest of the market on a like-for-like quote is usually a sign of a lower quality part, not a better deal. We cover exactly why this gap exists in our guide to OEM vs aftermarket parts.

None of these are complicated to check, and asking about them before you commit takes a couple of minutes at most. A repairer who is doing things properly will not mind being asked.

What to do before you bring your device in

A few minutes of preparation makes the whole process faster and safer for your data.

  • Back up your device if it is still working, via iCloud, Google or a cable to a computer.
  • Note down or remember your passcode. Technicians need this to fully test the repair, including Face ID, Touch ID and app functionality, not to access your personal data unnecessarily.
  • Turn off Find My iPhone or Find My Device if you are having a screen, battery or logic board repair, since Activation Lock can prevent a technician from fully testing or, in some cases, completing certain repairs.
  • Remove your SIM card and memory card if you would rather keep them with you, and remove any case or screen protector beforehand.
  • Mention any previous repairs the device has had, since a prior repair using non-standard parts can occasionally affect how straightforward a new repair is.

None of this is required, and a good repairer can work around most of it, but it does mean less back and forth and a faster turnaround.

Frequently asked questions

Do I need to back up my phone before every repair?

It is good practice for any repair, but essential for anything beyond a simple screen replacement. Battery, charging port and board-level repairs involve fully opening the device, and while data is very rarely affected, backing up first removes any risk entirely.

Can I stay while my phone is repaired?

For quick repairs like a screen or battery, often yes, since these typically take under an hour. Water damage and board-level repairs take longer and are usually not done while you wait.

Will the technician see my personal data?

Your data is never browsed or accessed during a standard repair. It is only interacted with directly if you specifically request a data recovery or transfer service, and even then only with your knowledge and consent.

What happens if the quote changes after the diagnostic?

You are always told before any work begins and asked to confirm. A reputable repairer will explain exactly why the price has changed, for example if the diagnostic uncovered a second fault, rather than simply presenting a higher bill afterwards.

Is it normal for a repair to take longer than quoted?

Occasionally, usually because a part needs to be sourced or a fault turns out to be more complex once the device is open. This should always be communicated to you as soon as it is known, not left until you arrive to collect your device.

Does a repair affect my phone’s resale value?

A well-executed repair using quality parts has minimal impact on resale value compared to leaving a device damaged or non-functional. A poor quality repair, on the other hand, can noticeably reduce it, which is another reason the quality of parts and workmanship matters more than the price alone.

Ready to book a repair?

Now that you know exactly what to expect, from diagnostic through to the final quality check, booking a repair should feel a lot less like a leap of faith. Every repair we carry out follows the same process described here: honest diagnosis first, a confirmed price before any work begins, and a warranty on the finished job.

Not sure yet whether your device needs a professional repair, or if the parts used actually matter? Our guide on OEM vs aftermarket phone parts explains exactly what you are paying for and why quality varies so much between repairers. Or get in touch directly on our contact us page for a free diagnostic and quote.

Back to posts

OEM vs Aftermarket Phone Parts: What’s the Difference and Which Should You Choose?

Ask three different repair shops for a screen replacement quote and you can get three noticeably different prices for what sounds like the exact same job. The reason almost always comes down to the part being fitted, not the labour. Understanding what “OEM” and “aftermarket” actually mean, and where the real quality differences lie, is the difference between a repair that feels exactly like the original and one that leaves you with a screen that never quite looks or feels right.

Quick answer

  • OEM (Original Equipment Manufacturer) parts are made to the same specification as the part that originally shipped in your device, often from the same factories that supply the manufacturer.
  • Aftermarket parts cover a huge range, from high-quality compatible parts that perform almost identically, down to poor quality generic parts that cause real problems.
  • Screens and batteries show the biggest quality gap between good and bad aftermarket parts. Charging ports and speakers show less variation.
  • Using non-genuine parts does not automatically void your statutory rights or a repairer’s own warranty, though it can affect specific manufacturer warranty claims.
  • A price far below everyone else’s for the same repair is the clearest sign of a lower quality part, more reliably than any marketing claim on either side.

What “OEM” actually means (and what it does not)

OEM stands for Original Equipment Manufacturer. In the repair world, it is used to describe parts made to the same specification, and very often by the same component factories, as the parts that shipped inside your device when it was new. This is different from “genuine Apple” or “genuine Samsung” parts, a term that technically only applies to parts sourced directly through the manufacturer’s own authorised channels.

In practice, most independent repairers cannot buy stock directly from Apple or Samsung’s authorised parts programmes for every repair type, so “OEM” in an independent repair context usually means a high quality, original-specification part pulled from the same supply chain, tested to match the performance of the factory original as closely as possible. This is a meaningful, real distinction from cheap aftermarket parts, even though it is not identical to a manufacturer-branded part.

What counts as “aftermarket”

Aftermarket is a much broader category than people expect, and lumping it all together is where a lot of confusion comes from. It genuinely spans two very different things.

  • High quality compatible parts from established manufacturers who specialise in producing components to match or closely approach original specifications. These often perform within a small, barely noticeable margin of an OEM part.
  • Low quality generic parts, mass produced with minimal quality control, cheaper materials, and no meaningful testing standard. These are where the real, noticeable problems come from: dull colours, poor touch response, or batteries that report a false charge percentage.

The word “aftermarket” on its own tells you almost nothing about which of these two categories a part falls into. The repairer’s own standards and sourcing are what actually determine that.

Screen quality differences explained

Screens show the widest quality gap of any commonly replaced part, and it is usually the most noticeable to you as the owner.

  • Panel type. Many recent iPhones and flagship Android phones use OLED or AMOLED panels for true blacks and vivid colour. Some low quality aftermarket “OLED” screens are actually LCD panels with an OLED-style backlight arrangement, which look noticeably different, especially in dark scenes and at an angle.
  • Colour accuracy and brightness. Cheaper panels often run cooler or warmer than the original, and struggle to reach the same peak brightness outdoors.
  • Touch sensitivity and digitiser thickness. A poor quality digitiser layer can feel slightly less responsive, or sit fractionally proud of the frame, which is often what people mean when a repaired screen “just feels a bit off”.
  • Auto-brightness and True Tone sensors. On iPhone, True Tone adjusts the display’s colour temperature to match ambient lighting. This relies on the original screen’s serial number being recognised by the device, so a straightforward part swap without proper reprogramming tools can disable it, regardless of whether the new screen is OEM or aftermarket.

A genuinely good aftermarket screen from a reputable supplier can be very difficult to tell apart from an OEM part in day to day use. A poor one is usually obvious within the first day, in colour, brightness or touch response.

Every model has its own part costs and options. See our iPhone screen repair, Samsung screen repair and Google Pixel screen repair pages for model-specific pricing.

Battery quality differences explained

Batteries carry a genuine safety dimension that screens do not, which makes quality even more important here.

  • Actual vs advertised capacity. A battery labelled with the same milliamp-hour rating as the original does not guarantee it genuinely delivers that capacity. Poor quality cells commonly report a higher percentage than what is actually available, meaning the phone dies well before it reaches 0 percent.
  • Battery management chip compatibility. Modern phones use a small chip inside the battery pack to communicate health and charge data to the device. A mismatched or absent chip can cause inaccurate percentage readings, unexpected shutdowns, or a persistent battery health warning even on a brand new part.
  • Cell quality and safety certification. Reputable battery cells go through genuine safety testing and certification. Very cheap, uncertified cells carry a meaningfully higher risk of swelling or, in rare but serious cases, overheating. This is one area where paying a little more for a properly certified part is a safety decision, not just a quality one.

Model-specific battery pricing is available on our iPhone battery replacement, Samsung battery replacement and Google Pixel battery replacement pages.

Camera, speaker, charging port and other components

These parts show a smaller, though still real, quality gap. Camera modules can differ in image sharpness and low light performance if the lens or sensor grade is lower than original. Speakers can sound noticeably thinner or distort at higher volumes if the driver quality is poor. Charging ports and their connecting flex cables are more mechanical than these other components, so the main risk with a poor quality part is a shorter working life or a looser physical connection over time, rather than an immediately obvious difference on day one.

A worked example: why three quotes for the same repair can differ so much

Imagine getting three quotes for the same cracked iPhone screen. One shop quotes noticeably below the other two, one sits in the middle, and one is the most expensive. This is almost never random.

The cheapest quote is very often a lower grade LCD-style panel sold as a straight replacement, sometimes with reduced touch sensitivity or a slightly duller display, and frequently a shorter or non-existent warranty. The middle quote is typically a good quality aftermarket or refurbished OEM panel, close to original performance, with a fair standard warranty attached. The most expensive quote is usually a fully genuine or top-tier OEM part, often with the longest warranty and the closest possible match to factory original, including True Tone functionality if the right reprogramming tools are used.

None of these three is automatically the “wrong” choice. The right one depends on your device, your budget, and how long you plan to keep the phone. The mistake is assuming the price difference is pure profit margin rather than a genuine difference in what is being fitted.

“Unable to verify this part”: what those warning messages actually mean

Newer iPhones sometimes show a notification after a screen, battery or camera replacement along the lines of “Unable to verify this iPhone has a genuine Apple part”. This causes a lot of unnecessary alarm, so it is worth explaining exactly what it does and does not mean.

This message appears because each of these components is paired to the device’s internal serial number at the factory. When a part is replaced, even with a genuine part sourced outside Apple’s own authorised repair programme, the phone cannot automatically re-verify that pairing itself. For a screen, this notification is generally cosmetic. The screen works completely normally, including touch and display quality, though features tied to the original pairing such as True Tone or automatic brightness matching can be affected unless proper reprogramming tools are used during the repair to re-establish that pairing.

For a battery, the notification is usually paired with a battery health screen that simply shows “unknown part” rather than a percentage, though the battery still charges and functions normally. For camera modules on the very newest models, Apple has tied some functionality more tightly to verified pairing, which is worth asking your repairer about directly if camera performance after a repair matters a great deal to you.

The practical takeaway: these messages are a notification, not usually a functional block, but a repairer using the right tools to properly re-pair components where possible will leave you with fewer of these warnings and closer to original functionality than one who does not.

Does using non-OEM parts void your warranty?

Not automatically, and not entirely. Your statutory rights under the Consumer Rights Act 2015, and any warranty offered directly by the repairer on their own work, are separate from a manufacturer’s own warranty policy and remain intact regardless of which parts were used. What can genuinely happen is a manufacturer declining to cover a specific fault that was directly caused by a third-party part or a poor installation, while the rest of the device’s manufacturer warranty stays valid. We cover this distinction fully, including the legal detail, in our guide to right to repair in the UK.

Why genuine and OEM parts cost more: what you are actually paying for

The price difference is not simply markup. Higher grade panels and cells cost more to manufacture, quality testing and certification add cost at every stage, and sourcing through more reputable supply chains carries a premium over the cheapest generic option available. A repairer using better parts is also usually absorbing a higher failure and replacement rate on cheap stock avoided altogether, which is a cost that gets passed on somewhere either way, either in price or in how many repeat repairs a shop ends up doing for free.

When it is worth paying more for OEM or premium parts

  • On a current flagship device where colour accuracy, brightness and touch feel matter to daily use.
  • On a screen repair, since this is where quality differences are most noticeable and most permanent to live with.
  • If you plan to sell or trade in the device later, since a poor quality repair is often noticed and can reduce resale value.
  • On a camera module, where sensor and lens quality genuinely affects photo results in a way most people notice quickly.

When good quality aftermarket parts are a smart choice

  • On an older or budget device where a full-price OEM part would cost close to what the phone itself is worth.
  • For batteries specifically, where a reputable aftermarket cell from an established supplier performs very close to original at a noticeably lower cost.
  • For a phone you intend to keep for a shorter period, such as a temporary or secondary device.

The key word throughout is reputable. A good quality aftermarket part from a supplier with a track record is a completely different product from the cheapest unlabelled part available online, even though both fall under the same “aftermarket” label.

Why part quality is likely to matter even more in future

Regulation is starting to catch up with this issue. The EU’s Ecodesign rules for smartphones, which already apply in Northern Ireland, set minimum durability standards for spare parts, including batteries that must retain at least 80 percent of their original capacity after 800 full charge cycles. As these kinds of standards spread, whether through direct regulation or simply because manufacturers build parts to one global standard, the gap between a properly certified part and a cheap uncertified one is likely to become an even bigger factor in how long a repair actually lasts. Our full guide to right to repair in the UK covers what these rules currently require and where they apply.

Does this apply to laptop and tablet parts too?

The same principles apply beyond phones. MacBook and laptop screens, batteries and keyboards show similar quality variation between OEM and generic aftermarket parts, and the same “ask what grade of part you are getting” approach applies just as much here.

  • Laptop screens vary in brightness, colour accuracy and viewing angle in much the same way phone screens do, and are worth asking about directly, especially on machines used for photo or video work.
  • Laptop batteries carry the same safety considerations as phone batteries, arguably more so given their larger size, making cell quality and certification just as important.
  • Keyboards and trackpads show less dramatic quality differences, though cheaper replacement keyboards can develop sticky or unresponsive keys sooner than a higher quality part.

See our MacBook repairs, laptop repair, HP laptop repair, Dell laptop repair and Lenovo laptop repair pages for model-specific options and pricing.

How to spot a poor quality part after a repair

If you have already had a repair done elsewhere and are wondering whether the part quality is the reason something feels off, these are the tell-tale signs.

  • Screen ghosting or a faint image “burned” into the display shortly after the repair, rather than after years of use, which points to a lower grade panel.
  • Touch response that feels delayed or misses taps near the very edges of the screen, especially in corners.
  • A visible colour tint, often slightly blue, yellow or pink compared to how the display used to look, particularly noticeable on a plain white background such as a notes app.
  • A battery percentage that drops unevenly, sitting at a stable number for a while and then dropping sharply, or a phone that switches off unexpectedly before reaching 0 percent.
  • A screen or back glass that sits slightly proud of the frame, or gaps at the edges, which points to either a poor quality part or a rushed installation rather than the part itself.

If you notice any of these within the warranty period of a previous repair, it is worth going back to whoever carried it out before assuming you need to pay for a second repair entirely.

How to tell if a repair shop is using good quality parts

You cannot inspect a part before it goes into your phone, so you have to judge the shop instead. A few honest questions tell you most of what you need to know.

  • Ask directly what grade of part they use, and whether OEM or premium aftermarket options are available. A shop that cannot or will not answer clearly is a warning sign in itself.
  • Check the warranty length. A short or non-existent warranty on parts usually reflects the shop’s own confidence in what they are fitting.
  • Compare the price against several other quotes for the exact same model and repair. A significant outlier on the low side is rarely a bargain.
  • Read reviews that mention long-term results, not just the initial repair experience, since poor quality parts often only reveal problems after a few weeks or months of use.

What parts do we use?

We offer OEM and premium quality aftermarket options depending on the device and your priorities, and we are upfront about which is which and why the price differs, rather than presenting every option as identical. Every repair carries a warranty on both the part and the workmanship, and we will always tell you honestly if a cheaper option is not worth the trade-off on a particular device.

Frequently asked questions

Can I ask which parts will be used before I book a repair?

Yes, and you should. Any reputable repairer will tell you clearly what grade of part is being fitted and what the price difference reflects.

Will an aftermarket screen look different from the original?

A good quality one, very little if at all. A poor quality one, often noticeably, particularly in colour accuracy, brightness and how the display looks in dark scenes.

Do aftermarket batteries degrade faster than OEM ones?

Poor quality ones often do, and can also report inaccurate battery percentages from day one. A reputable aftermarket battery from an established supplier typically performs very close to an OEM part over its lifespan.

Is it illegal for a repairer to use aftermarket parts without telling me?

Under UK consumer law, goods and services must be as described. If you were quoted for or told you were receiving one grade of part and a different, lower grade part was actually fitted without your knowledge, that is a misrepresentation you can challenge.

Does Apple or Samsung’s own repair service always use better parts than an independent repairer?

Manufacturer repair channels use fully genuine parts by definition, but a good independent repairer using genuine OEM-grade parts can offer very comparable quality, usually at a lower price and often faster turnaround.

Book a repair with parts you can trust

Now that you know what actually separates a good repair from a disappointing one, you know exactly what to ask before booking anywhere. We are always upfront about the parts we use and why, on every device we work on.

Curious what the rest of the repair process looks like once you have chosen your parts? Read our full guide on what happens during a phone repair, or contact us directly for a free quote with no obligation.

Back to posts

Repair vs Replace: The Real Cost of a New Phone (UK E-Waste Guide)

A cracked screen or a battery that will not last the day often triggers the same instinct: just buy a new phone. But the environmental and financial maths behind that decision rarely gets looked at properly. Here is what repairing versus replacing actually costs, in money and in carbon, based on real UK e-waste figures.

Quick answer

  • Manufacturing a new phone causes roughly 80 percent of its entire lifetime carbon footprint, before you have even switched it on. Repairing the phone you already own avoids that cost almost entirely.
  • The UK disposes of around 25 million mobile phones every year, and only about 31 percent of all UK electronic waste is properly recycled.
  • A repair typically costs a fraction of a replacement, and for most faults, batteries, screens, charging ports, cameras, it is the cheaper option by a wide margin.
  • Replacement genuinely makes more sense when a device is very old, no longer receiving security updates, or has structural damage that would cost close to a replacement to fix properly.

The real environmental cost of a new phone

Most people assume a phone’s environmental impact comes mainly from charging it every night. In reality, research consistently shows that manufacturing accounts for somewhere between 75 and 85 percent of a smartphone’s total lifetime carbon footprint, driven largely by mining and refining the metals inside it and producing its circuit boards and chips. Charging and everyday use make up a comparatively small share of the total.

This matters because it means the most carbon-expensive part of your phone’s life has already happened by the time you are deciding whether to fix it or replace it. Repairing a broken screen or battery keeps that sunk environmental cost in use for longer, while buying a new phone means paying that full manufacturing cost again, on top of whatever it costs you in pounds.

UK e-waste, by the numbers

FigureWhat it means
~25 millionMobile phones disposed of in the UK every year
~6 million tonnesTotal electronic waste generated in the UK annually
31%Share of UK e-waste that is actually recycled
2nd highestThe UK’s rank in Europe for e-waste generated per person
~24kgAverage e-waste generated per person, per year, in the UK

To put the recycling potential in perspective, recovering the materials from just one million recycled phones yields around 16 tonnes of copper, 350kg of silver, 34kg of gold and 15kg of palladium. Every phone that ends up in a landfill or forgotten in a drawer instead of being repaired, resold or properly recycled represents materials that have to be freshly mined all over again for the next device.

What actually happens to the phones we do not deal with properly

The overwhelming majority of unwanted phones do not get recycled responsibly. Many sit unused in drawers for years after being replaced, some are thrown in with general household rubbish despite this being against UK regulations for electronic waste, and a portion are exported, legally or otherwise, to countries with far less robust e-waste processing, where valuable materials are recovered using methods that can be genuinely harmful to the people doing it and the local environment. None of this is necessary for a phone that could have been repaired and kept in use for another year or two, or sold on and used by someone else entirely.

The financial case for repair over replacement

For the most common faults, a screen crack, a battery that no longer lasts the day, a charging port that has stopped making reliable contact, repair costs a fraction of what a new device costs, and often a fraction of even a mid-range replacement. Since these components are also the ones most likely to fail on an otherwise perfectly good phone, a repair usually restores a device to fully working condition rather than just patching around a symptom.

When replacement genuinely makes more sense than repair

Repair is not always the right call, and an honest repairer should tell you when it is not. Replacement tends to make more sense when a phone is old enough to have stopped receiving security updates, when the repair cost approaches a large share of a comparable replacement, or when there is structural damage, such as a bent chassis or a badly cracked back glass alongside other faults, that makes a full recovery impractical. A device that has already been repaired multiple times for unrelated faults is also worth weighing up honestly rather than sinking further cost into.

If your phone has more serious damage such as water damage or will not turn on at all, it is still worth a free diagnostic before assuming the worst. Many faults that look terminal turn out to be straightforward and inexpensive to fix.

If you do replace it, do not let the old one go to waste

When replacement really is the right call, what happens to your old phone still matters. Before you back up and hand it over, see our guide on how to get data off a broken phone if it is not fully working. From there, you have better options than a drawer or the bin.

  • Sell it. Even a broken phone has resale value. Our guide on where to sell a broken phone covers the best routes, including trade-in and marketplace options.
  • Buy refurbished instead of new next time. A refurbished device gets full use out of a phone that has already been manufactured, avoiding that 80 percent manufacturing carbon cost entirely. iExpert Market sells fully tested, reliable refurbished phones at a fraction of the price of new.
  • Recycle it properly through a certified electronics recycler if it genuinely has no resale value left, rather than general waste.

A quick decision guide

SituationBest option
Cracked screen, worn battery, faulty charging port on an otherwise good phoneRepair
Water damaged or won’t turn on, cause unknownFree diagnostic first, then repair if viable
Very old device, no more security updates, repair cost close to replacementReplace, ideally with a refurbished device
Old phone still working after you upgradeSell it or hand it on rather than storing or binning it

Frequently asked questions

Is repairing a phone actually better for the environment than replacing it?

In almost all cases, yes. Since manufacturing causes roughly 80 percent of a phone’s lifetime carbon footprint, keeping your existing phone in use through repair avoids that cost, while a new phone means paying it again in full.

How much UK e-waste is actually recycled?

Around 31 percent of all UK electronic waste is properly recycled, despite the UK generating roughly 6 million tonnes of e-waste every year and having one of the highest e-waste rates per person in Europe.

What should I do with a phone I am not going to repair?

Sell it if it has any resale value, even broken, hand it on to someone who can use it, or recycle it through a certified electronics recycler as a last resort. Avoid letting it sit unused or putting it in general waste.

Is buying refurbished actually more sustainable than buying new?

Yes. A refurbished phone has already absorbed its manufacturing carbon cost in a previous life, so buying one instead of new avoids that cost being paid again, while still getting you a fully tested, working device.

Get an honest opinion before you decide

We diagnose every device honestly and tell you if repair is not worth it, rather than pushing a repair that does not make sense. If it is, we can usually have it done the same day.

Back to posts

Right to Repair in the UK: What Phone Owners Actually Need to Know

“Right to repair” gets thrown around a lot, and a fair amount of what circulates online about it is out of date or simply wrong. Here is what UK law actually says today about getting your phone fixed, what is genuinely changing, what still is not law despite some headlines claiming otherwise, and whether using an independent repairer instead of the manufacturer affects your warranty.

Quick answer

  • Your main legal protection today is the Consumer Rights Act 2015, not “right to repair” specifically. It gives you a statutory right to a repair, replacement or refund for faulty goods, separate from any manufacturer warranty.
  • The UK’s existing 2021 “Right to Repair” regulations do not currently cover phones, tablets or laptops. They apply to household appliances such as washing machines, dishwashers, fridges and TVs.
  • Northern Ireland is the exception. It follows the EU’s newer Ecodesign rules for smartphones and tablets, which took effect in June 2025 and do require longer spare parts availability and more durable batteries.
  • Using an independent repairer instead of the manufacturer does not automatically void your warranty in most circumstances, though the specifics depend on your warranty terms and what actually goes wrong afterwards.

Your actual legal right to a repair: the Consumer Rights Act 2015

This is the law that matters most in practice, and it applies to every phone, tablet and laptop bought in the UK, regardless of brand. It gives you a statutory right to a repair, replacement or refund if a product is faulty, of unsatisfactory quality, or not fit for purpose, and it exists entirely separately from any manufacturer warranty. The exact remedy available depends on how long you have owned the item.

  • 0 to 30 days: you have a short-term right to reject faulty goods and demand a full refund.
  • 30 days to 6 months: the retailer gets one opportunity to repair or replace the item. If that attempt fails, you are entitled to a refund.
  • After 6 months: you can still claim, generally up to 6 years in England and Wales, but the burden shifts to you to show the fault was present at the time of purchase rather than caused by wear, damage or misuse.

This right sits with the retailer you bought from, not the manufacturer, and it is a separate, additional protection on top of whatever warranty came in the box.

Does the UK actually have a “right to repair” law for phones?

Not yet, and this is worth clearing up because it gets misreported. The UK introduced the Ecodesign for Energy-Related Products and Energy Information Regulations 2021, often nicknamed the “Right to Repair Regulations”, which require manufacturers to make spare parts and repair information available to professional repairers. However, these regulations currently apply to a specific list of household appliances: washing machines and washer-dryers, dishwashers, refrigeration appliances, and electronic displays such as televisions.

Phones, tablets and laptops are not on that list. Consumer groups including Which? and the Green Alliance have been pushing the government to extend the regulations to cover them, and it remains a live campaign issue, but as things stand there is no dedicated UK right to repair law specifically covering smartphones.

Northern Ireland vs Great Britain: a real difference

This is where it gets genuinely different depending on where in the UK you are. Northern Ireland continues to align with EU single market rules for goods under the Windsor Framework, which means the EU’s newer Ecodesign for Smartphones and Tablets Regulation, in force since June 2025, applies there directly.

That EU regulation is considerably more specific than anything currently in force in Great Britain. It requires manufacturers to make critical spare parts, such as batteries, screens, charging ports, cameras, microphones and speakers, available to professional repairers within 5 to 10 working days, for at least 7 years after a model stops being sold. It also sets minimum durability standards, including batteries that must retain at least 80 percent of their original capacity after 800 full charge cycles, and requires devices to resist accidental drops and basic water exposure.

England, Scotland and Wales do not currently have an equivalent smartphone-specific regulation of their own.

Why the EU rules affect UK buyers anyway

Manufacturers rarely build a separate, less repairable version of the same phone just for one market. When a rule forces a phone to be designed with replaceable batteries and available spare parts for the EU and Northern Ireland, that same design almost always ships to the rest of the UK too, simply because it is not commercially sensible to run two different production lines. In practice, this means recent flagship phones sold in Great Britain have often become somewhat easier to repair even without a matching domestic law, purely as a side effect of EU rules elsewhere.

Will Great Britain get its own smartphone right to repair law?

Possibly, but there is no confirmed date, and it is worth being sceptical of anything online that states one with confidence. Under the previous government, policy work exploring an expansion of right to repair rules was underway, but it had not progressed to a firm proposal before it stalled, and it remains unclear whether or when the current government will take it forward. If and when new rules are confirmed, we will update this guide.

In the meantime, the practical reality for most people is a mix of the Consumer Rights Act 2015, manufacturer warranties, and, if you happen to be in Northern Ireland, the stronger EU-aligned rules.

Does having your phone repaired elsewhere void your warranty?

This is one of the most common worries we hear, and in most cases the answer is no. A manufacturer cannot lawfully void your entire warranty simply because a repair was carried out by someone other than themselves. Competition law in both the UK and EU has long protected the right of independent repairers and consumers to use non-manufacturer parts and services without automatically losing warranty cover on unrelated parts of the device.

What a manufacturer can usually do is decline to cover a specific fault if it was directly caused by a poor-quality independent repair. For example, if a badly fitted screen damages the display cable, the manufacturer may reasonably refuse to cover that specific display fault under warranty, while the rest of your device’s warranty remains intact. This is exactly why the quality of the repairer you choose matters. A properly carried out repair using suitable parts should not create warranty problems on components it never touched.

It is always worth checking your specific manufacturer’s warranty terms, since wording varies, but “any independent repair voids your entire warranty” is a myth far more often than it is an enforceable reality.

What this means in practice if your phone breaks

  1. If it broke within 30 days of purchase, contact the retailer first. You are entitled to a full refund under the Consumer Rights Act 2015.
  2. Between 30 days and 6 months, the retailer gets one attempt at a repair or replacement before you can insist on a refund.
  3. Outside of that window, or if you would simply rather not go through the retailer, an independent repairer such as ourselves can usually fix the fault faster and often more cheaply than a manufacturer-led process, without voiding cover on the rest of your device.
  4. If you are out of any statutory or manufacturer cover entirely, which is common on older devices, independent repair is very often the most cost-effective route back to a working phone.

Frequently asked questions

Is there a UK right to repair law for smartphones yet?

Not specifically. The UK’s 2021 Right to Repair Regulations cover household appliances only. Northern Ireland is the exception, where EU smartphone Ecodesign rules have applied since June 2025.

What is my strongest legal protection if my phone is faulty?

The Consumer Rights Act 2015. It applies UK-wide, covers every device regardless of brand, and gives you a statutory right to a repair, replacement or refund, separate from any manufacturer warranty.

Will using an independent repairer void my Apple or Samsung warranty?

Not automatically. Manufacturers cannot lawfully void your entire warranty just for using a third party. They can decline to cover a specific fault that a poor repair directly caused, which is why repair quality matters more than who carries it out.

Does buying a phone in Northern Ireland give me better repair rights?

Yes, in terms of manufacturer obligations. Devices sold there fall under EU Ecodesign rules requiring 7 years of spare parts availability and more durable batteries, which do not currently apply in England, Scotland or Wales.

Get your device repaired properly, wherever you are

Whatever your statutory rights look like on paper, a reliable independent repair is often the fastest and most cost-effective way back to a working device, and it will not put your device’s remaining warranty at risk when carried out properly.

Not sure whether a repair is worth it on an older device? Our guide on where to sell a broken phone covers the alternative, or contact us for a free, honest diagnosis either way.

Back to posts

Why Is My MacBook Not Turning On? Causes & Fixes

A MacBook that will not turn on is not always as serious as it looks. A stuck sleep state, a display sending video to an external monitor instead of the built-in screen, or a battery flat enough that it needs several minutes on charge before responding can all look identical to a dead machine. This guide covers how to tell the difference, the fixes worth trying yourself, and when it genuinely needs a professional look.

Quick answer: why your MacBook will not turn on

  • Completely dead, no lights, no sound, no fan? Almost always a charging or battery fault. Try a different cable and charger before anything else.
  • Fan spins and you can hear it, but the screen stays black? The MacBook is on. This is usually a display or graphics fault, not a power fault.
  • Turns on then shuts off again within seconds? Points to a battery or logic board fault rather than something a restart will fix.
  • Recently had a spill or drop? Stop trying to turn it on repeatedly and get it looked at, since repeated power attempts on damaged hardware can turn a fixable fault into an unfixable one.
  • Just updated macOS? A long startup screen with a progress bar is normal after an update, and can take considerably longer than usual.

First, check whether it is actually off, or just a black screen

  1. Listen and feel for the fan. If it is running, the MacBook is powered on even with a black screen.
  2. Press any key or tap the trackpad in case it is simply asleep with the display dimmed right down.
  3. Turn brightness up with the function keys in case it powered on with the screen at its dimmest setting.
  4. Disconnect any external monitor. If one was connected last, some MacBooks will send video output there instead of the built-in display.
  5. Plug into power for at least 15 to 30 minutes before trying again, in case the battery is simply too flat to boot.

How to tell a dead MacBook from a dead screen

A MacBook that seems completely lifeless is sometimes fully powered on underneath a screen that has simply stopped displaying anything, which is a very different, usually cheaper, repair. A few checks tell the two apart before you assume the worst.

  • Listen for the startup chime. Older Intel MacBooks play a sound on boot. If you hear it, the machine is powering on regardless of what the screen shows.
  • Feel for the fan and check the vents. Hold the MacBook near your ear, close to the hinge where the vents sit, and feel or listen for airflow and fan noise. Warmth and movement mean it is running.
  • Shine a torch at an angle across the closed lid area, or very close to the screen once open. If you can make out a very faint, dim image, the backlight has failed but the display panel and logic board are still working. This points to a backlight or screen repair rather than anything more serious.
  • Press the Caps Lock key. If the indicator light comes on, the keyboard and logic board are receiving power, which again points toward a screen fault rather than a dead machine.
  • Connect an external monitor via HDMI or a USB-C to HDMI adapter. A picture on the external screen confirms the MacBook itself is fully working and the fault is isolated to the built-in display.

If none of these show any sign of life at all, no chime, no fan, no warmth, no external display, the fault is much more likely to be power related, covered in the charging section below.

Common causes of a MacBook that will not turn on

CauseTypical signsWhat usually fixes it
Flat or failed batteryNo response even on charge, or dies again within minutes of unpluggingBattery replacement
Faulty charging port or cableNo charging light, or light flickers when the cable is movedCharging port repair
Stuck sleep or software freezeFan running, keyboard lit, but screen unresponsiveForce restart
Liquid damageRecent spill, keys sticking, intermittent powerProfessional cleaning and diagnostic, urgently
Display or graphics faultFan and startup sound present, screen stays blackScreen or logic board diagnostic
Drop or impact damageCracked case, hinge damage, power loss after a fallFull diagnostic before further use

Unplug everything before troubleshooting further

MacBooks have a built-in safety feature that cuts the power-on process short if a connected accessory is drawing an unusual or short-circuited amount of current. A faulty USB hub, external drive, dongle or even a damaged charging cable can be enough to stop the machine powering on at all, and it is one of the quickest things to rule out.

Disconnect absolutely everything, printer cables, USB hubs, external drives, HDMI or display adapters, and the charger itself, then try the power button on battery alone. If that does not work, reconnect only the charger and try again. Adding accessories back one at a time after that will quickly reveal if one of them is the actual culprit.

How to force restart your MacBook

On any MacBook, whether it has an Apple Silicon chip (M1, M2, M3 or later) or an older Intel processor, hold the power button down for around 10 seconds until the screen goes black and any fan noise stops. Release it, wait a few seconds, then press the power button once to turn it back on. This clears a frozen state without affecting your files.

Resetting SMC and NVRAM: only applies to older Intel MacBooks

If you have an Intel-based MacBook, a System Management Controller (SMC) reset and an NVRAM reset are two further troubleshooting steps worth trying for power-related faults. On models with a non-removable battery, shut down, then hold Shift, Control, Option and the power button together for 10 seconds. For NVRAM, restart and immediately hold Command, Option, P and R for around 20 seconds until you hear the startup sound twice. MacBooks from 2018 onward with an Intel processor use Apple’s T2 security chip, which took over the SMC’s job. To reset it, shut down, then hold Control and Option on the left of the keyboard together with Shift on the right for 7 seconds, then also hold the power button for a further 7 seconds while still holding the other three, then release all four at once.

Apple Silicon MacBooks (M1 and later) do not have a separate SMC to reset, and NVRAM is managed automatically by the system, so neither of these steps applies. A simple force restart, as above, is the equivalent fix on these models.

Unusual beeping sounds on startup

On older MacBooks, a series of repeating beeps as you try to power on points to a memory fault rather than a battery or charging issue. One beep repeating every five seconds generally means no memory has been detected at all, while three beeps followed by a pause, repeating, means installed memory has failed a data integrity check.

On any MacBook Air or MacBook Pro from 2012 onward, memory is soldered directly to the logic board rather than fitted in removable slots, so beep codes on these models point to a logic board fault rather than something you could reseat or swap yourself. This is a case where a proper diagnostic is the only sensible next step.

Charging related causes

Plug in with a cable and charger you know works, ideally not the one you suspect is faulty, and check for a charging light if your model has one. On MagSafe models, amber or orange means charging and green means fully charged. No light at all after several minutes on a known-working charger points to either a battery that has failed completely or a charging port that is not making contact, both of which need a professional repair rather than further troubleshooting at home.

MacBook will not turn on after a spill or liquid exposure

Switch it off immediately if it is still on, disconnect the charger, and do not attempt to turn it back on to test it. Liquid causes a short circuit the moment power is applied to a wet board, and every additional attempt to power on increases the risk of permanent damage. Do not use a hairdryer or leave it in rice. The safest thing you can do is get it opened, cleaned and properly dried by someone who can do this without applying power, as quickly as possible.

Every MacBook has small liquid contact indicators built in near the areas most likely to let moisture through, typically under the keyboard, trackpad, and around the edges of the logic board. These change colour, usually to red or pink, once they have been in contact with liquid, which is how a technician confirms liquid exposure even weeks after the event and even if the MacBook appears to be working normally again.

Liquid on the keyboard or trackpad specifically can cause problems beyond the obvious: both share a power rail with the SMC itself, so a short circuit in either one can stop the entire MacBook responding to the power button, even though the fault is really in the keyboard or trackpad rather than the power system. This is why a MacBook that stops turning on straight after a spill on the keyboard is not necessarily as serious as it first looks, but it does need proper diagnosis rather than guesswork to tell the difference.

MacBook will not turn on after a drop or impact

A fall can dislodge internal connectors, crack the logic board, or damage the battery without any visible sign on the outside of the case. If your MacBook stopped turning on immediately after being dropped, avoid repeated power attempts and have it diagnosed before assuming the worst. Internal damage from a drop is often more repairable than people expect, particularly if the battery itself has not been punctured.

Which MacBook do you have?

Find your exact model below for specific repair information and pricing, or visit the full MacBook repairs hub if yours is not listed here.

When to stop troubleshooting and get it looked at

Stop trying fixes yourself and book a diagnostic if the MacBook shows no response at all after 30 minutes on a known-working charger, if it has been dropped or exposed to liquid, if it turns on then shuts off repeatedly, or if you can smell burning or see swelling around the trackpad or keyboard, which is a sign of a swollen battery and should be treated urgently.

Frequently asked questions

Why is my MacBook charging light not coming on?

Try a different cable and charger first, since these fail more often than the MacBook itself. If a known-working charger still shows no light, the charging port or battery is the most likely cause.

Can a MacBook battery just die without any warning?

Yes. Batteries degrade gradually, but the point where they can no longer hold enough charge to boot the machine can feel sudden, especially if you rely on macOS’s battery percentage rather than checking battery health directly.

Is it safe to keep pressing the power button if nothing happens?

If the MacBook is dry and has not been dropped, a few attempts will not cause harm. If it has been wet or dropped, stop, since repeated power attempts on damaged hardware are one of the most common ways a repairable fault becomes unrepairable.

Will I lose my files if my MacBook will not turn on?

Not usually. Most causes, including battery, charging port and display faults, do not touch the storage drive, and your files are recovered along with the repair. Board level faults are the exception, which is why an honest diagnostic before any work begins matters.

Get a free diagnostic

Whatever the cause, our engineers diagnose MacBooks honestly before any work begins and confirm the cost upfront.

If you have a Windows laptop instead, our guide on why is my laptop not turning on covers brand-specific troubleshooting for Dell, HP and Lenovo. Or get in touch on our contact us page for advice on your exact model.

Back to posts

Why Is My Phone So Slow? Causes & How to Speed It Up

A phone that used to feel instant and now lags on everything is almost always down to one of a handful of causes: nearly full storage, an ageing battery that can no longer supply full power, too many apps running in the background, or a genuine hardware fault. The fix is different for each, and running the wrong one wastes time without solving anything. Here is how to work out which one you have and fix it.

Quick answer: why phones slow down

  • Storage nearly full? This is the single most common cause. Free up space and performance usually recovers immediately.
  • Battery old or health below 80 percent? Your phone may be deliberately throttling performance to avoid random shutdowns.
  • Just updated the software? Slowdowns for a day or two after a major update are normal while the system reindexes.
  • Phone is several years old and slow everywhere, even after a factory reset? That is usually a hardware limitation rather than something fixable with software.
  • Slow only in specific apps? That points to the app itself, or your Wi-Fi and mobile data, rather than the phone.

Slow internet vs a genuinely slow phone

Before assuming your phone itself is the problem, rule out your connection. A weak Wi-Fi signal or poor mobile data coverage can make browsing, streaming and app loading feel exactly like a slow phone, even when the device itself is running perfectly. This is one of the most common causes of a phone that only feels slow in certain apps or locations.

  • iPhone: go to Settings, then Wi-Fi, and confirm you are connected to the right network with a strong signal. If problems persist, go to Settings, then General, then Transfer or Reset iPhone, then Reset, then Reset Network Settings. This clears saved Wi-Fi passwords and network configurations, so you will need to reconnect afterwards.
  • Android: go to Settings, then Network and Internet, then Wi-Fi, and check the connected network. Tap the network name, select Forget, then reconnect with the password to refresh the connection.
  • If neither fixes it, try loading a website or app over mobile data instead of Wi-Fi, or vice versa, to work out whether the fault is your home network, your mobile signal, or the phone itself.

If everything is fast on a strong connection but slow the moment you switch networks, the issue is your internet rather than your phone, and no repair will fix it.

Software fixes to try first

  1. Restart your phone. This clears background processes and memory leaks that build up over days of use and is genuinely the fastest fix available.
  2. Check your storage. On iPhone go to Settings, then General, then iPhone Storage. On Android go to Settings, then Storage. Once a phone passes around 90 percent full, the operating system struggles to manage temporary files and everything slows down.
  3. Update your software. Manufacturers regularly release performance and battery fixes, and running an old, unsupported version can make normal tasks feel sluggish.
  4. Close and offload unused apps. Apps left open in the background continue to use memory and battery. On iPhone, offloading unused apps in Settings removes the app but keeps its data.
  5. Clear app caches and browser data. Social media apps and browsers in particular can build up several gigabytes of cached data that quietly slows the whole phone down.
  6. Remove live wallpapers and heavy widgets. These run constantly in the background and cost more performance and battery than they are usually worth.
  7. Turn off location services for apps that do not need them. Constant GPS tracking in the background is one of the heavier drains on both processing power and battery, particularly for apps you rarely open.
  8. Make restarting a weekly habit rather than a last resort. A phone left running for weeks at a time accumulates far more background clutter than one restarted regularly, and the difference in day-to-day speed is noticeable.

Storage almost full: the most common cause

Modern phones use spare storage space as working memory for everyday tasks like switching between apps, loading photos and running the camera. When storage gets close to full, the phone has nowhere left to work and everything from opening apps to typing a message starts to lag. The biggest space users are almost always large videos, duplicate photos synced from messaging apps, and cached data from apps you barely use. Deleting a handful of long videos or clearing WhatsApp’s media cache often fixes a slow phone in minutes, with no repair needed at all.

Malware and junk apps

On Android, apps installed from outside the Play Store, or Play Store apps that ask for far more permissions than they need, can run constantly in the background, drain the processor, and generate network traffic you never asked for. This shows up as a phone that is slow everywhere, gets warm even when idle, and burns through battery faster than it used to.

  • Go to Settings, then Apps, and sort by battery or data usage to spot anything unfamiliar or using far more than it should.
  • Uninstall anything you do not recognise or no longer use, particularly apps installed outside the Play Store.
  • Run a scan with a reputable security app if you suspect something more serious, especially after clicking a link in a text or downloading an app from outside the official store.

iPhones are far less susceptible to this particular cause thanks to Apple’s app sandboxing and App Store review process, though the same principle of removing unused or suspicious apps still applies if you have installed anything through a third-party profile or configuration.

Hardware causes: when it is not software

If you have freed up storage, restarted, and updated the software and the phone is still slow everywhere, the cause is more likely to be hardware.

An ageing or degraded battery. As a battery wears down, it becomes less able to deliver quick bursts of power. Both iPhone and Android manufacturers build in performance throttling that automatically slows the processor down to prevent the phone randomly switching off when the battery cannot keep up. This is one of the most common causes of a phone that used to feel fast suddenly feeling sluggish, and it is also one of the easiest to fix.

Failing memory (RAM). RAM is your phone’s short-term working memory, used every time you switch between apps or the camera loads quickly. It is not something that wears out the way a battery does, but on a phone that has suffered drop or water damage, a loose or failing memory chip can cause exactly the same symptoms as general slowness, along with random app crashes or restarts. Unlike a laptop, phone memory is soldered directly to the logic board and cannot be swapped out, so a genuine RAM fault points to a board-level diagnostic rather than a part you could replace yourself.

A failing charging port or intermittent charge. A phone that is not charging reliably overnight can wake up on low battery and immediately throttle itself for the rest of the day, which feels identical to a general slowdown even though the real fault is the charging port or cable.

Past water or liquid exposure. Even a phone that survived a splash and kept working can develop light corrosion on internal connections over the following weeks, causing components to intermittently underperform. If your phone has been wet at any point and started slowing down since, this is worth ruling out. See our water damaged phone guide or book a water damage repair.

iPhone specific causes of slowdown

Check your battery health under Settings, then Battery, then Battery Health and Charging. Apple flags anything below 80 percent as significantly degraded, and this is usually accompanied by a note about peak performance capability if throttling is active. Also check that Low Power Mode is not stuck on, since it deliberately reduces background activity and visual effects to save battery. If your iPhone is still slow with a healthy battery and normal storage, our iPhone repairs team can run a full diagnostic.

Android specific causes of slowdown

Android slowdowns often come from manufacturer software layers such as Samsung’s One UI or pre-installed apps you never use running in the background. Go into Settings, then Apps, and check which apps are using the most battery and data in the background, then disable or uninstall anything you do not need. Fragmented storage on older Android phones can also contribute, particularly on devices with 32GB or 64GB of storage that are now running several years of accumulated app updates. Significant Locations and background location history, found under Settings, then Privacy, can also be worth checking on both platforms, since apps with constant location access in the background are a common hidden drain that rarely gets noticed until battery and speed both suffer.

When it is time to repair, and when it is time to replace

A battery or charging port repair on a phone that is a couple of years old is almost always worth doing, and usually solves a slowdown completely. On a phone that is five years old or more, running an operating system version close to the end of its support life, it is worth weighing up the cost of a repair against a newer, faster device. If a repair is not the right call, iExpert Market offers reliable refurbished phones at a fraction of the cost of buying new.

A simple order to troubleshoot in

With this many possible causes, it helps to work through them in the order they are most likely to actually be the problem, rather than trying everything at once.

  1. Restart the phone. Takes 30 seconds and fixes more than people expect.
  2. Check storage and free up space if it is above roughly 90 percent full.
  3. Confirm it is not just your Wi-Fi or mobile signal by testing on both.
  4. Update the operating system if you are behind on updates.
  5. Check battery health and consider a replacement if it has dropped significantly.
  6. Review background apps and permissions, and remove anything unfamiliar.
  7. If it is still slow everywhere with none of the above explaining it, book a diagnostic to check for a charging, RAM or logic board fault.

Frequently asked questions

Does closing background apps actually make a phone faster?

Rarely, and sometimes it makes things slower, since reopening a closed app from scratch uses more resources than resuming it from the background. Restarting the phone entirely is far more effective than manually closing every app.

Will a factory reset speed my phone up?

Often, yes, if the slowdown is caused by years of accumulated apps, cached data and background processes. It will not help if the real cause is an ageing battery or a hardware fault, so back up your data first and try the simpler fixes above before resetting.

Why does my phone slow down right after a software update?

This is usually temporary. Updates reindex Spotlight or Google search data, rebuild caches and reinstall background services, which can make the phone feel sluggish for a day or two before settling back to normal.

Does battery health really affect how fast a phone feels?

Yes. Both iOS and Android intentionally reduce processor speed on phones with a badly worn battery to prevent unexpected shutdowns, which can make a phone feel noticeably slower even though the processor itself has not changed.

Is it worth repairing an old, slow phone?

Usually, if the fix is a battery or charging port. It is worth thinking twice on very old devices that are no longer receiving software updates, where a refurbished replacement may serve you better long term.

Does Apple deliberately slow down old iPhones?

Not deliberately to force upgrades, despite the “Batterygate” controversy in 2017 when Apple admitted to throttling performance on iPhones with degraded batteries. The company’s explanation, which it still maintains, is that this was a software protection to prevent phones with worn batteries from randomly shutting off under heavy load, not a scheme to push people toward new devices. Apple now shows battery health and any active performance throttling directly in Settings, so you can check and address it yourself with a battery replacement rather than a new phone.

Still slow after trying everything?

If you have freed up storage, restarted, updated your software and your phone is still noticeably slower than it used to be, book a diagnostic and we will tell you honestly whether a battery, charging port or another repair will fix it, or whether your money is better spent elsewhere.

You might also find our guide on why is my phone not charging useful, or get in touch on our contact us page for advice on your specific model.

Back to posts

How to Get Data Off a Broken Phone

The right way to get data off a broken phone depends entirely on what “broken” means. A cracked but working screen, a black unresponsive display, a phone that will not turn on, and a water damaged phone each need a different approach, and trying the wrong one can make things worse or destroy data that was still recoverable. This guide covers every scenario, what to check before you assume your photos and messages are gone, and when it genuinely needs a professional.

Quick answer: how to recover data from a broken phone

  • Screen cracked but still responds to touch? Back up normally via iCloud, Google, or a cable to a computer.
  • Screen black or unresponsive but the phone powers on? Try screen mirroring or an external mouse before assuming data is lost.
  • Phone will not turn on at all? Rule out a charging fault first, then a professional diagnostic is the only way to know if data is recoverable.
  • Water damaged? Do not charge it or keep pressing the power button. Switch it off, remove the SIM, and get it looked at quickly before corrosion spreads.
  • Already checked your cloud backup? A lot of “lost” data is already sitting safely in iCloud, Google Photos or Samsung Cloud.

If your screen is cracked but the phone still works

A cracked screen that still responds to touch and displays clearly is the easiest scenario. Back up as normal: connect to Wi-Fi and let iCloud or Google back up automatically, or plug the phone into a computer with a cable and copy photos, contacts and files directly. Once everything important is safely backed up, it is worth getting the screen fixed properly rather than continuing to use a device with broken glass, since cracks spread and can eventually stop the display working altogether.

If your screen is black or unresponsive but the phone powers on

If you can hear notifications, feel vibrations, or see the screen light up faintly but cannot see or touch anything usable, the phone may still be fully functional underneath a broken display or digitiser. Do not assume the data is gone before trying these.

  • Screen mirroring. On iPhone, connect to a Mac with a cable and use QuickTime Player’s “New Movie Recording” with the phone selected as the camera source to see and sometimes interact with the screen. On Android, tools such as scrcpy, or a manufacturer’s own screen mirroring feature via a Smart TV or Chromecast, can display and control the phone from another device.
  • An external mouse. Recent iPhones support AssistiveTouch with a Bluetooth mouse, letting you navigate blind if you know your passcode and app layout. Many Android phones support USB or Bluetooth mice in the same way.
  • Voice assistants. Siri or Google Assistant can sometimes trigger a manual backup or open specific apps by voice alone, even with a completely dead display.

If the display itself is the fault, for example after a drop that left the screen black with a working phone underneath, our unresponsive touchscreen guide and green line on screen guide cover related display faults and what usually causes them.

If your phone will not turn on at all

Before assuming the worst, rule out a simple charging fault. Plug the phone in with a known-working cable and charger, leave it for at least 30 minutes, and try a force restart. If there is still no sign of life, the cause is usually a battery that has fully discharged and failed, or a charging port that is not making contact. Our guide to a phone that will not turn on walks through the full troubleshooting process.

If charging genuinely makes no difference, the fault is likely on the logic board itself. This is the point where a professional diagnostic is the only reliable way to find out whether your data can still be recovered, since opening the phone yourself without the right tools risks damaging the storage chip and losing everything for good.

If your phone is water damaged

Water damage is the most time-sensitive scenario for data recovery. Corrosion starts spreading across the circuit board within hours of exposure, and every extra charge cycle or power-on attempt pushes current through components that may already be shorting.

  • Switch the phone off immediately if it is still on, and do not turn it back on to “check” if it still works.
  • Do not plug it in to charge. This is one of the most common causes of a short circuit that turns a recoverable phone into an unrecoverable one.
  • Remove the SIM card and any case, and dry the outside gently. Skip the rice: it does little for internal moisture and dust from it can cause its own problems.
  • Get it looked at as soon as possible. The sooner a phone is professionally opened, cleaned and dried, the better the chances of both a full repair and full data recovery.

See our full water damaged phone guide for the complete step by step process, or go straight to phone water damage repair and iPhone water damage repair to book a diagnostic.

Check your cloud backup before assuming anything is lost

Many people pay for professional data recovery on a phone that already has everything important safely backed up. It is worth checking from another device before you do anything else.

  • iPhone: sign in at icloud.com from a computer or another device and check Photos, Contacts and Notes. Check Settings, then your name, then iCloud on another Apple device to see when the last backup ran.
  • Android: sign in to photos.google.com and drive.google.com with the same Google account, or check Samsung Cloud via account.samsung.com if you have a Samsung device.
  • Messages: WhatsApp backs up separately to Google Drive or iCloud depending on your phone, and is worth checking on its own since it is not always included in a standard device backup.

If your last backup is weeks or months old, or specific things like WhatsApp media, voice memos or offline documents are missing, that gap is what professional recovery is actually solving, rather than starting from zero.

Professional data recovery: what we do and when it is needed

When a phone cannot be turned on, mirrored or controlled by any of the methods above, the only remaining way to reach your data is by working on the device itself. Depending on the fault, this can mean carefully repairing just enough of the phone, such as a screen or battery, to get it booting again long enough to back up, or in more serious cases removing the storage chip directly and reading it on specialist equipment.

We always diagnose first and tell you honestly whether recovery looks realistic and what it would involve before any work begins, rather than charging for an attempt with no clear chance of success.

What not to do when trying to recover data from a broken phone

  • Do not repeatedly restart a water damaged phone to “see if it works”. Every attempt risks a short circuit that makes recovery harder or impossible.
  • Do not attempt a DIY screen or battery swap on a phone holding data you cannot afford to lose, without backing up first wherever possible. A slipped tool or a torn cable can turn a simple repair into a data loss situation.
  • Do not ignore early corrosion signs such as a phone that switches itself off randomly after water exposure, even if it seems to be working again.
  • Be cautious with cheap online DIY data recovery kits and software for physically broken phones. Most consumer recovery software only helps with deleted files on a working device, not a phone that will not turn on or connect.

Which repair keeps your data safe, by fault

What’s wrongBest next step
Cracked screen, still worksBack up as normal, then book a screen repair
Black or unresponsive screen, phone powers onTry screen mirroring or an external mouse, then a screen replacement
Won’t charge or turn onBattery or charging port repair
Water damagedSwitch off, do not charge, book water damage repair
No response to any of the aboveProfessional data recovery

Frequently asked questions

Can data be recovered from a phone with a completely black screen?

Often, yes. A black screen does not always mean the phone or its storage has failed. If the device still powers on and responds to charging, screen mirroring or a professional screen replacement can frequently restore access to everything on it.

Does a water damaged phone always lose its data?

No, not always. Storage chips themselves are fairly resistant to moisture. Most water damage data loss actually comes from corrosion shorting other components, or from the phone being repeatedly powered on after exposure. Acting quickly and not charging the phone significantly improves the odds.

How much does phone data recovery cost?

It depends entirely on what is wrong with the phone and how much work is needed to reach the data, from a straightforward screen or battery repair through to board level work. We diagnose first and confirm the cost before starting, so you are never charged for a recovery attempt without knowing the price upfront.

Can I recover data myself without professional help?

If the phone still turns on and responds in any way, quite possibly, using the cloud backup checks and mirroring methods above. Once a phone will not power on, has visible water damage, or shows no response to charging, DIY options are very limited and the wrong attempt can make professional recovery harder.

Is my data safe when I hand my phone in for repair?

Yes. Your data is never accessed, viewed or shared during a repair. It is only interacted with directly if you specifically request a data recovery or transfer service, and even then only with your knowledge.

Get your data back safely

Whatever is wrong with your phone, the safest first move is almost always the one that avoids further power cycles or DIY attempts on a device holding data you cannot replace. Our team can diagnose the fault, tell you honestly what your recovery options are, and carry out the repair once you are happy to go ahead.

You might also find these related guides useful: how to fix a water damaged phone, why is my phone not turning on, and where can I sell a broken phone once your data is safely backed up. Or get in touch on our contact us page for advice on your specific phone.

Back to posts

How to Connect Apple Watch to iPhone (Pairing, Setup & Fixes)

Pairing an Apple Watch with an iPhone takes about five minutes when everything works first time, but a Bluetooth error, a stuck pairing screen, or a watchOS and iOS mismatch can turn it into an hour of frustration. This guide covers every pairing method, from the standard camera scan to manual pairing when the camera will not work, how to switch a watch to a new iPhone, and fixes for the most common connection failures.

Quick answer: how to pair your Apple Watch

  • Update your iPhone to the latest available iOS version and make sure the Apple Watch app is installed.
  • Turn on Bluetooth and Wi-Fi on your iPhone, and keep both devices within a few centimetres of each other.
  • Open the Watch app, tap “Pair New Watch”, and point your iPhone camera at the animation shown on the watch face.
  • Follow the prompts to choose “Set Up as New Apple Watch” or restore from a backup.
  • If the camera will not scan, tap “Pair Apple Watch Manually” at the bottom of the screen and enter the code shown on the watch instead.

What you need before you start

Every Apple Watch pairs with an iPhone 8 or later running a compatible, up to date version of iOS, though the newest watch models need a newer handset: Apple Watch Series 9 and later, and Apple Watch Ultra 2 and later, require iPhone XS or later. Before you start, check that you have the following.

  • A compatible iPhone signed in with an Apple ID, with a working internet connection.
  • Bluetooth and Wi-Fi switched on, and Airplane Mode switched off.
  • Your Apple Watch charged to at least 50 percent, with both devices sitting close together.
  • A watch that has been factory reset or unpaired if it was previously linked to another Apple ID. Buying secondhand? See our guide on how to unpair an Apple Watch to clear Activation Lock first.

If your iPhone itself is the problem, for example a cracked screen that stops the camera focusing properly, or a battery that will not hold enough charge to get through setup, pairing will keep failing no matter what you try on the watch side. Our iPhone screen repair and iPhone battery replacement services can get your handset back to full working order first.

How to pair an Apple Watch to iPhone for the first time

  1. Charge your Apple Watch for at least 15 to 20 minutes before you begin.
  2. Turn on the Apple Watch by holding the side button until the Apple logo appears.
  3. Bring the watch close to your iPhone. A “Use your iPhone to set up this Apple Watch” prompt should appear on your iPhone automatically. If it does not, open the Watch app and tap “Pair New Watch” or the plus icon in the top corner.
  4. Tap “Continue”, then hold your iPhone so the animated pattern on the watch face sits inside the camera viewfinder.
  5. Once the watch shows “Paired”, agree to the terms and conditions and sign in with your Apple ID if prompted.
  6. Choose “Set Up as New Apple Watch” or “Restore from Backup”, then select your wrist and preferred settings for Siri, Wrist Detection and analytics.
  7. Set or skip a passcode, and choose whether to enable Apple Pay.
  8. Leave both devices near each other and connected to Wi-Fi while the watch finishes syncing apps and settings. This can take anywhere from a few minutes to over an hour depending on how much data is being restored.

How to pair manually if the camera will not scan

If your iPhone camera cannot focus on the pairing animation, whether that is because of a cracked lens, poor lighting or a stiff shutter button blocking the view, you can enter a code by hand instead.

  1. On the Apple Watch, tap the small “i” information icon on the pairing screen.
  2. This reveals a six digit code, for example 123 456.
  3. On your iPhone, open the Watch app, tap “Pair New Watch”, then tap “Pair Apple Watch Manually” at the bottom of the screen.
  4. Select your Apple Watch from the list, then enter the six digit code shown on the watch.
  5. Continue through the same setup steps as the camera method: choose your wrist, sign in, and set up as new or restore from backup.

Setting up as new vs restoring from a backup

“Set Up as New Apple Watch” gives you a clean device with no apps, health data or settings carried over, which is the right choice for a brand new watch or one bought secondhand. “Restore from Backup” reinstalls your apps, watch faces, complications and most settings from your most recent iCloud backup, which is what you want when replacing a lost, damaged or upgraded watch with the same Apple ID.

If you are moving from an older Apple Watch to a new one, unpair the old watch first so it creates a fresh backup automatically. Our step by step guide to unpairing an Apple Watch covers this, including how to remove Activation Lock so the old watch can be sold or handed on safely.

How to connect a second Apple Watch to the same iPhone

An iPhone can only have one Apple Watch actively connected as its primary watch at a time. If you own two watches, for example a Series model for everyday use and an Ultra for sport, you need to unpair whichever one is currently connected before pairing the other. Go to the Watch app, tap the currently paired watch, tap the info icon, then “Unpair Apple Watch” before starting the pairing process again with the second one.

The exception is Family Setup, available on cellular Apple Watch Series 6 and later and Ultra models, which lets you pair an additional watch to your iPhone on behalf of a child or relative who does not have their own iPhone. Family Setup is started from the Watch app under “Family Setup” rather than the standard “Pair New Watch” flow.

How to switch your Apple Watch to a new iPhone

  1. On your old iPhone, open the Watch app, select your watch, tap the info icon and choose “Unpair Apple Watch”. This automatically creates a fresh backup before disconnecting.
  2. Sign in to the same Apple ID on your new iPhone and restore your other data if needed.
  3. Open the Watch app on the new iPhone and follow the standard first time pairing steps above.
  4. Choose “Restore from Backup” and select the backup created when you unpaired the watch on your old iPhone.

For the full walkthrough on removing a watch safely, including what happens to Activation Lock and cellular plans, see how to unpair an Apple Watch.

Common pairing problems and how to fix them

Bluetooth will not turn on, or the toggle is greyed out. Restart your iPhone and check Settings, then Screen Time, then Content and Privacy Restrictions, to make sure Bluetooth has not been locked by a restriction profile.

“Unable to pair with Apple Watch” error. Force restart both devices, move away from other Bluetooth accessories such as headphones or speakers that might be interfering, and confirm your iPhone is running a compatible iOS version for your watch model.

Pairing stuck on a spinning wheel. Large backups can genuinely take 30 minutes or more to restore. Keep both devices on charge, close together, and connected to Wi-Fi rather than mobile data, and avoid closing the Watch app.

Watch does not appear in the Watch app at all. Make sure the watch is showing its pairing screen and not already linked to another Apple ID. Secondhand watches often still show “This Apple Watch is linked to an Apple ID” or an Activation Lock screen; our unpairing guide explains how to clear this, and our Apple Watch reset guide covers a full factory reset from the watch itself if you no longer have access to the original owner’s iPhone.

The watch will not turn on to start pairing. This is almost always a battery or charging fault rather than a pairing problem. If the watch will not hold charge or will not power on at all after a long charge, our Apple Watch battery replacement and Apple Watch charging repair services can diagnose and fix it.

The watch screen is cracked or unresponsive, so you cannot tap through setup. A damaged display can stop you confirming prompts or entering a passcode during pairing. Our Apple Watch screen repair service replaces cracked or dead displays so the watch is usable again before you try pairing.

The problem is actually the iPhone, not the watch. A phone that will not turn on, has a smashed screen, or has a battery so worn it dies mid setup will block pairing regardless of the watch’s condition. See our iPhone repairs page or book a charging port repair if the handset will not stay powered on long enough to finish setup.

Which Apple Watch models can pair with your iPhone

Every Apple Watch model pairs using the same process described above. The table below shows the minimum iPhone needed for each, and links through to model specific repair information and pricing if your watch needs fixing before, or instead of, pairing it.

Apple Watch modelMinimum iPhone required
Apple Watch Ultra 3iPhone XS or later
Apple Watch Ultra 2iPhone XS or later
Apple Watch UltraiPhone 8 or later
Apple Watch Series 11iPhone XS or later
Apple Watch Series 10iPhone XS or later
Apple Watch Series 9iPhone XS or later
Apple Watch Series 8iPhone 8 or later
Apple Watch Series 7iPhone 8 or later
Apple Watch Series 6iPhone 8 or later
Apple Watch Series 5iPhone 8 or later
Apple Watch SE (2nd Gen)iPhone 8 or later
Apple Watch SE (1st Gen)iPhone 8 or later

Not sure which model you have engraved on the back, or need pricing for a specific repair before you pair it? Visit our full Apple Watch repair hub for every model.

Frequently asked questions

Can I pair an Apple Watch without an iPhone?

Not for the initial setup. Apple Watch always needs an iPhone to complete first time pairing. The one exception is Family Setup, which lets a family member’s iPhone pair an additional cellular Apple Watch on behalf of someone who does not own an iPhone themselves, after which that watch can be used somewhat independently.

Can I pair an Apple Watch with an Android phone?

No. Apple Watch only works with an iPhone. There is no official or reliable way to pair it with an Android device.

Why does pairing say a watchOS update is required?

Some newer iPhones need a newer watchOS version than an older Apple Watch is currently running. Keep both devices connected to Wi-Fi and power during pairing so the update can download and install automatically before setup continues.

How long does pairing take?

Pairing itself takes a couple of minutes, but restoring apps and data from a backup can add anywhere from five minutes to over an hour depending on how much was on your previous watch.

Do I need Wi-Fi, or is Bluetooth enough to pair?

Bluetooth handles the initial connection, but Wi-Fi is needed to download any required software updates and to restore apps and data, so keep both switched on throughout.

Can I use my old Apple Watch with a new iPhone without losing data?

Yes, as long as you unpair the watch from your old iPhone first rather than just switching it off. Unpairing creates a fresh backup that can be restored onto the same watch once it is paired with your new iPhone.

What if I forgot to unpair my Apple Watch before selling it?

The new owner will be blocked by Activation Lock and unable to pair it to their own iPhone. You can remove this remotely from your Apple ID at icloud.com, or by signing back into the Watch app if you still have access to it. See our guide to unpairing an Apple Watch for the full steps.

Still can’t get your Apple Watch to connect?

If you have worked through every step above and your Apple Watch or iPhone still will not pair, the cause is usually hardware rather than software: a failing battery, a damaged charging port, a cracked screen, or a broken button that stops you confirming prompts. Our engineers diagnose and repair all of these issues on the same day in most cases.

You might also find our related guides useful: how to reset an Apple Watch and how to unpair an Apple Watch. Or get in touch with our team directly on the contact us page and we will point you in the right direction.

Back to posts

Tell us what's broken, get a free quote

Older device, rare model, or a fault you can't describe? Send us a message with a photo and we'll come back with a fixed price.

Request a Quote
Request a same-day personalised quote!
×

    Please upload a image showing the back of your device or any visible damage for assessment (optional)