How to Unpair an Apple Watch (With or Without Your iPhone)
Unpairing an Apple Watch is the correct way to erase it before selling, giving it away, sending it for repair, or moving to a new iPhone. It is not the same as a factory reset, and the difference matters: unpairing backs up your data, erases the watch and removes Activation Lock in one process. A factory reset does only the middle part.
Quick answer: how do I unpair an Apple Watch?
Keep the watch and iPhone close together
Open the Watch app on your iPhone
Tap All Watches at the top of the screen
Tap the info button next to your watch
Tap Unpair Apple Watch
On cellular models, choose whether to keep or remove your mobile plan
Enter your Apple Account password to switch off Activation Lock
Wait for it to finish before separating the devices
That password prompt is the step that actually matters. It releases the watch from your account, and skipping it is the most common reason a sold watch cannot be paired by its new owner.
What unpairing actually does
Three things happen in sequence, automatically.
It takes a fresh backup. Before erasing anything, your iPhone syncs a current backup of the watch. This is why unpairing is safer than wiping the watch directly.
It erases the watch. All content and settings are removed and the watch returns to its out-of-box state.
It removes Activation Lock. Entering your Apple Account password releases the watch so somebody else can set it up.
A factory reset performed on the watch itself does only step two. That distinction catches people out constantly.
Unpair, reset or erase: what is the difference?
Force restart – erases nothing. For a frozen watch only.
Reset settings – returns settings to default but keeps apps and data.
Erase all content and settings – wipes the watch but leaves Activation Lock in place. Use when you have no access to the paired iPhone.
Unpair – backs up, erases and removes Activation Lock. The right choice in almost every case where you still have the iPhone.
If the paired iPhone has been sold, lost, broken or already wiped, you cannot use the Watch app. You need two separate steps, and doing only one leaves the job half done.
Step one – erase the watch. On the watch, go to Settings, General, Reset, Erase All Content and Settings. Enter the passcode if prompted and confirm.
Step two – remove Activation Lock. On any computer, sign in to iCloud with the Apple Account the watch was paired to. Open Find My, select the watch, and choose Remove This Device.
Without step two the watch is erased but still locked to your account, and nobody else can pair it. This is exactly the situation second-hand buyers most often find themselves in.
How to unpair when the watch screen is broken
You do not need a working watch screen. Unpairing is driven entirely from the iPhone, so a cracked, black or unresponsive display does not prevent it.
Follow the standard steps in the Watch app. As long as the watch powers on and stays within Bluetooth range, the iPhone completes the backup, erase and Activation Lock removal without you touching the watch.
If the watch will not power on, the iPhone cannot reach it. Remove the device through Find My on iCloud instead, which releases Activation Lock even though the watch was never erased. Worth doing before sending a watch for repair or trade-in.
If the screen is the actual problem, we cover Apple Watch screen repair across every generation. A screen lifting at one edge is very often a swollen battery pushing it out rather than glass damage.
Should I keep or remove my cellular plan?
On GPS + Cellular models you are asked this during unpairing, and the right answer depends on what happens next.
Keep the plan if you are re-pairing to the same iPhone, sending the watch for repair, or upgrading your phone but keeping the watch and network.
Remove the plan if you are selling or giving the watch away, or switching network.
If you remove it and later need it back, you will have to re-add it through your network, which sometimes means a phone call. If in doubt and the watch is staying yours, keep it.
What happens to my data and backups?
Unpairing creates a fresh backup on your iPhone automatically. When you pair a watch again – the same one or a replacement – you are offered the option to restore from it.
What comes back: watch faces, app layout and settings, notification preferences, health and activity data, workout history and general configuration.
What does not: Bluetooth pairings, Apple Pay cards (removed for security and re-added manually), and Messages, which sync from the iPhone rather than the backup.
Health and fitness history lives in the Health app on your iPhone rather than solely on the watch, so it survives independently. The exception is a watch that has not synced recently – open the Watch app and let it sync first, particularly if the watch has been off or out of range.
Unpairing before you sell: a checklist
Sync first. Keep the watch near the iPhone so the backup is current.
Unpair through the Watch app rather than resetting the watch itself.
Remove the cellular plan if the watch is leaving you.
Enter your Apple Account password when prompted. Do not skip this.
Check Find My afterwards and confirm the watch has gone from your device list.
Keep your bands if you want them, and clean the contacts.
Step five takes thirty seconds and is the difference between a smooth sale and a buyer who cannot use what they bought.
Unpairing to move to a new iPhone
You usually do not need to unpair at all. If you set up the new iPhone from a backup of the old one, the watch transfers across automatically.
Unpair only if you are setting the new iPhone up as new rather than from a backup, or if the transfer fails. In that case unpair from the old iPhone first if you still have it, then pair to the new one and restore from the backup. If the old iPhone is gone, use the without-the-iPhone method above.
Common problems while unpairing
Unpairing is stuck or spinning. A backup runs first, so several minutes is normal. Keep both devices close and charged and leave it alone. If nothing has changed after 30 minutes, force restart the watch by holding the side button and Digital Crown for 10 seconds, then try again.
The watch is not listed in the Watch app. Check Bluetooth is on and the devices are in range. Restarting both usually restores the connection.
It asks for a password you do not remember. That is your Apple Account password, not the watch passcode. Reset it through Apple account recovery, then try again.
It says unpairing failed. Try again with Wi-Fi on, since Activation Lock removal needs an internet connection to reach Apple’s servers.
The watch still appears in Find My. Remove it manually there. The entry occasionally lingers even when unpairing completed.
What unpairing will not fix
Unpairing is housekeeping, not a repair. If the watch has a hardware fault, erasing it changes nothing:
Open the Watch app on your iPhone, tap All Watches, tap the info button beside your watch, then tap Unpair Apple Watch. Enter your Apple Account password when prompted to remove Activation Lock, and keep both devices close until it finishes. This backs up, erases and releases the watch in one process.
Does unpairing an Apple Watch erase everything?
Yes, the watch is wiped completely – but a fresh backup is taken to your iPhone first, so nothing is truly lost. Pairing a watch again lets you restore that backup, bringing back watch faces, settings, health data and workout history.
How do I unpair an Apple Watch without the iPhone?
Erase the watch via Settings, General, Reset, Erase All Content and Settings. Then separately sign in to iCloud on a computer, open Find My, select the watch and choose Remove This Device. Both steps are needed – the first erases it, the second removes Activation Lock.
Can I unpair an Apple Watch with a broken screen?
Yes. Unpairing runs entirely from the iPhone, so a cracked or unresponsive display does not prevent it, provided the watch powers on and stays in Bluetooth range. If it will not power on, remove it through Find My on iCloud instead.
What is the difference between unpairing and resetting an Apple Watch?
Unpairing backs up your data, erases the watch and removes Activation Lock. A factory reset on the watch only erases it – Activation Lock stays, so the watch remains tied to your Apple Account and nobody else can pair it. Always unpair if you still have the iPhone.
Should I keep or remove my cellular plan when unpairing?
Keep it if you are re-pairing to the same iPhone, sending the watch for repair, or upgrading your phone but keeping the watch. Remove it if you are selling or giving the watch away, or changing network. Re-adding a removed plan sometimes requires contacting your network.
Do I need to unpair before getting a new iPhone?
Usually not. If you set up the new iPhone from a backup of the old one, the watch transfers automatically. Only unpair if you are setting the new phone up as new, or if the automatic transfer fails.
Why is my Apple Watch stuck while unpairing?
A backup runs before the erase, so several minutes is normal. Keep both devices close and charged and leave it alone. If nothing changes after 30 minutes, force restart the watch by holding the side button and Digital Crown for 10 seconds, then try again with Wi-Fi enabled.
Does unpairing remove Activation Lock?
Yes, provided you enter your Apple Account password when prompted. Afterwards, check the watch no longer appears in Find My – if it does, remove it there manually.
Need a repair rather than a reset?
If the watch is unpaired and the problem is still there, it is hardware. We repair screens, batteries and charging faults across every Apple Watch generation, with a 12-month guarantee on parts and labour.
Contact us with your model and what it is doing, and we will confirm a fixed price before any work begins. We work from our Essex workshop and accept devices from across the UK by tracked, insured post.
Pairing a replacement watch, or setting one up for the first time? See our full guide on how to connect an Apple Watch to iPhone, including manual pairing and switching to a new handset.
How to Reset an Apple Watch (Every Method Explained)
There are four different ways to reset an Apple Watch, and picking the wrong one either fails to fix your problem or wipes data you did not mean to lose. This guide covers all of them, in order of how drastic they are, plus the one step almost everyone forgets before selling a watch.
Quick answer: which reset do you need?
Watch frozen or unresponsive? Force restart. Nothing is erased.
Odd behaviour, settings playing up? Reset settings only. Your data stays.
Selling, giving away or starting fresh? Unpair from your iPhone. This backs up, erases and removes Activation Lock in one step.
Forgotten passcode, or no access to the paired iPhone? Factory reset on the watch itself.
If you are getting rid of the watch, unpairing from the iPhone is the correct method – not a factory reset on the watch. The reason why is explained below, and getting it wrong leaves the watch unusable for the next owner.
1. Force restart (soft reset) – fixes a frozen watch
This is the equivalent of pulling the plug. It erases nothing at all and is always the first thing to try when the watch has locked up, is stuck on the Apple logo, or will not respond to taps.
Hold the side button and the Digital Crown together for at least 10 seconds, then let go when the Apple logo appears. Hold longer than feels right – a lot of people release after five seconds and conclude it has not worked.
Only use this if the watch is genuinely unresponsive. If it is working normally, switch it off and on instead by holding the side button and dragging the Power Off slider.
2. Reset settings only – keeps your data
Less well known and often the right middle ground. It returns settings to default without erasing apps, health data or watch faces.
On the watch: Settings, then General, then Reset, then Reset Settings. Useful when something is behaving oddly – notifications not arriving, brightness or haptics misbehaving – but you do not want to start over.
3. Factory reset from the watch itself
This erases everything on the watch. Use it when you cannot get to the paired iPhone, or when you have forgotten your passcode.
Open Settings on the watch
Tap General, then Reset
Tap Erase All Content and Settings
Enter your passcode if prompted
On a cellular model, choose whether to keep or remove your mobile plan – keep it if you are re-pairing to the same iPhone
Confirm and wait for the watch to restart
Important: this does not remove Activation Lock. The watch will still be tied to your Apple Account, so anyone else pairing it will be locked out. See the section below.
4. Unpair from your iPhone – the method to use before selling
This is the one most people should use. Unpairing takes a fresh backup, erases the watch and removes Activation Lock, all in a single process.
Keep the watch and iPhone close together
Open the Watch app on your iPhone
Tap All Watches at the top
Tap the info button next to your watch
Tap Unpair Apple Watch
On cellular models, choose to keep or remove the plan
Enter your Apple Account password to turn off Activation Lock
Wait for the process to finish before disconnecting
That password prompt is the critical step. It is what actually releases the watch, and it is why unpairing is the correct route rather than an on-watch factory reset.
We have a dedicated guide to unpairing an Apple Watch, covering every scenario including when you no longer have the paired iPhone and when the watch screen is broken.
Activation Lock: the step everyone forgets
Activation Lock ties the watch to your Apple Account so a stolen device cannot be reused. It is a genuinely good security feature and a genuine problem if you skip removing it.
If you factory reset the watch from the watch itself and then sell it, the buyer cannot pair it. It will ask for your Apple Account credentials, and no repair shop, no Apple Store and no amount of resetting can bypass that. The only fix is for you to remove it remotely.
To remove it after the fact, sign in to iCloud on a computer, open Find My, select the watch, choose Remove This Device, and confirm. If you bought a second-hand watch that is Activation Locked, the only legitimate route is to go back to the seller.
Before selling, it is also worth checking the watch is not still listed in your Apple Account device list.
How to reset an Apple Watch without the paired iPhone
Common when the iPhone has been sold, lost or replaced. Use the on-watch factory reset in section 3 above – it works without the phone.
The catch is Activation Lock again. Erasing the watch without the iPhone does not release it from your Apple Account, so you must sign in to iCloud separately through Find My on any computer and remove the device there. Do both, or the watch will be erased but still locked.
How to reset an Apple Watch with a forgotten passcode
If you cannot remember the passcode and the watch is locked, you have two routes.
With the paired iPhone: unpair using the Watch app as described above. It erases and restores the passcode-free state, then you can set it up again from a backup.
Without the iPhone: put the watch on its charger, hold the side button until Power Off appears, then firmly press and hold the Digital Crown until the Erase All Content and Settings option appears. Confirm it.
Ten failed passcode attempts will disable the watch entirely, so it is better to reset deliberately than to keep guessing.
Will a reset erase my health and fitness data?
Not permanently, provided the watch was paired to an iPhone. Health and activity data syncs to the Health app on your iPhone, so it lives there independently of the watch.
When you unpair, the iPhone takes a fresh backup automatically, and pairing a new or reset watch lets you restore from it. Your rings, workouts and history come back.
The exception is a watch that was never properly paired or synced, or one where the paired iPhone has already been wiped. In that situation the data may only exist on the watch, and a factory reset removes it for good – so sync before you erase.
What a reset will not fix
Worth being straight about, because a lot of people reset repeatedly hoping a hardware fault will disappear. A reset only addresses software. It will not help with:
A cracked or lifting screen. Swelling underneath usually means the battery, not the glass – see Apple Watch screen repair.
Battery draining in hours, or the watch dying overnight. That is a worn cell, not a software glitch – see Apple Watch battery replacement.
Water inside the display, or the screen lifting at one edge. A lifting screen is very often a swollen battery pushing it out, and that needs looking at rather than resetting.
A watch that will not power on at all even on the charger after 30 minutes.
A useful rule: if a force restart fixes it temporarily and the problem returns, it is usually hardware. If a full erase and setup does not change anything, it is definitely hardware.
Common problems while resetting
Stuck on the Apple logo or spinning wheel. A full erase can take 15 to 30 minutes on older models. Leave it on the charger and do not interrupt it. If it is still there after an hour, force restart and try again.
The watch will not unpair. Keep it close to the iPhone, make sure both have Bluetooth and Wi-Fi on, and try restarting both first.
Erase option greyed out. Usually the watch is not charged enough. Put it on the charger for half an hour and try again.
Watch will not pair after reset. Almost always Activation Lock. Check Find My and remove the device from your Apple Account.
Which Apple Watch do you have?
The reset steps above are the same across every model, though older watches take noticeably longer to erase. If you need a repair rather than a reset, find your model below:
Hold the side button and the Digital Crown together for at least 10 seconds, then release when the Apple logo appears. This erases nothing and is the correct first step for a frozen or unresponsive watch. Only use it when the watch will not respond normally.
How do I factory reset an Apple Watch?
On the watch, go to Settings, then General, then Reset, then Erase All Content and Settings. Enter your passcode if asked and confirm. Note that this does not remove Activation Lock – if you are selling the watch, unpair it from your iPhone instead.
How do I reset an Apple Watch without the iPhone?
Use the on-watch reset: Settings, General, Reset, Erase All Content and Settings. That works without the phone, but it will not remove Activation Lock. You must also sign in to iCloud on a computer, open Find My, select the watch and choose Remove This Device.
Does resetting an Apple Watch delete my health data?
Not permanently, as long as it was paired to an iPhone. Health and activity data syncs to the Health app on the phone and stays there. Unpairing takes a fresh backup automatically, so you can restore it to a new or reset watch.
How do I reset an Apple Watch if I forgot the passcode?
With the paired iPhone, unpair using the Watch app. Without it, put the watch on its charger, hold the side button until Power Off appears, then press and hold the Digital Crown until Erase All Content and Settings appears. Avoid repeated guesses – ten failed attempts disables the watch.
Why won’t my Apple Watch pair after I reset it?
Almost always Activation Lock. A factory reset from the watch does not release it from your Apple Account. Sign in to iCloud on a computer, open Find My, select the watch and choose Remove This Device. If you bought it second-hand, only the original owner can do this.
How long does an Apple Watch reset take?
A force restart is a few seconds. A full erase typically takes 15 to 30 minutes, longer on older models. Keep the watch on its charger and do not interrupt it. If it is still on the Apple logo after an hour, force restart and try again.
Will resetting fix my Apple Watch battery problem?
No. A reset only addresses software. If your watch drains in hours or dies overnight, the cell has degraded and needs replacing. A swollen battery can also push the screen up at one edge, which needs attention rather than another reset.
Still not working after a reset?
If you have erased the watch and the problem is still there, it is a hardware fault and no amount of resetting will change it. We repair screens, batteries and charging faults across every Apple Watch generation, with a 12-month guarantee on parts and labour.
Contact us with your model and what it is doing, and we will give you a fixed price before any work starts. We work from our Essex workshop and take devices from across the UK by tracked, insured post.
Setting up a watch from scratch, or pairing one after a factory reset? See our full guide on how to connect an Apple Watch to iPhone, covering both the standard camera pairing method and manual pairing if the camera will not scan.
How Much Does It Cost to Replace a Samsung Screen?
Samsung screen replacement in the UK ranges from around £49 for an entry-level Galaxy A model to £299 for the newest flagships. The gap is enormous, and it is not arbitrary – it comes down to the panel technology inside your specific handset. This guide explains what drives the price and links you straight to the current cost for every Samsung we repair.
Quick answer: how much does a Samsung screen replacement cost?
At iExpert Repairs, Samsung screen replacement costs £49 to £299 depending on the model:
Galaxy A series (budget): £49 to £99
Galaxy S series (flagship): £99 to £299
Galaxy Note series: £119 to £199
Galaxy Z foldables: £89 to £599
Every price includes the part, the labour and a 12-month guarantee, with no separate assessment fee. Prices are kept current on each model page, so follow the link for your handset to see exactly what it costs today. Our full Samsung screen repair service page covers the process.
What actually determines the price?
1. AMOLED versus LCD. The biggest factor by far. Samsung flagships use Super AMOLED, which generates light at each pixel rather than using a backlight. It produces the deep blacks the S series is known for and costs far more to manufacture. Budget A-series models mostly use LCD, mature technology made in huge volume. That single difference is why the cheapest Galaxy A screen is roughly a sixth of the price of the most expensive flagship panel.
2. Whether the glass curves. A flat panel lifts off the frame. A curved panel is bonded around the sides and must be released with controlled heat, then re-bonded evenly. Slower, riskier work, and the price reflects the time as much as the part.
3. Physical size. Panel cost scales with area and manufacturing yield – larger sheets fail quality control more often, so fewer usable panels come off each production run. That is why an Ultra model always costs more than the standard version of the same generation.
4. Whether it folds. Foldables have two screens, and the flexible inner panel is among the most expensive components in any phone.
Galaxy S series screen replacement
The S series spans nearly a decade of flagships, and prices run from £99 to £299. The newest panels are still expensive to source, while older S models have settled considerably. Follow your model for its current price:
A folding phone has two separate screens. The flexible inner display is the expensive one; the outer cover screen is a conventional panel and costs considerably less. Tell us which is damaged when you get in touch, because quoting the wrong one produces a wildly wrong price.
The other issue specific to folders is grit. The hinge draws in dust and sand, and particles working under the inner panel cause bumps and eventually cracks along the fold. A mark along the crease is usually that rather than anything you did.
The Note range uses AMOLED panels and an S Pen that writes through a digitiser layer beneath the display. A replacement screen has to preserve that layer, not just restore touch – a panel can respond perfectly to fingers and still read the S Pen inconsistently near the edges.
Galaxy A series screen replacement
The A series is where Samsung sells the most handsets in the UK, and it is by far the cheapest range to repair at £49 to £99.
Before paying for any screen, check whether the display has failed or only the backlight has gone. This works on LCD models, which covers most of the Galaxy A range.
Take the phone into a dark room and shine a torch at the screen at an angle. If you can faintly make out your home screen underneath, the backlight has failed rather than the panel, and everything on the phone is intact. If the phone rings, vibrates or appears when plugged into a computer but the screen stays black, it is running fine behind a dead display – our guide to phones that will not turn on covers those checks.
Why is my Samsung screen showing a green line?
A thin green or pink line down the display, particularly after a software update, is a known AMOLED fault rather than damage you caused. It affects S20 to S23 models and the Note 20 most heavily. No software fix removes it, and the only reliable repair is a screen replacement. Samsung ran a free replacement programme but it closed in September 2025. See our full guide to the green line issue.
Original versus aftermarket Samsung screens
You will see quotes far below ours. It is worth knowing what the difference buys.
Genuine Samsung service packs come with the frame attached and match original colour, brightness and touch exactly. Most expensive.
Quality aftermarket AMOLED is made to the same specification by third parties. On most models these are visually indistinguishable in normal use, and they are what our pricing is based on.
Cheap TFT or incell copies are where the very low quotes come from. On an AMOLED phone this is a downgrade you will notice – blacks look grey, brightness is lower, colour is flatter, and the always-on display drains far more battery because the panel cannot switch off individual pixels.
Ask any repairer which grade they are quoting. A price that looks too good on an S-series Samsung usually means a TFT copy fitted in place of an AMOLED.
What is included
The replacement display assembly
All labour
A 12-month guarantee on parts and workmanship
Touch response tested across the whole panel, including curved edges
Fingerprint sensor re-tested on in-display models
Proximity and ambient light sensor checks
Free clearing of a lint-blocked charging port while it is with us
The in-display fingerprint sensor matters
Most modern Galaxy flagships read your fingerprint through the screen, so a replacement panel must be seated correctly against the sensor behind it and enrolment retested. Skip that and the phone comes back with a flawless display and a reader that recognises nothing – discovered the next time you pick it up rather than in the shop. It is a fair question to put to any repairer.
Is it worth replacing a Samsung screen?
What is the phone worth against the repair? On a recent flagship the screen is a fraction of what a replacement handset costs, so repair is straightforward. On an entry-level A-series phone the screen can cost close to the phone’s used value – which does not make it wrong, but it deserves thought.
Is anything else wrong? A screen alone is one repair. A screen plus a tired battery plus a worn charging port is three, and the arithmetic usually stops working. We will tell you when you have reached that point rather than quoting for everything.
How long will you keep it? A new panel with a 12-month guarantee on a phone you plan to keep two more years is money well spent.
If repair does not make sense we will say so and help you get the data off instead – data recovery is often the better spend on an older handset.
Screen and battery together
If the phone is a few years old and needs a screen anyway, ask about the battery at the same time. The phone is already open so you save on labour, and a degraded cell is the other thing most likely to send you back within the year. See Samsung battery replacement for current pricing. If it has been shutting down or draining fast, our guide to rapid battery drain explains why.
How long does it take?
Most flat-screen models are same-day once the phone is with us. Curved AMOLED panels take longer because the assembly must be heat-released and re-bonded evenly, then tested. Foldable inner screens are the longest job. We confirm a realistic timescale with the fixed quote.
Samsung tablets
Galaxy Tab screens follow the same logic – AMOLED costs far more than LCD, and size drives the rest. Two tablets from the same generation can differ by several hundred pounds purely because one uses an LCD panel and the other AMOLED. See Samsung tablet repairs for current prices.
Frequently asked questions
How much does it cost to replace a Samsung screen in the UK?
Between £49 and £299 depending on the model. Budget Galaxy A handsets start around £49, Galaxy S flagships run £99 to £299, Note models £119 to £139 and Z foldables £89 to £229. Every price includes parts, labour and a 12-month guarantee. Follow the link for your model to see its current price.
Why are Samsung screens more expensive than other Android phones?
Because Samsung fits AMOLED panels across most of its range. AMOLED generates light at each individual pixel instead of using a backlight, giving better contrast but costing considerably more to make. Budget A-series models use LCD, which is why they are so much cheaper to repair.
Is it cheaper to repair a Samsung screen or buy a new phone?
On a flagship, repair is almost always cheaper – the screen is a fraction of what a replacement handset costs. On an entry-level A-series phone the screen can approach the phone’s used value, so it is a genuine decision. Two or more faults at once is usually where repair stops making sense.
Can a cracked Samsung screen be repaired without full replacement?
Not on modern models. The glass, touch layer and display are bonded into a single assembly and replaced together. Any quote offering a cheap glass-only repair on a Galaxy S or Note handset should be treated with real caution.
Will I lose my data during a Samsung screen replacement?
No. A screen replacement does not touch storage, so photographs, messages, apps and accounts come back exactly as they were. Backing up beforehand is sensible practice, but the repair itself does not put data at risk.
Does replacing the screen affect the fingerprint sensor?
It can if the work is rushed. Most modern Galaxy flagships read fingerprints through the display, so the new panel must be seated correctly against the sensor and enrolment retested. We check it before the phone goes back.
Why does my Samsung screen have a green line?
It is a known AMOLED panel fault, most common on S20 to S23 and Note 20 models and often appearing after a software update. No software fix removes it and the only reliable repair is a screen replacement.
Do you repair Samsung foldable screens?
Yes, across the Z Fold and Z Flip ranges. A folder has two screens at very different prices, so tell us which is damaged when you contact us.
Do you offer a warranty on Samsung screen repairs?
Yes, 12 months on both the part and the workmanship. If a replacement screen develops dead touch areas, colour problems or lifts at an edge in normal use, it comes back to us at no cost. A fresh drop is a new accident rather than a failed repair, and we say so plainly.
Get an exact price for your Samsung
Follow your model above for its current price, or tell us which handset you have and what happened. iExpert Repairs works from our Essex workshop and accepts devices from anywhere in the UK through a tracked, fully insured mail-in service.
Contact us and we will confirm a fixed price and realistic timescale before anything is done. If the repair is not worth doing, we will tell you rather than take the booking.
A phone that will not turn on is alarming in a way that most faults are not. There is no error message, no clue and no obvious cause – just a black screen and no response. The good news is that in a large proportion of cases the phone is not dead at all, and several of the fixes cost nothing.
Quick answer: why is my phone not turning on?
A phone that will not turn on almost always comes down to one of five things: a completely flat or failed battery, a faulty charging cable or port, a software crash that has left the phone frozen rather than off, a broken screen on a phone that is actually running, or liquid or impact damage to the board.
Start with a forced restart and a 30-minute charge on a known-good cable. Between them those two steps resolve most cases. If the phone vibrates, makes sounds, or shows up on a computer but the screen stays black, the phone is alive and you are looking at a display fault rather than a dead device.
First: is your phone actually off, or just showing a black screen?
This is the single most useful distinction, and almost nobody checks it first. A phone with a failed screen looks identical to a phone that is completely dead, but they are entirely different repairs at very different prices.
Run these three checks in order:
Ring it from another phone. If it rings, vibrates or lights up an LED, the phone is powered on and working. Your problem is the display.
Plug it into a computer. If the computer chimes, or the phone appears in File Explorer or Finder, it is running.
Shine a torch at the screen in a dark room, at an angle. On phones with LCD screens, a failed backlight leaves the image faintly visible underneath. If you can just make out your home screen or lock screen, the display has failed rather than the phone.
If any of those tests show signs of life, stop worrying about the battery. You need a screen repair, and everything on the phone is safe.
The torch test only works on LCD panels. Most modern flagships use OLED, which has no backlight, so a blank OLED screen needs a proper diagnosis rather than that shortcut.
Step 1: force restart the phone
Phones do not always crash gracefully. A software freeze can leave a handset in a state where the screen is off, the buttons do nothing, and it looks completely dead – while the battery quietly drains. A forced restart cuts power to the hardware and reboots it, and it costs nothing to try.
The button combination differs by phone:
iPhone 8 and newer: press and release volume up, press and release volume down, then press and hold the side button for around 10 seconds until the Apple logo appears.
iPhone 7 and 7 Plus: hold volume down and the side button together for about 10 seconds.
iPhone 6s and earlier: hold the home button and the top or side button together.
Samsung, Google Pixel, Huawei and most Android phones: hold power and volume down together for 10 to 20 seconds.
Hold longer than feels reasonable. Many people give up after three or four seconds, which is not enough. If nothing happens on the first attempt, plug the phone into a charger and try the same combination again while it is connected.
Step 2: charge it properly for 30 minutes
A deeply discharged lithium battery cannot power a phone straight away. If a battery has been flat for days or weeks, it needs to build up enough charge before the phone will even display a charging symbol – and that can take 15 to 30 minutes of being plugged in with no visible sign that anything is happening.
Do this properly rather than assuming:
Use a different cable. Cables fail internally at the strain relief far more often than ports fail, and a broken cable shows no outward damage. This is the most common cause of a phone that seems dead.
Use a different plug, and a wall socket rather than a laptop USB port. Laptop ports often deliver too little current to revive a flat battery.
Leave it for 30 minutes before judging. Do not press buttons repeatedly during this time.
Try wireless charging if your phone supports it. If the phone charges wirelessly but not by cable, the charging port is your fault, not the battery.
That last test is genuinely useful and almost nobody thinks of it. It isolates the port from the battery in seconds.
Step 3: check the charging port for lint
This is the most under-appreciated cause of a phone that will not turn on, and it is free to fix.
Every time a phone goes into a pocket or a bag, the charging socket collects fibres. Over months that lint compacts into a solid plug at the bottom of the port, and the cable can no longer seat fully. It feels like it is connected – it may even click – but the contacts are not meeting, so the phone never charges and eventually goes flat.
Shine a torch into the port and look. If you can see grey fuzz packed at the bottom, that is your problem. Switch the phone off, and gently hook it out with a wooden or plastic toothpick. Never use a metal pin, a needle or a paperclip – you can short the contacts or bend a pin, turning a free fix into a paid repair.
If the port is clean and the phone still will not charge, our guide to phones that will not charge covers the next steps in detail.
Step 4: rule out the battery
Lithium batteries do not last forever. They degrade by charge cycles rather than by calendar age, so a phone charged daily for three or four years will hold a fraction of its original capacity. Eventually a cell degrades to the point where it cannot deliver enough current to boot the phone at all, even though it may still show a charge.
Signs that the battery is the culprit:
The phone died suddenly at 20 or 30 per cent rather than counting down to zero.
It had been shutting down unexpectedly in cold weather for weeks beforehand.
It only powers on while physically connected to a charger, and dies the moment you unplug it.
The back of the phone has started to bulge, or the screen sits slightly proud of the frame.
That last one matters. A swollen battery is a genuine safety issue. Stop charging the phone immediately, do not press on the back or try to compress it, and do not puncture it under any circumstances. Get it to a repair shop as it is.
If the phone had been draining unusually fast before it died, our guide to fast battery drain explains what was probably happening.
Step 5: consider what happened just before it died
The 24 hours before a phone stops turning on usually contain the answer. Think back honestly:
Was it dropped? Even a knock that left no visible damage can disturb the battery or display connector inside.
Did it get wet? Including rain, a bathroom shelf during a shower, or a spill you thought you had dried. Corrosion works slowly, so a phone can fail days after the event.
Was it very hot or very cold? A phone left on a car dashboard in summer or in a coat pocket during a frost can shut down to protect itself.
Did it fail during or just after a software update? An interrupted update can leave a phone unable to boot, which is often recoverable.
Was it charging with an unbranded cheap charger? Poor-quality chargers can deliver unstable voltage and damage the charging circuit.
If liquid is involved, act now rather than later. Do not plug it in and do not try to charge it – power running through a wet board is what turns a recoverable phone into a dead one, and it causes more write-offs than the liquid itself. Rice does nothing useful; it draws surface moisture while corrosion continues underneath. Our guide to water damaged phones explains the first hour in detail, and our water damage repair service covers the professional clean.
Step 6: try a recovery boot before giving up
If the phone still shows nothing, there is one more free step worth trying. Both iPhone and Android can be forced into a recovery mode that bypasses the normal boot process, and a phone that reaches recovery is not dead – it has a software problem, which is far better news than a hardware one.
iPhone: connect it to a computer, open Finder or iTunes, then perform the forced restart button sequence for your model but keep holding the final button past the Apple logo until a cable-and-computer image appears. If you see that screen, the hardware is fine and the software needs restoring.
Android: with the phone off, hold volume down and power together. Most Samsung, Pixel and Huawei handsets will boot into a bootloader or recovery menu. If you reach a menu, the phone is alive.
Be aware that restoring an iPhone in recovery mode usually erases it. If you have no backup, that is a very good reason to speak to a repair shop first rather than clicking through – data recovery is often possible before a restore, and impossible afterwards.
If the screen is black or the phone will not respond at all, see our full guide on how to get data off a broken phone for scenario by scenario steps before you hand it in.
What causes a phone to stop turning on?
Cause
Typical signs
Fix
Flat or failed battery
Died suddenly at 20-30%, or only runs while plugged in
Battery replacement
Faulty cable or plug
Charges on a different cable, or wirelessly but not wired
Free – replace the cable
Lint in the charging port
Cable feels loose or will not click in fully
Free – clear the port
Failed charging port
Clean port, good cable, still no charge
Charging port repair
Broken display
Phone rings, vibrates or shows on a computer
Screen replacement
Software crash or failed update
Reaches recovery mode
Software restore
Liquid damage
Known exposure, possible corrosion
Board clean, sometimes data recovery only
Impact damage to the board
Dropped, no response to anything
Board-level diagnosis
What it costs to fix in the UK
Because the cause determines the repair, the price range is wide. These are our fixed prices, including parts, labour and a 12-month guarantee:
Charging port cleaning – free as part of any diagnosis
Is it worth repairing a phone that will not turn on?
It depends entirely on what is wrong, which is why a diagnosis matters before you make the decision.
Almost always worth it: a battery, a charging port, or a cleaning job. These are inexpensive relative to any handset and they restore the phone completely.
Usually worth it: a screen replacement on a phone that is otherwise sound, particularly if the handset still has resale value or you were not planning to replace it.
Often not worth it: board-level liquid damage on an older or budget phone, or a phone needing several repairs at once. At that point the sensible spend is usually data recovery rather than a full repair, and we will tell you when you have reached it rather than quoting for everything.
What we will not do is take payment for a repair that leaves you disappointed. If the honest answer is that the phone is not worth saving, you will hear that.
What about the data?
This is what most people are actually worried about, and it deserves a direct answer.
If the phone is not turning on because of a battery, a charging port or a screen, your data is completely safe. None of those repairs touch the storage, and everything comes back exactly as it was.
Where liquid or board damage is involved, data becomes the priority rather than the repair. Even a phone that will never work again will often give up its photographs, messages and contacts – but the odds fall the longer corrosion is left, which is the main argument for acting quickly rather than leaving it in a drawer for a fortnight. Our data recovery service covers exactly this.
One practical point: if your phone is currently working but showing warning signs – random shutdowns, rapid drain, refusing to charge – back it up today. It is far easier to protect data before a phone dies than after.
What not to do
Do not put it in rice. It does not draw moisture from inside the board and it delays the clean that would actually help.
Do not keep pressing the power button repeatedly. If the phone is frozen, a proper forced restart is what is needed.
Do not use a metal pin in the charging port. You risk shorting the contacts or bending a pin.
Do not charge a phone with a swollen back. Stop and get it looked at.
Do not try a hairdryer or oven “fix”. Heat damages adhesives, screens and batteries, and can make a swollen cell genuinely dangerous.
Do not restore an iPhone in recovery mode if you have no backup until you have asked about data recovery first.
How we diagnose a phone that will not turn on
When a dead phone arrives with us, we work through the same sequence every time rather than guessing.
Bench power test. We connect the phone to a supply that shows exactly how much current it is drawing. That single reading tells us whether the board is alive, shorted or drawing nothing at all – before anything is opened.
Known-good cable and charger. Eliminating the simplest cause first.
Port inspection and cleaning. Compacted lint is cleared at no charge.
Battery check. Voltage and behaviour under load, which reveals a cell that shows charge but cannot deliver current.
Display isolation. A test screen tells us whether the phone is running behind a failed panel.
Corrosion inspection. If liquid is suspected, the board is examined before power is applied again.
You get a fixed price after that. If the answer turns out to be a £6 cable, we will tell you that too.
Why is my phone not turning on even when plugged in?
Most often the cable, the plug or the charging port rather than the phone. Try a different cable and a wall socket rather than a laptop port, then check the charging socket for compacted lint with a torch. If the phone charges wirelessly but not by cable, the port is your fault. If none of that works, a failed battery that can no longer accept charge is the next most likely cause.
How do I force restart a phone that will not turn on?
On iPhone 8 and newer, press and release volume up, press and release volume down, then hold the side button for around 10 seconds. On iPhone 7, hold volume down and the side button together. On most Android phones including Samsung, Pixel and Huawei, hold power and volume down together for 10 to 20 seconds. Hold longer than feels necessary, and try again while the phone is plugged in.
How long should I charge a dead phone before it turns on?
At least 30 minutes on a known-good cable and a wall plug. A deeply discharged lithium battery needs to build up charge before the phone can display anything at all, so a completely flat phone can show no sign of life for 15 to 30 minutes. Do not judge it after five.
My phone vibrates but the screen stays black. What does that mean?
The phone is powered on and working, and the display has failed. That is a screen repair rather than a dead phone, and your data is entirely safe. Confirm it by ringing the phone or plugging it into a computer to see whether it is recognised.
Can a completely dead phone be fixed?
Usually, yes. Most phones that will not turn on need a battery, a charging port, a screen or a software restore, and all of those are routine repairs. Board-level liquid damage is the exception, and even then data recovery is often still possible.
Will I lose my data if my phone will not turn on?
Not for a battery, charging port or screen repair – none of those touch your storage and everything comes back as it was. With liquid or board damage the picture is less certain, but photographs and messages can often still be recovered. The odds improve significantly if you act quickly rather than leaving the phone for weeks.
Is a swollen battery dangerous?
Yes. If the back of your phone is bulging or the screen is lifting from the frame, stop charging it immediately, do not press or puncture it, and have it replaced. A swollen lithium cell is a genuine fire risk and is not something to keep using.
Does putting a wet phone in rice work?
No. Rice absorbs surface moisture but does nothing about liquid already inside the phone, and while it sits there corrosion continues on the board. What actually helps is switching the phone off, not charging it, and getting it professionally cleaned quickly.
How much does it cost to fix a phone that will not turn on?
It depends on the cause. Clearing a blocked charging port is free as part of our diagnosis. A battery replacement is typically £45 to £89 and a charging port repair £49 to £79. Screen prices vary by model. Our £15 diagnostic covers a full investigation and a fixed quote before any work starts.
How long does the repair take?
Battery, charging port and most screen repairs are usually completed the same day once the phone is with us. Liquid damage takes longer because the board needs cleaning and drying properly before it can be tested. We confirm a realistic timescale with the quote.
Get a fixed price before you commit
If your phone will not turn on and the free steps above have not worked, we can tell you what is actually wrong before you spend anything. iExpert Repairs works from our Essex workshop and accepts devices from across the UK through a tracked, fully insured mail-in service, so you do not need to be local.
Contact us with your model and what happened, and we will come back with a fixed price and a realistic timescale. Nothing is done until you approve it, and if the phone is not worth repairing we will say so rather than take the booking.
Why Is There a Green Line on My Phone Screen? Causes & Fixes
If a thin green line has appeared down your phone screen, you are not imagining it and you almost certainly did not cause it. It is one of the most reported display faults of the past three years, it overwhelmingly affects phones with AMOLED screens, and in the majority of cases it appears within days of a software update rather than after a drop.
The short answer: a green line on your phone screen is a hardware fault in the display panel or its connection to the motherboard. No software fix, factory reset or update will remove it. The only reliable repair is a screen replacement. Samsung ran a free replacement programme for affected models, but that programme closed in September 2025, so most owners in the UK now face a paid repair.
The 30-second test: is it your screen or your software?
Before you spend anything, do this. It takes half a minute and it tells you definitively which problem you have.
Take a screenshot of the affected screen, then open that screenshot in your gallery.
The line does NOT appear in the screenshot – the fault is physical. The screenshot captures what your phone is sending to the display, not what the display is actually showing. If the image is clean but your screen is not, the panel or its connector has failed. This is the usual outcome and it needs a screen replacement.
The line DOES appear in the screenshot – the fault is being generated in software or by the graphics processor. That is rare, but it is worth ruling out because it can occasionally be resolved without a repair.
You can double-check by viewing that same screenshot on a computer or another phone. If it looks perfect elsewhere, your display is the problem.
What actually causes a green line on a phone screen
AMOLED displays drive each pixel individually. The panel is divided into columns, and each column of pixels is fed by a driver circuit connected through a ribbon cable to the motherboard. When one of those column drivers fails, or the connection carrying its signal degrades, the entire column stops receiving proper instructions.
Green appears most often because of how the subpixels are arranged and driven – a column stuck at full output on the green subpixel produces exactly the bright, thin vertical line owners describe. The same failure can present as pink, red, white or black depending on which part of the circuit has gone.
Three things commonly trigger it:
Ageing solder or flex connections. Years of thermal cycling – a phone heating up and cooling down thousands of times – gradually stresses the join between the display ribbon and the board.
Impact you may have forgotten. A knock that did no visible damage can still disturb a connector. The line may appear weeks later.
Heat. Sustained high temperatures accelerate the degradation, which is why heavy gaming and long periods in direct sun are associated with earlier failure.
Why it so often happens right after a software update
This is the part that makes owners understandably angry, and it deserves a straight explanation.
A system update installs new display drivers. Those drivers change how the panel is addressed – refresh behaviour, voltage, colour management and pixel mapping. On a panel that is already marginal, the new driver is simply the moment the weakness becomes visible. The update did not create the fault; it exposed one that was already developing.
That distinction matters because it explains two things people find confusing: why rolling back the update does not fix it, and why a phone that has never been dropped can develop the line overnight.
Which phones are affected?
Any phone with an AMOLED or OLED display can develop this fault. In practice, reports cluster heavily around Samsung Galaxy models from the S20 through S23 generations and the Note 20, along with a number of A-series handsets.
It is not exclusive to Samsung. We see the same failure on Huawei P and Mate models with OLED panels, on Google Pixel handsets, on OnePlus, and on OLED iPhones – the underlying technology and failure mode are the same.
Phones with LCD screens do not develop this particular fault. If you own an LCD handset and have a line on your display, the cause is different, and our guide to why phone screens flicker covers those symptoms.
Free things worth trying before you book a repair
These will not fix a failed panel, but they cost nothing and they rule out the small number of cases that are not hardware.
Restart the phone properly. A full power off and on, not just a screen lock.
Boot into safe mode. If the line disappears in safe mode, a third-party app is involved – which points to software rather than the panel.
Take the case off. A tight case, particularly one with a rigid frame, can put constant pressure on the edge of the display. It is uncommon, but it is free to eliminate.
Check for a pending update. Where a specific driver bug is responsible, a later patch occasionally resolves it.
Run the screenshot test above. This is the one that actually tells you something.
What will not help: factory resets, clearing the cache partition, screen-repair apps from the app store, or pressing on the line. Pressing an AMOLED panel to “reseat” it can spread the damage and turn one line into several.
Can a green line be fixed without replacing the screen?
Honestly, no – not reliably. The failure is in the panel assembly or its connection, and neither is a serviceable component on a modern phone. On a bonded display, the glass, touch layer and panel are a single unit.
You may see suggestions online about reseating the display connector. In a small number of cases a genuinely loose connector can be reseated, and any competent technician will check that during diagnosis. But where the column driver itself has failed – which is the majority – the assembly has to be replaced.
Be wary of anyone offering a cheap “software fix” for this. There isn’t one.
Samsung’s free screen replacement programme – and why it may no longer help you
Samsung acknowledged the issue and ran a one-time free screen replacement programme covering verified green and pink line defects on selected Galaxy models, broadly the S20 to S23 series and the Note 20. Eligibility required the device to be within roughly three years of purchase or activation, with no physical or liquid damage, and the fault confirmed by an authorised service centre.
The programme was extended more than once, and the final extension ran to September 2025. It has now closed. Coverage also varied by region, and reporting focused heavily on Samsung India – UK terms were never identical.
It is still worth one phone call to Samsung UK before paying anyone, because goodwill decisions are made case by case. But for most UK owners reading this in 2026, the realistic position is a paid repair.
Your rights in the UK
Samsung’s UK manufacturer warranty typically runs two years. Separately from that, the Consumer Rights Act 2015 says goods must be of satisfactory quality and durable, and your claim under that Act is against the retailer who sold you the phone – not the manufacturer. In England and Wales claims can in principle be brought within six years of purchase, and within five years in Scotland.
The practical catch is the burden of proof. After the first six months of ownership, it falls to you to show the fault was inherent rather than caused by use. A widely documented panel defect affecting a specific model range is exactly the kind of evidence that supports such a claim, so it can be worth pursuing with the retailer if your phone is relatively young.
We are a repair company rather than legal advisers, so treat this as a starting point rather than formal advice – but it is a conversation worth having with your retailer before you assume you have to pay.
What does it cost to replace a green line screen?
Because the fault concentrates on specific models, we can be precise. These are our fixed prices, including parts, labour and a 12-month guarantee:
Will the green line come back after a screen replacement?
Not from the same cause. A replacement panel comes with a new set of column drivers and a new connection, so the specific failure is resolved.
What matters is the quality of the part and the care taken fitting it. A panel seated under tension, or bonded unevenly, can develop different problems – ghost touch being the common one, where the phone registers taps nobody made. Every screen we fit is covered for 12 months on parts and labour, and we test touch response across the whole panel, including the curved edges on models that have them, before the phone goes back.
Can I keep using the phone with a green line?
Yes, in the short term. It is a display fault, not a safety issue, and it does not put your data at risk. Nothing on the phone is in danger.
Two caveats. First, these lines rarely stay still – one line usually becomes two or three over the following months, and some owners find the affected area eventually stops responding to touch. Second, if the display deteriorates to the point where you cannot see or use it, getting your data off becomes considerably harder. If you are going to delay, back the phone up now while the screen still works. Where a display has already failed completely, our data recovery service can usually still retrieve what was stored on it.
Green, pink, white or black – does the colour matter?
Diagnostically, only a little. All of these are column or row driver failures in the same family, and the treatment is the same.
Green or pink vertical lines – the classic AMOLED driver failure, most associated with post-update appearance.
White or coloured horizontal bands – usually a row driver or a connection fault.
Black vertical lines – a column receiving no signal at all, often further progressed.
Flickering rather than a solid line – may be a different fault entirely; our screen flickering guide covers that.
You cannot prevent a manufacturing weakness, but heat is the accelerant you can control. Avoid leaving the phone in direct sunlight or on a car dashboard, take the case off during long gaming sessions or fast charging if it runs hot, and avoid charging under a pillow or duvet. None of that guarantees anything – but sustained heat is the one factor consistently linked with earlier panel failure.
Frequently asked questions
Does a factory reset fix a green line on a phone screen?
No. A factory reset clears software and data but changes nothing physical. Because the green line is a failure in the display panel or its connection, a reset makes no difference. Run the screenshot test first – if the line does not appear in the screenshot, the fault is hardware and no software action will help.
Why did a green line appear after a software update?
The update installed new display drivers that address the panel differently. On a panel with a developing weakness, that change is simply the moment the fault becomes visible. The update exposed the problem rather than causing it, which is why rolling back the update does not remove the line.
Will Samsung replace my screen for free?
Samsung ran a one-time free replacement programme for verified green and pink line defects on models around the S20 to S23 and Note 20 range, but the final extension closed in September 2025. It is still worth contacting Samsung UK, as goodwill decisions are made case by case, but most UK owners now face a paid repair.
How much does it cost to fix a green line on a Samsung screen?
At iExpert Repairs a Galaxy S21 screen replacement is £135, an S22 is £145, an S23 is £139 and an S23 Ultra is £199, each including parts, labour and a 12-month guarantee. The green line requires a full display replacement because the fault is in the panel assembly itself.
Can a green line on a phone screen be repaired without replacing the display?
Very rarely. If the display connector has simply worked loose it can sometimes be reseated, and a good technician will check that during diagnosis. In most cases the column driver inside the panel has failed, and the assembly has to be replaced. There is no software fix.
Is it safe to keep using a phone with a green line?
Yes – it is a display fault, not a safety concern, and your data is not at risk. However, these lines usually multiply over time and the affected area can stop responding to touch, so back the phone up while the screen still works.
Do iPhones get the green line issue?
Yes. Any OLED display can develop it, so OLED iPhones, Google Pixel, OnePlus and Huawei handsets are all susceptible. It is reported most often on Samsung simply because Samsung sells the largest number of AMOLED phones.
How long does a green line screen replacement take?
Usually the same day once the phone is with us, depending on the model and parts availability. We confirm a fixed price before any work starts, and nothing goes ahead until you approve it.
Get a fixed price for your repair
If a green or pink line has appeared on your display, we can tell you what it will cost before you commit to anything. iExpert Repairs works from our Essex workshop and takes devices from across the UK through a tracked, fully insured mail-in service, so you do not need to be local. Contact us with your model and we will confirm the price and a realistic timescale.
Folding handsets deserve their own note, because owners of a Galaxy Z Fold or Z Flip often see something that looks like the green line but is not.
A folding phone has two displays: a flexible inner panel and a conventional outer cover screen. On the inner panel, a line running along or near the fold is usually related to the crease and the flex layer rather than a column driver failure. It behaves differently too – it may be more visible at certain angles, or change as the phone opens and closes.
The screenshot test still applies and is still the first thing to do. But on a folder it is worth telling us which screen is affected and whether the line follows the crease, because inner and outer panels are separate parts at very different prices.
How we actually diagnose it
When a phone arrives with a line on the display, we work through the same sequence every time rather than assuming.
Screenshot comparison. Exactly the test described above, done on our equipment so we can view the capture on a calibrated screen.
Full-screen colour test. We display solid red, green, blue, white and black across the whole panel. This reveals how many columns are affected, whether the fault is intermittent, and whether other areas are beginning to go.
Connector inspection. The display ribbon and its seating on the board are checked, because a genuinely loose connector is the one case that can occasionally be resolved without a new panel.
Touch mapping. We check whether touch response has been affected along the same column, which often indicates how far the fault has progressed.
Frame check. On any phone that has been dropped, we check whether the chassis has deformed – a bent frame stops a new panel bonding flat, and fitting one anyway causes a repeat failure.
You get a fixed price after that, before any work begins. If the connector turns out to be the whole problem, you pay less than a screen replacement – we are not going to sell you a panel you do not need.
Should you repair it or replace the phone?
Worth thinking through properly rather than defaulting either way. Three questions decide it.
What is the phone worth, and what does the repair cost? On an S22 Ultra at £169 against a handset still worth several hundred, repair is straightforward. On an older S20 at £135, it is closer, and how much you like the phone matters more.
Is anything else wrong? A green line alone is one repair. A green line plus a tired battery plus a worn charging port is three, and at that point the arithmetic usually stops working. We will tell you when you have reached that stage rather than quoting for everything and hoping you do not add it up.
How long do you want to keep it? A replacement panel with a 12-month guarantee on a phone you intend to keep for two more years is money well spent. On a handset you were planning to change in three months, it may not be.
If the answer is that repair does not make sense, say so and we will help you get the data off instead. That is often the thing genuinely worth paying for.
Check your insurance before you pay
Two policies people forget they have. Many home contents policies include gadget cover, sometimes as a bolt-on you added years ago and stopped thinking about. Some bank current accounts – particularly packaged or premium accounts – include mobile phone cover as a standard benefit.
Both are worth five minutes of checking before you pay for a screen. Be aware that a manufacturing defect is not the same as accidental damage, and gadget policies are generally written to cover the latter, so read what yours actually says. Where an excess applies, compare it against the repair price rather than assuming a claim is cheaper.
What to do right now
Back up your phone today, while the screen still works. This is the single most useful thing you can do, and lines rarely improve.
Run the screenshot test to confirm whether it is hardware or software.
Check your purchase date and retailer. If the phone is relatively young, the Consumer Rights Act claim sits with the retailer, not Samsung.
Check insurance and bank account benefits.
Get a fixed repair price so you know what the paid route actually costs before deciding.
Does the green line get worse over time?
Usually yes. Most owners report one line becoming two or three over the following weeks or months, and the affected columns sometimes stop responding to touch. It rarely stays static, which is why backing up early matters.
Can pressing on the line fix it?
No, and it is actively risky. Pressing an AMOLED panel can damage neighbouring columns and turn one line into several. It is one of the more common ways people make a single-line fault considerably worse.
Is a third-party screen as good as an original?
It depends entirely on the grade of the part. A quality replacement assembly restores colour, brightness and touch properly; a cheap one can bring ghost touch, poor colour or weak edge response. Ask what grade of panel you are being quoted for – the price difference usually reflects a real difference in the part.
Will a green line affect my phone’s trade-in value?
Significantly. Trade-in and recycling services grade displays strictly, and a visible line typically moves a handset into the lowest condition bracket or makes it ineligible for the headline price. If you are planning to trade in, it is worth comparing the repair cost against the difference in valuation rather than assuming you should not bother.
How to Stop a Phone From Overheating: Causes & Fixes
Quick Answer: How Do You Stop a Phone From Overheating?
If your phone is overheating, immediately stop using demanding apps, move the device to a cooler environment, remove its protective case, lower the screen brightness, disconnect it from the charger if safe to do so, and allow it to cool naturally. Restart the phone after it has cooled, install any available software updates, and check battery usage to identify apps consuming excessive resources.
If your phone becomes hot repeatedly during normal use, shuts down because of temperature warnings, drains its battery unusually quickly, or continues overheating after basic troubleshooting, the issue may be caused by a failing battery, charging component, motherboard fault, or previous liquid damage. In these situations, a professional diagnostic is recommended before further damage occurs.
Introduction
Modern smartphones are more powerful than ever before. They stream high-definition videos, run advanced mobile games, capture professional-quality photos, process artificial intelligence features, support fast charging, and perform dozens of background tasks simultaneously. While these capabilities make smartphones incredibly useful, they also generate heat.
A slightly warm phone during charging or heavy use is completely normal. However, when your device becomes uncomfortably hot, displays temperature warnings, drains its battery rapidly, slows down unexpectedly, or shuts itself off to protect internal components, overheating should never be ignored. Excessive heat can reduce battery lifespan, slow overall performance, damage delicate internal hardware, and in severe cases, permanently affect important components such as the battery, charging circuitry, display, processor, and motherboard. The longer an overheating problem continues, the greater the risk of expensive repairs.
Fortunately, many overheating problems are not caused by permanent hardware failure. Our technicians regularly diagnose devices that appear to have serious thermal issues but are actually affected by software bugs, background applications, incorrect charging habits, poor ventilation, or environmental conditions. Identifying the real cause is the key to preventing unnecessary repair costs. Whether you own an iPhone, Samsung Galaxy, Google Pixel, Huawei, OnePlus, Oppo, Vivo, Xiaomi, Motorola, Sony Xperia, or another Android smartphone, the troubleshooting advice in this guide applies to almost every modern mobile device.
Why Do Phones Overheat?
Every smartphone generates heat while operating. The processor, graphics chip, battery, display, modem, cameras, and charging system all produce heat whenever they are working. Under normal conditions, this heat is safely dispersed through the phone’s internal cooling design.
Unlike laptops or desktop computers, smartphones do not contain cooling fans. Instead, they rely on graphite sheets, copper heat spreaders, vapour chambers, aluminium frames, and software-based thermal management to regulate temperature. When these systems become overwhelmed, the device begins to overheat.
Some heating is completely expected during:
Fast charging
4K or 8K video recording
Long gaming sessions
Video editing
GPS navigation
Video calls
Large software updates
File transfers
Mobile hotspot usage
However, if your phone becomes excessively hot while performing simple tasks such as browsing the internet, sending messages, checking emails, or remaining idle on a table, this often indicates an underlying issue that requires further investigation.
Our repair technicians frequently discover that persistent overheating is linked to deteriorating batteries, damaged charging circuits, software conflicts, liquid damage, or failing internal components rather than normal daily usage. Understanding the difference between expected warmth and abnormal overheating is the first step towards preventing more serious hardware damage.
Common Causes of Smartphone Overheating
Although every device is different, most overheating problems fall into several common categories.
1. Heavy Processor Workloads
Modern applications place enormous demands on smartphone processors. High-performance games, video editing software, augmented reality applications, artificial intelligence features, and continuous camera processing can push both the CPU and GPU close to their maximum capacity.
As processor activity increases, power consumption rises, generating additional heat.
2. Battery Wear
Lithium-ion batteries naturally degrade over time. As batteries age, they become less efficient and generate more heat during charging and normal operation.
Older batteries may also experience increased internal resistance, making overheating more noticeable even during everyday tasks.
3. Charging Problems
Using damaged charging cables, incompatible power adapters, faulty wireless chargers, or defective charging ports can produce excessive heat while charging. If your phone becomes unusually hot whenever it charges, the charging system itself may require professional inspection.
4. Software Conflicts
Operating system bugs, corrupted updates, poorly optimised applications, or apps running continuously in the background can place constant stress on the processor. In many cases, software optimisation alone significantly reduces operating temperatures.
5. Environmental Heat
Using your smartphone outdoors on hot summer days, leaving it inside a parked vehicle, or exposing it to direct sunlight can raise internal temperatures rapidly. Once the surrounding temperature increases, your phone has far less ability to cool itself effectively.
6. Internal Hardware Faults
Persistent overheating may also indicate:
Failing batteries
Charging IC problems
Motherboard faults
Power management IC failure
Liquid damage corrosion
Short circuits
Damaged charging assemblies
These faults generally require specialist diagnostic equipment and should not be ignored.
Why Is My Phone Overheating? (Understanding the Root Causes)
Before you can stop your phone from overheating, you first need to understand why it becomes hot in the first place. Smartphones naturally produce heat whenever the processor, battery, display, modem, or charging circuitry is working. However, when the temperature rises beyond normal operating levels, performance begins to suffer, battery life decreases, and internal components may become permanently damaged.
Modern smartphones – including iPhones, Samsung Galaxy devices, Google Pixel phones, Huawei smartphones, OnePlus devices, Oppo, Xiaomi, Sony Xperia, Motorola, and other Android phones – contain advanced processors capable of handling gaming, AI photography, 4K video recording, navigation, and multitasking. All of these activities generate heat. Occasional warmth is completely normal. Excessive overheating is not.
Overheating can occur because of software problems, faulty charging accessories, battery degradation, damaged internal components, environmental conditions, or poor device maintenance. Professional diagnosis always starts by identifying the actual source of the heat rather than assuming the battery is responsible.
Common Reasons Phones Overheat
Some of the most common causes include:
Heavy gaming
Recording 4K or 8K videos
Fast charging
Wireless charging
Background apps
Poor signal strength
GPS navigation
Direct sunlight
Old battery
Software bugs
Malware
Water damage
Charging port faults
Motherboard issues
Some problems are completely harmless, while others indicate hardware damage requiring professional repair.
Is Your Phone Too Hot or Just Warm?
Many users become worried even though their phone is operating within its normal temperature range. Generally:
Normal Temperature
Slight warmth while charging
Warm during gaming
Warm during video calls
Slight heat while updating apps
Abnormal Temperature
Too hot to hold comfortably
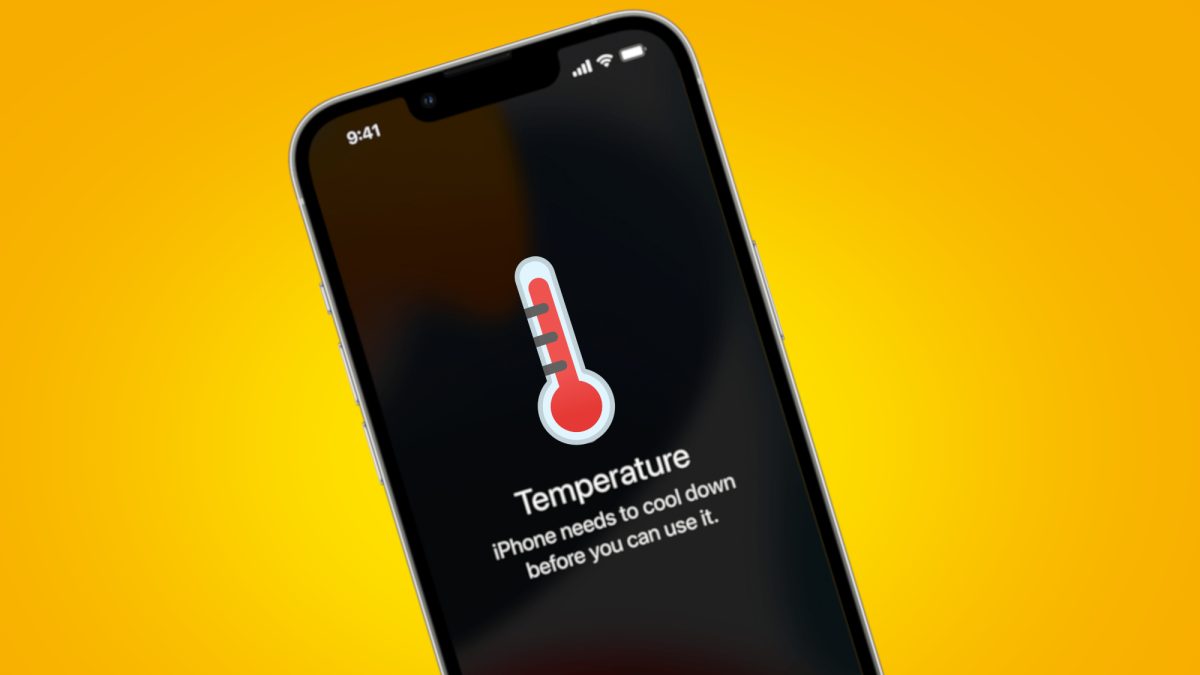
Temperature warning appears
Apps begin closing automatically
Screen dims unexpectedly
Charging pauses itself
Phone restarts repeatedly
Camera stops working
Battery drains rapidly
If these symptoms appear regularly, further troubleshooting is recommended.
What Happens When a Phone Overheats?
Modern smartphones include built-in thermal protection systems designed to prevent permanent damage. When internal temperatures rise too high, your phone may automatically:
Reduce processor speed
Lower screen brightness
Disable camera flash
Pause charging
Close background apps
Disable 5G temporarily
Display temperature warnings
Restart automatically
Shut down completely
These safety measures help protect the battery, processor, display, storage chips, and motherboard. Ignoring repeated overheating may eventually shorten your phone’s lifespan.
How to Stop Your Phone from Overheating (Step-by-Step Guide)
Step 1: Remove the Phone Case
Many protective cases trap heat. Thick rugged cases, waterproof cases and low-quality silicone covers reduce airflow around the device. While they provide excellent protection against drops, they can also prevent heat from escaping. If your phone feels unusually hot:
Remove the case.
Leave the phone on a flat surface.
Allow it to cool naturally.
Avoid placing it on cushions or beds.
Many overheating complaints disappear after removing heavy protective cases during gaming or charging.
Step 2: Stop Using the Phone Immediately
If your phone becomes extremely hot, continuing to use it will only increase internal temperatures.
Close:
Games
Camera
Social media
Video streaming
Navigation
Video calls
Turn off the display and allow the device several minutes to cool naturally. Never place a hot phone inside a refrigerator or freezer. Rapid temperature changes can create internal condensation, leading to moisture damage.
Step 3: Close Background Applications
Many apps continue working even when you’re no longer using them. These may include:
Social media
Cloud backups
Photo syncing
GPS tracking
Fitness apps
Streaming services
Messaging apps
Closing unnecessary background applications reduces processor activity and lowers heat generation. Restarting the phone also clears many temporary background processes.
Step 4: Reduce Screen Brightness
The display is one of the largest power consumers inside any smartphone. Maximum brightness significantly increases battery usage and processor workload. Reduce brightness manually or enable:
Auto Brightness
Adaptive Brightness
Dark Mode
These settings reduce heat while extending battery life. OLED displays especially benefit from Dark Mode during prolonged use.
Step 5: Turn Off Unused Features
Many wireless radios continue working constantly. Disable features you don’t currently need:
Bluetooth
GPS
NFC
Personal Hotspot
Wi-Fi (when unused)
Mobile Data (when unnecessary)
Reducing wireless activity helps lower processor load and battery consumption.
Step 6: Move Out of Direct Sunlight
Environmental heat dramatically affects smartphone temperature. Avoid leaving your phone:
Inside parked cars
On dashboards
On window ledges
At the beach
Near heaters
In direct sunlight
Even a perfectly healthy smartphone can overheat when exposed to high external temperatures. If possible:
Move indoors.
Place the phone in the shade.
Allow natural airflow.
Step 7: Turn Off Fast Charging When Possible
Fast charging is one of the biggest reasons modern smartphones become warm. Technologies such as USB Power Delivery (USB-PD), Qualcomm Quick Charge, Samsung Super Fast Charging, Huawei SuperCharge, and other fast-charging systems deliver higher power to the battery, naturally generating more heat.
A slight increase in temperature while fast charging is normal. However, if your phone becomes excessively hot every time it charges, there may be an underlying issue that needs attention. If you do not need a rapid charge, consider using standard charging for overnight charging sessions. You can also:
Remove the phone case while charging.
Charge on a hard surface.
Avoid charging under pillows or blankets.
Keep the charging area well ventilated.
Stop using demanding apps while charging.
Reducing charging stress helps improve battery longevity and keeps temperatures under control.
Step 8: Use Genuine or High-Quality Chargers
Low-quality charging accessories are a common cause of overheating. Cheap chargers may deliver unstable voltage or current, placing unnecessary stress on your phone’s battery and charging circuitry.
Always use:
Original manufacturer chargers
Certified USB cables
Trusted power adapters
High-quality charging accessories
Avoid:
Damaged charging cables
Loose USB connectors
Unknown third-party chargers
Extremely cheap charging accessories
Using reliable charging equipment helps maintain safe charging temperatures while protecting your battery and charging port.
Step 9: Update Your Phone’s Software
Software updates do much more than add new features. Manufacturers frequently release improvements for:
Thermal management
Battery optimisation
CPU efficiency
Charging performance
Background app control
Security patches
System stability
If your phone started overheating immediately after installing an update, don’t panic. Manufacturers often release follow-up updates that resolve temporary software bugs affecting temperature management. Check for updates regularly.
iPhone
Settings → General → Software Update
Android
Settings → Software Update
Install only official updates provided by your device manufacturer. If your phone becomes unusually hot while charging, charges slowly, or repeatedly displays charging warnings, our Why Is My Phone Not Charging? explains how charging faults, damaged ports, faulty accessories, and battery issues can all contribute to overheating.
Step 10: Scan for Malware and Problematic Apps
Although less common than hardware faults, malicious software can significantly increase processor activity. Signs include:
Constant overheating
Rapid battery drain
Slow performance
Random advertisements
High data usage
Apps opening unexpectedly
Review recently installed applications. Uninstall any apps that:
Continuously run in the background
Request unnecessary permissions
Consume excessive battery
Cause the phone to become hot immediately after installation
Keeping only trusted applications installed improves both security and thermal performance.
Step 11: Restart Your Phone Regularly
Many users leave their smartphones running for weeks without restarting them. Over time, background services, temporary files, memory leaks, and stalled processes may increase processor workload. Restarting your device helps:
Refresh system services
Clear temporary cache
Close frozen background apps
Improve RAM management
Reset network connections
A simple restart often resolves temporary overheating caused by software glitches.
Step 12: Enable Battery Optimisation
Modern smartphones include intelligent battery management systems that reduce unnecessary power consumption. Battery optimisation limits:
Background activity
Automatic syncing
Location tracking
Idle processor usage
Battery-intensive apps
Enabling these features reduces heat generation throughout the day while extending battery life.
Can Overheating Damage Your Phone?
Yes. Occasional warmth is perfectly normal, but repeated overheating can gradually damage several important components inside your smartphone.
Long-term exposure to excessive heat may affect:
Battery health
OLED display
Processor
Charging IC
Storage chips
Camera sensors
Motherboard
Internal adhesives
Waterproof seals
Over time, this can lead to reduced performance, shorter battery life, charging issues, unexpected shutdowns, and costly repairs. This is why manufacturers build automatic thermal protection systems into modern smartphones. Ignoring repeated overheating warnings can eventually shorten your device’s overall lifespan.
Warning Signs That Overheating Is Becoming Serious
Contact a professional technician if your phone regularly experiences any of these symptoms:
Temperature warning messages
Phone shuts down automatically
Battery swelling
Burning smell
Screen discoloration
Display flickering
Charging stops repeatedly
Camera closes automatically
Device becomes too hot to hold
Heat continues even when idle
These symptoms often indicate a hardware issue rather than normal operating temperatures.
From Our Repair Bench
At iExpert Repairs, one of the most common misconceptions we encounter is that every overheating phone needs a new battery. In reality, our diagnostics often reveal other causes such as a failing charging port assembly, software conflicts, damaged power management circuitry, or poor-quality charging accessories. By identifying the exact source of the heat before replacing any components, we help customers avoid unnecessary repair costs while restoring safe and reliable performance.
Can Overheating Damage Your Phone Battery?
Yes. Your smartphone’s battery is one of the components most affected by excessive heat. Modern smartphones use lithium-ion batteries, which are designed to operate within a safe temperature range. When the battery is repeatedly exposed to high temperatures, its chemical structure gradually begins to degrade.
Unlike accidental damage, battery wear caused by overheating happens slowly over time. Many users only notice the problem after months of repeated overheating.
Signs Heat Is Damaging Your Battery
Watch for symptoms such as:
Battery draining unusually fast
Unexpected shutdowns
Slow charging
Battery percentage jumping suddenly
Battery health declining quickly
Phone becoming hot during normal tasks
Swollen battery
Reduced screen-on time
Poor performance
If several of these symptoms appear together, professional battery testing is recommended.
Can Overheating Damage the Processor?
Absolutely. The processor (CPU) is effectively the brain of your smartphone. During demanding activities such as:
Gaming
AI image processing
Video editing
4K or 8K recording
Live streaming
Augmented reality
the processor generates significant heat. Modern smartphones automatically reduce processor speed through a process known as thermal throttling.
Thermal throttling protects the processor from permanent damage by slowing performance until temperatures return to safe levels. This explains why an overheating phone often feels slower than usual. You may notice:
Lag
Apps freezing
Lower gaming frame rates
Camera delays
Slower multitasking
These symptoms often disappear once the device cools.
Can Overheating Damage the Display?
Yes. Excessive temperatures can affect OLED and LCD displays over time. Possible issues include:
Screen flickering
Temporary image retention
Brightness reduction
Touchscreen lag
Colour distortion
Display blackouts
Fortunately, modern smartphones include thermal protection that automatically lowers screen brightness before serious damage occurs. If your display repeatedly flickers during overheating, further inspection may be required.
Can Overheating Damage the Motherboard?
The motherboard is the most important hardware component inside your smartphone. Repeated overheating may gradually affect:
Power management circuits
Audio IC
Charging IC
Memory chips
CPU connections
Solder joints
Although modern devices are built to withstand occasional high temperatures, long-term overheating can shorten the lifespan of delicate electronic components. Motherboard repairs are considerably more complex than replacing batteries or screens. Preventing overheating is therefore much more cost-effective than repairing board-level damage later.
Common Overheating Myths
Many online suggestions for cooling smartphones are either ineffective or potentially harmful. Let’s separate fact from fiction.
Myth
Reality
Put your phone in the freezer
❌ Rapid cooling can create condensation and cause internal damage.
Place your phone in a refrigerator
❌ Moisture may form inside the device.
Use ice packs directly
❌ Sudden temperature changes may damage internal components.
Overheating always means the battery is faulty
❌ Software, charging accessories, apps, or motherboard issues can also be responsible.
Every hot phone needs replacing
❌ Many overheating issues can be resolved through proper troubleshooting or repair.
Closing every app permanently prevents overheating
❌ Background activity is only one possible cause.
The safest method is always to allow the phone to cool naturally in a well-ventilated environment.
Although many overheating issues can be resolved at home, certain symptoms usually indicate an internal hardware fault. Arrange a professional diagnostic if your phone:
Professional diagnostics help identify whether the fault lies with the battery, charging port, power management system, motherboard, or another internal component.
How Professional Technicians Diagnose an Overheating Phone
When a smartphone repeatedly overheats, replacing the battery immediately isn’t always the correct solution. At iExpert Repairs, every device undergoes a structured diagnostic process to identify the actual source of the problem before any repair is recommended.
Modern smartphones are made up of hundreds of interconnected components. Heat may originate from the battery, charging port, power management IC, processor, motherboard, software, or even a third-party accessory. Professional diagnostics help isolate the fault, ensuring only the necessary repair is carried out.
Our technicians begin by gathering information from the customer, including when the overheating occurs, how long it lasts, whether it happens while charging or during normal use, and if the device has recently been dropped, exposed to water, or updated. This approach saves customers from paying for unnecessary repairs while improving the chances of a long-lasting solution.
Step 1: Understanding When the Phone Gets Hot
One of the first questions we ask is “When does the phone actually overheat?” The answer often provides valuable clues. For example:
A phone that overheats only while charging may have a charging system fault.
A device that becomes hot during gaming may simply be working under heavy load.
A phone that overheats while sitting idle usually requires deeper investigation.
If overheating started immediately after liquid exposure, internal corrosion may be affecting the power circuits.
Understanding the pattern helps technicians narrow down the possible causes before opening the device.
What Different Overheating Patterns Can Tell You
When Does the Phone Overheat?
What It May Indicate
Our Recommended Next Step
Only while charging
Charging accessory, charging port, or battery issue
Test with an original charger and inspect the charging system.
During gaming or video editing
Heavy processor workload
Reduce demanding tasks and monitor temperatures.
While using the camera
Normal processing or camera-related hardware issue
Allow the phone to cool and check for software updates.
Even when the phone is idle
Background process or hardware fault
Carry out a full software and hardware diagnostic.
After water exposure
Possible internal corrosion
Arrange a professional inspection as soon as possible.
Immediately after a drop
Loose connector or damaged internal component
Have the device checked before further damage develops.
Step 2: External Inspection
Before any tools are used, the device is carefully examined from the outside. Technicians look for physical signs that may explain the overheating. These include:
Cracked back glass
Bent frame
Swollen battery
Loose charging port
Signs of liquid exposure
Burn marks around the charging connector
Previous repair work
Poorly fitted replacement parts
Sometimes the cause becomes obvious before the phone is even opened.
A swollen battery, for example, should always be replaced immediately because it presents both a performance and safety risk.
If your phone became noticeably hotter after being dropped and now has additional problems such as charging issues, display faults, or camera failures, our How to Fix Phone? guide explains how accidental damage can affect multiple internal components and why a complete diagnostic is often the safest approach.
Step 3: Battery Health Assessment
Battery testing is one of the most important parts of the diagnostic process.As lithium-ion batteries age, they become less efficient at storing and delivering power. This forces the battery to work harder, generating additional heat during everyday tasks.
Rather than relying on guesswork, technicians measure battery performance using professional diagnostic tools. They assess:
Battery health
Charge cycles
Voltage stability
Charging behaviour
Temperature readings
Current draw
Battery efficiency
These results help determine whether the battery is still operating within safe limits or has reached the point where replacement is the most practical solution.
Signs Your Battery May Be Contributing to Overheating
What You Notice
What It Could Mean
Recommended Action
Battery drains much faster than before
Battery cells may be worn
Have the battery professionally tested.
Phone becomes hot during basic tasks
Reduced battery efficiency
Check battery health before replacing other parts.
Device shuts down unexpectedly
Battery may no longer supply stable power
Arrange a diagnostic to confirm the fault.
Battery percentage changes suddenly
Battery calibration or ageing issue
Perform a health assessment before replacing the device.
Rear panel lifting slightly
Possible battery swelling
Stop using the phone and seek immediate professional assistance.
Step 4: Charging System Inspection
Many people assume overheating always starts with the battery. In reality, the charging system is responsible for a significant number of overheating cases we diagnose. Our technicians inspect:
Charging port
USB connector
Charging flex cable
Charging IC
Power management circuit
Charging accessories
Dust inside the charging port, damaged connectors, or unstable voltage can all generate unnecessary heat while charging. Using genuine or premium-quality accessories helps minimise unnecessary stress on the charging system.
Step 5: Software Diagnostics
Not every overheating issue is caused by faulty hardware. Modern smartphones constantly manage hundreds of background processes, applications, wireless connections, and security services.
A software conflict can sometimes keep the processor working continuously without the user realising it. Professional software diagnostics check:
Background applications
CPU usage
Battery consumption
Memory usage
System errors
Firmware version
Thermal logs
Operating system integrity
Many devices return to normal after unnecessary background activity has been identified and corrected.
Software Issues That Can Make a Phone Run Hot
Software Problem
What You Might Experience
How It’s Usually Resolved
App stuck in the background
Constant warmth and faster battery drain
Force close or uninstall the app if necessary.
Failed software update
Random overheating after an update
Install the latest official update or system patch.
Corrupted system files
Slow performance and excessive heat
Repair or reset affected system settings.
Malware or suspicious apps
High processor activity even when idle
Remove the app and perform a security scan.
Too many background services
Device feels warm throughout the day
Optimise background activity and restart the phone regularly.
How to Stop an iPhone from Overheating
iPhones are designed with intelligent thermal management, but they can still become hot during charging, gaming, video recording, navigation, or software-intensive tasks. Newer models may temporarily reduce screen brightness, slow performance, or pause charging until the temperature returns to normal.
The good news is that most overheating problems can be prevented with a few simple habits.
1. Reduce Display Brightness
The OLED or LCD display is one of the largest power consumers on an iPhone. Instead of keeping brightness at 100%, enable Auto-Brightness or manually lower it when indoors. Doing so reduces battery strain while keeping the device significantly cooler.
2. Avoid Direct Sunlight
Leaving an iPhone on a car dashboard, garden table, or windowsill during summer can quickly push internal temperatures beyond Apple’s recommended operating range. Always keep the device in the shade whenever possible.
3. Update iOS Regularly
Apple frequently improves:
Battery optimisation
CPU scheduling
Background processing
Thermal management
Bug fixes
Installing the latest iOS version often resolves unexplained heating problems.
4. Remove Thick Cases During Intensive Tasks
Heavy protective cases can trap heat. If you’re:
Recording 4K video
Gaming
Charging quickly
Using GPS navigation
consider removing the case temporarily.
5. Use Certified Chargers
Poor-quality chargers often generate unnecessary heat. Using Apple-certified or reputable USB-C chargers provides more stable charging and better temperature control.
Common iPhone Overheating Causes
Situation
Likely Cause
Recommended Action
Phone gets hot while charging
Fast charging
Remove case and charge in a cool room
Warm during FaceTime
High processor usage
Lower brightness and close unused apps
Hot after iOS update
Background indexing
Wait several hours for optimisation
Heats during gaming
GPU workload
Reduce graphics settings
Gets hot outdoors
High ambient temperature
Move to shade immediately
How to Prevent Samsung Galaxy Phones from Overheating
Samsung devices include advanced cooling systems, especially in flagship Galaxy models. However, intensive multitasking and gaming can still increase temperatures.
1. Enable Adaptive Battery
Samsung’s Adaptive Battery learns your usage habits and limits unnecessary background activity. Benefits include:
Lower CPU usage
Reduced battery drain
Less heat generation
2. Optimise Device Care
Samsung’s Device Care automatically detects:
Memory usage
Background apps
Battery health
Storage issues
Running optimisation once every few days helps maintain smooth performance.
3. Reduce Gaming Graphics
Samsung phones with high-refresh-rate AMOLED displays consume considerable power. Lowering:
Graphics quality
Frame rate
Screen refresh rate (when appropriate)
helps reduce thermal load.
4. Samsung Cooling Tips
Feature
Benefit
Adaptive Battery
Reduces unnecessary background activity
Device Care
Optimises memory and storage
Performance Profile
Balances speed and temperature
Software Updates
Improves efficiency
Certified Charger
Stable charging temperatures
If your Samsung also experiences rapid battery drain, our Why Is My Phone Battery Draining So Fast? guide explains how overheating and battery degradation are often connected.
How to Stop Google Pixel Phones from Overheating
Google Pixel devices rely heavily on AI processing. Features such as:
Magic Editor
Live Translate
Call Screening
Recorder AI
Circle to Search
place additional demands on the processor.
1. Reduce Background AI Tasks
Close apps you’re no longer using. Background AI processing continues even after switching apps.
2. Install Pixel Feature Updates
Google frequently releases updates that improve:
Battery optimisation
Heat management
Tensor chip performance
Keeping Pixel software updated is essential.
3. Disable Unused Location Services
Continuous GPS tracking creates additional heat. Only allow location access for apps that genuinely need it.
4. Pixel Overheating Checklist
Check
Status
Latest Android version installed
✓
Background apps closed
✓
GPS limited
✓
AI features managed
✓
Charging with certified charger
✓
Smartphone Brand Comparison
Brand
Common Heat Trigger
Best Prevention Method
Apple iPhone
Video recording
Reduce brightness
Samsung Galaxy
Gaming
Device Care optimisation
Google Pixel
AI processing
Install updates
Huawei
Camera usage
Battery optimisation
OnePlus
Fast charging
Charge in cool environments
Xiaomi
Gaming
Performance mode management
Oppo
Background apps
Battery optimisation
Vivo
Camera processing
Close unused apps
Human-Friendly Repair Comparison
Problem
Can You Fix It Yourself?
Professional Repair Needed?
Too many apps running
Yes
No
High screen brightness
Yes
No
Hot weather
Yes
No
Software bug
Usually
Rarely
Dust in charging port
⚠ Sometimes
If severe
Battery deterioration
No
Yes
Charging IC fault
No
Yes
Motherboard overheating
No
Yes
Water damage
No
Yes
How to Prevent Your Phone from Overheating in the Future
Once you’ve resolved an overheating issue, adopting a few simple habits can significantly reduce the chances of it happening again. At iExpert Repairs, many of the overheating cases we diagnose could have been avoided with better charging practices, regular software maintenance, and improved device care.
Below are the most effective ways to keep your smartphone running cooler throughout the year.
1. Charge Your Phone in a Cool Environment
Charging naturally generates heat because electrical energy is converted into stored battery power. Charging in a hot room, inside a parked car, or under direct sunlight increases this heat even further.
For safer charging:
Place your phone on a hard, flat surface.
Avoid charging on beds, sofas, cushions, or blankets.
Keep the device away from radiators and windows exposed to direct sunlight.
If possible, remove thick protective cases while fast charging.
Keeping the surrounding temperature lower allows heat to dissipate more efficiently and helps protect the battery over time.
2. Use Genuine or Certified Charging Accessories
Low-quality chargers and damaged cables can deliver unstable power, causing unnecessary heat and increasing the risk of battery wear. Choose:
Original manufacturer chargers.
USB-C PD certified chargers.
MFi-certified Lightning accessories for iPhones.
High-quality USB cables from reputable brands.
Using reliable accessories helps maintain stable charging speeds and reduces stress on the phone’s power management system.
Comparison of Charging Accessories
Charger Type
Heat Generation
Recommended?
Manufacturer Original
Low
Yes
Certified Third-Party
Low
Yes
Cheap Unbranded Charger
High
No
Damaged Charging Cable
High
Replace Immediately
Unknown Fast Charger
Moderate to High
Use with Caution
3. Keep Your Software Up to Date
Software updates are about more than security. They often include improvements to battery optimisation, processor efficiency, and thermal management.
Regular updates can:
Reduce unnecessary background activity.
Improve charging behaviour.
Fix overheating-related software bugs.
Enhance battery performance.
Improve app compatibility.
If your device became warm after a recent update, allow a day or two for background optimisation before assuming there is a hardware fault.
4. Protect Your Phone from Extreme Temperatures
Both excessive heat and freezing conditions can affect battery performance. Avoid leaving your phone:
On a car dashboard.
Next to heaters.
In direct sunlight.
Near kitchen appliances.
Inside hot tents during summer.
Likewise, extremely cold conditions can temporarily reduce battery performance until the phone returns to a normal operating temperature.
5. Give Your Phone Time to Rest
Many people use their phones continuously throughout the day for gaming, streaming, navigation, photography, and social media. Allowing the device to cool between demanding tasks helps prevent heat from building up. Simple habits include:
Closing unused apps.
Locking the screen when not in use.
Restarting the phone every few days.
Taking short breaks during long gaming sessions.
These small changes reduce processor workload and improve overall stability.
Typical UK Phone Overheating Repair Costs
The cost of repairing an overheating phone depends on the underlying cause. A software optimisation may cost little or nothing, while board-level repairs require specialist diagnostics and equipment.
Repair Type
Typical UK Cost
Professional Diagnostic
£15-£35
Internal Cleaning
£20-£40
Battery Replacement
£40-£120
Charging Port Repair
£40-£100
Cooling / Thermal Optimisation
£30-£70
Power Management IC Repair
£90-£220
Motherboard Repair
£120-£300+
The exact price depends on the phone model, the extent of the damage, and whether multiple components require repair.
Typical Repair Times
Repair
Estimated Time
Diagnostic Assessment
20-40 Minutes
Software Optimisation
Same Day
Battery Replacement
45-90 Minutes
Charging Port Repair
1-2 Hours
Water Damage Diagnostic
Same Day
Motherboard Repair
1-3 Working Days
Most common overheating-related repairs can be completed on the same day, subject to parts availability.
FAQs About Phone Overheating
1. Is it normal for a phone to get warm while charging?
Yes. A slight increase in temperature during charging is normal. However, if the phone becomes too hot to comfortably hold, further investigation is recommended.
2. Can overheating permanently damage my phone?
Yes. Repeated overheating can shorten battery lifespan, reduce performance, and in severe cases damage internal components.
3. Does fast charging make phones hotter?
Yes. Fast charging naturally generates more heat than standard charging, although modern phones are designed to manage this safely.
4. Why does my phone overheat when gaming?
Games place heavy demands on the processor and graphics chip, increasing power consumption and heat output.
5. Can a bad battery cause overheating?
Absolutely. A degraded or damaged battery is one of the most common hardware-related causes of excessive heat.
6. Should I keep using my phone if it displays an overheating warning?
No. Stop using it, move it to a cooler location, and allow it to cool naturally before restarting.
7. Can phone cases trap heat?
Yes. Thick or rugged cases may reduce airflow during charging or gaming.
8. Why does my phone get hot after a software update?
New updates often trigger background optimisation tasks that temporarily increase processor activity.
9. Does wireless charging generate more heat?
Wireless charging can produce slightly more heat than wired charging due to energy transfer losses.
10. Can overheating affect battery life?
Yes. High temperatures accelerate battery degradation over time.
11. Is it safe to cool my phone in a fridge?
No. Rapid temperature changes can create condensation inside the device and lead to liquid damage.
12. When should I seek professional repair?
If overheating continues despite troubleshooting, or if accompanied by battery swelling, charging problems, or random shutdowns, arrange a professional diagnostic.
Final Thoughts
Phone overheating is often a symptom rather than the problem itself. While temporary warmth during charging or intensive use is perfectly normal, persistent or excessive heat usually indicates that something needs attention.
By following the troubleshooting steps in this guide, maintaining good charging habits, keeping your software updated, and recognising early warning signs, you can often prevent more serious hardware failures and extend the lifespan of your smartphone. If the issue persists, a professional diagnostic is the safest way to identify the root cause and avoid unnecessary repairs.
If your phone microphone is not working, begin by identifying whether the issue is caused by software or hardware. Restart your phone, remove the protective case, clean the microphone opening carefully, test the microphone using the Voice Recorder app, disconnect Bluetooth accessories, update the operating system, and check app permissions. If callers still cannot hear your voice or recordings remain silent, the microphone, charging port assembly, audio IC, flex cable, or motherboard may require professional repair. Most smartphone microphone repairs can be completed the same day by certified technicians using premium-quality replacement parts.
Expert Tip
Never insert needles, pins, paper clips, or other metal objects into your phone’s microphone hole. Modern smartphones use extremely sensitive MEMS microphones that can be permanently damaged by improper cleaning. If debris is blocking the microphone, use compressed air or a soft anti-static brush instead. If the problem persists after safe cleaning, professional diagnosis is the safest option.
Introduction
Your smartphone’s microphone plays a far bigger role than simply allowing people to hear your voice during calls. It is responsible for voice calls, video calls, voice notes, voice assistants, voice recordings, online meetings, social media videos, speech-to-text features, and countless other everyday tasks. When the microphone stops working correctly, even the simplest communication can become frustrating.
A faulty microphone may cause callers to hear nothing at all, hear your voice intermittently, experience distorted or muffled audio, or complain about excessive background noise. In some cases, the problem only affects specific apps such as WhatsApp, FaceTime, Zoom, Microsoft Teams, or Google Meet, while in others the microphone fails across the entire device.
The good news is that not every microphone problem requires replacing the phone or even replacing the microphone itself. Many issues are caused by software settings, blocked microphone ports, Bluetooth conflicts, app permissions, or temporary operating system glitches that can often be resolved within minutes.
The challenge is identifying the real cause before attempting a repair. Replacing the wrong component or attempting an unnecessary DIY repair can increase costs and may even cause further damage to your device.
Whether you own an iPhone, Samsung Galaxy, Google Pixel, Huawei, OnePlus, Oppo, Vivo, Sony Xperia, or another Android smartphone, the troubleshooting methods in this guide apply to almost every modern mobile device.
Why Is Your Phone Microphone Not Working?
Modern smartphones usually contain multiple microphones rather than just one. Depending on the device model, different microphones are used for:
Phone calls
Speakerphone calls
Voice recording
Video recording
Noise cancellation
Voice assistants
Video conferencing
Voice typing
This means a problem affecting one microphone may not affect the others. For example, your voice may sound perfectly clear during video recordings but disappear during normal phone calls, indicating that only one microphone has developed a fault.
Microphone problems can appear gradually or suddenly. Some develop after months of dust accumulation, while others occur immediately after dropping the phone, exposing it to water, or installing a software update. Some of the most common causes include:
Dust or lint blocking the microphone opening
Water or liquid damage
Physical impact after dropping the phone
Faulty charging port assembly
Damaged microphone flex cable
Software bugs
Corrupted operating system updates
Incorrect microphone permissions
Bluetooth audio conflicts
Worn internal components
Motherboard or Audio IC faults
Third-party accessories interfering with audio
Fortunately, many microphone issues are easier to fix than people expect. Our technicians regularly diagnose devices that appear to have failed microphones but actually only require software adjustments or careful cleaning.
Before You Attempt Any Microphone Repair
One of the biggest mistakes smartphone users make is immediately assuming the microphone has failed. Professional technicians always begin with a structured inspection before replacing any components. Before troubleshooting your phone, follow these essential preparation steps.
1. Back Up Your Important Data
If your smartphone still powers on normally, create a backup before performing advanced troubleshooting. Protect important information including:
Photos
Videos
Contacts
Messages
Notes
Documents
App data
Passwords
Although microphone troubleshooting is generally safe, any advanced software recovery procedure carries a small risk of data loss.
2. Remove Cases and Accessories
Many protective accessories partially cover microphone openings without users noticing. Before testing the microphone, remove:
Thick protective cases
Waterproof cases
Phone skins
External microphones
USB accessories
Headphones
Bluetooth devices
Even premium phone cases can occasionally interfere with microphone performance if they aren’t designed specifically for your phone model.
3. Inspect the Microphone Openings
Modern smartphones often have two or three microphone holes. Carefully inspect each one under bright lighting. Look for:
Pocket lint
Dust
Dirt
Dried liquid residue
Makeup or cosmetic residue
Food particles
Damage around the microphone grille
Bent frame after a drop
Many “broken” microphones simply have blocked microphone ports.
4. Determine Whether the Problem Is Software or Hardware
This is one of the most important steps during professional smartphone diagnostics.
Software Problems
Hardware Problems
App permissions
Water damage
Operating system bugs
Broken microphone
Bluetooth conflicts
Charging port assembly damage
Voice recorder errors
Flex cable failure
App crashes
Motherboard faults
Settings misconfiguration
Physical impact damage
Correctly identifying the cause prevents unnecessary repairs and saves both time and money.
From Our Repair Bench
At iExpert Repairs, we diagnose microphone faults on smartphones every day. Surprisingly, a significant number of devices booked in for “microphone replacement” don’t actually need a new microphone. In many cases, the issue is caused by compacted pocket lint blocking the microphone port, incorrect app permissions, Bluetooth devices accidentally taking over audio input, or software glitches following an operating system update.
That’s why our technicians always carry out a full diagnostic before replacing any parts. This approach helps customers avoid unnecessary repair costs while ensuring the real fault is identified first.
Why Is My Phone Microphone Not Working?
A faulty microphone can make your smartphone almost impossible to use. You may be unable to make phone calls, send voice notes, use voice assistants like Siri or Google Assistant, join video meetings, or record clear videos. Fortunately, a microphone problem doesn’t always mean the hardware has failed. In many cases, the issue is caused by software settings, blocked microphone holes, moisture, Bluetooth conflicts, or app permissions.
Our technicians at iExpert Repairs have repaired thousands of microphone-related issues across iPhones, Samsung Galaxy devices, Google Pixel phones, Huawei smartphones, OnePlus devices, and many other Android models throughout the UK. Based on that real-world experience, we’ve created this complete troubleshooting guide to help you identify the cause and determine whether a simple fix or a professional repair is required.
Common Signs of a Faulty Phone Microphone
Different microphone faults produce different symptoms. Recognising the signs helps narrow down the cause more quickly. You may notice:
People cannot hear you during phone calls.
Voice notes record no sound.
Your voice sounds muffled or distorted.
Siri or Google Assistant cannot hear commands.
Video recordings have no audio.
Speakerphone works but normal calls do not.
Only certain apps cannot detect your voice.
Audio cuts in and out randomly.
Calls constantly switch between clear and silent audio.
Microphone stops working after a phone drop or water exposure.
Some symptoms point towards software issues, while others indicate physical damage to one of the phone’s internal microphones. Most modern smartphones don’t have just one microphone. Premium devices usually contain two to four microphones, each serving a different purpose.
Microphone
Function
Primary microphone
Voice calls
Secondary microphone
Noise cancellation
Top microphone
Video recording
Rear microphone
Camera audio recording
This explains why:
Phone calls may fail while videos still record sound.
Voice Recorder works but WhatsApp doesn’t.
Speakerphone works while normal calls don’t.
Video recordings sound perfect but calls remain silent.
Professional technicians always identify which microphone has failed before recommending repairs.
Step 1: Restart Your Phone
A temporary software glitch is one of the easiest causes to eliminate. Restarting refreshes:
Audio drivers
Background services
Phone app
Voice processing
System cache
Many temporary microphone problems disappear after a simple restart. Although basic, this remains one of the first diagnostic steps our technicians perform.
Step 2: Test the Microphone Properly
Don’t rely only on phone calls. Instead, test multiple audio functions. Try:
Voice Recorder
WhatsApp Voice Notes
Camera Video Recording
Google Assistant
Siri
Zoom
Microsoft Teams
Voice Search
If Voice Recorder works but phone calls don’t, the issue is likely software-related rather than a damaged microphone. Testing multiple apps provides valuable clues before replacing any hardware.
Step 3: Check Microphone Permissions
Privacy settings may prevent apps from accessing your microphone. Review permissions for apps such as:
WhatsApp
Zoom
Teams
Messenger
Skype
Google Meet
Camera
On Android:
Settings → Privacy → Microphone Permission
On iPhone:
Settings → Privacy & Security → Microphone
If permission is disabled, the app cannot record your voice even if the microphone is fully functional.
Step 4: Clean the Microphone Openings
One of the most overlooked causes of poor microphone quality is dirt. Microphone holes easily collect:
Pocket lint
Dust
Makeup
Skin oils
Dirt
Fabric fibres
These tiny openings are extremely sensitive. Clean carefully using:
Soft anti-static brush
Microfibre cloth
Compressed air
Never use:
Pins
Needles
Toothpicks
Safety pins
Metal wire
These objects can permanently damage the microphone membrane. If your phone has also started producing distorted audio or you cannot hear callers properly, the problem may involve both the microphone and speaker system. In that case, read our How to Fix Phone Speaker Issues for a complete diagnosis.
Step 5: Disconnect Bluetooth Devices
Many users forget their phone remains connected to:
Wireless earbuds
Bluetooth headphones
Smart watches
Car audio systems
Portable speakers
If Bluetooth audio is active, your phone may be using another microphone instead of the built-in one. Try:
Disable Bluetooth.
Disconnect all paired devices.
Test your microphone again.
This simple step resolves many “microphone not working” complaints.
Step 6: Remove the Phone Case
Some rugged phone cases partially cover the microphone openings. This can cause:
Muffled audio
Quiet recordings
Distorted voice
Poor call quality
Remove the case temporarily and repeat the microphone tests.
Step 7: Install the Latest Software Updates
Operating system updates frequently include fixes for:
Audio drivers
Call quality
Voice processing
App compatibility
Security improvements
Check for updates.
iPhone
Settings → General → Software Update
Android
Settings → Software Update
Install official manufacturer updates only.
Step 8: Boot Into Safe Mode (Android)
Third-party applications occasionally interfere with microphone functionality. Safe Mode loads only essential system apps. If the microphone works normally in Safe Mode:
A recently installed app is likely responsible.
Remove suspicious apps.
Restart normally.
Test again.
Safe Mode is particularly useful after installing recording apps or call-recording software.
Step 9: Reset App Preferences or Network Settings
Corrupted settings may affect voice communication. Depending on your device, consider:
Reset Network Settings
Reset App Preferences
Reset All Settings
These options restore system configurations without immediately erasing personal files. A full factory reset should only be considered after backing up your important data and exhausting less invasive troubleshooting steps.
How to Fix a Phone Microphone After Water Damage?
Water damage is one of the most serious causes of microphone failure. Even a small amount of moisture can affect the delicate microphone membranes, audio circuits, and connectors inside your smartphone. While some devices have water-resistant ratings, no phone is completely waterproof, and prolonged exposure to liquids can still cause internal damage.
If your microphone stopped working after dropping your phone in water, spilling a drink on it, or getting caught in heavy rain, acting quickly can significantly improve the chances of a successful repair.
1. Turn Off Your Phone Immediately
If your phone is still switched on after water exposure, power it off as soon as possible. Continuing to use a wet phone can cause short circuits that damage the motherboard, charging IC, microphones, speakers, cameras, and display components. Remove the following if possible:
SIM card
Memory card
Protective case
External accessories
Leave the device switched off until it has been properly inspected or dried.
2. Dry the Outside Carefully
Use a clean, lint-free microfibre cloth to gently dry the exterior of the device. Pay particular attention to:
Bottom microphone holes
Charging port
Speaker grilles
SIM tray
Camera openings
Avoid shaking the phone, as this may push water deeper into the internal components.
3. Avoid Common DIY Mistakes
Many online “solutions” can actually make water damage worse.
Never:
Use a hairdryer.
Place the phone in an oven.
Leave it on a radiator.
Put it in direct sunlight for long periods.
Insert cotton buds or sharp objects into the microphone.
Charge the phone immediately.
Blow into the microphone holes.
One of the biggest myths is putting a wet phone in rice. For a complete step-by-step recovery process, read our Water Damaged Phone Repair guide, where our technicians explain what actually works and what should always be avoided.
4. Test the Microphone After Drying
Once the phone has dried naturally, test every microphone individually.
Check:
Phone calls
Speakerphone calls
Voice Recorder
Camera video recording
WhatsApp voice notes
Siri or Google Assistant
Sometimes only one microphone fails while the others continue working normally. Testing each function separately helps identify which microphone may be damaged.
5. Watch for Signs of Internal Corrosion
Even if the microphone starts working again, corrosion may continue developing inside the phone over the following days or weeks. Warning signs include:
Crackling audio
Muffled recordings
Random microphone failure
Speaker distortion
Charging problems
Camera issues
Unexpected shutdowns
Corrosion spreads gradually, which is why early professional cleaning often prevents much more expensive repairs later.
How to Fix a Phone Microphone After a Drop?
Dropping your smartphone can damage much more than the display. The impact may loosen internal connectors, damage the microphone module, or even affect the motherboard. If your microphone stopped working immediately after your phone was dropped, the problem is likely hardware-related.
1. Inspect the Device Carefully
Look for signs such as:
Cracked screen
Bent frame
Loose back glass
Damaged charging port
Cracked camera lens
Visible dents around the microphone area
Physical damage around the bottom edge of the phone often indicates impact near the primary microphone.
2. Test Different Recording Modes
Record audio using:
Front camera
Rear camera
Voice Recorder
Phone calls
Speakerphone
If only one function fails, technicians can identify which microphone requires replacement without replacing unnecessary components.
3. Check for Loose Internal Connections
Inside modern smartphones, microphones connect to the motherboard using delicate flex cables. A heavy drop may cause:
Loose connectors
Torn flex cables
Damaged microphone modules
Cracked solder joints
Motherboard faults
These issues require professional inspection because opening modern smartphones without specialist tools can damage waterproof seals, display cables, and Face ID or fingerprint components.
Signs Your Phone Needs Professional Microphone Repair
While many software-related microphone issues can be resolved at home, certain symptoms almost always require professional attention. Arrange a diagnostic if:
Nobody can hear you during calls.
Voice recordings contain no sound.
Audio cuts in and out constantly.
The microphone stopped working after water damage.
The problem began immediately after dropping the phone.
Cleaning the microphone made no difference.
Software updates have not resolved the issue.
Voice Assistant cannot detect your speech.
Multiple microphones have stopped working.
Other hardware problems have appeared alongside the microphone fault.
At iExpert Repairs, every device undergoes a comprehensive diagnostic before any repair is recommended. Our technicians identify the exact cause of the fault, ensuring only the necessary components are repaired or replaced. This approach helps avoid unnecessary costs while restoring your smartphone to full working order.
How Professional Technicians Diagnose Phone Microphone Problems
One of the biggest mistakes people make is assuming the microphone itself has failed. In reality, a microphone issue can originate from several different components, including the charging port assembly, audio IC, flex cables, motherboard, software, or even a blocked microphone mesh.
At iExpert Repairs, our certified technicians follow a structured diagnostic process before recommending any repair. This ensures that only the faulty component is repaired, saving customers unnecessary costs while restoring the device to full working order.
Step 1: Visual Inspection
Every repair begins with a careful external inspection. Technicians check for:
Impact damage
Bent frames
Cracked housings
Water indicators
Corrosion
Damaged microphone mesh
Loose charging ports
Previous repair work
Many microphone issues become obvious before the device is even opened.
Step 2: Software Diagnostics
Professional diagnostic software helps determine whether the microphone hardware is communicating correctly with the operating system. Technicians inspect:
Audio drivers
Microphone permissions
System logs
Error reports
Firmware version
App conflicts
Operating system integrity
Many intermittent microphone faults are resolved through software optimisation rather than hardware replacement.
Step 3: Audio Function Testing
Rather than relying on a single voice recording, technicians test every microphone individually. Typical tests include:
Standard phone calls
Speakerphone calls
Voice Recorder
Video recording
Noise cancellation
Voice Assistant
Third-party communication apps
Testing multiple audio functions helps identify exactly which microphone has failed.
Step 4: Internal Hardware Inspection
If software checks don’t identify the fault, the phone is carefully disassembled using specialist tools. Technicians inspect:
Microphone flex cables
Charging port assembly
Audio IC connections
Internal connectors
Moisture indicators
Corrosion
Motherboard damage
Because modern smartphones are tightly sealed with adhesive and waterproof gaskets, opening them without proper equipment can cause additional damage. This is why hardware inspections should always be carried out by experienced repair professionals.
Common Causes of Phone Microphone Failure
After repairing thousands of smartphones across the UK, we’ve found that most microphone problems fall into a small number of categories.
Cause
Typical Symptoms
Recommended Solution
Dust or debris
Muffled voice
Professional cleaning
Software bug
Microphone works intermittently
Software update or reset
Water damage
Distorted or no audio
Internal cleaning and diagnostics
Physical impact
Microphone stopped after a drop
Hardware inspection
Charging port assembly failure
Calls have no audio
Charging port replacement
Audio IC fault
Multiple microphones fail
Motherboard repair
Flex cable damage
Random microphone failure
Flex cable replacement
Manufacturing wear
Weak audio on older phones
Component replacement
Understanding the underlying cause prevents unnecessary repairs and helps restore reliable audio performance.
DIY Repair vs Professional Microphone Repair
Although basic troubleshooting is safe for most users, replacing a smartphone microphone is a complex repair that requires specialist tools and experience.
Task
DIY Suitable
Technician Required
Restart the phone
Suitable
Required
Update the software
Suitable
–
Clean the microphone openings
Suitable
–
Check microphone permissions
Suitable
–
Test the microphone using the Voice Recorder app
Suitable
–
Disconnect Bluetooth devices
Suitable
–
Replace the microphone module
–
Required
Replace the charging port with microphone assembly
–
Required
Repair the Audio IC
–
Required
Repair motherboard faults
–
Required
Clean and repair water-damaged components
–
Required
Attempting advanced repairs without the correct tools may damage waterproof seals, display assemblies, Face ID components, fingerprint sensors, or the motherboard, significantly increasing repair costs.
Why Choose iExpert Repairs for Phone Microphone Repairs?
When your microphone stops working, you need more than just a replacement part – you need an accurate diagnosis from experienced professionals.
At iExpert Repairs, we’ve been repairing smartphones for over 10 years, helping customers across the UK restore clear call quality, reliable voice recording, and full microphone functionality. We repair microphone faults on:
Whether the issue is caused by liquid damage, accidental drops, worn charging port assemblies, or motherboard faults, our certified technicians use premium-quality replacement parts and manufacturer-approved repair procedures to ensure long-lasting results.
Why Customers Trust iExpert Repairs
Over 10 years of smartphone repair experience.
Certified repair technicians.
Professional diagnostic service before every repair.
Premium-quality replacement components.
Same-day repairs on most devices.
UK-wide secure mail-in repair service.
Free tracked return delivery.
12-month warranty on most repairs.
If your phone has additional issues such as a cracked display, charging fault, battery problem, speaker failure, or camera malfunction.
How to Prevent Phone Microphone Problems?
While not every microphone fault can be avoided, good maintenance habits can significantly reduce the risk of expensive repairs. At iExpert Repairs, we’ve found that many microphone issues are caused by everyday wear, accidental damage, or poor charging and cleaning practices rather than manufacturing defects.
Following these simple tips can help keep your phone’s microphones working properly for years.
1. Keep the Microphone Openings Clean
Your smartphone’s microphone holes are exposed to dust, pocket lint, and other debris every day. Over time, this buildup can muffle your voice or reduce recording quality.
To keep them clean:
Wipe your phone regularly with a soft microfibre cloth.
Use a soft anti-static brush to remove dust.
Store your phone in a clean pocket or bag.
Avoid placing the phone on dirty surfaces.
Never insert needles, pins, or other sharp objects into the microphone openings, as this can permanently damage the sensitive microphone membrane.
2. Protect Your Phone from Drops
Accidental drops remain one of the leading causes of microphone failure. Even if the screen doesn’t crack, the impact can damage internal microphone components, flex cables, or the motherboard. Reduce the risk by:
Using a high-quality protective case.
Installing a tempered glass screen protector.
Avoiding carrying your phone loosely with keys or coins.
Keeping a secure grip when using your phone outdoors.
If your phone has recently been dropped and you’re experiencing multiple problems such as display damage or touch issues alongside microphone failure, our Phone Touch Screen Not Responding? explains how impact damage can affect several components at once.
3. Avoid Water and Excess Moisture
Although many modern smartphones offer some level of water resistance, no device is completely immune to liquid damage.
To reduce the risk:
Keep your phone away from swimming pools and sinks.
Avoid using it in heavy rain whenever possible.
Never charge a wet phone.
Dry the device immediately if it becomes damp.
If liquid has already entered your phone, follow the advice in our Water Damaged Phone Repair guide before attempting to use or charge the device again.
4. Use High-Quality Accessories
Poor-quality accessories can sometimes contribute to hardware problems over time. Whenever possible, use:
Manufacturer-approved chargers.
Certified USB cables.
Reliable power adapters.
Quality protective cases.
Cheap accessories may cause charging instability, electrical fluctuations, or overheating that can affect other internal components.
5. Keep Your Software Updated
Manufacturers regularly release software updates that improve:
Audio processing
Call quality
Security
System stability
App compatibility
Performance
Installing official updates helps prevent software bugs that may interfere with microphone functionality. Avoid downloading unofficial firmware or software from untrusted sources, as these can introduce compatibility issues and compromise device security.
When Should You Replace Your Phone Instead of Repairing It?
Not every microphone fault means it’s time to buy a new smartphone. In many cases, repairing the device is far more affordable than replacing it, particularly if the problem is limited to the microphone or another single component. Repairing your phone is usually the best option when:
Only the microphone has failed.
The device is otherwise in good condition.
The repair cost is significantly lower than buying a replacement.
The phone still receives software updates.
You want to keep your existing data and apps.
However, replacing the device may be the more practical choice if:
The motherboard has severe liquid damage.
Multiple expensive components have failed.
Repair costs approach the value of the phone.
The device is very old and no longer supported by the manufacturer.
Frequently Asked Questions
1. Why can’t people hear me during phone calls?
This is commonly caused by a blocked microphone, incorrect microphone permissions, software issues, water damage, or a faulty microphone module. Testing the microphone with Voice Recorder can help determine whether the problem is hardware or software related.
2. Can a phone microphone be repaired?
Yes. In many cases, a faulty smartphone microphone can be repaired or replaced without replacing the entire phone. Professional technicians first perform diagnostics to identify the exact cause before recommending any repair.
3. How much does microphone repair cost in the UK?
The cost depends on your phone model and the underlying fault. A simple microphone replacement is generally less expensive than repairing motherboard-related audio issues. A professional diagnostic provides the most accurate quotation.
4. Can dust stop my microphone from working?
Yes. Dust, lint, and debris can block the microphone openings, making your voice sound muffled or preventing clear audio recording. Careful cleaning often restores normal performance if no hardware damage is present.
5. Why does my microphone work on speakerphone but not during normal calls?
Modern smartphones contain multiple microphones. If only one microphone has failed, some functions may continue working while others do not. Professional testing can identify which microphone requires repair.
6. Can water permanently damage a phone microphone?
Yes. If moisture reaches the internal microphone components, corrosion may develop and cause permanent damage. Switching the phone off immediately and arranging professional cleaning offers the best chance of successful recovery.
7. Is it safe to replace a phone microphone yourself?
Modern smartphones are highly compact and sealed. Replacing a microphone requires specialist tools and experience, making professional repair the safest option for most users.
8. How long does microphone repair usually take?
Most standalone microphone repairs can often be completed on the same day, depending on the device model and the availability of replacement parts. More complex repairs involving liquid damage or motherboard faults may take longer.
9. Why is my phone microphone so quiet during calls?
A quiet microphone is often caused by dust blocking the microphone opening, a damaged microphone mesh, incorrect noise cancellation settings, a phone case covering the microphone, or internal hardware damage. Start by cleaning the microphone carefully, removing the phone case, and testing the microphone using Voice Recorder. If callers still struggle to hear you, professional diagnostics may be needed.
10. Can software updates fix phone microphone problems?
Yes. Software updates often include bug fixes for audio processing, microphone performance, call quality, and app compatibility. Before considering a hardware repair, install the latest official software update for your iPhone or Android device and test the microphone again.
11. Why does my phone microphone stop working after getting wet?
Water can damage the microphone membrane, connectors, or internal audio circuits. Even if the phone appears to work normally, corrosion may develop over time and cause poor audio quality or complete microphone failure. Turn the device off immediately, avoid charging it, and have it professionally inspected as soon as possible.
12. How Long Does a Phone Microphone Repair Usually Take?
Most standalone microphone repairs can often be completed on the same day, depending on your phone model and the availability of replacement parts. More complex repairs involving water damage or motherboard faults may require additional diagnostic time. At iExpert Repairs, most common smartphone repairs are completed quickly and backed by a 12-month warranty.
Final Thoughts
A clear and reliable microphone is essential for calls, voice notes, video meetings, voice assistants, and emergency communication. When your phone microphone stops working, the cause isn’t always obvious. In some cases, a simple settings change or software update is enough to restore normal performance, while in others, the problem may be linked to internal hardware that requires specialist attention.
The safest approach is to work through each troubleshooting step methodically rather than jumping straight to repairs or replacing your device. Identifying the real cause can save time, reduce unnecessary costs, and prevent accidental damage from incorrect DIY fixes.
If the issue persists after completing the checks in this guide, a professional diagnostic is the most reliable way to confirm whether the fault lies with the microphone itself or another internal component. An accurate diagnosis ensures the correct repair is carried out the first time, helping restore clear audio and reliable performance without replacing parts that don’t need changing.
For more smartphone troubleshooting advice, explore our complete repair guides covering charging problems, speaker faults, water damage, touchscreen issues, and overall smartphone diagnostics. If you need expert assistance, you can also book a repair with iExpert Repairs, where our experienced team provides trusted smartphone repair services for customers across the UK.
How Much Does Phone Microphone Repair Cost in the UK?
The cost of repairing a phone microphone in the UK depends on your smartphone model, the type of fault, and whether the issue is caused by a blocked microphone, liquid damage, a damaged charging port assembly, or a motherboard-related audio IC fault. Minor issues such as microphone cleaning are generally inexpensive, while board-level repairs require advanced diagnostics and specialist equipment.
Below are the typical price ranges for common microphone repairs across the UK.
Repair Type
Typical UK Cost (2026)
Microphone Cleaning
£15-£30
Charging Port with Microphone Assembly
£40-£90
iPhone Microphone Repair
£45-£120
Samsung Microphone Repair
£40-£110
Audio IC / Motherboard Repair
£90-£220
The final repair cost depends on your device model, the extent of the damage, and whether additional components require replacement. At iExpert Repairs, every device undergoes a professional diagnostic assessment before any repair is carried out, ensuring you receive an accurate quotation with no unnecessary work. Most microphone repairs can be completed on the same day using premium-quality replacement parts and are backed by our 12-month warranty.
Typical Phone Microphone Repair Times
The repair time for a faulty phone microphone varies depending on the type of fault and whether additional components require replacement. Most common microphone repairs can be completed on the same day, while more complex motherboard repairs may take longer because they require detailed diagnostics and precision board-level work.
Repair Type
Typical Repair Time
Microphone Cleaning
20-30 Minutes
Microphone Replacement
45-90 Minutes
Charging Port with Microphone Assembly
1-2 Hours
Water Damage Diagnostics
Same Day
Audio IC / Motherboard Repair
1-3 Working Days
Repair times may vary depending on the device model, parts availability, and the severity of the fault. At iExpert Repairs, our certified technicians carry out a full diagnostic assessment before beginning any repair, helping ensure accurate turnaround times and high-quality results.
The best way to fix a phone is to first identify whether the problem is software- or hardware-related. Start with simple troubleshooting steps such as restarting the device, updating the software, checking battery health, cleaning the charging port, freeing up storage, and testing with an original charger. If your phone has a cracked screen, water damage, battery failure, charging port issues, or motherboard faults, professional repair is usually the safest and most cost-effective solution. Most common smartphone repairs can be completed on the same day by certified technicians using high-quality replacement parts.
Expert Tip: Avoid opening your phone yourself unless you have the proper tools and repair experience. Modern smartphones are sealed devices, and incorrect DIY repairs can cause further damage or void any remaining warranty.
Introduction
A smartphone has become much more than a communication device. It stores your memories, helps you work remotely, manages your finances, provides navigation, and keeps you connected with family, friends, and colleagues. So when your phone suddenly stops working properly, it can disrupt your entire day.
Whether you’re dealing with a cracked screen, battery problems, charging issues, overheating, water damage, camera failures, speaker problems, or software glitches, many phone issues can often be diagnosed and, in some cases, resolved without immediately replacing the device.
The challenge is knowing which problems you can safely fix yourself and which require professional attention. Attempting the wrong repair can sometimes turn a simple issue into an expensive motherboard repair.
Why Do Phones Stop Working?
Modern smartphones contain thousands of tiny electronic components working together inside an incredibly compact design. Even a minor fault can affect the entire device. Some issues develop gradually over months, while others occur instantly after a drop, software update, or exposure to water.
The most common causes include:
Physical impact damage
Battery wear
Charging port contamination
Liquid damage
Faulty software updates
Component ageing
Manufacturing defects
Excessive heat
Third-party accessories
Motherboard failures
Fortunately, not every issue requires expensive repairs. In fact, experienced technicians estimate that many smartphone problems originate from software settings, dirt build-up, worn accessories, or batteries reaching the end of their lifespan.
Understanding the real cause is the first step toward finding the right solution.
Signs Your Phone Needs Attention
Ignoring small issues often leads to larger and more expensive repairs later. Watch for warning signs such as:
Symptom
Possible Cause
Phone won’t turn on
Battery, charging IC, motherboard
Screen cracked
Physical impact
Battery drains quickly
Battery degradation
Device overheats
Background apps or hardware fault
Charging is inconsistent
Dirty or damaged charging port
No sound
Speaker failure or software issue
Camera won’t focus
Camera module damage
Random restarts
Software corruption or battery fault
Touchscreen not responding
Digitiser damage
Wi-Fi keeps disconnecting
Network settings or antenna issue
Recognising these symptoms early can prevent further damage and reduce repair costs.
Before You Attempt Any Phone Repair
One of the biggest mistakes people make is trying random internet fixes without first protecting their data. Before troubleshooting your smartphone, follow these essential preparation steps.
1. Back Up Your Data
If your phone still powers on, create a complete backup immediately. Protect items such as:
Photos
Videos
Contacts
Messages
Documents
Notes
Passwords
App data
A hardware failure can occur unexpectedly, making data recovery much more difficult.
2. Remove Accessories
Before inspecting your phone, remove:
Protective case
Screen protector (only if severely damaged)
SIM card
Memory card
External accessories
Sometimes accessories themselves interfere with charging, signal strength, or button functionality.
3. Inspect the Device Carefully
Take a few minutes to examine the phone under good lighting. Check for:
Cracks
Bent frame
Water inside cameras
Loose buttons
Dirt in charging port
Speaker blockage
Swollen battery
Burn marks
Corrosion
Many faults become obvious after a simple visual inspection.
4. Identify Whether the Issue Is Software or Hardware
This is one of the most important steps in smartphone diagnostics.
Software Problems
Hardware Problems
Apps crashing
Broken screen
Slow performance
Water damage
Update failures
Dead battery
Bluetooth bugs
Charging port damage
Wi-Fi glitches
Camera failure
Phone freezing
Speaker damage
Knowing the difference saves time and prevents unnecessary repairs.
How to Diagnose Your Phone Correctly?
Professional technicians rarely begin by replacing parts immediately. Instead, they follow a structured diagnostic process to isolate the fault before carrying out any repair. A simple diagnosis often includes checking:
Battery health
Charging voltage
Screen functionality
Internal sensors
Software logs
Storage health
Network connectivity
Speaker output
Camera performance
Physical damage
Following a logical process helps avoid replacing perfectly functional components.
Start With the Simplest Fixes First
Many smartphone problems can be resolved within minutes without opening the device. Begin with these quick checks:
1. Restart Your Phone
Restarting clears temporary memory, refreshes system processes, and resolves many software glitches.
2. Check Available Storage
Nearly full storage can cause:
Slow performance
Camera failures
App crashes
Update errors
Aim to keep at least 10-20% of your storage free for optimal performance.
3. Install Software Updates
Manufacturers regularly release updates that fix:
Performance issues
Battery bugs
Security vulnerabilities
Camera improvements
Connectivity problems
Always install updates from official sources.
4. Remove Recently Installed Apps
If problems started immediately after installing a new application, uninstall it temporarily to see whether the issue disappears. Poorly optimised apps often cause:
Battery drain
Overheating
Freezing
Random restarts
5. Test With Original Accessories
A surprising number of charging problems are caused by:
Cheap USB cables
Low-quality charging adapters
Damaged charging bricks
Whenever possible, test using the original manufacturer-approved charger.
Understanding the Most Common Smartphone Problems
Over the past decade, our technicians have repaired thousands of smartphones across the UK. While every device is different, certain faults appear far more frequently than others.
The most common smartphone repair requests include:
Cracked screens
Battery replacement
Charging port repairs
Water damage recovery
Camera repairs
Speaker replacement
Microphone issues
Software troubleshooting
Back glass replacement
Motherboard diagnostics
Each of these issues requires a different repair approach. Some can be safely addressed at home, while others demand specialist tools, genuine-quality replacement parts, and professional expertise.
For example, if your phone refuses to charge, it’s worth reading our dedicated guide on Why Is My Phone Not Charging? Guide, where we explain charging faults, battery problems, charging port issues, and practical solutions in greater detail. Likewise, if your device has suffered physical damage, our Mobile Phone Repair Guide provides a complete overview of the professional repair process, helping you understand what to expect before booking a repair.
How to Fix a Phone That Won’t Turn On
One of the most worrying smartphone problems is pressing the power button and getting no response. A phone that won’t turn on doesn’t always mean it’s permanently damaged. In many cases, the issue is caused by a drained battery, a software crash, a faulty charging accessory, or a damaged charging port rather than a major hardware failure.
Before assuming your device needs replacing, work through the following troubleshooting steps. These simple checks can often restore your phone without the need for professional repairs.
1. Check Whether the Battery Is Completely Drained
If your battery has been fully discharged, your phone may need several minutes before showing any sign of life. Try the following:
Connect the phone to an original or high-quality charger.
Leave it charging for 20-30 minutes.
Avoid using wireless charging if it isn’t responding.
Check whether the charging icon appears.
Sometimes the battery is so deeply discharged that the display remains black for several minutes before charging begins.
2. Perform a Force Restart
If your phone has frozen because of a software crash, a normal press of the power button may not work. A force restart can often solve the issue.
General methods include:
iPhone: Press Volume Up, then Volume Down, then hold the Side Button.
Samsung Galaxy: Hold the Power and Volume Down buttons together.
Google Pixel: Hold the Power button for around 30 seconds.
Huawei:Hold the Power button until the device restarts.
A forced restart refreshes the operating system without deleting your personal data.
3. Inspect the Charging Port
Dust, pocket lint, and debris often prevent proper charging. Carefully inspect the charging port using a torch. Look for:
Dust build-up
Bent connector pins
Moisture
Corrosion
Loose charging socket
Never use metal objects to clean the port. Instead, use compressed air or a soft plastic cleaning tool. If your phone only charges when the cable is held at a certain angle, the charging port may need professional replacement.
If you’re already experiencing charging issues, our guide on Why Is My Phone Not Charging? explains how to diagnose charging faults in greater detail before deciding whether a repair is required.
4. Look for Physical Damage
Carefully inspect your phone for visible signs of damage. Common indicators include:
Cracked display
Bent frame
Swollen battery
Water inside the camera lenses
Burn marks
Loose buttons
Even if the screen remains black, the phone may still be running in the background. Signs include:
Vibrations
Notification sounds
Incoming calls
Charging sounds
If these are present, the display may have failed rather than the phone itself.
5. Try Recovery or Safe Mode
Sometimes software corruption prevents Android phones from booting correctly. Booting into Recovery Mode or Safe Mode can help identify whether the problem is caused by a third-party application or a failed software update.
Possible fixes include:
Clearing the cache partition
Removing problematic apps
Installing pending updates
Performing a factory reset (only after backing up data)
Factory resetting should always be considered a last resort because it erases personal data stored on the device.
Common Reasons a Phone Won’t Turn On
Possible Cause
Symptoms
Recommended Solution
Flat battery
No response at all
Charge for 30 minutes
Faulty charger
Battery not charging
Test another charger
Charging port damage
Intermittent charging
Clean or replace charging port
Software crash
Black screen
Force restart
Screen failure
Phone vibrates but display stays black
Screen replacement
Water damage
Random behaviour
Professional cleaning
Motherboard fault
Completely dead phone
Advanced diagnostics
How to Fix a Phone That Won’t Charge
Charging issues are among the most common smartphone repair requests received by technicians across the UK. Fortunately, many of these problems have straightforward solutions that don’t require replacing the device.
Before booking a repair, try the following checks.
1. Test a Different Charger
Charging accessories wear out over time. Replace both:
Charging cable
Power adapter
If another charger works normally, your phone is likely not the problem.
2. Clean the Charging Port
Pocket lint can block the charging connector surprisingly quickly. Use:
Compressed air
Soft anti-static brush
Plastic cleaning pick
Avoid:
Pins
Needles
Screwdrivers
These can permanently damage the charging contacts.
3. Check for Moisture Warnings
Many smartphones stop charging automatically when moisture is detected. If you recently exposed your phone to:
Rain
Humidity
Water splashes
Allow it to dry naturally before attempting to charge again. Never use hairdryers or direct heat.
4. Update the Software
Charging bugs occasionally appear after operating system updates. Installing the latest software version can resolve:
Slow charging
Charging interruptions
Incorrect battery percentage readings
Know When the Charging Port Needs Repair
Professional repair is usually required if:
Cable feels loose
Charging constantly disconnects
Device only charges at certain angles
Port is visibly damaged
Cleaning doesn’t solve the issue
Certified technicians can replace the charging port using premium-quality components while fully testing charging performance before returning your device.
Battery life naturally declines as smartphones age, but excessive battery drain can also result from software issues, background activity, poor charging habits, or failing hardware. If your phone no longer lasts through the day, don’t assume the battery immediately needs replacing. A few simple adjustments can often improve performance significantly.
Start by checking which apps are consuming the most power through your phone’s battery usage settings. Social media apps, GPS services, video streaming platforms, and games are common causes of rapid battery drain. Closing unnecessary background apps and reducing screen brightness can also help extend battery life.
Other practical ways to improve battery performance include:
Enable Battery Saver or Low Power Mode.
Turn off Bluetooth, GPS, and Wi-Fi when not needed.
Reduce screen timeout duration.
Disable background app refresh for non-essential apps.
Keep your operating system updated.
Avoid exposing your phone to excessive heat.
If your battery continues to drain unusually fast even after optimisation, it may have reached the end of its lifespan. Most smartphone batteries begin to lose capacity after 2–3 years of regular use and may require replacement.
Signs You May Need a New Battery
Symptom
Likely Cause
Recommended Action
Battery drains within hours
Battery wear
Battery health check
Phone shuts down unexpectedly
Weak battery cells
Battery replacement
Device becomes hot while charging
Battery degradation
Professional inspection
Battery percentage jumps suddenly
Software or battery fault
Diagnostics required
Swollen battery
Safety hazard
Stop using the phone immediately
How to Fix a Cracked Phone Screen?
A cracked screen is one of the most common smartphone problems. While a small crack may seem harmless at first, it can quickly worsen over time and affect your phone’s display, touch sensitivity, and even its internal components.
Minor cosmetic damage may allow you to continue using the device temporarily, but deep cracks can expose the display to dust, moisture, and accidental pressure, increasing the likelihood of complete screen failure. Before replacing the screen, assess the extent of the damage.
1. Check the Severity of the Damage
Ask yourself the following questions:
Is the touch screen still responsive?
Are there black spots or coloured lines on the display?
Is the glass lifting from the frame?
Does the display flicker?
Are sharp glass fragments exposed?
Can you still unlock and use the phone normally?
If the damage is limited to the outer glass, the phone may still function correctly for a short period. However, if the OLED or LCD panel underneath has been damaged, professional screen replacement is usually required.
2. Temporary Steps to Prevent Further Damage
Until you arrange a repair, you can minimise additional damage by following these precautions:
Apply a temporary screen protector if the glass is stable.
Avoid placing pressure on the damaged display.
Keep the phone away from water and dust.
Back up your important data as soon as possible.
Avoid placing the phone in a pocket with keys or coins.
These measures won’t repair the screen but can help prevent the damage from becoming worse.
3. When Should You Replace the Screen?
Professional screen replacement is recommended if:
The display remains black.
Touch is partially or completely unresponsive.
The screen flickers continuously.
Green, purple, or white lines appear.
The glass is severely shattered.
Parts of the display are missing.
Modern smartphones use advanced OLED and AMOLED displays that require specialist tools for safe replacement.
How to Fix a Phone Touchscreen That Is Not Responding
An unresponsive touchscreen makes even the simplest tasks difficult. Fortunately, touch issues are not always caused by hardware damage. Software glitches, insufficient storage, faulty apps, moisture, or screen protectors can also affect touch performance.
Begin by identifying when the issue occurs. For example:
Does touch stop working after unlocking?
Is only part of the screen affected?
Does the issue appear after installing an app?
Does the phone respond after restarting?
These observations help determine whether the fault is software- or hardware-related.
1. Restart the Device
Restarting clears temporary system errors that may interfere with touchscreen responsiveness. If your screen is completely frozen, perform a force restart using your device’s button combination.
2. Remove the Screen Protector
Low-quality or damaged tempered glass protectors sometimes reduce touch sensitivity. Temporarily remove the protector and test the display again.
4. Free Up Storage
Phones with extremely low storage often experience:
Touch lag
App crashes
Slow animations
Frozen screens
Aim to keep at least 10-20% of your storage free.
5. Check for Software Updates
Manufacturers frequently release updates that improve:
Display responsiveness
Touch calibration
System stability
Bug fixes
Keeping your phone updated reduces the risk of software-related touch issues.
6. When Is Screen Replacement Necessary?
Professional repair is recommended if:
Touch no longer works after a drop.
The display has visible cracks.
Only sections of the screen respond.
Ghost touches appear.
The phone selects items without being touched.
How to Fix a Phone That Keeps Overheating?
It’s normal for smartphones to become slightly warm during gaming, video editing, or fast charging. However, excessive heat can damage the battery, reduce performance, and shorten your device’s lifespan.
If your phone frequently overheats during normal use, investigate the cause before permanent damage occurs.
1. Common Causes of Overheating
The most common reasons include:
Gaming for extended periods.
High screen brightness.
Background apps.
Faulty batteries.
Poor signal strength.
Charging while using the phone.
Malware.
Hot weather.
2. Ways to Cool Down Your Phone
Follow these simple steps:
Remove the protective case temporarily.
Close unnecessary apps.
Reduce display brightness.
Turn off unused features such as Bluetooth and GPS.
Avoid direct sunlight.
Pause gaming while charging.
Restart the device.
These actions often reduce internal temperatures within a few minutes.
3. When Overheating Requires Professional Repair
Seek professional assistance if:
The phone becomes extremely hot every day.
The battery begins swelling.
Performance drops significantly.
Charging causes excessive heat.
The device shuts down automatically.
Persistent overheating may indicate battery degradation or internal hardware faults.
How to Fix a Phone Camera That Is Not Working?
Modern smartphone cameras contain advanced sensors, image stabilisation systems, autofocus motors, and AI processing features. Even a minor fault can prevent the camera from functioning correctly.
Common camera problems include:
Black camera screen.
Blurry photos.
Camera app crashes.
Autofocus not working.
Camera shaking.
Flash not working.
1. Basic Camera Troubleshooting
Before considering repairs:
Restart the phone.
Update the Camera app.
Clean the camera lens using a microfibre cloth.
Remove any bulky case blocking the lens.
Check storage space.
Install pending software updates.
Many software-related camera issues can be resolved with these simple steps.
2. When Camera Repair Is Needed
Professional camera replacement may be required if:
The lens is cracked.
Water has entered the camera module.
Autofocus has completely failed.
Images remain blurry after cleaning.
The camera app cannot detect the hardware.
Our detailed article How to Fix a Phone Camera Not Working? explains camera diagnostics, common faults, and repair options for iPhone, Samsung Galaxy, Google Pixel, Huawei, and other smartphone brands.
Expert Advice Before Booking a Repair
Before replacing any smartphone component, it’s important to identify the root cause rather than guessing. Many problems that appear to require expensive repairs are actually caused by software bugs, worn charging accessories, or simple maintenance issues. Following a structured troubleshooting process can save both time and money.
However, if your phone has suffered water damage, severe impact damage, battery swelling, motherboard faults, or complete display failure, continuing to use it may cause further internal damage. In these situations, it’s safest to stop using the device and have it inspected by certified smartphone repair specialists.
At iExpert Repairs, our technicians carry out professional diagnostics before recommending any repair. Whether you own an iPhone, Samsung Galaxy, Google Pixel, Huawei, or another Android device, every repair uses premium-quality replacement parts, includes comprehensive testing, and is backed by a 12-month warranty. With our convenient UK-wide mail-in repair service, same-day repairs, and Fix Now, Pay Later with Klarna, getting your smartphone back to full working order has never been easier.
How to Fix Phone Speaker Problems?
If you can’t hear calls, music sounds distorted, or your loudspeaker suddenly stops working, don’t assume the speaker has failed. Many speaker problems are caused by software settings, dirt buildup, or moisture rather than damaged hardware.
Start with the simplest troubleshooting steps before considering a repair.
1. Check the Volume Settings
It sounds obvious, but many speaker issues are caused by incorrect settings.
Make sure:
Media volume is turned up.
Silent Mode is disabled.
Do Not Disturb is turned off.
Bluetooth audio isn’t connected to another device.
Restart the phone after adjusting the settings.
2. Clean the Speaker Grilles
Over time, dust, pocket lint, and debris can block the speaker openings.
Clean carefully using:
A soft anti-static brush
Compressed air
A clean microfibre cloth
Avoid inserting metal objects into the speaker, as they can permanently damage the delicate speaker mesh.
3. Test Different Audio Sources
Try:
Playing YouTube videos
Making a phone call
Using speakerphone
Listening with headphones
This helps determine whether the issue affects the loudspeaker, earpiece, microphone, or software.
4. When Does the Speaker Need Repair?
Professional repair is usually required if:
No sound comes from the speaker.
Audio crackles continuously.
Sound is extremely quiet.
Water has entered the speaker.
The phone was dropped before the problem started.
If your phone’s audio isn’t working correctly, our detailed guide How to Fix Phone Speaker Issues explains every possible cause and solution.
How to Fix Phone Wi-Fi Problems?
Wi-Fi issues can prevent you from browsing the internet, downloading apps, streaming videos, or using online services.
Fortunately, many connection problems can be fixed within a few minutes.
1. Restart Your Router and Phone
This simple step often resolves temporary connection problems.
Restart:
Your smartphone
Your Wi-Fi router
Your broadband modem (if separate)
Then reconnect.
2. Forget the Network
If your phone repeatedly disconnects:
Open Wi-Fi Settings.
Select your network.
Tap Forget Network.
Reconnect using your password.
This refreshes the connection settings.
3. Check for Software Updates
Wi-Fi bugs occasionally appear after operating system updates.
Installing the latest software often resolves:
Random disconnections
Slow Wi-Fi speeds
Authentication errors
4. Reset Network Settings
If the problem continues:
Reset Wi-Fi settings.
Reset Bluetooth settings.
Reset Mobile Network settings.
This won’t delete your personal data but will remove saved network connections.
How to Fix Phone Bluetooth Problems?
Bluetooth allows smartphones to connect with wireless headphones, speakers, smartwatches, and vehicles. When Bluetooth stops working, the problem is often software-related.
Try these solutions:
Restart Bluetooth.
Restart your phone.
Remove old paired devices.
Pair again from scratch.
Update your phone software.
Ensure the accessory battery isn’t flat.
If none of these steps help, there may be an issue with the phone’s Bluetooth antenna or motherboard.
Water damage is one of the most serious smartphone problems because moisture can affect the battery, charging port, display, cameras, speakers, and motherboard. Quick action significantly improves the chances of a successful repair.
1. What to Do Immediately
If your phone gets wet:
Turn it off immediately.
Remove the SIM card.
Remove any protective case.
Dry the exterior with a soft cloth.
Keep the device upright.
Avoid charging the phone until it has been professionally inspected or has completely dried.
2. What You Should Never Do
Avoid these common mistakes:
Don’t use a hairdryer.
Don’t place the phone on a radiator.
Don’t charge it immediately.
Don’t shake the phone.
Don’t put it in rice.
Rice cannot remove moisture trapped inside modern smartphones and may leave dust particles inside the charging port.
3. Why Professional Cleaning Matters
Liquid damage often causes corrosion inside the device. Professional technicians can:
Some smartphone problems are safe to troubleshoot yourself, while others require specialist tools and technical expertise.
Issue
DIY Troubleshooting
Professional Repair Recommended
Restarting the phone
✔
Cleaning charging port
✔
Software updates
✔
Removing unnecessary apps
✔
Battery replacement (modern phones)
✔
Screen replacement
✔
Charging port replacement
✔
Camera replacement
✔
Water damage
✔
Motherboard repair
✔
Attempting complex repairs without the correct tools may cause additional damage and increase repair costs.
Why choose iExpert Repairs to fix your phone?
When your smartphone needs expert attention, choosing an experienced repair provider makes all the difference. At iExpert Repairs, we provide trusted smartphone repair services for customers throughout the UK.
Fix Now, Pay Later with Klarna available at checkout.
Whether you’re in London, Birmingham, Manchester, Glasgow, Liverpool, Leeds, Sheffield, Bristol, or anywhere else in the UK, our convenient mail-in service makes professional smartphone repairs simple and reliable.
How to Fix a Phone: FAQs
1. Can I fix my phone myself?
Yes, you can fix some common phone problems yourself, such as restarting a frozen device, updating the software, clearing storage, cleaning the charging port, or replacing a faulty charging cable. However, hardware issues like cracked screens, battery replacement, water damage, charging port repairs, and motherboard faults should be handled by certified repair technicians to avoid further damage.
2. What is the most common phone problem?
The most common smartphone problems include cracked screens, battery drain, charging issues, overheating, water damage, touchscreen problems, speaker faults, camera issues, and software glitches. Most of these problems can be diagnosed through basic troubleshooting before deciding whether professional repair is needed.
3. How do I know if my phone has a hardware or software problem?
Software problems usually cause app crashes, freezing, slow performance, or system errors and can often be resolved with updates or resets. Hardware problems typically involve physical damage, charging port failures, battery issues, broken screens, or faulty internal components that require professional repair.
4. Why won’t my phone turn on even after charging?
If your phone won’t turn on after charging, the battery may be completely discharged, the charging port may be damaged, the charger could be faulty, or there may be a software crash or motherboard issue. Try using a different charger, performing a force restart, and checking for visible damage before seeking professional diagnostics.
5. How can I fix a phone that won’t charge?
Start by testing another charging cable and adapter, cleaning the charging port, restarting the phone, and checking for software updates. If your phone still won’t charge or only charges at certain angles, the charging port or battery may require replacement by a qualified technician.
6. Why is my phone battery draining so quickly?
Rapid battery drain can be caused by background apps, high screen brightness, outdated software, poor network coverage, excessive gaming, or an ageing battery. Optimising your settings may improve battery life, but older batteries often need replacing after two to three years of regular use.
7. Is it worth repairing a cracked phone screen?
In most cases, yes. Replacing a cracked screen is usually much more affordable than buying a new smartphone, especially for premium devices like iPhones, Samsung Galaxy phones, and Google Pixel models. Repairing the screen also helps prevent further internal damage caused by dust or moisture.
Yes, many water-damaged phones can be repaired if action is taken quickly. Turn the device off immediately, avoid charging it, and have it inspected by professional technicians as soon as possible. Early cleaning and corrosion removal greatly increase the chances of a successful repair.
9. Why is my phone overheating?
Phones commonly overheat because of intensive gaming, prolonged camera use, background apps, charging while in use, high temperatures, or battery problems. If your device overheats regularly during normal use, it should be professionally inspected to prevent long-term damage.
10. How much does phone repair cost in the UK?
The cost of phone repair in the UK depends on the device model and the type of repair required. Screen replacements, battery replacements, charging port repairs, and camera repairs all vary in price. Requesting a professional diagnostic is the best way to receive an accurate repair quote.
11. How long does a phone repair usually take?
Many common smartphone repairs, including screen and battery replacements, can often be completed on the same day. More complex repairs, such as water damage recovery or motherboard repairs, may take longer depending on the extent of the damage and the availability of replacement parts.
12. Do professional phone repairs come with a warranty?
Most reputable repair providers offer a warranty on their repairs. At iExpert Repairs, most repairs are backed by a 12-month warranty, giving customers added confidence in the quality of the replacement parts and workmanship.
Final Thoughts
Learning how to fix a phone starts with identifying the real cause of the problem rather than guessing. Many issues, including charging problems, battery drain, overheating, connectivity errors, and software glitches, can often be resolved with safe troubleshooting techniques. However, hardware faults such as cracked screens, water damage, failed batteries, charging port issues, and motherboard problems should be handled by experienced professionals to avoid further damage.
If you’ve worked through the troubleshooting steps in this guide and your phone still isn’t functioning correctly, professional diagnostics can help identify the issue quickly and prevent unnecessary repair costs.
At iExpert Repairs, our certified technicians repair thousands of smartphones every year using premium-quality parts and industry-approved repair procedures. Every repair is thoroughly tested, backed by a 12-month warranty, and supported by our convenient UK-wide mail-in service. Whether you own an iPhone, Samsung Galaxy, Google Pixel, Huawei, or another smartphone, we’re here to help you get back up and running with fast, reliable, and affordable repairs.
If your laptop fan is loud, it’s usually because the cooling system is working harder than normal to remove excess heat. Common causes include dust blocking the vents, high CPU or GPU usage, too many background programs, outdated drivers, malware, failing fan bearings, dried thermal paste, or poor airflow. In many cases, cleaning the cooling system and reducing system load solves the problem, but persistent loud fan noise may indicate that the cooling hardware needs professional repair.
Is It Normal for a Laptop Fan to Be Loud?
Not always.
Every laptop contains one or more cooling fans designed to remove heat from the processor, graphics chip and other internal components. During demanding activities such as gaming, video editing, software development or running multiple applications, the fan naturally spins faster to keep temperatures under control.
However, if your laptop fan suddenly becomes much louder during light tasks like web browsing, watching videos or working on documents, it usually indicates that something is forcing the cooling system to work harder than it should.
Ignoring persistent fan noise can eventually lead to overheating, slower performance, unexpected shutdowns and, in severe cases, permanent damage to internal components.
Signs Your Laptop Fan Noise Could Be a Problem
A loud fan is often accompanied by other warning signs that shouldn’t be ignored.
Symptom
Possible Cause
Fan constantly running at high speed
High CPU usage or overheating
Laptop feels extremely hot
Blocked airflow or cooling failure
Slow performance
Thermal throttling
Unexpected shutdowns
Critical overheating
Grinding or rattling sounds
Worn or damaged fan bearings
Fan speed constantly changes
Software or driver issues
Fan remains loud after startup
Background processes or hardware fault
If your laptop has also started running slowly, it’s worth reading our guide on How to Fix a Slow Laptop?, as overheating and poor performance often occur together.
How Does a Laptop Cooling System Work?
Understanding how your cooling system works makes it much easier to identify why the fan has become noisy. A typical laptop cooling system consists of:
Cooling fan
Heat sink
Heat pipes
Air vents
Thermal paste
Temperature sensors
When the processor or graphics chip begins producing heat, the thermal paste transfers that heat into the heat sink through copper heat pipes. The cooling fan then pushes hot air out through the exhaust vents while drawing cooler air into the laptop.
If any part of this process becomes less efficient, the fan must work significantly harder to maintain safe operating temperatures.
What Happens When the Cooling System Can’t Keep Up?
When cooling efficiency drops, your laptop automatically increases fan speed to protect sensitive components. This usually happens in stages:
Temperature Condition
Laptop Response
Slight temperature increase
Fan speed increases slightly
Moderate heat
Fan becomes clearly audible
High temperature
Fan runs at maximum speed
Critical temperature
CPU performance is reduced (thermal throttling)
Dangerous temperature
Laptop may shut down automatically
Thermal throttling protects your processor but also makes the laptop feel much slower than usual.
If you’ve noticed both excessive heat and reduced battery life, the issue may also be linked to battery health. Our guide on Why Is My Laptop Battery Not Charging? explains how power-related problems can contribute to higher system temperatures.
Why You Shouldn’t Ignore a Loud Laptop Fan
Many people continue using their laptop because “it’s still working.” Unfortunately, this can make the problem much worse. A constantly overworked cooling system can lead to:
Higher internal temperatures
Reduced processor performance
Faster battery degradation
Premature SSD and motherboard wear
Unexpected crashes
Automatic shutdowns
Shorter overall laptop lifespan
In repair workshops, we often see laptops that initially only had excessive fan noise but later required expensive motherboard or cooling system repairs because the warning signs were ignored.
Early diagnosis is almost always faster, cheaper and easier than repairing damage caused by prolonged overheating.
Common Situations Where Laptop Fans Become Loud
A noisy fan doesn’t always indicate a fault. Some activities naturally generate much more heat than others. Your laptop fan may become noticeably louder while:
Playing modern PC games
Editing 4K videos
Rendering 3D graphics
Running virtual machines
Using AI software
Performing Windows updates
Installing large applications
Running antivirus scans
Connecting multiple external displays
Charging while performing demanding tasks
In these situations, temporary fan noise is completely normal. However, if the fan continues running loudly long after these tasks have finished, further investigation is recommended.
1. Dust Build-Up Inside the Cooling System
The most common reason a laptop fan suddenly becomes loud is dust. Even if your laptop looks clean from the outside, fine dust particles gradually collect inside the cooling system, especially around the fan blades, heat sink and air vents.
As the dust layer becomes thicker, airflow is restricted and hot air can no longer escape efficiently. To compensate, the fan spins much faster and stays active for longer periods, creating the loud humming or whirring noise many users notice.
This problem is especially common in laptops that are more than a year old or are regularly used on beds, carpets, sofas or other soft surfaces where dust and fibres can easily be drawn into the cooling vents.
Common Signs
Fan becomes louder every month.
Laptop feels unusually warm underneath.
Airflow from the vents feels weak.
Performance drops during everyday tasks.
Fan continues running even when the laptop is idle.
How to Fix It
Start by turning the laptop off and disconnecting the charger. Inspect the cooling vents for visible dust and gently clean them using compressed air. Avoid inserting sharp objects into the vents, as this can damage the fan blades.
If the laptop has not been cleaned internally for several years, a professional internal cleaning is often the safest and most effective solution.
2. High CPU Usage
Your laptop fan automatically speeds up whenever the processor begins generating more heat. Sometimes this is expected, but in many cases unnecessary background activity is responsible.
Applications such as Google Chrome with dozens of open tabs, video editing software, games, Windows updates and cloud synchronisation tools can all place heavy demand on the processor. Even a single application consuming excessive CPU resources can cause the cooling fan to run continuously at maximum speed.
How to Check CPU Usage
On Windows:
Ctrl + Shift + Esc → Task Manager → Processes
Look for applications consistently using a high percentage of CPU resources. On macOS:
Activity Monitor → CPU
Sort processes by CPU usage to identify any software consuming unusually high system resources.
How to Fix It
Close programs you no longer need.
Reduce the number of browser tabs.
Restart the laptop.
Disable unnecessary startup applications.
Update resource-intensive software.
3. Too Many Background Programs
Many users only look at the applications they can see on the screen, but dozens of background processes may be running without their knowledge.
Examples include:
Cloud backup software
Antivirus scans
Windows indexing
Driver update utilities
Messaging applications
RGB control software
Printer services
Software launchers
Individually these consume little power, but together they can keep the processor constantly busy.
Signs
Fan becomes loud shortly after startup.
CPU usage remains high while the laptop appears idle.
Battery drains faster than usual.
Laptop becomes warm without heavy use.
Fix
Disable unnecessary startup applications through Task Manager or System Settings and uninstall software you no longer use.
4. Malware or Hidden Background Activity
A laptop that suddenly develops loud fan noise without any obvious reason may have unwanted software running in the background.
Certain types of malware secretly consume processor resources by mining cryptocurrency, displaying hidden advertisements or performing other malicious activities. This significantly increases CPU temperatures, forcing the cooling fan to run constantly.
Warning Signs
Fan runs loudly even when no applications are open.
CPU usage remains unusually high.
Laptop becomes slower than normal.
Battery drains rapidly.
Frequent pop-ups or unexpected browser behaviour.
What to Do
Run a full Windows Security scan.
Update your antivirus software.
Remove suspicious applications.
Check browser extensions.
Install the latest Windows security updates.
Removing malicious software often restores normal processor temperatures almost immediately.
5. Blocked Air Vents
Laptop cooling systems depend on unrestricted airflow. If the intake or exhaust vents are blocked, hot air becomes trapped inside the chassis, forcing the fan to work continuously.
Many users unknowingly block the vents by using their laptop on:
Beds
Sofas
Cushions
Blankets
Carpets
Their lap for extended periods
Soft materials prevent cool air from entering the laptop and dramatically reduce cooling efficiency.
Best Practice
Always place your laptop on a hard, flat surface such as a desk or table. If you regularly perform demanding tasks like gaming, video editing or programming, using a quality laptop cooling stand can further improve airflow.
6. Dried or Worn Thermal Paste
Thermal paste sits between the processor and the heat sink, helping transfer heat away from the CPU efficiently. Over time, especially after several years of use, this material begins to dry out and lose its effectiveness.
When this happens:
Heat transfer becomes inefficient.
Processor temperatures rise quickly.
Cooling fan operates at much higher speeds.
Laptop performance may decrease due to thermal throttling.
Signs That Thermal Paste May Need Replacing
Symptom
Likely Cause
Fan always loud
Poor heat transfer
CPU temperature rises rapidly
Dried thermal paste
Laptop overheats under light use
Reduced cooling efficiency
Performance drops after a few minutes
Thermal throttling
Replacing thermal paste requires partial disassembly of the laptop and should usually be performed by an experienced technician to avoid damaging delicate internal components.
7. Outdated Drivers or BIOS
Your laptop’s BIOS and system drivers play an important role in temperature management and fan control. Manufacturers regularly release updates that improve cooling performance, optimise fan curves and fix bugs affecting thermal management.
An outdated BIOS can sometimes cause the fan to run unnecessarily fast even when temperatures are normal.
Recommended Updates
BIOS
Chipset drivers
Graphics drivers
Windows updates
Manufacturer support software
Download updates directly from your laptop manufacturer’s official website to avoid compatibility issues.
8. Demanding Software and Games
Modern software places much greater demand on laptop hardware than standard office work. Activities that commonly increase fan noise include:
AAA gaming
Video editing
3D rendering
Artificial intelligence applications
CAD software
Large spreadsheet calculations
Virtual machines
Live streaming
During these workloads, louder fan operation is completely normal because the processor and graphics chip generate significantly more heat. However, if fan noise continues long after you’ve closed these applications, another cooling issue is likely present.
At iExpert Repairs, we frequently find that laptops suffering from persistent loud fan noise have more than one contributing factor – for example, dust build-up combined with ageing thermal paste or high background CPU usage. Identifying the exact cause early can prevent overheating from developing into more serious hardware faults.
9. Worn or Failing Fan Bearings
If your laptop fan produces a grinding, rattling, buzzing or clicking sound instead of a smooth airflow noise, the fan itself may be wearing out.
Laptop cooling fans contain small bearings that allow the blades to rotate smoothly. After years of continuous use, these bearings can wear down, causing the fan to become noisy even when the laptop isn’t particularly hot. Unlike dust or software-related issues, a worn fan won’t improve with cleaning alone.
Common Symptoms
Grinding or scraping noises.
Clicking sounds while the fan is spinning.
Fan speed constantly fluctuates.
Loud noise immediately after startup.
Noise becomes worse over time.
Can You Continue Using the Laptop?
It is possible for a short period, but it isn’t recommended. A failing fan can eventually stop spinning altogether, preventing the cooling system from removing heat. This significantly increases the risk of overheating and potential damage to the processor or motherboard.
If the fan is physically damaged, replacing it is usually the safest long-term solution. At iExpert Repairs, we replace faulty cooling fans using high-quality compatible parts and thoroughly test the cooling system before returning the device.
10. Faulty Temperature Sensors
Modern laptops rely on multiple temperature sensors to monitor the CPU, GPU and motherboard. These sensors constantly report temperatures to the BIOS, which automatically adjusts fan speed.
If a sensor begins sending incorrect readings, the laptop may incorrectly assume it is overheating and force the fan to run at maximum speed, even when internal temperatures are normal.
Fan speed changes suddenly without heavy workload.
Because faulty sensors are integrated into the motherboard, diagnosis usually requires professional testing.
11. Charging Can Increase Fan Noise
Many people notice that their laptop fan becomes louder while charging. This is completely normal to some extent.
Charging the battery generates additional heat, and if you’re simultaneously running demanding software, the cooling system has to remove heat from both the processor and the battery.
This Is Usually Normal When
Gaming while charging.
Editing videos.
Running large software updates.
Using external monitors.
Rendering graphics.
It May Indicate a Problem If
The fan remains extremely loud long after charging finishes.
The laptop becomes unusually hot around the battery.
Charging is inconsistent.
The battery drains unusually quickly.
12. Motherboard or Power Component Problems
Although less common, certain motherboard faults can also cause excessive fan activity.
Problems involving the charging circuit, voltage regulators, processor power delivery or graphics components may generate additional heat that forces the cooling fan to operate continuously. These issues cannot normally be diagnosed without specialist equipment.
Possible Symptoms
Loud fan despite low CPU usage.
Frequent blue screen errors.
Unexpected shutdowns.
Burning smell.
Charging problems.
Laptop fails to boot consistently.
Board-level repairs should always be carried out by experienced technicians because modern laptop motherboards contain delicate surface-mounted components that require specialist repair equipment.
How to Fix a Loud Laptop Fan?
Once you’ve identified the likely cause, the next step is resolving it safely. Start with the simplest fixes before considering hardware repairs.
Step 1: Restart Your Laptop
A simple restart can clear temporary software glitches, background processes and stuck system services that may be causing unnecessary processor activity.
Many users notice quieter fan operation immediately after restarting.
Step 2: Close Resource-Heavy Applications
Open Task Manager (Windows) or Activity Monitor (Mac) and identify applications consuming excessive CPU resources. Close programs that are no longer needed, especially:
Use compressed air to remove dust from the intake and exhaust vents. Hold the can upright and apply short bursts rather than continuous airflow.
Never insert metal objects into the vents or attempt to force the fan blades to rotate at high speed, as this can damage the cooling system.
Step 4: Place the Laptop on a Hard Surface
Always use your laptop on a desk or table. Avoid:
Beds
Cushions
Blankets
Sofas
Thick carpets
Good airflow alone can reduce internal temperatures by several degrees.
Step 5: Reduce Startup Applications
Many unnecessary applications launch automatically every time Windows starts. Disabling unused startup programs reduces processor usage and helps the fan return to normal operating speeds more quickly.
Windows
Task Manager → Startup Apps
Disable applications you don’t need immediately after booting.
Step 6: Scan for Malware
Run a complete antivirus scan using Windows Security or another trusted security solution. Hidden malware often keeps the processor under constant load, resulting in continuous fan noise. Removing malicious software frequently restores normal cooling performance.
Step 7: Update Windows, Drivers and BIOS
Installing the latest software updates can improve thermal management and correct fan-control bugs. Check for updates to:
Windows
BIOS
Graphics drivers
Chipset drivers
Manufacturer utilities
Always download BIOS updates directly from your laptop manufacturer’s official support website.
Step 8: Monitor CPU Temperatures
Temperature-monitoring software can help determine whether your laptop is genuinely overheating. As a general guide:
CPU Temperature
Condition
35-50°C
Excellent at idle
50-70°C
Normal everyday use
70-85°C
Heavy workload
Above 90°C
Excessive heat requiring attention
Consistently high temperatures suggest the cooling system requires cleaning or repair.
Step 9: Replace Thermal Paste (Advanced)
If your laptop is several years old and continues overheating after cleaning, dried thermal paste may be reducing heat transfer.
Replacing thermal paste can lower processor temperatures significantly, but because it involves dismantling the cooling assembly, it’s generally recommended for experienced technicians.
Step 10: Replace the Cooling Fan
If the fan produces grinding, clicking or rattling sounds even after cleaning, the fan motor has likely reached the end of its lifespan. Replacing the cooling fan restores quiet operation and prevents future overheating.
Which Fix Works Best?
Problem
Recommended Solution
Dust inside vents
Clean cooling system
High CPU usage
Close demanding applications
Too many startup programs
Disable unnecessary startup apps
Malware
Perform a full antivirus scan
Outdated BIOS
Install latest updates
Dried thermal paste
Replace thermal compound
Grinding fan noise
Replace cooling fan
Constant overheating
Professional cooling system inspection
Motherboard fault
Board-level diagnosis and repair
In many cases, a combination of cleaning, software optimisation and proper airflow is enough to solve the problem. However, if the fan remains excessively loud despite these steps, the issue is likely hardware-related and should be professionally diagnosed before overheating causes more expensive damage.
When Is a Loud Laptop Fan a Serious Problem?
A laptop fan that occasionally becomes louder during demanding tasks is completely normal. However, if the noise is persistent or accompanied by other symptoms, it may indicate a more serious issue that requires attention.
You should arrange a professional inspection if you notice any of the following:
The fan remains at maximum speed even when the laptop is idle.
The laptop becomes too hot to touch.
Performance slows down significantly after a few minutes of use.
The laptop shuts down unexpectedly.
You hear grinding, clicking or rattling noises.
The fan stops spinning intermittently.
Warning messages about high CPU temperatures appear.
The laptop freezes or crashes during everyday tasks.
Ignoring these warning signs can allow excessive heat to damage the processor, graphics chip, SSD, battery or even the motherboard, resulting in far more expensive repairs.
Can You Continue Using a Laptop With a Loud Fan?
It depends on the cause. If the fan only becomes louder while gaming, editing videos or running demanding software, and the noise returns to normal afterwards, there is usually no cause for concern.
However, if the fan is constantly loud during light tasks such as browsing the internet or checking emails, it’s best to investigate the problem as soon as possible. Continuing to use an overheating laptop for extended periods can reduce component lifespan and increase the risk of hardware failure.
Laptop Fan Noise Troubleshooting Checklist
Before booking a repair, work through this simple checklist.
Check
Completed
Restarted the laptop
✓
Closed unnecessary applications
✓
Checked CPU usage
✓
Cleaned the air vents
✓
Scanned for malware
✓
Installed Windows updates
✓
Updated BIOS and drivers
✓
Used the laptop on a hard surface
✓
Checked CPU temperatures
✓
Listened for grinding or rattling noises
✓
If you’ve completed these steps and the fan is still unusually loud, a hardware inspection is recommended.
How to Prevent Your Laptop Fan From Becoming Loud Again
Regular maintenance can significantly reduce fan noise and help extend your laptop’s lifespan.
1. Keep the Cooling Vents Clean
Dust is one of the biggest causes of overheating. Cleaning the vents regularly helps maintain proper airflow and prevents the fan from working harder than necessary.
2. Avoid Blocking Airflow
Always place your laptop on a flat, solid surface. Soft materials such as beds, blankets and cushions block the cooling vents and trap heat inside the device.
3. Limit Unnecessary Background Programs
Running dozens of applications simultaneously increases processor workload and heat generation. Close software you aren’t actively using.
4. Keep Windows and Drivers Updated
Software updates often include improvements to power management, cooling performance and fan control.
5. Monitor Laptop Temperatures
If you regularly use your laptop for gaming, editing or professional workloads, checking system temperatures occasionally can help you spot cooling issues before they become serious.
6. Schedule Professional Internal Cleaning
For laptops used daily, especially in dusty environments, an internal cleaning every 12 to 18 months can remove accumulated dust, improve airflow and reduce fan noise.
Professional Laptop Fan Repair Across the UK
If your laptop fan continues making excessive noise after basic troubleshooting, professional repair is often the safest solution.
At iExpert Repairs, our certified technicians diagnose the root cause rather than simply replacing parts unnecessarily. Whether the problem is a blocked cooling system, worn fan bearings, dried thermal paste or a motherboard fault, we carry out a full inspection before recommending the most cost-effective repair.
Our laptop repair services include:
Cooling fan replacement
Internal dust removal
Thermal paste replacement
Heat sink servicing
BIOS diagnostics
Motherboard repair
Charging circuit repairs
Full overheating diagnostics
Performance optimisation
We repair all major laptop brands, including Apple MacBook, HP, Dell, Lenovo, ASUS, Acer, Microsoft Surface, MSI, Samsung and many others.
Whether you visit our Essex repair centre or use our secure nationwide mail-in service, every repair is completed using premium-quality replacement parts and backed by a 12-month warranty for added peace of mind.
Why Is My Laptop Fan So Loud? – FAQs
1. Why is my laptop fan so loud all of a sudden?
A laptop fan can suddenly become loud if the system detects higher-than-normal temperatures. This may happen because of dust blocking the cooling vents, high CPU usage, multiple background applications, Windows updates, gaming, video editing, malware or a failing cooling fan. If the fan remains noisy even when the laptop is idle, it’s a good idea to inspect the cooling system or have the device professionally diagnosed.
2. Is it normal for a laptop fan to be loud?
Yes, but only under certain conditions. It’s perfectly normal for your laptop fan to become louder while gaming, editing videos, rendering graphics or running demanding software. However, if the fan stays loud during light tasks such as browsing the web or checking emails, there may be an underlying cooling or hardware issue that needs attention.
3. Why is my laptop fan loud even when I’m not using it?
If your laptop fan continues running loudly while the device is idle, background processes may be consuming system resources. Windows updates, antivirus scans, cloud synchronisation, malware or unnecessary startup applications can all increase processor activity and cause the cooling fan to run continuously.
4. Can dust make my laptop fan louder?
Yes. Dust is one of the most common reasons for excessive fan noise. Over time, dust accumulates inside the cooling system, reducing airflow through the heat sink and vents. As temperatures rise, the fan spins faster to compensate, making it much louder than normal.
5. How do I stop my laptop fan from being so loud?
Start by closing unnecessary applications, cleaning the cooling vents, checking CPU usage, updating Windows and drivers, scanning for malware and ensuring the laptop is placed on a hard surface with good airflow. If these steps don’t reduce the noise, the cooling fan or thermal paste may need professional attention.
6. Why is my laptop fan loud after a Windows update?
Some Windows updates temporarily increase processor usage while installing files, rebuilding indexes or performing background optimisation. During this process, the cooling fan may run faster. If the fan remains loud for several days after the update has completed, investigate other possible causes such as software conflicts or outdated drivers.
7. Can overheating cause a loud laptop fan?
Absolutely. Overheating is one of the primary reasons a laptop fan becomes noisy. As internal temperatures increase, the cooling system automatically raises fan speed to remove excess heat and protect sensitive components from damage.
8. Why is my gaming laptop fan always loud?
Gaming laptops are designed to handle powerful processors and graphics cards that generate significant heat. During gaming, the cooling fans often operate at high speeds to maintain safe temperatures. However, if the fan becomes unusually loud during light use, the cooling system may require cleaning or servicing.
9. Can malware cause my laptop fan to run constantly?
Yes. Certain types of malware secretly consume CPU resources by running hidden processes in the background. This increases processor temperatures and forces the cooling fan to work harder. Running a full antivirus scan can help identify and remove malicious software.
10. How can I check if my laptop fan is faulty?
Signs of a faulty laptop fan include grinding noises, clicking sounds, rattling, inconsistent fan speeds, overheating despite low CPU usage or the fan failing to spin altogether. These symptoms usually indicate worn bearings or mechanical failure, which often requires fan replacement.
11. Why is my laptop fan loud while charging?
Charging generates additional heat inside the laptop. If you’re simultaneously using demanding applications, the processor and battery produce even more heat, causing the fan to spin faster. This is generally normal unless the fan remains excessively loud after charging has finished.
A laptop that won’t connect to WiFi can be incredibly frustrating, especially when you need internet access for work, online meetings, studying, gaming, or streaming. Sometimes the problem is as simple as an incorrect password or Airplane Mode being enabled. In other cases, the issue may be caused by outdated network drivers, Windows updates, router problems, damaged wireless hardware, or motherboard faults.
The good news is that many WiFi connection problems can be fixed at home without replacing your laptop. By following a logical troubleshooting process, you can often restore your wireless connection in just a few minutes.
In this complete UK guide, you’ll learn:
Why your laptop isn’t connecting to WiFi
The most common hardware and software causes
Step-by-step fixes you can safely try yourself
When professional laptop repair is required
Typical UK repair costs for WiFi-related faults
How to prevent future wireless connection problems
Whether you own an HP, Dell, Lenovo, ASUS, Acer, Microsoft Surface, gaming laptop, or MacBook, this guide will help you identify the cause and get your laptop back online.
Quick Answer
If your laptop isn’t connecting to WiFi, one of the following issues is usually responsible.
Possible Cause
Can You Fix It Yourself?
WiFi turned off
Yes
Airplane Mode enabled
Yes
Wrong WiFi password
Yes
Router problem
Yes
Windows network glitch
Yes
Outdated WiFi driver
Yes
Faulty Windows update
Yes
Network adapter settings
Yes
Damaged WiFi card
Usually No
Motherboard fault
No
If basic troubleshooting doesn’t restore your internet connection, the problem may involve faulty internal hardware that requires professional diagnosis.
Who Is This Guide For?
This guide is designed for anyone experiencing WiFi connectivity problems on a laptop, including:
Students attending online classes
Remote workers relying on video meetings
Business users
Gamers experiencing unstable internet
Home users with slow or unreliable WiFi
Owners of HP, Dell, Lenovo, ASUS, Acer, Microsoft Surface and MacBook laptops
Whether your laptop cannot detect WiFi, keeps disconnecting, or connects without internet access, the troubleshooting steps in this guide will help you identify the cause before paying for unnecessary repairs.
Common Symptoms of a Laptop That Won’t Connect to WiFi
Not every WiFi problem looks the same. The symptoms your laptop displays can often help identify whether the issue is caused by software, hardware, your router, or your internet service.
Internet works on other devices but not the laptop
Laptop software or hardware fault
Laptop only connects near the router
Weak wireless antenna or interference
WiFi stopped working after a Windows update
Driver compatibility issue or corrupted update
Laptop keeps asking for the WiFi password
Incorrect credentials or router authentication problem
WiFi works after restarting but fails again later
Driver conflicts, overheating, or hardware fault
Understanding these symptoms can help you narrow down the cause and avoid unnecessary repairs.
Why Is My Laptop Not Connecting to WiFi?
A laptop’s wireless connection depends on several components working together, including the WiFi adapter, wireless antenna, network drivers, operating system, router, modem, and your internet service provider. If any of these components develops a fault, your laptop may struggle to detect, connect to, or maintain a stable WiFi connection.
Sometimes the solution is as simple as restarting your router or reconnecting to the network. In other situations, the issue may involve corrupted drivers, damaged wireless hardware, motherboard faults, or software conflicts that require professional diagnosis.
Before assuming the worst, work through the most common causes one step at a time.
1. WiFi Has Been Turned Off
One of the simplest reasons your laptop won’t connect to WiFi is that the wireless function has been disabled.
Many laptops include a dedicated WiFi key or keyboard shortcut that can accidentally switch wireless networking off. In Windows, the WiFi adapter may also be disabled through system settings.
Signs
No available WiFi networks appear.
The WiFi icon is missing or replaced by an Ethernet symbol.
Airplane Mode is turned off but wireless networks still don’t appear.
Other devices connect to the same router without any issues.
How to Fix It
Make sure WiFi is enabled in Windows Settings.
Check whether your laptop has a physical WiFi switch or keyboard shortcut (such as Fn + F2, Fn + F5, or Fn + F12, depending on the manufacturer).
Restart your laptop after enabling WiFi. If the adapter still doesn’t appear, open Device Manager and check whether the wireless network adapter has been disabled. Fortunately, this is one of the easiest WiFi problems to resolve and usually doesn’t require any repairs.
2. Airplane Mode Is Enabled
Airplane Mode disables all wireless communications, including WiFi and Bluetooth. Many users accidentally enable it using a keyboard shortcut or through Windows Quick Settings without realising it.
Common Signs
No wireless networks are visible.
The Airplane icon appears in the taskbar.
Bluetooth also stops working.
Ethernet continues working normally.
How to Fix It
Open Quick Settings and ensure Airplane Mode is switched off. You can also check:
Settings → Network & Internet → Airplane Mode
Turn Airplane Mode off and wait a few seconds for available WiFi networks to appear. If WiFi still doesn’t return, restart the laptop and check whether the wireless adapter has been disabled.
3. Incorrect WiFi Password
Sometimes the problem isn’t your laptop at all – it’s simply using the wrong wireless password.
This often happens after changing your router password, replacing your broadband router, or attempting to connect to a different network with a similar name.
Symptoms
Windows repeatedly asks for the password.
The laptop attempts to connect before immediately disconnecting.
Other devices using the correct password connect normally.
The message “Can’t connect to this network” appears.
How to Fix It
Select Forget Network in Windows WiFi settings. Search for your WiFi network again.
Enter the correct password carefully, paying attention to uppercase and lowercase letters. If you’re unsure of the password, check the label on your router or log into the router’s administration settings.
Once the correct credentials are entered, your laptop should reconnect automatically whenever the network is available. If the connection still fails despite using the correct password, continue with the next troubleshooting steps, as the problem may involve Windows, your network adapter, or the router itself.
4. Your Router or Broadband Connection Has a Problem
Sometimes the issue isn’t your laptop at all. Your wireless router, modem, or broadband service may be temporarily unavailable, preventing your laptop from connecting to the internet.
Power outages, ISP maintenance, router firmware issues, or overheating can all interrupt your wireless connection.
Common Signs
Other devices also cannot access the internet.
Your laptop connects to WiFi but shows “No Internet”.
The router’s internet light is red or flashing.
Web pages fail to load on every connected device.
Restarting the laptop doesn’t solve the issue.
How to Fix It
Restart both your modem and wireless router by unplugging them from the power supply for around 60 seconds before turning them back on.
Wait a few minutes for the connection to fully re-establish. Try connecting another device, such as a smartphone, to the same WiFi network. If none of your devices have internet access, the problem is likely with your broadband provider rather than your laptop. If only your laptop cannot connect while other devices work normally, continue with the troubleshooting steps below.
5. Outdated or Corrupted WiFi Drivers
Your wireless driver allows Windows to communicate with the laptop’s WiFi hardware. If the driver becomes outdated, corrupted, or incompatible after an update, your laptop may fail to detect or connect to wireless networks.
Driver-related issues are among the most common causes of WiFi problems on Windows laptops.
Symptoms
WiFi disappears after a Windows update.
The wireless adapter shows a warning icon in Device Manager.
WiFi disconnects randomly.
Windows reports that no wireless adapter is installed.
The connection works only after restarting the laptop.
How to Fix It
Open Device Manager and expand Network Adapters.
Locate your wireless adapter. Right-click the adapter and choose Update Driver. If updating doesn’t help, uninstall the driver and restart the laptop. Windows will usually reinstall a compatible version automatically.
For the best results, download the latest driver directly from your laptop manufacturer’s support website. Keeping your drivers up to date can improve both connection stability and wireless performance.
6. A Recent Windows Update Caused the Problem
Windows updates improve security and system stability, but occasionally they introduce compatibility issues with wireless drivers. Many users notice WiFi problems immediately after installing a major Windows update.
Common Signs
WiFi stopped working after installing updates.
The wireless adapter disappears from Device Manager.
Available networks no longer appear.
Internet worked perfectly before the update.
How to Fix It
Check for any additional driver updates through Windows Update. If the issue started immediately after a recent update, uninstall the latest quality update through Windows Recovery or Windows Update History.
You can also restore your laptop to a previous restore point if one is available.
If your laptop has become unstable following a Windows update or is experiencing broader performance issues, our guide How to Fix a Slow Laptop? explains additional optimisation steps that may help restore overall system stability.
7. The Network Adapter Has Been Disabled
Your laptop’s wireless network adapter can sometimes become disabled due to software changes, driver conflicts, BIOS settings, or accidental configuration changes. When this happens, Windows cannot communicate with the WiFi hardware even though it is physically installed.
Symptoms
No WiFi icon appears in Windows.
Device Manager shows the adapter as disabled.
Troubleshooting reports that wireless capability is turned off.
Other networking features continue working normally.
How to Fix It
Open Device Manager. Expand Network Adapters.
If your wireless adapter has a small downward arrow, right-click it and select Enable Device. You should also check Settings > Network & Internet to ensure WiFi is enabled.
If the adapter repeatedly disables itself after restarting, the issue may indicate a failing driver or hardware fault requiring further diagnosis.
8. Weak WiFi Signal or Wireless Interference
Even if your laptop detects your WiFi network, a weak signal can prevent a stable connection.
Walls, metal furniture, neighbouring wireless networks, and electronic devices such as microwaves or cordless phones can all interfere with WiFi performance.
Warning Signs
WiFi works only when you’re close to the router.
Internet speed is extremely slow.
The connection drops frequently.
Video calls buffer or disconnect.
Other rooms have poor signal strength.
How to Fix It
Move closer to your wireless router and test the connection. Restart the router and reposition it in a more central, open location if possible. Disconnect unnecessary devices that may be using large amounts of bandwidth. If your home has several dead zones, consider installing a WiFi extender or mesh WiFi system to improve coverage.
If your laptop continues to lose its connection even when placed next to the router, the problem may lie with the laptop’s wireless hardware rather than the network itself.
9. Incorrect Network Settings or DNS Problems
Sometimes your laptop connects to the WiFi network successfully but still cannot access the internet. In many cases, incorrect network settings, corrupted DNS information, or an IP address conflict is responsible.
These issues commonly occur after changing routers, installing VPN software, or making manual network configuration changes.
Common Symptoms
Connected to WiFi but no internet access.
Websites fail to load while the WiFi icon shows as connected.
Error messages such as “No Internet, Secured” appear.
Other devices connected to the same network work normally.
Some websites load while others do not.
How to Fix It
Restart your router and laptop. Open Command Prompt as Administrator and renew your IP address if you’re comfortable using Windows networking tools.
You can also reset your network settings through Settings > Network & Internet > Advanced Network Settings > Network Reset.
If the problem continues, changing your DNS server to a trusted public DNS provider may also improve connectivity. Most network configuration issues can be resolved without replacing any hardware.
10. Faulty Internal WiFi Card
Every laptop contains a wireless network card that allows it to communicate with WiFi networks. Like any hardware component, this card can fail over time due to age, overheating, liquid damage, electrical faults, or physical impact.
Unlike software problems, a faulty WiFi card usually prevents the laptop from detecting or maintaining wireless connections regardless of the network you’re using.
Signs
No wireless networks are detected.
The WiFi adapter disappears from Device Manager.
Driver reinstallations do not solve the issue.
External USB WiFi adapters work normally.
The problem remains after reinstalling Windows.
Can You Fix It Yourself?
Usually not. Replacing an internal WiFi card requires partial disassembly of the laptop. Depending on the model, the technician may need to remove the bottom cover, battery, cooling system, or keyboard to access the wireless module.
At iExpert Repairs, our technicians diagnose faulty WiFi adapters and replace defective wireless cards using high-quality compatible parts for all major laptop brands.
11. Motherboard or Internal Hardware Failure
If you’ve tried every software fix and your laptop still won’t detect or connect to WiFi, the problem may involve the motherboard or other internal components.
The motherboard controls communication between the processor, wireless adapter, memory, storage, and other essential hardware. Damage to these circuits can prevent the wireless adapter from functioning correctly.
Common Symptoms
Symptom
Possible Hardware Fault
WiFi adapter not detected
Motherboard communication failure
WiFi fails after liquid damage
Short circuit
WiFi stops working after a drop
Internal hardware damage
Wireless card works intermittently
Motherboard or connector issue
Multiple hardware problems occur together
Motherboard failure
Because motherboard repairs often require advanced diagnostics and micro-soldering equipment, they should only be carried out by qualified technicians.
Is Your Laptop, Router, or Internet Service Actually Causing the Problem?
One of the biggest mistakes people make when their laptop won’t connect to WiFi is assuming the laptop is always at fault. In reality, the issue could be caused by your router, broadband provider, Windows settings, or even temporary network congestion.
Before paying for a repair, it’s worth carrying out a few simple checks to identify where the problem actually lies. Doing so can save both time and money and may help you avoid replacing parts that are working perfectly.
1. Compare the Symptoms
Situation
Most Likely Cause
Laptop connects to WiFi but websites won’t load
Broadband provider, DNS, or router issue
Other devices also have no internet
Router or ISP outage
Only your laptop cannot connect
Laptop software or hardware issue
Laptop connects to your phone’s hotspot but not your home WiFi
Router configuration or security settings
Laptop cannot detect any WiFi networks
Wireless adapter, driver, or hardware fault
2. Test Your Laptop with a Mobile Hotspot
One of the quickest ways to narrow down the cause is by connecting your laptop to your smartphone’s mobile hotspot. If the laptop connects successfully to the hotspot, the wireless hardware inside your laptop is usually working correctly. This suggests the issue is more likely related to your home router, broadband connection, or network settings.
However, if the laptop cannot connect to either your home WiFi or a mobile hotspot, the problem is far more likely to involve the wireless adapter, network drivers, Windows configuration, or internal hardware.
Test Result
What It Usually Means
Connects to mobile hotspot
Home router or broadband issue
Cannot connect to any WiFi network
Laptop software or hardware fault
Connects after restarting only
Driver or Windows problem
Disconnects from every network
Faulty WiFi adapter or motherboard issue
3. Could Battery Saver Be Disabling Your WiFi?
Many Windows laptops automatically reduce power consumption when running on battery. In some cases, these power-saving features temporarily switch off the wireless adapter, causing the WiFi connection to drop unexpectedly.
If your laptop connects normally while plugged into the charger but regularly disconnects when running on battery power, review your Power Management settings and disable any option that allows Windows to turn off the wireless adapter to save energy.
4. Connected to WiFi but the Internet Is Still Slow?
A successful WiFi connection doesn’t always mean your internet is performing properly. If websites load slowly, video calls keep buffering, or downloads take much longer than expected, the problem may be related to signal strength, network congestion, or software rather than the wireless connection itself.
Possible Cause
Recommended Solution
Weak WiFi signal
Move closer to the router
Too many connected devices
Disconnect unused devices
Router congestion
Restart the router
Background downloads
Pause Windows updates and downloads
VPN or proxy software
Disable temporarily and test again
Outdated network driver
Install the latest driver
5. Does Your Windows Version Matter?
Different versions of Windows can experience different types of wireless connectivity problems. Older operating systems may no longer receive driver updates, while newer versions occasionally introduce compatibility issues after major updates.
Windows Version
Common WiFi Issue
Windows 11
Driver compatibility after major updates
Windows 10
Network reset or driver conflicts
Windows 8.1
Older wireless driver support
Windows 7
Unsupported security protocols and outdated drivers
6. Expert Insight from iExpert Repairs
Based on thousands of laptop repairs completed across the UK, our technicians have found that most WiFi connectivity problems are not caused by failed hardware. In many cases, the issue is resolved through driver updates, Windows network repairs, router configuration changes, or correcting software settings without replacing any internal components.
However, laptops that have suffered liquid damage, accidental drops, repeated overheating, or electrical faults are significantly more likely to require hardware repairs such as WiFi card replacement, antenna repair, or motherboard diagnostics.
For this reason, we always recommend identifying the exact cause before replacing parts. A professional diagnosis not only saves money but also ensures the correct repair is carried out the first time.
What We See Most Often?
Based on repairs completed by our technicians during the past year, the most common causes of laptop WiFi problems were:
Cause | Approximate Frequency
Driver or Windows issue | 42%
Router or network configuration | 24%
Faulty WiFi card | 16%
Damaged wireless antenna | 8%
Motherboard fault | 6%
Other hardware issues | 4%
This shows that most WiFi problems can be resolved without replacing the entire laptop.
Step-by-Step Troubleshooting Checklist
Before arranging a repair, work through the following checklist.
Step
Check
Restart your laptop
✓
Restart your router and modem
✓
Turn WiFi on
✓
Disable Airplane Mode
✓
Forget and reconnect to the WiFi network
✓
Check the correct WiFi password
✓
Update or reinstall WiFi drivers
✓
Run Windows Network Troubleshooter
✓
Reset network settings
✓
Test another WiFi network
✓
Connect using a USB WiFi adapter (if available)
✓
If your laptop still refuses to connect after completing these checks, the issue is likely related to internal hardware that requires professional diagnosis.
While many WiFi problems can be fixed at home, some faults require specialist tools and technical expertise. You should arrange a professional inspection if:
Your laptop cannot detect any WiFi networks.
The wireless adapter is missing from Device Manager.
WiFi stopped working after liquid damage.
The laptop has been dropped or physically damaged.
Driver updates and network resets do not solve the problem.
The laptop connects using Ethernet but never through WiFi.
An external USB WiFi adapter works, but the internal adapter does not.
You suspect a motherboard or internal hardware fault.
At iExpert Repairs, we diagnose and repair WiFi connectivity issues on all major laptop brands, including HP, Dell, Lenovo, ASUS, Acer, Microsoft Surface, gaming laptops, and MacBooks. Whether the issue involves a faulty wireless card, damaged antenna, motherboard fault, or software corruption, our technicians use premium OEM-grade parts and professional diagnostic equipment to restore reliable wireless performance.
How Much Does It Cost to Fix Laptop WiFi Problems in the UK?
One of the first questions people ask when their laptop won’t connect to WiFi is, “How much will it cost to repair?” The answer depends on the underlying cause of the problem.
In many cases, WiFi issues are software-related and can be resolved through driver updates, network configuration, or operating system repairs. However, if the fault is caused by a damaged wireless card, broken internal antenna, liquid damage, or a motherboard failure, professional repair may be required.
The good news is that many WiFi-related repairs are significantly more affordable than replacing the entire laptop. A professional diagnosis can help identify the exact issue and prevent unnecessary replacement of working components.
Typical Laptop WiFi Repair Costs in the UK
The table below provides a general estimate of common laptop WiFi repair costs across the UK in 2026.
Repair Required
When It’s Usually Needed
Typical UK Price
Software diagnosis and network repair
Windows networking errors, driver issues
£40-£90
WiFi driver installation or repair
Corrupted or outdated wireless drivers
£40-£80
Internal WiFi card replacement
Faulty or failed wireless adapter
£60-£150
WiFi antenna repair
Weak signal or damaged antenna cable
£70-£160
Motherboard repair
Internal communication or circuit faults
£150-£450+
Liquid damage repair
WiFi failure after liquid exposure
£90-£350+
Please note: These are estimated UK repair prices for 2026. The final cost depends on your laptop model, replacement part availability, and the complexity of the repair.
Is It Worth Repairing a Laptop That Won’t Connect to WiFi?
For most users, the answer is yes.
A laptop that won’t connect to WiFi doesn’t necessarily have a major hardware fault. Many devices only require a software repair, wireless driver update, network reset, or replacement WiFi card to restore full functionality.
Replacing a laptop can cost hundreds or even thousands of pounds, particularly if you own a business laptop, gaming laptop, or MacBook. In comparison, repairing the existing device is often the more affordable and environmentally responsible option.
If your laptop is also experiencing charging problems, frequent shutdowns, or poor battery life, these issues may be related to the overall health of the device. Our guide Why Is My Laptop Battery Not Charging? explains how power-related faults can sometimes affect system stability and wireless performance.
Should You Repair or Replace Your Laptop?
Situation | Best Option
Laptop less than 5 years old | Repair
Only WiFi has stopped working | Repair
Motherboard badly damaged | Compare repair cost
Repair exceeds laptop value | Replace
Very old Windows 7 laptop | Consider upgrading
Which WiFi Problems Can You Safely Fix Yourself?
Not every wireless connection problem requires professional repair. There are several troubleshooting steps that are completely safe to try before arranging a repair.
However, once the issue involves internal hardware or motherboard components, it’s usually best to stop troubleshooting and seek professional assistance.
Safe Checks You Can Try at Home
Situations That Usually Need Professional Repair
Restart your laptop
Internal WiFi card failure
Restart your router
Motherboard faults
Turn WiFi on
Liquid damage
Disable Airplane Mode
Damaged wireless antenna
Forget and reconnect to the network
Hardware replacement
Update WiFi drivers
Internal component repair
Run Windows Network Troubleshooter
Electrical or circuit faults
Reset network settings
Persistent hardware-related connectivity issues
Trying these basic checks first can often restore your wireless connection without the need for repairs.
When Should You Stop Troubleshooting?
Many users continue restarting their laptop or reinstalling drivers repeatedly, hoping the WiFi connection will suddenly return. Unfortunately, if the problem is caused by failing hardware, repeated troubleshooting is unlikely to resolve it.
You should stop DIY troubleshooting and arrange a professional inspection if you notice any of the following:
The WiFi adapter no longer appears in Device Manager.
Your laptop cannot detect any wireless networks.
The problem started after liquid damage or a physical drop.
Windows has been reinstalled but WiFi still doesn’t work.
External USB WiFi adapters work while the internal adapter does not.
The laptop has multiple hardware faults occurring at the same time.
These symptoms often indicate hardware failure that requires specialist diagnostic equipment.
Why Professional Diagnosis Saves Money?
Many users replace the WiFi card assuming it has failed, only to discover the real problem is a damaged antenna cable, incorrect BIOS settings, corrupted Windows installation, or a motherboard fault.
Professional diagnostics identify the exact cause before any parts are replaced, helping you avoid unnecessary repair costs.
Could Overheating Be Affecting Your WiFi Connection?
Although overheating doesn’t directly disable WiFi in every case, excessive heat can affect internal components, including the wireless adapter, motherboard, and processor.
Over time, high temperatures may lead to unstable wireless connections, unexpected disconnects, or complete hardware failure. Warning signs include:
The cooling fan constantly runs at high speed.
The laptop feels unusually hot.
WiFi disconnects during heavy workloads.
The laptop becomes slow before losing its wireless connection.
Unexpected shutdowns occur while using the internet.
If your laptop frequently overheats, it’s important to address the cooling problem before it causes further hardware damage.
Professional Laptop WiFi Repair Services
If you’ve tried all the troubleshooting steps in this guide and your laptop still won’t connect to WiFi, it’s likely that the problem requires professional diagnosis.
At iExpert Repairs, we repair WiFi and network-related faults on all major laptop brands, from everyday home laptops to business devices, gaming laptops, and MacBooks. Every repair begins with a thorough diagnostic process to identify the exact cause before any work is carried out.
Whether the issue involves a faulty WiFi card, damaged wireless antenna, motherboard fault, driver corruption, or software-related networking problem, our technicians use premium OEM-grade replacement parts and professional repair procedures to restore reliable wireless connectivity.
WiFi Hardware Repairs by Experienced Technicians
If testing confirms that your laptop’s internal wireless hardware has failed, replacing the faulty component is often the quickest and most cost-effective solution.
Many common repairs can be completed the same day, subject to parts availability, helping you get back online with minimal disruption.
Specialist Repairs for HP, Dell, Lenovo and MacBook Laptops
Every laptop manufacturer uses different wireless hardware, internal layouts, and repair procedures. That’s why model-specific experience is essential for accurate diagnosis and long-lasting repairs.
Our technicians provide specialist repair services for:
HP Laptop Repair – including Pavilion, Envy, ProBook, EliteBook and Omen models.
Dell Laptop Repair– including Inspiron, Latitude, XPS, Precision and Alienware devices.
Whether you’re based in London, Birmingham, Manchester, Liverpool, Leeds, Glasgow, Bristol, Sheffield, or anywhere else in the UK, you can access our professional repair services without visiting us in person.
Our nationwide mail-in repair process is simple:
Request a personalised repair quote.
Securely package your laptop.
Send it to our repair centre.
Our technicians diagnose and repair the fault.
Your laptop is fully tested before being returned via tracked delivery.
This convenient service allows customers throughout the UK to benefit from expert laptop repairs, regardless of their location.
FAQs About Laptop WiFi Problems
1. Why is my laptop not connecting to WiFi even though the password is correct?
If your password is correct but your laptop still won’t connect, the issue may be caused by outdated WiFi drivers, incorrect network settings, router problems, a disabled wireless adapter, or faulty internal hardware. Restarting both your router and laptop is a good place to start before trying more advanced troubleshooting.
2. Why can’t my laptop find any WiFi networks?
If no wireless networks appear, your WiFi adapter may be disabled, the wireless driver could be corrupted, Airplane Mode might be enabled, or the internal WiFi card may have failed.
3. Why is my laptop connected to WiFi but has no internet access?
This usually indicates a router, ISP, DNS, or IP configuration issue rather than a fault with the WiFi connection itself. Restarting the router and resetting your network settings often resolves the problem.
4. Can a Windows update stop my laptop from connecting to WiFi?
Yes. Occasionally, Windows updates can install incompatible network drivers or change system settings, preventing your laptop from connecting to wireless networks until the driver is updated or the update is removed.
5. How do I reset my laptop’s WiFi settings?
Windows allows you to perform a Network Reset through Settings > Network & Internet > Advanced Network Settings > Network Reset. This reinstalls your network adapters and restores the default networking configuration.
6. Why does my laptop keep disconnecting from WiFi?
Frequent disconnections may be caused by weak signal strength, outdated drivers, router interference, power management settings, or a failing internal WiFi adapter.
7. How do I know if my laptop’s WiFi card is faulty?
If your laptop cannot detect any wireless networks, the WiFi adapter disappears from Device Manager, driver updates don’t help, and a USB WiFi adapter works normally, the internal WiFi card may need replacing.
8. Can a damaged router cause WiFi problems on my laptop?
Yes. A faulty router, outdated firmware, overheating, or broadband service interruptions can prevent your laptop from connecting even if the laptop itself is working correctly.
9. Why does my laptop only connect to WiFi near the router?
A weak wireless signal, damaged internal antenna, interference from walls or electronic devices, or a failing WiFi adapter can all reduce wireless range.
10. Is it safe to update WiFi drivers myself?
Yes. Updating drivers through your laptop manufacturer’s official website or Windows Update is generally safe and can resolve many wireless connectivity issues.
11. Can malware affect my laptop’s WiFi connection?
Yes. Certain types of malware can modify network settings, interfere with internet access, or affect system performance, making it difficult to maintain a stable wireless connection.
12. How much does it cost to repair laptop WiFi problems in the UK?
Software-related repairs typically cost between £40 and £90, while replacing an internal WiFi card generally ranges from £60 to £150. More complex motherboard repairs may cost considerably more depending on the laptop model.
13. Can I use a USB WiFi adapter instead of repairing my laptop?
Yes. A USB WiFi adapter can provide a temporary or permanent solution if the internal wireless card has failed, although replacing the original hardware is usually the better long-term option.
14. Why did my laptop stop connecting to WiFi after I dropped it?
A physical impact can damage the internal WiFi card, wireless antenna, motherboard, or other components. Even if there is no visible external damage, the laptop should be professionally inspected.
15. Can overheating affect my laptop’s WiFi performance?
Yes. Excessive heat can affect the motherboard, wireless adapter, and other internal components, leading to unstable wireless connections or complete hardware failure over time.
Conclusion
A laptop that won’t connect to WiFi can interrupt work, online learning, video calls, gaming, and everyday browsing, but it doesn’t always indicate a serious hardware problem. In many cases, the issue can be resolved by enabling WiFi, restarting your router, updating network drivers, resetting Windows network settings, or correcting a simple configuration error.
However, if your laptop continues to experience connectivity problems after basic troubleshooting, the cause may be a faulty WiFi card, damaged wireless antenna, motherboard issue, or another internal hardware fault that requires professional attention. Identifying the root cause early can help prevent more expensive repairs and keep your laptop performing reliably for longer.
If you’ve also noticed slow performance, overheating, charging problems, black screen issues, or your laptop failing to turn on, these problems may be connected. Resolving them promptly can improve your laptop’s stability, reliability, and overall lifespan.