Fix Now, Pay Later with Klarna - Available at Checkout!

How to Fix a Slow Laptop: Causes & Fixes

Introduction

A slow laptop can interrupt work, online meetings, studying, gaming, and everyday browsing. Tasks that once opened instantly may begin taking several minutes, applications may freeze unexpectedly, and even simple activities like opening a web browser can become frustrating. Fortunately, a sluggish laptop does not always mean it needs replacing.

Performance problems usually develop gradually due to software clutter, limited storage, ageing hardware, malware, or overheating. Identifying the underlying cause is the first step towards restoring speed and improving overall reliability. Many issues can be resolved with simple maintenance, while others may require professional diagnosis or hardware upgrades.

This guide explains the most common reasons laptops become slow, provides practical troubleshooting steps, and highlights situations where expert assistance is the better option. Whether you own a Dell, HP, Lenovo, MacBook, ASUS, Acer, Microsoft Surface, or another model, these recommendations apply to most modern laptops used across the UK.

If your device continues performing poorly after following these steps, our Laptop Repair specialists at iExpert Repairs can diagnose hardware faults, replace failing components, and restore your laptop to peak performance using premium-quality parts backed by a comprehensive warranty.

Why Trust This Guide?

Unlike general online tutorials, this guide is based on real-world laptop repair experience from certified technicians at iExpert Repairs. Every recommendation reflects practical repair procedures used daily in our UK repair centre.

  • Over 2,500 laptops repaired
  • Certified repair technicians
  • Premium OEM-grade replacement parts
  • 12-month warranty on qualifying repairs
  • Repairs for all major laptop brands
  • Nationwide UK mail-in repair service
  • Regularly reviewed and updated using current repair standards

Why Is My Laptop So Slow?

Laptop performance naturally declines over time as software becomes more demanding and storage fills with files, updates, and temporary data. However, age alone is rarely the only reason behind noticeable slowdowns. In many cases, several smaller issues combine to create significant performance problems.

Running dozens of startup programs, outdated drivers, insufficient memory, malware infections, overheating, and failing storage devices all reduce system responsiveness. Even a laptop with good specifications can feel slow when these problems are left unresolved.

Understanding what’s causing the slowdown allows you to apply the correct solution instead of wasting time on unnecessary fixes. Some problems can be solved within minutes, while others require component replacement or professional repair.

Quick Answer: How Can You Speed Up a Slow Laptop?

Most slow laptops can be improved by following these essential maintenance steps:

SolutionDifficultyPerformance Improvement
Restart the laptopEasyModerate
Close unnecessary programsEasyModerate
Disable startup appsEasyHigh
Free up storage spaceEasyHigh
Delete temporary filesEasyModerate
Scan for malwareEasyHigh
Install system updatesEasyModerate
Update device driversMediumModerate
Replace HDD with SSDAdvancedExcellent
Upgrade RAMAdvancedExcellent

If your laptop remains slow after completing these steps, the issue could involve hardware failure, overheating, motherboard faults, or a failing storage drive. In these situations, booking a professional Laptop Repair service is usually the fastest and most cost-effective solution.

Common Signs Your Laptop Is Running Slowly
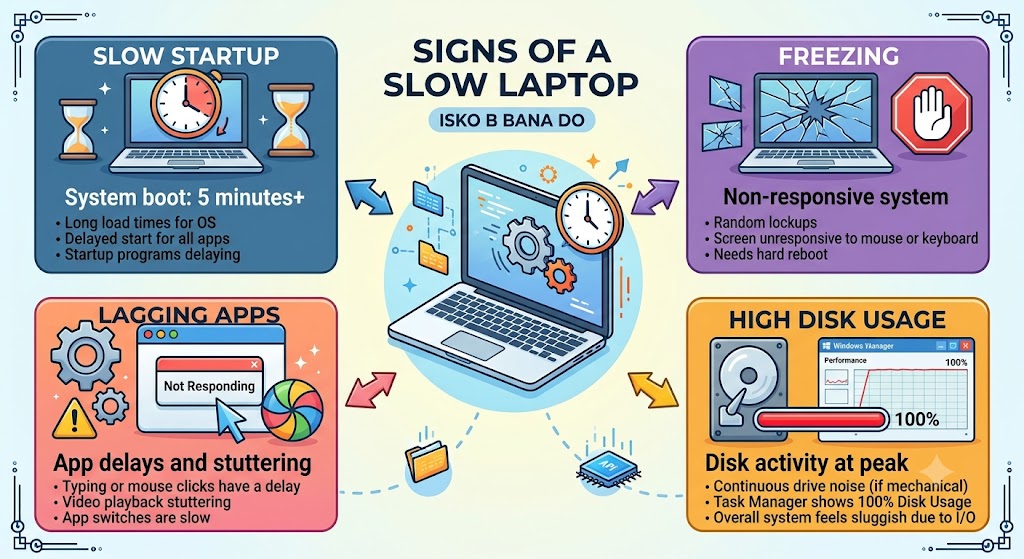
A slow laptop rarely develops only one symptom. Most users notice several performance issues occurring together before realising the device requires attention.

Typical warning signs include:

  • Long boot times before Windows or macOS loads.
  • Applications taking several minutes to open.
  • Frequent freezing while multitasking.
  • Delayed keyboard or mouse response.
  • Web browsers becoming unresponsive with multiple tabs.
  • Loud cooling fans running continuously.
  • Random system crashes or blue screen errors.
  • High disk usage even when the laptop appears idle.
  • Videos buffering despite a stable internet connection.
  • Slow file transfers and delayed software installations.

If several of these symptoms appear together, the problem is likely more than routine ageing and should be investigated before permanent hardware damage occurs.

What Causes a Laptop to Slow Down?

There isn’t a single reason every laptop becomes slow. Performance issues usually result from a combination of software inefficiencies, hardware wear, and inadequate maintenance.

1. Too Many Startup Programs

Many applications automatically launch every time the laptop starts. Although each program may consume only a small amount of memory, dozens running together can significantly increase boot times and reduce available system resources.

Over time, unnecessary startup applications continue operating in the background without the user realising it, affecting overall responsiveness throughout the day.

2. Low Available Storage

When the internal drive approaches full capacity, the operating system has less room to manage temporary files and virtual memory efficiently. This causes slower loading times, reduced application performance, and delayed file operations.

Keeping at least 15-20% of your storage free helps maintain smooth performance and prevents unnecessary slowdowns.

3. Malware or Virus Infections

Malicious software often runs silently in the background while consuming processor power, memory, and internet bandwidth. Besides reducing performance, malware may compromise personal information and system security.

A complete antivirus scan should always be performed if your laptop suddenly becomes unusually slow without an obvious explanation.

4. Ageing Hard Drive

Traditional mechanical hard drives naturally become slower over time due to wear and repeated read/write operations. A failing HDD often causes long loading times, clicking noises, and frequent freezing.

Replacing an older hard drive with a modern SSD is one of the most effective ways to improve laptop performance.

5. Insufficient RAM

Running multiple browser tabs, office applications, video editing software, or games requires adequate memory. When RAM is limited, the operating system relies heavily on storage as virtual memory, which dramatically reduces speed.

Adding more RAM can significantly improve multitasking and everyday productivity on compatible laptops.

6. Overheating Components

Dust accumulation, blocked vents, ageing thermal paste, or failing cooling fans can cause internal temperatures to rise beyond safe operating limits. To protect critical components, the processor automatically reduces its speed, making the laptop feel noticeably slower.

If your laptop becomes hot, noisy, or slows down after a short period of use, overheating could be the primary cause. Related issues are explained further in our guide on Why Is My Phone Overheating? Causes & Fixes Explained, where similar cooling principles apply to electronic devices.

7. Outdated Software and Drivers

Operating system updates and hardware drivers include important performance improvements, security patches, and compatibility fixes. Delaying these updates may result in slower performance, software conflicts, and reduced stability.

Keeping Windows, macOS, graphics drivers, and chipset software up to date helps your laptop perform more efficiently while reducing unexpected system errors.

How to Fix a Slow Laptop: Step-by-Step Solutions

The following troubleshooting methods are arranged from the simplest fixes to more advanced performance improvements. Completing each step systematically helps identify the exact cause while avoiding unnecessary repairs or hardware replacements.

1. Restart Your Laptop

Many people leave their laptops running for days or even weeks without performing a proper restart. During this time, background processes, temporary files, and memory usage continue to build up, reducing overall performance.

Restarting your laptop clears temporary system memory, closes unnecessary background tasks, and allows Windows or macOS to reload essential services correctly. It’s often the quickest way to resolve minor lag, freezing, and application slowdowns.

If your laptop still feels sluggish after restarting, continue with the following troubleshooting steps.

2. Close Unnecessary Background Programs

Applications running in the background consume valuable RAM, processor power, and battery life, even when you’re not actively using them. Video conferencing software, cloud storage apps, browsers with multiple tabs, and unnecessary utilities are common examples.

Open Task Manager (Windows) or Activity Monitor (Mac) to identify programs consuming excessive CPU or memory. Closing unused applications immediately frees up system resources and improves responsiveness, especially on laptops with limited RAM.

Regularly checking background processes also helps identify software that may be causing abnormal resource usage.

3. Disable Startup Applications
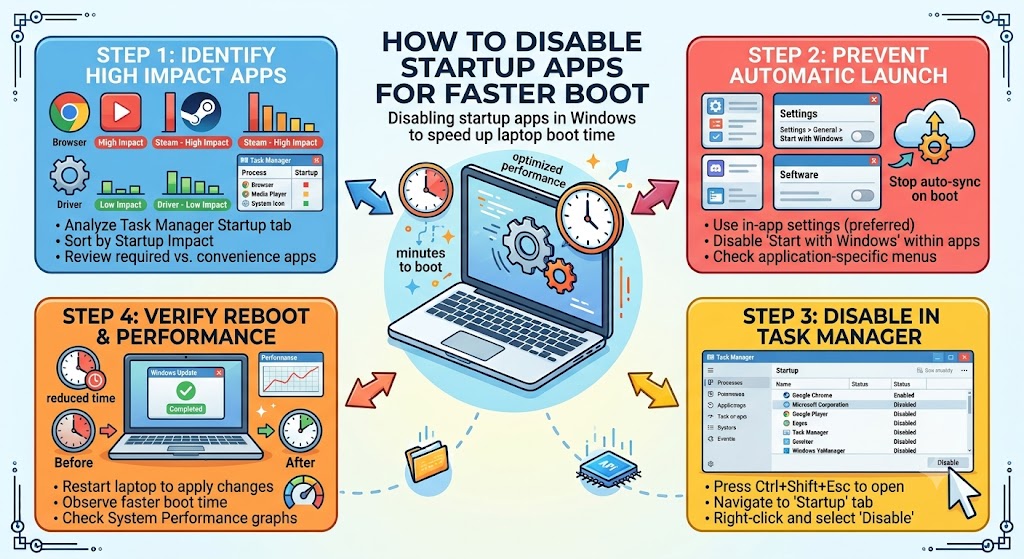
Many programs automatically launch every time your laptop starts. Although convenient for some applications, too many startup items can dramatically increase boot times and leave your laptop feeling slow before you even begin working.

Review your startup applications and disable anything that isn’t essential. Focus on software you rarely use rather than security applications or system services.

Reducing startup programs not only shortens boot times but also improves overall performance throughout the day.

4. Free Up Storage Space

Low storage space is one of the most common reasons laptops become slow. Operating systems require free space for updates, temporary files, virtual memory, and application caching. When storage is almost full, overall performance begins to decline.

Delete large downloads, duplicate files, old videos, and applications you no longer need. If possible, move important files to cloud storage or an external drive to free additional capacity.

Aim to keep at least 15-20% of your storage drive free for optimal performance.

5. Delete Temporary Files

Temporary files accumulate every time you browse the internet, install software, or update your operating system. Over time, these files can occupy several gigabytes of storage without providing any ongoing benefit.

Using Windows Disk Cleanup, Storage Sense, or macOS storage management tools helps remove unnecessary temporary files safely. Performing this simple maintenance every few months keeps your laptop running more efficiently and prevents unnecessary storage clutter.

6. Scan for Malware and Viruses

Malware often operates silently in the background, consuming processor resources while slowing down the entire system. Some malicious software also installs unwanted applications, displays intrusive advertisements, or attempts to steal personal information.

Run a complete scan using a trusted antivirus solution and remove any detected threats. Keeping your antivirus software updated also provides better protection against newly discovered security risks.

If your laptop suddenly becomes slow without any obvious explanation, malware should always be ruled out early in the troubleshooting process.

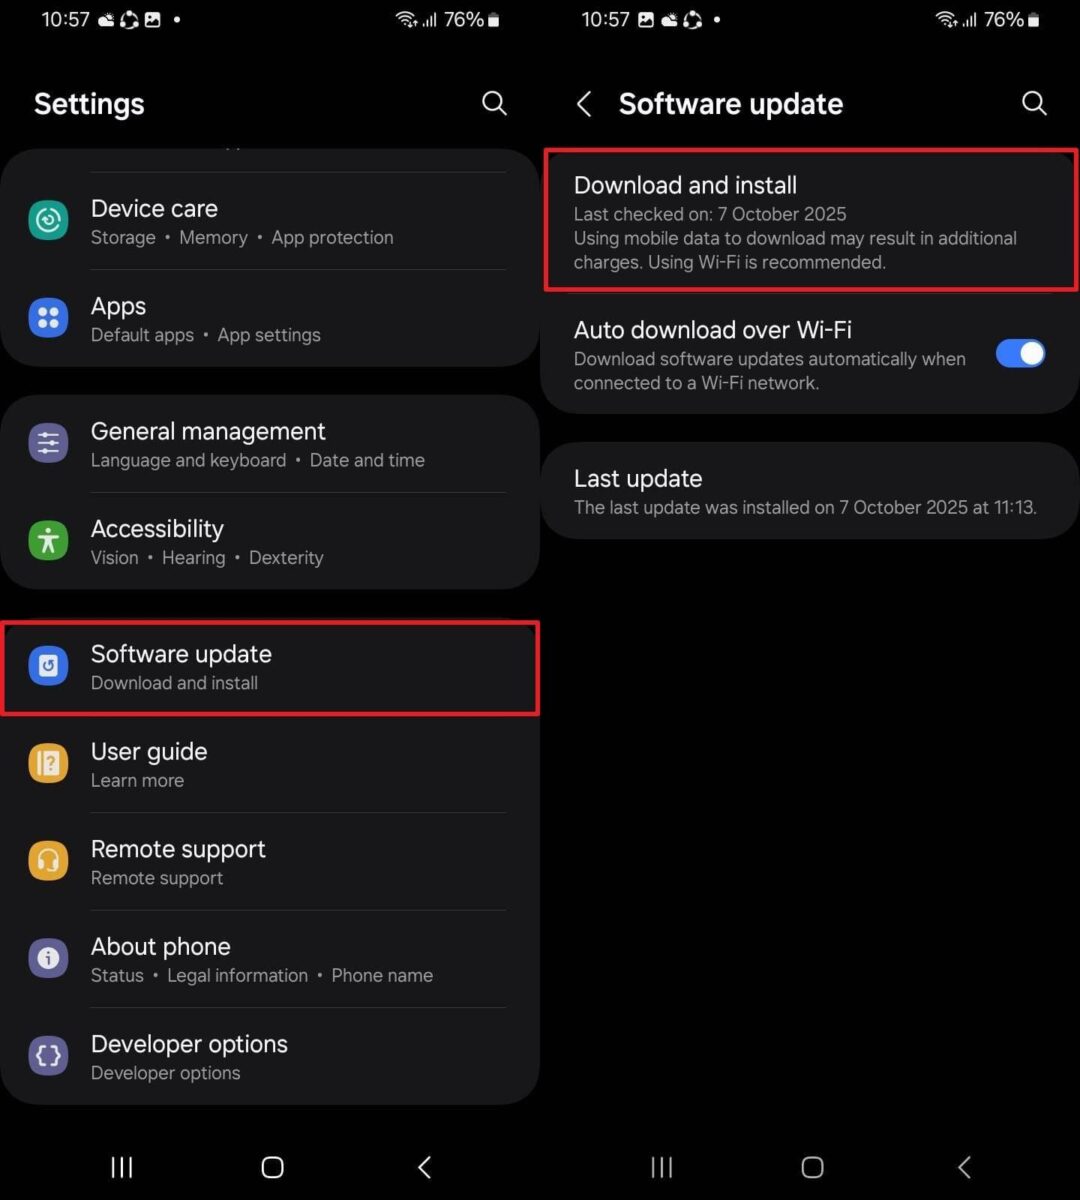
7. Update Windows or macOS

Operating system updates include important security improvements, performance enhancements, and bug fixes. Delaying these updates can lead to compatibility issues, reduced stability, and slower overall performance.

Check for available Windows or macOS updates and install any pending releases. Once installation is complete, restart your laptop to ensure all improvements are applied correctly.

Keeping your operating system current helps maintain long-term reliability while improving compatibility with modern applications.

8. Update Device Drivers

Hardware drivers allow Windows and macOS to communicate correctly with components such as graphics cards, storage devices, Wi-Fi adapters, and processors. Outdated drivers may cause slow performance, crashes, or unexpected system errors.

Visit your laptop manufacturer’s support page or use Windows Update to install the latest certified drivers. Updating graphics, chipset, and storage drivers often improves both performance and system stability.

Avoid downloading drivers from unknown websites, as unofficial versions may introduce additional problems.

9. Uninstall Unused Software

Many laptops contain applications that are rarely used but continue consuming storage space and system resources. Older programs may also run background services that affect overall performance.

Review your installed software regularly and remove applications you no longer need. This not only frees storage but also reduces background activity and simplifies future system maintenance.

If you are unsure whether a program is essential, research it before uninstalling to avoid removing important system components.

10. Optimise Your Web Browser

Web browsers are among the most resource-intensive applications on modern laptops. Running dozens of tabs, installing unnecessary extensions, or allowing excessive cached data to accumulate can noticeably reduce performance.

Close unused tabs, remove browser extensions you no longer require, and clear cached files periodically. Using fewer browser extensions also improves startup speed and reduces memory usage.

If browser performance remains poor after optimisation, resetting browser settings or trying an alternative browser may help.

11. Check Your Hard Drive Health

Your laptop’s storage drive plays a major role in overall performance. If the hard drive begins to fail, you may notice slow boot times, delayed file access, frequent freezing, or unusual clicking noises. Ignoring these warning signs can eventually lead to data loss and complete drive failure.

Windows users can check drive health using built-in diagnostic tools or the Command Prompt, while macOS users can use Disk Utility to verify storage integrity. Running these checks helps identify potential problems before they become more serious.

If your hard drive reports bad sectors or health warnings, replacing it as soon as possible is recommended. At iExpert Repairs, our technicians can diagnose storage issues and safely replace faulty drives while helping protect your important files.

12. Upgrade from HDD to SSD

If your laptop still uses a traditional Hard Disk Drive (HDD), upgrading to a Solid State Drive (SSD) is one of the best ways to improve performance. SSDs have no moving parts, allowing them to load Windows, applications, and files significantly faster than older mechanical drives.

Many users notice dramatic improvements immediately after upgrading, including quicker startup times, faster software launches, and smoother multitasking. An SSD also consumes less power, helping to improve battery efficiency on many laptops.

If you’re unsure which SSD is compatible with your device, our Laptop Repair specialists can recommend and install the right upgrade for your laptop model.

13. Add More RAM

Random Access Memory (RAM) allows your laptop to handle multiple applications simultaneously. If your laptop frequently slows down while multitasking, upgrading the memory may provide a noticeable improvement in everyday performance.

More RAM is especially beneficial for users who edit photos, attend video meetings, browse with multiple tabs open, or run professional software. Instead of relying heavily on virtual memory, the laptop can process tasks more efficiently using physical RAM.

Before upgrading, check your laptop’s maximum supported memory capacity and ensure compatible modules are installed for the best results.

14. Prevent Laptop Overheating

Heat is one of the most common reasons laptops lose performance over time. When internal temperatures rise, the processor automatically reduces its speed to prevent damage, making the entire system feel slower.

Keeping air vents clean, using the laptop on a hard surface, and ensuring cooling fans operate correctly all help maintain safe operating temperatures. Professional internal cleaning and thermal paste replacement can also improve cooling efficiency, particularly on older laptops.

If your device frequently becomes hot, shuts down unexpectedly, or the cooling fan runs constantly, professional servicing may be required to restore normal performance.

15. Run Built-in Performance Troubleshooters

Both Windows and macOS include diagnostic utilities that can identify software conflicts, storage errors, and performance-related issues automatically. Running these built-in tools is a simple way to detect problems that may not be immediately obvious.

Windows users can use System Maintenance, Storage Sense, and Performance Monitor, while macOS users can rely on Activity Monitor and Disk Utility to investigate system health.

Although these utilities cannot fix every problem, they often highlight resource-intensive processes or storage issues that require further attention.

When DIY Fixes Are Not Enough

While many software-related issues can be resolved at home, some performance problems are caused by failing hardware that requires specialist equipment and technical expertise. If your laptop continues running slowly after completing all troubleshooting steps, there may be an underlying component failure.

Professional diagnostics can identify issues such as damaged motherboards, failing SSDs or hard drives, faulty RAM modules, charging circuit faults, overheating processors, and other hardware-related problems that basic troubleshooting cannot resolve.

Attempting advanced repairs without the proper knowledge may result in further damage, making professional assistance the safer and more cost-effective option.

Professional Laptop Repair Services in the UK

If your laptop remains slow despite software optimisation, iExpert Repairs provides comprehensive Laptop Repair services for customers throughout the UK. Our experienced technicians repair all major brands, including MacBook, Dell, HP, Lenovo, ASUS, Acer, Microsoft Surface, Samsung, and many others.

Whether your laptop requires an SSD upgrade, RAM replacement, cooling system repair, motherboard diagnostics, charging port repair, battery replacement, or software recovery, we use premium OEM-grade parts and professional repair procedures to restore reliable performance.

Customers can visit our repair centre or use our secure nationwide mail-in repair service, with every repair backed by a 12-month warranty for complete peace of mind.

Slow Laptop Repair Cost in the UK

The cost of repairing a slow laptop depends on the underlying issue. Software optimisation is generally less expensive than replacing hardware components such as SSDs, RAM, or motherboards.

Repair ServiceEstimated UK Cost
Software Optimisation£40-£80
Virus & Malware Removal£50-£90
SSD Upgrade£80-£200+
RAM Upgrade£60-£180+
Cooling System Cleaning£50-£100
Laptop Battery Replacement£70-£180+
Motherboard DiagnosticsVaries by fault

For an accurate quotation, iExpert Repairs offers professional diagnostics before recommending the most suitable repair solution.

How to Prevent Your Laptop from Becoming Slow Again

Maintaining good performance is much easier than fixing a severely slow laptop. Simple maintenance habits help reduce wear on internal components and keep your operating system running efficiently over the long term.

Follow these best practices:

  • Keep Windows or macOS updated.
  • Install driver updates regularly.
  • Remove unused software every few months.
  • Avoid filling your storage drive completely.
  • Scan for malware routinely.
  • Clean dust from air vents.
  • Restart your laptop regularly instead of leaving it running continuously.
  • Back up important files before major updates.
  • Consider upgrading to an SSD if you still use a traditional hard drive.

Following these maintenance steps can significantly extend the lifespan of your laptop while reducing the likelihood of future performance issues.

FAQs About Fixing a Slow Laptop

1. Why is my laptop running so slow all of a sudden?

A laptop can suddenly become slow due to Windows or macOS updates, malware infections, insufficient storage space, overheating, outdated drivers, or background applications consuming system resources. Running a full system check and following basic troubleshooting steps usually helps identify the root cause.

2. How can I make my laptop faster without spending money?

You can improve your laptop’s performance by restarting it regularly, disabling unnecessary startup programs, deleting temporary files, uninstalling unused software, updating your operating system, scanning for malware, and freeing up storage space. These simple maintenance tasks often provide noticeable performance improvements.

3. Can a full hard drive slow down my laptop?

Yes. When your storage drive is almost full, Windows or macOS has less space to manage temporary files and virtual memory efficiently. Keeping at least 15–20% of your storage free helps maintain smooth performance.

4. Does restarting a laptop improve performance?

Yes. Restarting clears temporary memory, stops unnecessary background processes, and refreshes system resources. If your laptop has been running continuously for several days, a restart can often resolve minor performance issues.

5. How much RAM do I need for a fast laptop?

For everyday tasks such as browsing, office work, and streaming, 8GB of RAM is generally sufficient. If you regularly edit videos, play games, or multitask heavily, upgrading to 16GB or more will provide a smoother experience.

6. Is upgrading to an SSD worth it?

Absolutely. Replacing a traditional HDD with an SSD is one of the most effective ways to speed up a slow laptop. Boot times, application loading, and overall responsiveness improve significantly after upgrading.

7. How do I know if my hard drive is failing?

Common signs include slow boot times, frequent freezing, clicking noises, missing files, failed software installations, and repeated disk errors. If you notice these symptoms, it’s advisable to back up your data and have the drive professionally tested.

8. Can viruses make my laptop slow?

Yes. Malware and viruses consume system resources while running in the background. They may also install unwanted software, display advertisements, or compromise personal data, all of which can affect performance.

9. Why does my laptop freeze while multitasking?

Freezing during multitasking is usually caused by insufficient RAM, excessive CPU usage, outdated software, or background applications consuming too many resources. Upgrading memory and closing unnecessary programs often resolves the issue.

10. Why is my laptop slow when browsing the internet?

A slow browser may be caused by too many open tabs, excessive browser extensions, cached data, malware, or insufficient system memory. Clearing the browser cache and removing unnecessary extensions can improve browsing speed.

11. Can overheating slow down a laptop?

Yes. High temperatures force the processor to reduce its speed to prevent hardware damage, a process known as thermal throttling. Cleaning the cooling system and improving airflow can restore normal performance.

12. Should I repair or replace my slow laptop?

If your laptop is only a few years old, repairing or upgrading it is often more cost-effective than purchasing a new device. SSD upgrades, RAM upgrades, and professional servicing can extend its lifespan considerably.

13. How often should I clean my laptop to keep it running fast?

It’s recommended to clean temporary files every month, remove unused software every few months, and have the internal cooling system professionally cleaned every 12 to 24 months, depending on usage.

14. Do Windows updates slow down laptops?

Immediately after a major update, your laptop may temporarily feel slower while background optimisation completes. Once the process finishes, updates generally improve performance, security, and stability.

15. Can too many startup programs slow down my laptop?

Yes. Every startup application uses memory and processor resources during boot. Disabling unnecessary startup programs helps reduce boot time and improves overall responsiveness.

16. How long does it take to repair a slow laptop?

The repair time depends on the cause. Software optimisation can often be completed on the same day, while SSD upgrades, RAM installations, or hardware repairs may take between 24 and 48 hours.

17. How much does it cost to fix a slow laptop in the UK?

The cost varies depending on the fault. Software optimisation is generally less expensive than replacing hardware components. A professional diagnosis helps determine the most suitable and cost-effective repair.

18. Which laptop brands does iExpert Repairs service?

iExpert Repairs works on a wide range of laptop brands, including MacBook, Dell, HP, Lenovo, ASUS, Acer, Microsoft Surface, Samsung, MSI, Toshiba, and many other Windows and macOS devices.

19. Do you offer a warranty on laptop repairs?

Yes. All qualifying repairs completed by iExpert Repairs are backed by a 12-month warranty, giving customers confidence that replacement parts and workmanship meet high-quality standards.

20. Where can I get professional laptop repair in the UK?

If your laptop remains slow after following the troubleshooting steps in this guide, iExpert Repairs offers professional Laptop Repair services across the UK. Our certified technicians provide expert diagnostics, SSD and RAM upgrades, software optimisation, motherboard repairs, battery replacements, and many other services using premium OEM-grade parts.

Conclusion

A slow laptop doesn’t always mean it’s time to replace your device. In many cases, performance issues are caused by software clutter, insufficient storage, outdated drivers, malware, overheating, or ageing hardware. By following the troubleshooting steps in this guide, you can often restore your laptop’s speed, improve system performance, and extend its lifespan without the expense of purchasing a new device.

If your laptop continues to freeze, crash, overheat, or perform slowly after trying these solutions, the issue may be related to failing hardware such as the SSD, RAM, battery, charging port, cooling system, or motherboard. A professional diagnosis can identify the exact cause and ensure the correct repair is completed before the problem becomes more serious.

At iExpert Repairs, we provide trusted Laptop Repair services across the UK for all major brands, including MacBook, Dell, HP, Lenovo, ASUS, Acer, Microsoft Surface, Samsung, MSI, and Toshiba. From software optimisation and SSD upgrades to RAM upgrades, laptop screen repairs, battery replacements, motherboard diagnostics, and data recovery, our certified technicians use premium OEM-grade parts backed by a 12-month warranty to restore your laptop’s performance.

Back to posts
Why Is My iPad Not Charging? Common Causes & Fixes

Introduction

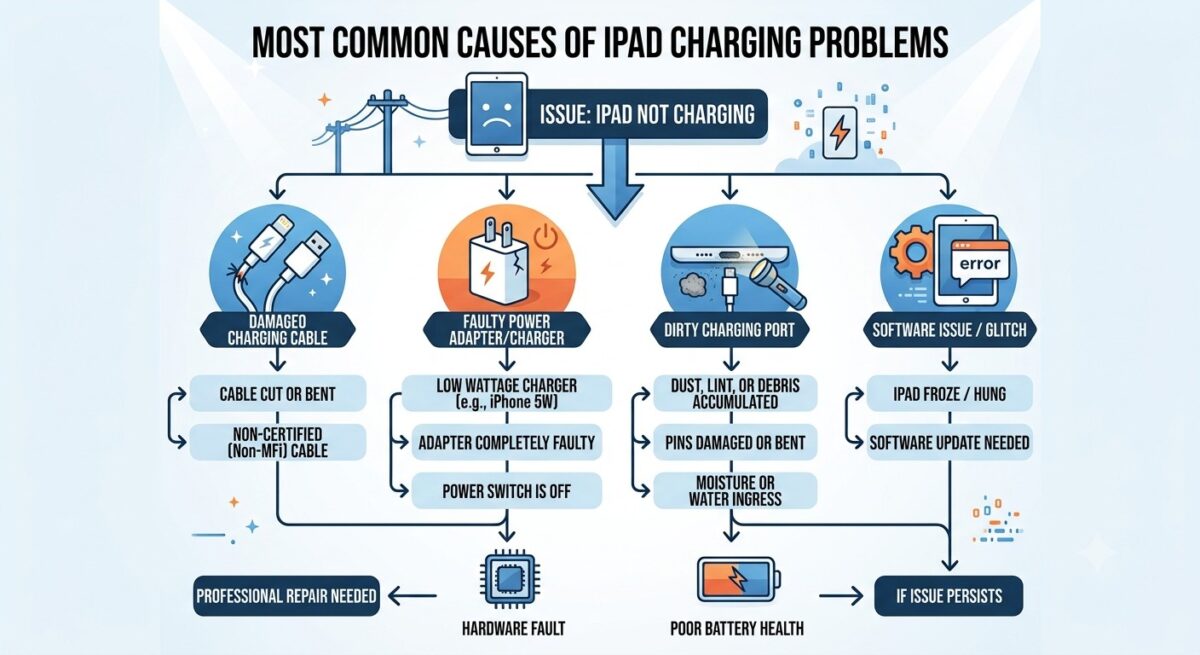
Few things are more frustrating than plugging in your iPad only to discover that it isn’t charging. Whether you’re trying to work, attend an online class, watch videos, or simply keep your device ready for everyday use, a charging problem can quickly become a major inconvenience. The good news is that an iPad failing to charge doesn’t always mean there’s a serious hardware fault. In many cases, the issue can be traced back to a damaged charging cable, a blocked charging port, outdated software, or even temporary system glitches.

However, if your iPad still refuses to charge after basic troubleshooting, the problem may involve the battery, charging port, or internal charging circuit. In this guide, we’ll explain the most common reasons why an iPad won’t charge, walk you through practical troubleshooting steps, and help you understand when professional repair is the best option. We’ll also briefly compare similar charging issues found on Android tablets, including Samsung Galaxy Tab devices, to give you a complete picture of tablet charging problems.

Why Is My iPad Not Charging? Quick Answer

If your iPad isn’t charging, the problem is usually caused by a faulty charging cable, damaged power adapter, dirty charging port, software issue, battery wear, overheating, or internal hardware failure. While many charging problems can be fixed at home, persistent issues often require professional diagnosis to prevent further damage.

Common Reasons Why an iPad Won’t Charge

Your iPad relies on several hardware and software components working together to charge correctly. If just one of these components develops a fault, charging may stop completely or become unreliable. Before assuming your battery has failed, it’s important to identify the actual cause, as many charging issues are surprisingly easy to fix.

The most common reasons include:

  • Damaged charging cable
  • Faulty power adapter
  • Dirty charging port
  • Software glitches
  • Battery deterioration
  • Overheating
  • Water damage
  • Internal charging circuit faults

Understanding these causes will help you troubleshoot your iPad more effectively and avoid replacing parts unnecessarily.

1. Faulty Charging Cable or Adapter

One of the most common reasons an iPad won’t charge is a damaged charging cable or power adapter. Charging accessories experience daily wear and tear, and even small signs of damage can interrupt the flow of power to your device. Frayed cables, bent connectors, loose USB ends, or damaged charging bricks can all prevent your iPad from charging properly.

If your iPad suddenly stops charging, begin by carefully inspecting your charging accessories. Look for exposed wires, cracked insulation, bent Lightning or USB-C connectors, and signs of overheating. If possible, try another Apple-certified or high-quality charger to see whether the problem disappears.

It’s also worth testing a different wall socket, as power outlets can occasionally develop faults too. Avoid using extremely cheap third-party chargers, as they may deliver unstable power and even damage your iPad’s battery over time.

2. Dirty or Damaged Charging Port

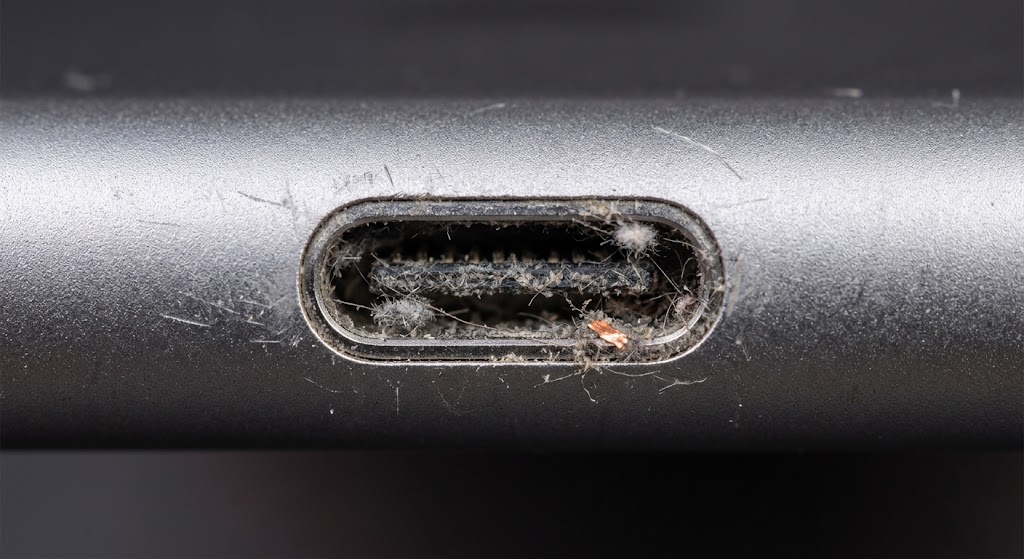
Even if your charging cable is in perfect condition, your iPad may still refuse to charge if the charging port is blocked. Dust, lint, pocket debris, and other small particles gradually collect inside the charging port, preventing the connector from making proper contact with the internal charging pins.

Common signs of a blocked or damaged charging port include:

  • The charging cable feels loose.
  • Charging starts and stops repeatedly.
  • You have to hold the cable at a certain angle.
  • The charging icon appears briefly before disappearing.

Use a flashlight to inspect the charging port carefully. If you notice dust or lint, gently remove it using a soft plastic tool or compressed air. Never use sharp metal objects such as needles or pins, as they can permanently damage the delicate connectors inside the port.

If cleaning the port doesn’t solve the problem, the charging connector itself may be worn or physically damaged. In these situations, professional repair is usually the safest option.

3. Software Glitches and iPadOS Bugs

Not every charging issue is caused by faulty hardware. Occasionally, software glitches can prevent your iPad from recognising that it’s connected to a charger. A temporary system error may cause the charging icon to disappear, stop the battery percentage from increasing, or interrupt charging unexpectedly.

Restarting your iPad is often enough to resolve these temporary issues. If the problem continues, check whether you’re running the latest version of iPadOS. Apple regularly releases updates that improve power management, battery performance, and charging reliability.

You should also close unnecessary background applications if your iPad becomes unusually warm while charging. Heavy processing loads can increase battery temperature and make charging appear much slower than normal.

Keeping your software up to date is one of the easiest ways to prevent future charging-related problems.

4. Battery Health and Ageing

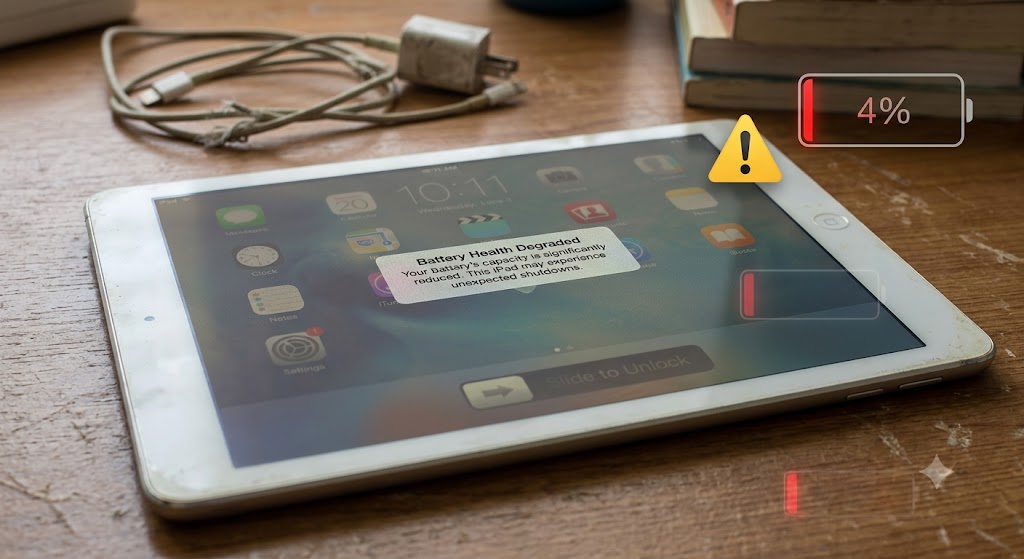
Every rechargeable battery gradually loses its ability to hold a charge as it gets older. While iPad batteries are designed to last for many years, heavy daily use eventually reduces their overall capacity. If your iPad is several years old, battery wear may be contributing to charging problems.

Signs of a worn battery include:

  • Charging takes much longer than before.
  • Battery drains unusually fast.
  • Random shutdowns.
  • Device won’t charge beyond a certain percentage.
  • iPad switches off despite showing battery remaining.

If you’ve already ruled out charger and charging port issues, a degraded battery becomes much more likely. Replacing the battery is often more affordable than replacing the entire device and can significantly improve battery life and performance.

4. Overheating Can Stop Your iPad Charging

Many users are surprised to learn that overheating can temporarily stop an iPad from charging. Apple includes built-in temperature protection that automatically pauses charging whenever the device becomes too hot. This safety feature protects the battery from long-term damage.

Your iPad may overheat if it’s left in direct sunlight, used for gaming while charging, or kept inside a hot car. Charging under pillows, blankets, or other surfaces that trap heat can also cause temperatures to rise.

If your iPad feels unusually warm, disconnect it from the charger and allow it to cool naturally before trying again. Avoid placing it in a refrigerator or using external cooling methods, as sudden temperature changes can create condensation and lead to additional damage.

5. iPad is Water or Liquid Damage

Liquid damage is another common reason an iPad refuses to charge. Even a small amount of moisture inside the charging port can interfere with electrical connections or trigger built-in safety mechanisms that temporarily disable charging.

Common symptoms of liquid damage include:

  • Moisture detection warnings.
  • Charging stops after exposure to water.
  • Corrosion around the charging connector.
  • Intermittent charging behaviour.

If your iPad has recently come into contact with water, disconnect the charger immediately and allow the device to dry completely before attempting to charge it again. Never use a hairdryer or place the device near direct heat, as excessive temperatures can cause further internal damage.

If charging problems continue after drying, professional inspection is strongly recommended because corrosion can spread inside the device over time.

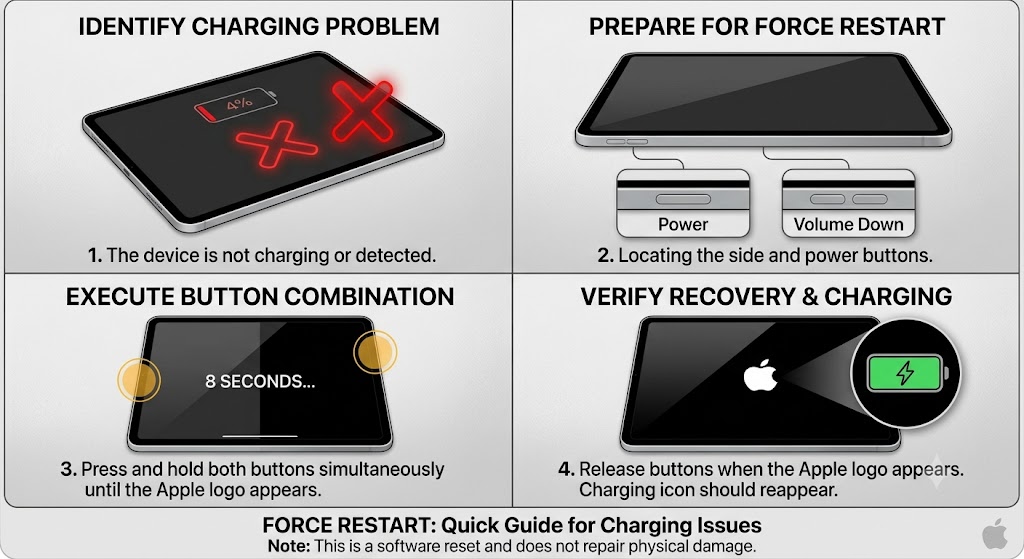
6. Force Restart Your iPad

If your iPad has completely frozen or the display remains black, performing a force restart may restore normal charging functionality. This process refreshes the operating system without deleting your personal data and can often resolve temporary software crashes that interfere with charging.

For newer iPads with Face ID, quickly press and release the Volume Up button, then the Volume Down button, and finally press and hold the Top button until the Apple logo appears. On models with a Home button, press and hold both the Home and Power buttons together until the Apple logo is displayed.

If your iPad begins charging normally after restarting, the issue was likely software-related rather than a hardware fault.

How to Fix an iPad That Won’t Charge

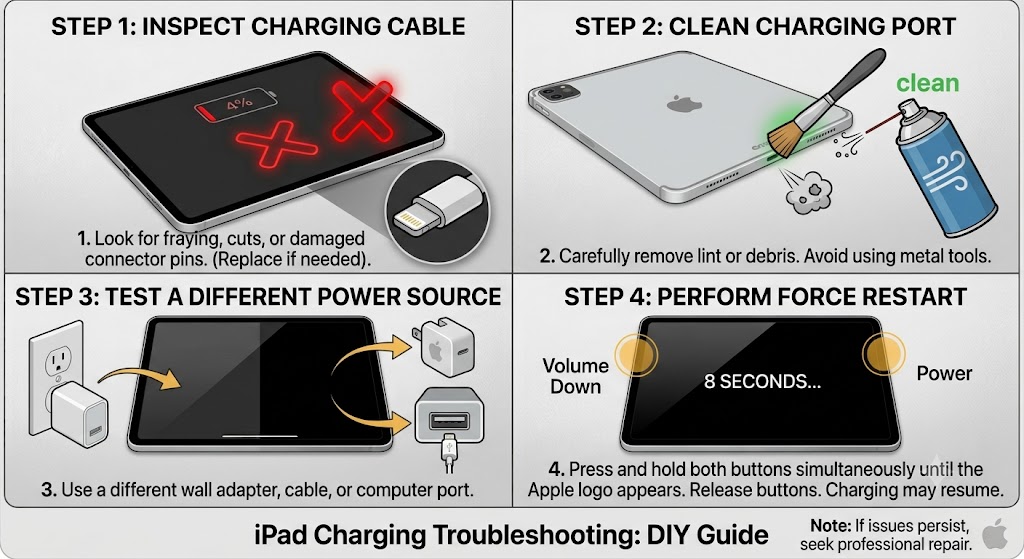
If you’ve identified that your iPad isn’t charging, don’t panic just yet. Many charging issues can be resolved without replacing any parts. By following the troubleshooting methods below, you can often identify whether the problem is caused by your charger, charging port, software, battery, or another hardware component. Start with the simplest fixes before considering professional repair.

1. Check Your Power Source

Sometimes the problem isn’t your iPad at all – it’s the power source you’re using. A faulty wall socket, damaged extension lead, or low-powered USB port can prevent your iPad from receiving enough power to charge correctly.

Try plugging your charger into a different wall outlet rather than charging through a computer’s USB port. If you’re using an extension lead, connect the charger directly to the wall socket. You should also test another Apple-certified charger if available. If your iPad begins charging normally, the issue was likely with the power source rather than the device itself.

2. Use the Correct Charger for Your iPad

Not every charger delivers enough power for every iPad model. Newer USB-C iPads generally require higher-wattage power adapters, while older Lightning models can work with lower-powered chargers. Using an incompatible or underpowered charger may result in slow charging or no charging at all.

Whenever possible, use the original Apple charger or a reputable replacement from a trusted manufacturer. Avoid extremely cheap third-party chargers, as they may provide unstable power output, affecting charging performance and potentially reducing your battery’s lifespan over time.

3. Clean the Charging Port Safely

Dust and lint can build up inside your iPad’s charging port over time, preventing the charging cable from connecting properly. Even a small amount of debris can stop electricity from reaching the battery, making it appear as though the iPad has stopped charging completely.

Inspect the charging port carefully under good lighting. If you notice dust or debris, gently remove it using compressed air or a non-metallic cleaning tool. Never use sharp objects like needles or paper clips, as they can damage the charging pins. If the cable still feels loose after cleaning, the charging port itself may need professional repair.

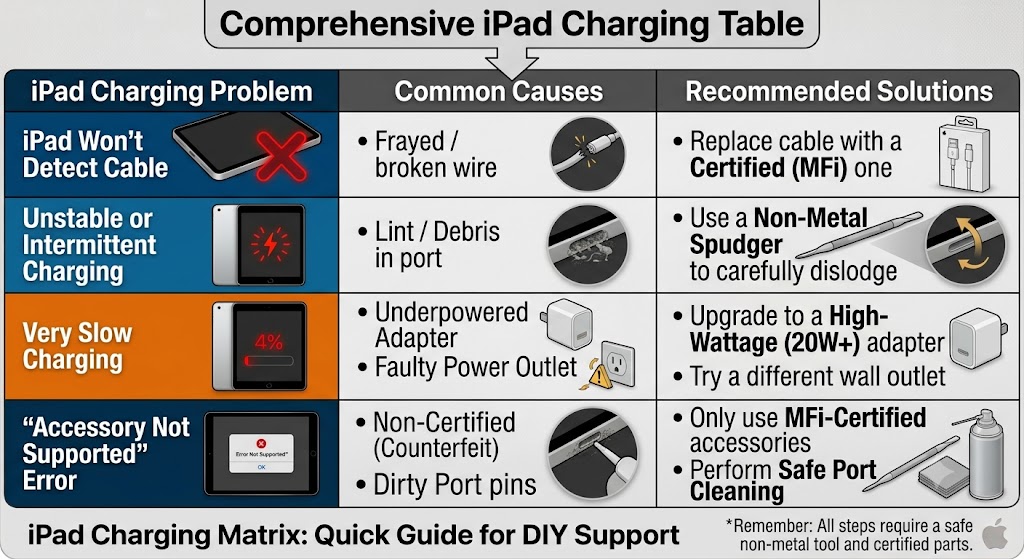
Common iPad Charging Problems and Their Solutions

Before moving on to more advanced troubleshooting steps, it’s helpful to understand the most common charging issues iPad users experience. The table below highlights the typical symptoms, their likely causes, and the recommended solutions. Use it as a quick reference to identify what may be preventing your iPad from charging properly.

ProblemPossible CauseRecommended Solution
iPad won’t charge at allFaulty charger, damaged charging port, or completely discharged batteryTest another charger, clean the charging port, and seek professional repair if the issue persists.
Charging is very slowLow-power adapter, background apps, or overheatingUse the correct Apple-compatible charger, close unnecessary apps, and allow the iPad to cool down.
Charging repeatedly stops and startsLoose charging cable or damaged charging portReplace the charging cable and inspect the charging port for damage or debris.
Charging cable only works at one angleBent connector or worn charging portHave the charging port professionally inspected and repaired if necessary.
iPad charges but the battery drains quicklyBattery degradation or ageingCheck the battery’s condition and consider a battery replacement if performance has significantly declined.
“Accessory Not Supported” message appearsNon-certified charger or damaged charging cableUse an Apple-certified charging cable and power adapter to ensure safe and reliable charging.

The table above covers the most common iPad charging problems, but every device is different. If you’ve checked these symptoms and your iPad still won’t charge, continue with the troubleshooting steps below to identify the exact cause and determine whether a simple fix or professional repair is required.

1. Update iPadOS to the Latest Version

Software problems can occasionally interfere with charging, particularly if your iPad is running an outdated version of iPadOS. Apple frequently releases updates that improve battery management, charging performance, and overall system stability.

If your iPad still has enough battery power, open Settings > General > Software Update and install any available updates. Before updating, make sure your internet connection is stable and avoid interrupting the installation process. Keeping your software up to date helps reduce the risk of future charging-related issues.

If your iPad becomes too hot, it may temporarily stop charging to protect the battery. This built-in safety feature prevents excessive heat from damaging internal components and is completely normal.

Move your iPad to a cooler environment, remove any thick protective case, and stop using demanding apps while it charges. Avoid leaving the device in direct sunlight or inside a hot car. Once it has cooled down, reconnect the charger and check whether charging resumes normally.

2. Test Another Charging Cable

Charging cables naturally wear out over time, especially if they’re frequently bent or tightly wrapped. Even if the cable appears undamaged on the outside, broken internal wires can prevent your iPad from charging consistently.

Try another Apple-certified Lightning or USB-C cable to rule out cable failure. If your iPad charges normally with a different cable, replacing the faulty accessory is a quick and inexpensive solution compared to repairing the device itself.

3. USB-C vs Lightning Charging Problems

Apple now uses both Lightning and USB-C connectors across different iPad models, and each connector type has its own common charging issues. Older Lightning ports are more likely to collect dust and lint, while USB-C ports can become loose or develop damaged internal pins after prolonged use.

Knowing which charging port your iPad uses can help narrow down the cause of the problem more quickly. If multiple chargers fail to work and the connector feels loose, professional inspection is recommended to determine whether the charging port requires replacement.

When Does an iPad Need Professional Repair?

If you’ve already tested multiple chargers, cleaned the charging port, restarted your iPad, and updated iPadOS without success, the issue is likely hardware-related. Continuing to force the charger into a damaged port can sometimes make the problem worse.

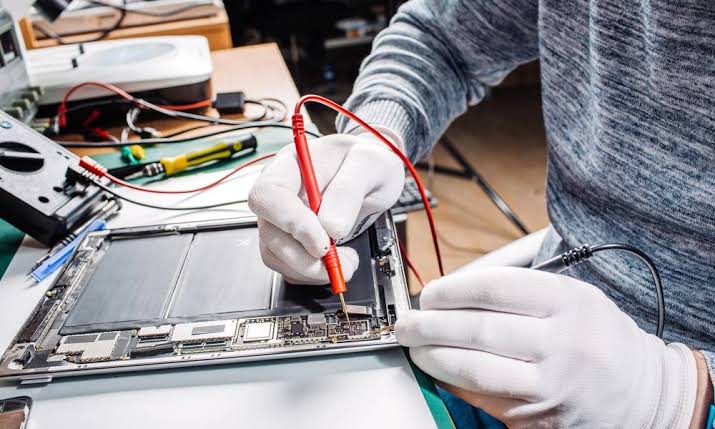
A qualified technician can inspect your battery, charging port, charging IC, motherboard, and internal power circuits using specialist diagnostic equipment. This ensures the correct component is repaired or replaced, saving you from unnecessary costs and helping restore your iPad to full working order.

How Much Does It Cost to Repair an iPad Charging Port in the UK?

One of the most common questions iPad owners ask is, “How much does it cost to repair an iPad charging port?” The answer depends on your iPad model, the type of charging connector (Lightning or USB-C), and whether the issue is limited to the charging port or involves additional internal components such as the charging IC or motherboard.

For most iPad models in the UK, a charging port replacement typically costs between £65 and £150. Older iPads with Lightning connectors are generally less expensive to repair, while newer USB-C models, such as the iPad Air, iPad Pro, and recent iPad generations, may cost more due to the complexity of the repair and the higher price of replacement parts. If the fault is caused by liquid damage or motherboard failure rather than the charging port itself, additional repair costs may apply.

Typical iPad Charging Port Repair Costs in the UK

iPad Repair TypeTypical UK Price
Charging Port Cleaning£20-£40
Lightning Charging Port Replacement£65-£100
USB-C Charging Port Replacement£79-£150
iPad Battery Replacement£60-£130
Charging IC Repair£120-£220
Motherboard Charging Repair£150-£300+

These prices are intended as a general guide and may vary depending on your iPad model, the availability of replacement parts, and the repair provider you choose. Before booking a repair, it’s always worth requesting a diagnostic assessment so the technician can confirm the exact cause of the charging issue and provide an accurate quotation.

How Long Does an iPad Charging Repair Take?

Many customers also ask, “How long does an iPad charging repair take?” The answer depends on the type of fault, your iPad model, and whether replacement parts are readily available. Fortunately, most common charging repairs can be completed much faster than people expect.

Simple repairs, such as charging port cleaning or battery replacement, are often completed on the same day. However, more complex faults involving the charging IC, motherboard, or liquid damage require additional diagnostic testing and microsoldering, which can increase repair times. Choosing an experienced repair specialist helps ensure your iPad is repaired accurately without unnecessary delays.

Typical iPad Charging Repair Times

Repair TypeTypical Turnaround Time
Charging Port Cleaning30-60 minutes
Charging Port Replacement1-3 hours
Battery Replacement1-2 hours
Charging IC Repair1-3 working days
Motherboard Repair2-5 working days
Liquid Damage Diagnosis1-3 working days
Full Diagnostic Inspection30-90 minutes

While many iPad charging repairs can be completed on the same day, the exact turnaround time depends on the availability of replacement parts and the complexity of the fault. If your device requires motherboard-level repairs or extensive liquid damage treatment, additional time may be needed to ensure the repair is completed safely and thoroughly. A professional diagnostic assessment is the best way to receive an accurate repair estimate and expected completion time.

iPad Charging Problems by Model

Charging faults can affect nearly every iPad model, regardless of its age. Older iPads are more likely to experience battery wear or Lightning port issues, while newer USB-C models can develop connector damage or charging circuit faults through everyday use.

If you’re looking for repair options for a specific device, you can explore dedicated repair services for models including the iPad 10th Gen (2022), iPad 9th Gen (2021), iPad Air 5 (2022), iPad Air 4 (2020), iPad Mini 6, iPad Mini 5, iPad Pro 11-inch, iPad Pro 12.9-inch, and many other iPad generations.

Troubleshooting Checklist Before Booking a Repair

Before booking an iPad repair, it’s worth carrying out a few basic troubleshooting steps. Many charging problems are caused by faulty accessories, software glitches, or minor charging port blockages that can be resolved without replacing any parts. Use the checklist below to ensure you’ve ruled out the most common causes before seeking professional assistance.

Troubleshooting StepWhy It MattersExpected Result
Try a different charging cableRules out a faulty or damaged cable.iPad begins charging normally if the cable was the issue.
Test another power adapterConfirms whether the charger is supplying enough power.Charging resumes with a working adapter.
Plug into a different wall socketEliminates problems with the power source.Confirms the electrical outlet isn’t faulty.
Clean the charging port carefullyRemoves dust and lint blocking the connector.Charging connection becomes stable and secure.
Restart or force restart your iPadFixes temporary software glitches affecting charging.Charging may resume after the device restarts.
Update to the latest version of iPadOSResolves known software bugs and charging issues.Improves charging stability and overall performance.
Allow the iPad to cool downCharging automatically pauses if the device overheats.Charging resumes once the device reaches a safe temperature.
Check for signs of liquid damageMoisture or corrosion can prevent normal charging.Helps determine whether professional repair is required.

If you’ve completed all of the troubleshooting steps above and your iPad still won’t charge, the problem is likely related to the battery, charging port, or internal charging circuitry. In this situation, a professional diagnostic inspection is the safest and most cost-effective way to identify the fault and restore normal charging.

Charging Port vs Battery Problems: How to Identify the Real Cause

If your iPad isn’t charging properly, it can be difficult to tell whether the issue is caused by a faulty charging port or a worn-out battery. Although both problems can prevent your iPad from charging, they often present different symptoms. The comparison table below will help you identify the most likely cause, making it easier to decide whether your device may need a charging port repair or a battery replacement.

SymptomLikely Charging Port IssueLikely Battery Issue
Charging cable feels loose or wobblyYesNo
iPad only charges when the cable is held at a certain angleYesNo
Charging repeatedly disconnects and reconnectsYesRare
Visible dirt, lint, or physical damage inside the charging portYesNo
Battery drains unusually fast after a full chargeNoYes
iPad shuts down unexpectedly despite showing battery lifeNoYes
Charging stops at a certain battery percentageRareCommon
iPad becomes unusually hot while chargingPossiblePossible
Device won’t charge even after trying multiple chargersPossiblePossible
Battery percentage jumps or behaves unpredictablyRareCommon

Although this comparison can help narrow down the source of the problem, it should only be used as a general guide. In some cases, both the charging port and battery may contribute to charging issues. If you’ve already tested different chargers, cleaned the charging port, restarted your iPad, and updated iPadOS without success, a professional diagnostic inspection is recommended. An experienced technician can accurately identify the faulty component and advise whether your iPad requires a charging port repair, battery replacement, or another hardware repair.

Tips to Prevent Future Charging Problems

While some hardware failures are unavoidable, good charging habits can significantly extend your iPad’s lifespan. Always use high-quality charging accessories, keep the charging port free from dust, and avoid exposing your device to excessive heat or moisture.

You should also unplug the charger carefully instead of pulling on the cable and replace damaged charging accessories as soon as you notice signs of wear. Taking these simple precautions can reduce the risk of future charging problems and help keep your iPad performing reliably for years.

FAQs – Why Is My iPad Not Charging?

1. Why is my iPad not charging even when it’s plugged in?

If your iPad isn’t charging when plugged in, the most common causes include a faulty charging cable, damaged power adapter, dirty charging port, software glitches, or a worn-out battery. Start by testing another Apple-certified charger, cleaning the charging port, and restarting your iPad. If the problem continues after trying these steps, the device may require professional repair.

2. Why is my iPad charging very slowly?

Slow charging is often caused by using a low-power charger, running multiple apps while charging, or charging the iPad in a hot environment. Using the correct Apple-compatible power adapter and allowing the device to charge without heavy usage can significantly improve charging speed.

3. How do I know if my iPad charging port is damaged?

A damaged charging port usually causes the charging cable to feel loose, disconnect frequently, or only work when held at a certain angle. You may also notice visible dirt, bent pins, or physical damage inside the port. If cleaning the port doesn’t solve the problem, it should be inspected by a qualified technician.

4. Can a dirty charging port stop my iPad from charging?

Yes. Dust, lint, and other debris can build up inside the charging port over time, preventing the charging cable from making proper contact. Carefully cleaning the port with compressed air or a non-metallic tool often restores normal charging without requiring any repairs.

5. Why does my iPad say “Accessory Not Supported”?

This message usually appears when you’re using a damaged, low-quality, or non-certified charging cable or power adapter. Switching to an Apple-certified charging accessory often resolves the issue. In some cases, a dirty or damaged charging port may also trigger this warning.

6. Can an outdated version of iPadOS affect charging?

Yes. Although it’s less common, software bugs in older versions of iPadOS can occasionally interfere with charging performance. Installing the latest software update helps improve battery management, charging reliability, and overall system stability.

7. Why does my iPad stop charging when it gets hot?

Apple devices include built-in temperature protection to prevent battery damage. If your iPad becomes too hot while charging, it may temporarily pause charging until the temperature returns to a safe level. Allow the device to cool naturally before reconnecting the charger.

8. How can I tell if my iPad battery needs replacing?

Common signs of a worn battery include rapid battery drain, unexpected shutdowns, slow charging, overheating, and poor battery life even after a full charge. If your iPad is several years old and these symptoms continue, a battery replacement may be the most effective solution.

9. Is it safe to use a third-party charger with my iPad?

Yes, but only if it’s from a reputable manufacturer and meets Apple’s charging standards. Cheap, uncertified chargers can provide unstable power, reduce charging efficiency, and may even damage your battery or charging circuit over time.

10. Can I fix an iPad that won’t charge myself?

Many charging issues can be resolved at home by replacing the charging cable, testing another adapter, cleaning the charging port, restarting the device, or updating iPadOS. However, if the problem is caused by internal hardware such as the charging port, battery, or motherboard, professional repair is recommended.

11. Why is my iPad charging on and off repeatedly?

Intermittent charging usually indicates a loose charging cable, damaged charging port, worn connector, or faulty charger. If the charging icon repeatedly appears and disappears, try another cable and inspect the charging port for debris or physical damage.

12. Does using my iPad while charging affect battery life?

Using your iPad for demanding activities such as gaming or video editing while charging generates additional heat, which can slow charging and increase long-term battery wear. For the fastest and safest charging, it’s best to minimise heavy usage until the battery has recharged.

13. What should I do if my iPad won’t charge after water damage?

Immediately disconnect the charger and turn off the device if possible. Allow the iPad to dry completely before attempting to charge it again. If charging problems continue after drying, internal corrosion may be present, and professional inspection is strongly recommended.

14. How long should an iPad battery last?

Most iPad batteries are designed to provide several years of reliable performance under normal usage. Battery lifespan depends on charging habits, usage patterns, and environmental conditions. As the battery ages, charging performance and battery capacity gradually decline.

15. Can a faulty charging cable damage my iPad?

A damaged or poor-quality charging cable may not only prevent proper charging but can also deliver unstable power to your device. Using Apple-certified or high-quality replacement cables helps protect both the battery and internal charging components.

16. Why won’t my iPad charge past a certain percentage?

If your iPad consistently stops charging at the same battery percentage, the problem may be related to battery degradation, software issues, overheating, or battery management features. Restarting the device, updating iPadOS, and testing another charger are good first steps before seeking professional diagnosis.

17. Do older iPads experience charging problems more often?

Yes. Older iPads are generally more likely to develop charging issues due to battery ageing, worn charging ports, and years of daily use. Regular maintenance and timely battery replacement can help extend the life of an older device.

18. Can wireless charging solve iPad charging problems?

Currently, iPads do not support standard wireless charging like many smartphones. Charging relies on the Lightning or USB-C port, making the condition of the charging accessories and connector especially important.

19. When should I seek professional iPad repair?

If you’ve already tried different chargers, cleaned the charging port, updated iPadOS, and restarted your iPad without success, it’s time to seek professional repair. A qualified technician can accurately diagnose whether the fault lies with the battery, charging port, or internal charging circuitry.

20. How can I prevent future iPad charging problems?

To reduce the risk of charging issues, always use certified charging accessories, keep the charging port clean, avoid exposing your iPad to excessive heat or moisture, unplug the charger carefully, and replace damaged cables as soon as signs of wear appear. These simple habits can help extend the lifespan of both your battery and charging port.

Conclusion

If you’ve been asking yourself, “Why is my iPad not charging?”, the good news is that many charging problems can be diagnosed and resolved without immediately replacing your device. In many cases, the issue is caused by something simple, such as a faulty charging cable, a damaged power adapter, dust inside the charging port, an outdated version of iPadOS, or temporary software glitches. Following the troubleshooting steps outlined in this guide can often help restore normal charging and save you the cost of unnecessary repairs.

However, if your iPad still won’t charge after testing different chargers, cleaning the charging port, updating the software, and restarting the device, the problem may be related to the battery, charging port, charging IC, or another internal hardware component. Continuing to use a faulty charger or forcing the charging cable into a damaged port may worsen the issue and lead to more expensive repairs.

Whether you own an iPad, iPad Air, iPad mini, or iPad Pro, diagnosing charging issues early can help extend the life of your device and reduce repair costs. If you’re unsure what’s causing the problem, a professional diagnostic service is the safest way to identify the fault and restore your iPad to full working order.

Why Choose iExpert Repairs?

At iExpert Repairs, we specialise in diagnosing and repairing charging problems across a wide range of Apple devices. Our experienced technicians use professional diagnostic equipment to accurately identify faults, ensuring that only the necessary components are repaired or replaced.

When you choose iExpert Repairs, you benefit from:

  • Experienced technicians with years of tablet repair expertise.
  • Professional diagnostics to identify the exact cause of charging issues.
  • High-quality replacement parts for reliable, long-lasting repairs.
  • Fast turnaround times to minimise downtime.
  • Competitive pricing with no hidden costs.
  • Repairs available for iPad, iPad Air, iPad mini, iPad Pro, and many Samsung Galaxy Tab models.
  • Friendly customer support before, during, and after your repair.

Our goal is to provide reliable, affordable, and professional tablet repair services, helping you get back to using your device as quickly as possible.

Back to posts

How Much to Fix iPad Screen? Complete Repair Cost Guide

Introduction

If you’re wondering how much to fix an iPad screen, you’re not alone. A cracked or damaged iPad display is one of the most common tablet repairs, and the cost depends on several factors, including your iPad model, the type of screen damage, and whether only the front glass or the entire display needs replacing. Understanding these factors can help you estimate repair costs before choosing a repair service.

Older iPad models are generally less expensive to repair because the glass and display can sometimes be replaced separately. In contrast, newer iPad Air Models and iPad Pro models often require a complete display assembly replacement, making repairs more expensive. The final price can also vary depending on whether you choose Apple or a reputable independent repair specialist and the quality of replacement parts used.

This guide provides accurate, up-to-date information based on current UK repair pricing and industry best practices. You’ll learn how iPad screen repair costs vary by model, what affects the overall price, the difference between glass-only repairs and full display replacements, and whether repairing your iPad is the most cost-effective option.

How Much Does It Cost to Fix an iPad Screen?

The cost of fixing an iPad screen in the UK typically ranges from £50 to over £500, depending on the model and the extent of the damage.

Older entry-level iPads usually have a separate glass digitiser, allowing technicians to replace only the cracked glass if the LCD underneath remains undamaged. This keeps repair costs relatively low.

On newer iPad Air and iPad Pro models, however, Apple uses fully laminated displays where the glass, digitiser, and LCD or OLED panel are bonded together. Even a small crack in the front glass may require replacing the entire display assembly, making repairs considerably more expensive.

Below is a general guide to typical UK repair costs.

iPad TypeTypical UK Repair Cost
Older iPad£50-£120
iPad 7th-10th Generation£70-£180
iPad Mini Models£70-£220
iPad Air Models£90-£320
iPad Pro Models£99-£550+

Please note: These are estimated market prices. The final cost depends on your specific iPad model, the severity of the damage, and the quality of replacement parts chosen.

What Determines the Cost of an iPad Screen Repair?

Several factors influence how much you’ll pay to repair an iPad screen.

1. Your iPad Model

The biggest factor is the model itself.

Entry-level iPads generally cost less to repair because replacement components are widely available. Premium models such as the iPad Pro feature advanced display technologies that significantly increase repair costs.

For example:

This is one reason why obtaining an accurate quote based on your exact model is important.

2. Type of Screen Damage

Not every cracked screen requires the same repair. Common types of damage include:

  • Cracked outer glass
  • Broken digitiser
  • Dead pixels
  • Black screen
  • Flickering display
  • Touch not responding
  • LCD bleeding
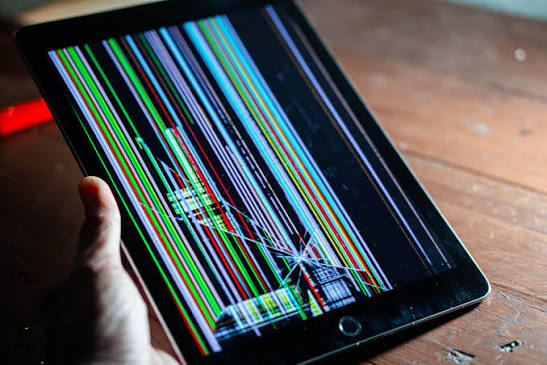
  • Display lines
  • Complete display failure

If your touchscreen has stopped responding after being dropped, it’s worth reading our guide on Phone Touch Screen Not Responding? before deciding whether a replacement is necessary.

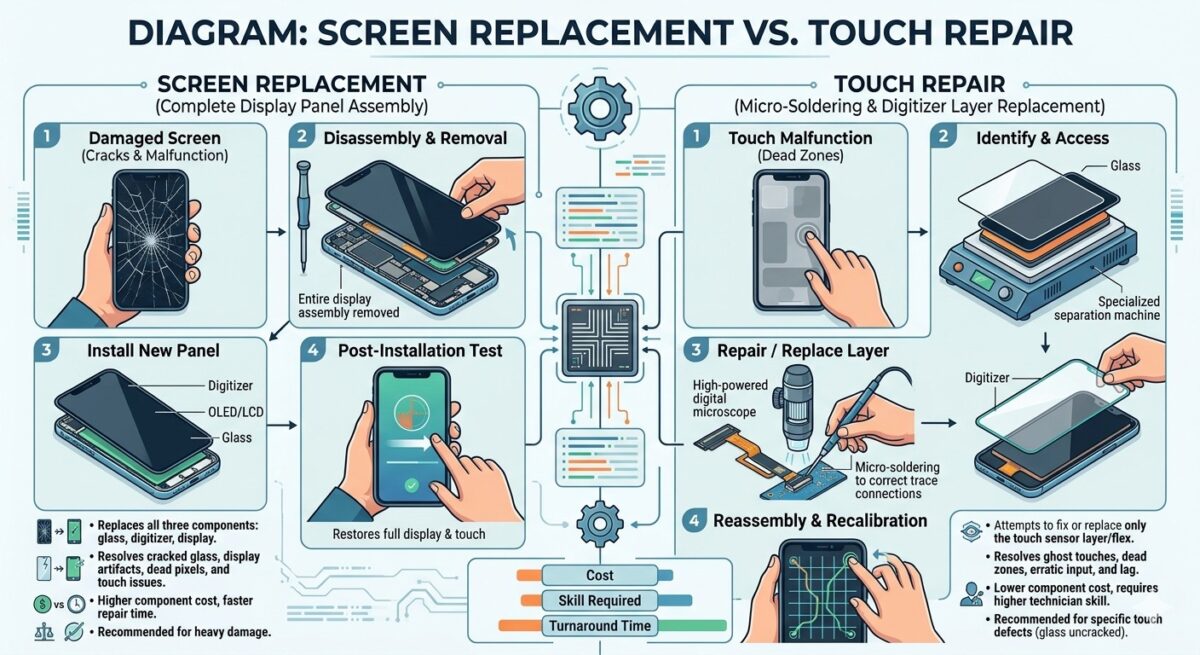
3. Glass-Only Repair vs Full Display Replacement

Many customers assume every cracked screen needs a complete replacement. In reality, some older iPads allow technicians to replace only the front glass, which is considerably cheaper. However, many newer iPads require replacing:

  • Glass
  • Touch digitiser
  • LCD or OLED panel

as one complete display assembly. This is why two iPads with similar cracks may have very different repair costs.

4. Replacement Part Quality

The quality of replacement parts also affects pricing. Generally, repair providers offer:

  • Genuine Apple parts (where available)
  • OEM-quality components
  • High-quality aftermarket displays
  • Budget replacement screens

Lower-cost parts may reduce the repair price but can sometimes affect brightness, colour accuracy, touch responsiveness, or long-term durability. Choosing a trusted repair specialist that uses high-quality components is often the better long-term investment.

5. Repair Provider

Where you choose to have your iPad repaired can significantly affect the final bill. Options include:

  • Apple
  • Apple Authorised Service Providers
  • Independent repair specialists
  • Local repair shops
  • Mail-in repair services

Independent repair centres often provide competitive pricing, faster turnaround times, and warranties while maintaining high repair standards.

Key Takeaways

Before requesting a repair quote, make sure you know:

  • Your exact iPad model
  • Whether only the glass is cracked or the display is damaged
  • If the touchscreen still works
  • Whether there are black spots, coloured lines, or flickering
  • The type of replacement parts being offered
  • The warranty included with the repair

Having this information helps you compare repair options more accurately and avoid unexpected costs.

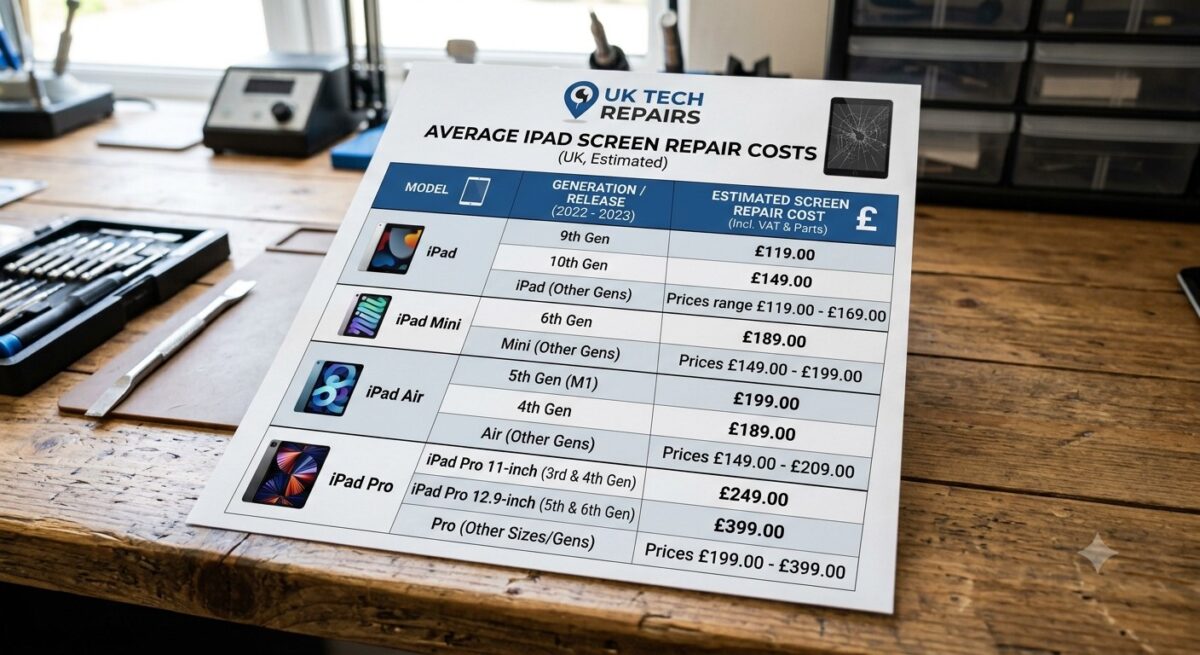
Average iPad Screen Repair Costs by Model

One of the biggest factors affecting the cost of an iPad screen repair is the model you own. Apple has released numerous iPad generations, each with different display technologies and repair requirements. Older iPads often feature a separate glass digitiser, while many newer iPad Air and iPad Pro models use fully laminated displays, making repairs more complex and expensive.

The prices below are general estimates for the UK repair market in 2026. Actual costs may vary depending on the repair provider, the quality of replacement parts used, and the extent of the damage.

Standard iPad Models

Standard iPads are generally the most affordable to repair because replacement parts are widely available and many older models allow glass-only repairs.

iPad ModelEstimated Screen Repair Cost (UK)
iPad 5th Generation£50-£90
iPad 6th Generation£55-£95
iPad 7th Generation£70-£120
iPad 8th Generation£75-£130
iPad 9th Generation£80-£140
iPad 10th Generation£120-£220

If you own one of these devices, choosing a specialist repair centre can often provide a quicker and more cost-effective solution than replacing the entire tablet.

iPad Mini Models

The compact design of the iPad Mini makes screen repairs slightly more expensive than some standard iPads, particularly on newer generations with laminated displays.

iPad Mini ModelEstimated Repair Cost
iPad Mini 2£60-£100
iPad Mini 3£60-£105
iPad Mini 4£90-£160
iPad Mini 5£120-£220
iPad Mini 6£180-£320

Owners of newer Mini models should expect higher repair costs due to the advanced display assembly and increased labour involved.

iPad Air Models

The iPad Air range combines premium performance with thinner, more advanced displays. As a result, screen repairs are usually more expensive than standard iPads.

iPad Air ModelEstimated Repair Cost
iPad Air (1st Gen)£70-£110
iPad Air 2£89-£180
iPad Air 3£89-£190
iPad Air 4£110-£300
iPad Air 5£119-£290

If you’re using a newer Air model, professional installation is strongly recommended, as these displays require specialised tools and careful handling.

iPad Pro Models

The iPad Pro range features Apple’s most advanced displays, including high refresh rates and premium laminated screen technology. Consequently, these models are usually the most expensive to repair.

iPad Pro ModelEstimated Repair Cost
9.7-inch£140-£220
10.5-inch£170-£260
11-inch£220-£420
12.9-inch£250-£550+

For newer Pro models, replacing the display often involves changing the entire screen assembly rather than just the front glass, significantly increasing repair costs.

If you own an iPad Pro, using an experienced repair specialist with high-quality replacement parts can help maintain display performance and touch responsiveness.

Apple vs Independent iPad Screen Repair Costs

When your iPad screen breaks, you’ll generally have two repair options: Apple or an independent repair specialist. Both have advantages, but the overall cost, turnaround time, and flexibility can differ considerably.

Apple Repair Services

Apple repairs are carried out using genuine components and follow the company’s official repair procedures. If your iPad is covered by AppleCare+, your repair cost may be significantly reduced.

However, if your device is out of warranty or accidental damage isn’t covered, official repair prices can be substantially higher than those offered by independent repair providers.

Apple repairs may also involve replacing the entire display assembly, even when only the outer glass is cracked.

Independent Repair Specialists

A reputable independent repair centre can often provide:

  • Competitive pricing
  • Faster turnaround times
  • High-quality replacement parts
  • Warranty on repairs
  • Repairs for older iPad models that Apple may no longer support

Many customers choose independent repair specialists because they offer excellent value while restoring the device to full working order. When selecting a repair provider, always check customer reviews, warranty terms, and the quality of the replacement components being used.

What Else Can Affect the Final Repair Price?

Even if two people own the same iPad model, the repair cost may not be identical. Several additional factors can influence the final quote.

Extent of the Damage

A small crack in the corner of the screen may require less work than an iPad with severe impact damage affecting the display, frame, and internal components.

Technicians will normally inspect the device to determine whether the damage is limited to the screen or if additional repairs are required.

Frame Damage

If the aluminium frame has become bent after a drop, fitting a new screen safely can be more difficult.

In some cases, technicians must straighten or repair the frame before installing the replacement display, increasing both labour time and repair costs.

Internal Component Damage

A heavy impact can damage more than just the screen. Your repair technician may also find issues with:

  • The touchscreen digitiser
  • Display connectors
  • Front camera
  • Face ID components (where applicable)
  • Internal flex cables
  • Battery

Identifying these problems early helps prevent repeat repairs later.

Replacement Part Quality

Not all replacement screens are manufactured to the same standard. Higher-quality components generally provide:

  • Better brightness
  • More accurate colours
  • Smoother touch response
  • Greater durability
  • Improved long-term reliability

Although premium parts may cost slightly more initially, they often deliver better value over the lifespan of the device.

Labour Costs

Repair prices also reflect the skill and experience required to complete the job safely. Modern iPads use strong adhesives and delicate internal components, meaning professional repairs require specialist equipment and technical expertise.

For this reason, choosing the cheapest repair option isn’t always the best decision if it compromises quality or reliability.

Glass Repair vs Full Display Replacement

Many people assume that every cracked iPad screen requires a complete display replacement. In reality, the type of repair depends on your iPad model and the extent of the damage.

Older iPads often have a separate front glass (digitiser) and LCD, allowing technicians to replace only the cracked glass if the display underneath is still working correctly. This type of repair is generally more affordable.

Newer iPad Air and iPad Pro models, however, feature fully laminated displays where the glass, touch digitiser, and LCD or OLED panel are bonded together. Even a minor crack can require replacing the entire display assembly, which increases both the complexity and the overall repair cost.

When Is Glass-Only Repair Possible?

A glass-only repair may be suitable if:

  • The LCD shows a clear image.
  • The touchscreen responds normally.
  • There are no black spots or dead pixels.
  • No coloured lines appear on the display.
  • The screen brightness remains consistent.
  • The damage is limited to the outer glass.

Replacing only the glass is usually the most cost-effective option for compatible iPad models.

When Do You Need a Full Display Replacement?

A complete display replacement is normally required if your iPad has:

  • A black or blank screen.
  • Flickering or flashing display.
  • Vertical or horizontal lines.
  • Dead pixels.
  • Ink-like black patches.
  • An unresponsive touchscreen.
  • Display discolouration.
  • Internal screen damage caused by a heavy impact.

A qualified technician can inspect your iPad and recommend the most appropriate repair based on the condition of the display.

Signs Your iPad Screen Needs Immediate Repair

Not every cracked iPad screen requires immediate replacement, but some warning signs indicate that your device should be inspected by a professional as soon as possible. Ignoring these symptoms can lead to further damage, higher repair costs, and even permanent display failure.

Common signs include:

  • A touchscreen that no longer responds accurately.
  • Flickering or flashing display.
  • Black spots or coloured lines on the screen.
  • A shattered screen with sharp or loose glass.
  • A black display even though the iPad is powered on.
  • The screen lifting away from the frame.
  • Dust or moisture entering through cracked glass.
  • Ghost touches or random screen inputs.

If you notice any of these issues, arranging a professional inspection promptly can help prevent additional damage and reduce the likelihood of more expensive repairs.

Is It Worth Repairing a Cracked iPad Screen?

In most cases, yes. Repairing a cracked iPad screen is often much more affordable than replacing the entire device, especially if the iPad is otherwise in good working condition.

Professional screen repairs can restore:

  • Touchscreen functionality
  • Display clarity
  • Device safety
  • Resale value
  • Everyday usability

If the battery, charging port, cameras, and internal hardware are all functioning correctly, investing in a quality screen repair is usually the most economical solution.

However, if your iPad has multiple faults – such as severe ipad water damage, motherboard issues, or extensive structural damage – you may want to compare the repair cost with the price of purchasing a newer model.

How Long Does an iPad Screen Repair Take?

The repair time depends on the iPad model, the availability of replacement parts, and the complexity of the repair. In general:

Repair TypeTypical Turnaround Time
Glass-only repair1-3 hours
Full display replacement2-4 hours
Advanced repairs with additional damageSame day to 3 working days

Many independent repair centres can complete common iPad screen repairs on the same day, provided the required parts are in stock. If additional components need replacing, such as the battery or charging connector, the repair may take slightly longer.

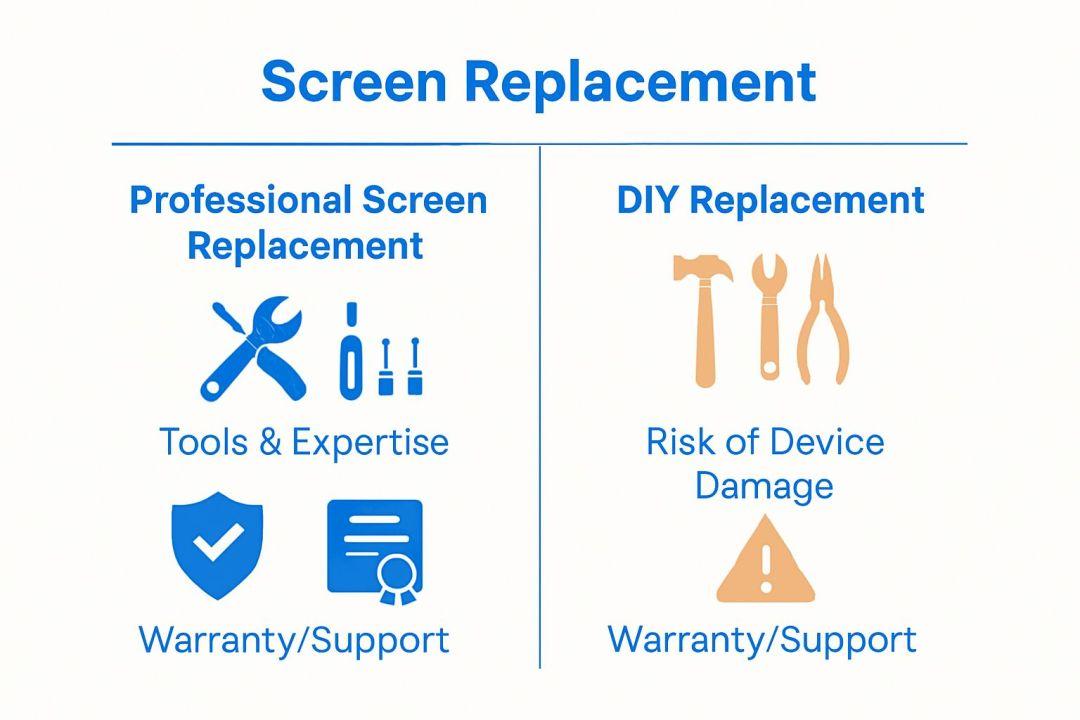
Can You Repair an iPad Screen Yourself?

While DIY repair kits are available online, replacing an iPad screen is considerably more difficult than many people expect.

Modern iPads are assembled using strong adhesives, delicate flex cables, and tightly packed internal components. Opening the device without the correct tools or experience can easily lead to further damage.

DIY repairs also carry the risk of:

  • Damaging the LCD.
  • Tearing internal flex cables.
  • Cracking the replacement screen during installation.
  • Reducing water and dust resistance.
  • Voiding any remaining warranty.
  • Increasing the overall repair cost if professional assistance is needed afterwards.

For most users, having the repair carried out by an experienced technician is the safer and more reliable option.

How to Prevent Future iPad Screen Damage

Although accidents can’t always be avoided, taking a few preventative measures can significantly reduce the risk of damaging your iPad screen and help extend the life of your device.

To better protect your iPad:

  • Use a high-quality protective case designed for your iPad model.
  • Install a tempered glass screen protector for added impact resistance.
  • Avoid placing heavy objects on top of your iPad.
  • Keep your device away from the edges of tables and desks.
  • Store your iPad safely when travelling.
  • Avoid exposing it to extreme heat or cold.
  • Clean the display regularly using a soft microfibre cloth.
  • Keep liquids away from your device whenever possible.

These simple precautions can help minimise accidental damage, reduce future repair costs, and keep your iPad performing at its best.

How to Choose a Reliable iPad Repair Service

Not all repair providers offer the same level of quality. Choosing a trusted repair specialist helps ensure your iPad is repaired correctly and continues to perform as expected.

Before booking a repair, consider the following:

Check Customer Reviews

Look for consistently positive reviews that mention repair quality, turnaround times, customer service, and aftercare.

Ask About Replacement Parts

A reputable repair centre should clearly explain whether they use genuine, OEM-quality, or premium aftermarket components.

Confirm the Warranty

Most professional repair providers include a warranty covering replacement parts and workmanship, giving you additional peace of mind after the repair.

Compare More Than Just Price

The cheapest repair isn’t always the best value. Experienced technicians, quality components, and reliable aftercare often justify paying slightly more for a repair that lasts.

Choose Specialists With Experience

Repairing modern iPads requires specialist knowledge and equipment. An experienced technician is more likely to diagnose hidden damage and complete the repair safely.

FAQs About iPad Screen Repair Costs

. How much does it cost to fix an iPad screen in the UK?

The cost of repairing an iPad screen in the UK typically ranges from £50 to £550+, depending on the iPad model, the extent of the damage, and whether only the glass or the entire display needs replacing.

2. Why are some iPad screen repairs more expensive than others?

Repair costs vary because different iPad models use different display technologies. Newer iPad Air and iPad Pro models have laminated displays that are more expensive to replace than the separate glass and LCD used in many older iPads.

3. Can a cracked iPad screen be repaired without replacing the display?

Yes. If only the outer glass is damaged and the LCD and touchscreen are still functioning correctly, some older iPad models can have a glass-only repair. Newer models usually require a complete display replacement.

4. Is it cheaper to repair an iPad screen than buy a new iPad?

In most cases, yes. Screen repairs are usually far more affordable than replacing the entire device, especially if the iPad is otherwise in good working condition.

5. How long does an iPad screen repair usually take?

Many iPad screen repairs can be completed on the same day. Depending on the model and the repair required, the process typically takes between 1 and 4 hours.

6. Does Apple repair cracked iPad screens?

Yes. Apple offers screen repair services for eligible iPad models. If your device is covered by AppleCare+, the repair cost may be reduced. Out-of-warranty repairs are generally more expensive.

7. Is an independent repair shop a good alternative to Apple?

A reputable independent repair specialist can provide high-quality repairs, competitive pricing, faster turnaround times, and warranties, making them a popular choice for many iPad owners.

8. Can I continue using my iPad with a cracked screen?

Although your iPad may still function, using it with a cracked screen isn’t recommended. Cracks can spread, reduce touch sensitivity, and allow dust or moisture to enter the device.

9. Will repairing my iPad screen erase my data?

A standard screen replacement shouldn’t affect your data. However, it’s always advisable to back up your iPad before any repair as a precaution.

10. What is the difference between glass replacement and display replacement?

Glass replacement involves replacing only the outer glass when the LCD is still working. Display replacement includes replacing the glass, digitiser, and LCD or OLED assembly together.

11. Can Face ID or Touch ID stop working after a screen repair?

When repairs are performed correctly using compatible parts and proper procedures, Face ID or Touch ID should continue to work. However, severe impact damage before the repair can sometimes affect these components.

12. Are aftermarket iPad screens reliable?

High-quality aftermarket screens can provide excellent performance and value. The quality varies between suppliers, so it’s important to choose a trusted repair provider that uses premium replacement parts.

13. How do I know if my iPad needs a full screen replacement?

Signs include black spots, coloured lines, flickering, dead pixels, an unresponsive touchscreen, or a completely blank display. A technician can confirm the exact repair required after inspecting the device.

14. Is it worth repairing an older iPad?

If your iPad still meets your daily needs and only the screen is damaged, repairing it is often a cost-effective option compared with purchasing a new device.

15. Can I repair my iPad screen myself?

DIY repair kits are available, but iPad screen replacements require specialist tools and experience. Attempting the repair yourself may cause additional damage and increase the overall repair cost.

16. What should I do immediately after cracking my iPad screen?

Stop using the device if the glass is badly shattered, apply a temporary screen protector or clear tape if necessary to prevent further cracking, back up your data, and arrange a professional inspection as soon as possible.

17. Does AppleCare+ cover accidental screen damage?

AppleCare+ can reduce the cost of accidental damage repairs, although a service fee usually applies. Coverage depends on your plan and the terms in effect at the time of the repair.

18. Can a cracked iPad screen get worse over time?

Yes. Even a small crack can spread with daily use, pressure, or further impacts. Delaying repairs may also increase the risk of damage to the LCD or internal components.

19. How can I protect my iPad screen after it has been repaired?

Using a high-quality tempered glass screen protector and a durable protective case can help reduce the risk of future screen damage caused by accidental drops or impacts.

20. How do I choose the best iPad screen repair service?

Look for a repair provider with experienced technicians, positive customer reviews, high-quality replacement parts, transparent pricing, and a warranty on both parts and workmanship. Choosing a trusted ipad repair specialist helps ensure a reliable and long-lasting repair.

Conclusion

If you’re wondering how much to fix an iPad screen, the cost will depend on several factors, including your iPad model, the severity of the damage, and the type of replacement parts used. In the UK, most iPad screen repairs typically range from £50 for older models to £550 or more for premium iPad Pro devices with advanced laminated displays.

While it may be tempting to delay a repair, even a small crack can become more serious over time. Continued use of a damaged screen can lead to reduced touch sensitivity, display failure, or further internal damage, ultimately increasing the overall repair cost.

Before making a decision, it’s always advisable to have your iPad inspected by an experienced repair technician. A professional assessment can determine whether your device requires a simple glass replacement or a complete display assembly, helping you avoid paying for unnecessary repairs.

Choosing a trusted repair specialist who uses high-quality replacement parts and offers a warranty on both parts and workmanship can help restore your iPad’s performance, preserve its value, and extend its lifespan. Whether you own an iPad, iPad Mini, iPad Air, or iPad Pro, a timely repair is often the most cost-effective way to keep your device performing at its best.

Need a Professional iPad Screen Repair?

If your iPad screen is cracked, unresponsive, flickering, or completely damaged, don’t wait until the problem gets worse. A professional repair can restore your device quickly, protect it from further damage, and save you the expense of buying a new iPad.

At iExpert Repairs, our experienced technicians specialise in repairing all major iPad models using high-quality replacement parts, advanced repair techniques, and thorough post-repair testing. We offer fast turnaround times, competitive pricing, and warranty-backed repairs, giving you complete confidence that your device is in safe hands.

If, after a professional assessment, repairing your iPad is no longer the most cost-effective option, we’ve got you covered. iExpert Market offers a wide range of professionally tested refurbished iPhones, iPads, Samsung devices, and other smartphones, all carefully inspected, quality-checked, and backed by strict testing standards. It’s an affordable and reliable way to upgrade your device while saving significantly compared to buying new.

Whether you need an expert iPad screen repair or you’re looking for a high-quality refurbished device, iExpert Repairs and iExpert Market provide trusted, affordable solutions to help you get the best value for your money.

Back to posts
How to Fix Phone Not Ringing: Causes, Fixes & Guide

Introduction

Is your phone not ringing when someone calls? This is one of the most common smartphone problems we diagnose at our repair centres – and in most cases, it’s caused by a simple settings issue that takes less than 5 minutes to fix.

After repairing over 2,000 smartphones across the UK, our senior technician has identified the exact causes behind this problem and put together this step-by-step guide to help you fix it yourself – without spending money on unnecessary repairs.

Whether you use an iPhone, Samsung Galaxy, Google Pixel, or another Android device, this guide covers every possible cause – from Silent Mode and Do Not Disturb settings to Bluetooth conflicts, SIM card issues, and hardware faults.

Quick Answer: Why Is My Phone Not Ringing?

If your phone is not ringing when someone calls, the most common causes include:

  • Silent mode enabled
  • Do Not Disturb activated
  • Ringtone volume turned down
  • Bluetooth devices connected
  • Airplane mode enabled
  • Software glitches
  • Damaged phone speaker
  • Call forwarding settings
  • Network or SIM card issues
  • Third-party app conflicts

Fortunately, most of these issues can be resolved in just a few minutes.

Common Reasons a Phone Is Not Ringing

If your phone is not ringing during incoming calls, several different factors could be responsible. Some issues can be fixed within seconds, while others may require more advanced troubleshooting or professional repair. The table below highlights the most common causes of phone ringing problems, along with the difficulty level and typical time needed to resolve them.

CauseDifficulty LevelTypical Fix Time
Silent Mode EnabledEasy1 Minute
Do Not Disturb Mode ActiveEasy1 Minute
Low Ringtone VolumeEasy1 Minute
Bluetooth Device ConnectedEasy2 Minutes
Airplane Mode EnabledEasy1 Minute
SIM Card or Network IssueMedium5 Minutes
Incorrect Call SettingsMedium5 Minutes
Software Glitch or BugMedium10 Minutes
Damaged Phone SpeakerDifficultProfessional Repair Required
Water Damage or Hardware FaultDifficultProfessional Diagnosis Required

Signs Your Phone Has a Ringing Problem

Before troubleshooting, it helps to identify exactly how the issue is occurring.

Common symptoms include:

  • Incoming calls appear on screen but no ringtone plays
  • Phone only vibrates during calls
  • Certain contacts cannot trigger a ringtone
  • Notification sounds work but calls remain silent
  • Calls go directly to voicemail
  • Ringtone sounds distorted or unusually quiet
  • Phone rings intermittently
  • No sound comes from the speaker during incoming calls

Understanding these symptoms can help narrow down the root cause much faster.

1. Check Whether Your Phone Is in Silent Mode

One of the simplest explanations is also one of the most overlooked.

Modern smartphones allow users to quickly switch between ring, vibrate, and silent modes. It is surprisingly easy to activate silent mode accidentally while carrying your phone in a pocket or bag.

For iPhone Users

Most iPhones include a physical Ring/Silent switch on the side of the device.

To check:

  1. Locate the switch above the volume buttons.
  2. If you see an orange indicator, silent mode is active.
  3. Move the switch toward the display.
  4. Test incoming calls.

For Android Users

Android devices use software controls instead of a physical switch.

To verify:

  1. Open Settings.
  2. Tap Sound & Vibration.
  3. Ensure Ring Mode is selected.
  4. Disable Vibrate or Silent settings.

Many users discover that their phone simply switched into silent mode without them noticing.

2. Increase Your Ringtone Volume

Another extremely common cause is ringtone volume being set too low.

Many smartphone users accidentally reduce ringtone volume while adjusting media playback or notification settings.

How to Check Ringtone Volume

On iPhone

  • Open Settings
  • Tap Sounds & Haptics
  • Locate Ringtone and Alerts
  • Move the slider to increase volume

On Android

  • Open Settings
  • Select Sound & Vibration
  • Tap Volume
  • Increase Ring Volume

Once adjusted, ask someone to call your number to verify whether the ringtone is now audible.

Why This Happens

Some phones separate:

  • Media volume
  • Notification volume
  • Alarm volume
  • Ring volume

Users often increase media volume while leaving ring volume muted.

3. Turn Off Do Not Disturb Mode

Do Not Disturb (DND) is designed to silence calls, alerts, notifications, and messages. Many users enable it temporarily and later forget that it remains active.

How to Disable Do Not Disturb on iPhone

  1. Open Settings
  2. Select Focus
  3. Tap Do Not Disturb
  4. Turn the feature off

How to Disable Do Not Disturb on Android

  1. Open Settings
  2. Select Notifications
  3. Tap Do Not Disturb
  4. Disable the setting

Check Scheduled DND Settings

Many phones automatically activate Do Not Disturb during:

  • Night-time hours
  • Work schedules
  • Driving mode
  • Sleep mode

Review your schedules carefully to ensure calls are not being silenced automatically.

4. Disconnect Bluetooth Devices

Bluetooth accessories can redirect incoming call audio away from your phone.

If your smartphone is connected to:

  • Wireless earbuds
  • Bluetooth headphones
  • Smart speakers
  • Vehicle infotainment systems

your ringtone may be playing through that device instead of the phone speaker.

How to Check Bluetooth Connections

  1. Open Bluetooth Settings
  2. Review connected devices
  3. Disconnect active accessories
  4. Call your phone from another number

If the ringtone returns, the Bluetooth connection was likely causing the issue.

5. Restart Your Smartphone

Restarting your device remains one of the most effective troubleshooting methods for smartphone issues.

Temporary software bugs can affect:

  • Audio services
  • Notification systems
  • Call handling processes
  • Background applications

A simple restart clears temporary system errors and often restores normal functionality.

How to Restart Your Phone

iPhone

  • Press and hold the side button and volume button
  • Slide to power off
  • Wait 30 seconds
  • Turn the device back on

Android

  • Hold the power button
  • Tap Restart
  • Wait for the phone to reboot

If your phone has recently shown other unusual behaviour, such as charging problems, our guide on Why Is My Phone Not Charging? Common Causes, Fixes, and iExpert Repairs Guide may help identify related software issues.

6. Check Airplane Mode Settings

Airplane Mode disables your phone’s ability to connect to mobile networks. While this feature is useful during flights, accidentally enabling it can prevent incoming calls from reaching your device.

How to Check Airplane Mode

On iPhone

  1. Open Control Center.
  2. Look for the airplane icon.
  3. If highlighted, tap it to disable Airplane Mode.

On Android

  1. Swipe down from the top of the screen.
  2. Locate the Airplane Mode icon.
  3. Turn it off if enabled.

After disabling Airplane Mode, wait a few moments for your phone to reconnect to the network and then test incoming calls.

7. Inspect SIM Card and Mobile Network Connection

Your smartphone relies on a stable network connection to receive calls. If your SIM card is damaged, loose, or experiencing network registration issues, your phone may not ring when someone tries to contact you.

Signs of SIM or Network Problems

  • Calls go straight to voicemail
  • No signal bars displayed
  • Frequent network disconnections
  • “No Service” message appears
  • Incoming calls fail intermittently

Basic SIM Troubleshooting

  • Power off your device
  • Remove the SIM card
  • Check for dirt or visible damage
  • Reinsert the SIM correctly
  • Restart the phone

If network problems continue, contact your mobile provider for further assistance.

Related Reading

If your device has recently suffered liquid exposure, network-related problems can sometimes develop alongside other hardware faults. Our Water Damaged Phone Repair – What To Do and How To Fix It guide explains the warning signs to watch for.

8. Check for Blocked Numbers and Call Settings

Many smartphones allow users to block specific contacts or filter suspected spam calls. In some cases, legitimate callers may accidentally be added to blocked lists.

Review Blocked Contacts

Check your settings for:

  • Blocked numbers
  • Call screening features
  • Spam protection filters
  • Contact-specific notification settings

Removing incorrect restrictions may immediately restore normal incoming call alerts.

Call Forwarding Issues

If call forwarding has been enabled, incoming calls may be redirected to another number before your phone has a chance to ring.

Verify that:

  • Call forwarding is disabled
  • Conditional forwarding settings are correct
  • Voicemail forwarding is functioning properly

9. Update Your Phone Software

Software updates frequently include bug fixes that resolve call, notification, and audio-related issues.

Using outdated software may cause:

  • Incoming call glitches
  • Notification failures
  • Audio service errors
  • Network communication problems

How to Check for Updates

iPhone

  • Settings
  • General
  • Software Update

Android

  • Settings
  • System
  • Software Update

Installing the latest updates can often resolve ringing problems without additional troubleshooting.

10. Check for Third-Party App Conflicts

Certain applications can interfere with your phone’s ability to handle calls and notifications correctly.

Apps that commonly cause issues include:

  • Call blockers
  • Battery-saving apps
  • Security software
  • Notification management tools
  • Device optimization applications

What to Do

If the problem started after installing a new app:

  1. Uninstall the app.
  2. Restart your phone.
  3. Test incoming calls.

You can also boot your device into Safe Mode to determine whether a third-party application is responsible.

11. Test the Phone Speaker

If all settings appear correct but no ringtone is audible, the problem may involve the speaker itself.

Speaker failures are more common than many users realise and can occur due to:

  • Accidental drops
  • Water damage
  • Dust accumulation
  • Internal component failure
  • Long-term wear

Signs of Speaker Damage

  • No ringtone sound
  • Distorted audio
  • Crackling noises
  • Low call volume
  • Speakerphone issues

If you notice any of these symptoms, you may benefit from reading our How to Fix Phone Speaker Issues: Complete Troubleshooting & Repair Guide for more detailed diagnostics.

Quick Speaker Test

Try:

  • Playing music
  • Watching a video
  • Using speakerphone during calls

If all audio functions are affected, professional speaker repair may be necessary.

12. Perform a Factory Reset

If you have exhausted every troubleshooting option and your phone still does not ring, a factory reset may resolve deep software corruption.

Before You Reset

Always back up:

  • Photos
  • Videos
  • Contacts
  • Messages
  • Documents
  • App data

Why Factory Resets Work

A factory reset removes:

  • Corrupted settings
  • Software conflicts
  • Persistent system bugs
  • Misconfigured applications

However, because it erases all user data, it should only be attempted after all other solutions have failed.

13. How to Fix Phone Not Ringing on iPhone

At iExpert Repairs, we regularly help customers whose iPhones fail to ring during incoming calls. In our experience, the most common causes include Silent Mode being enabled, Focus or Do Not Disturb settings, low ringtone volume, Bluetooth connections, and software-related issues.

Start by checking the Ring/Silent switch on the side of your iPhone. If the orange indicator is visible, silent mode is active. Next, go to Settings > Focus and ensure that no Focus Mode is blocking incoming call alerts. You should also verify your ringtone volume under Settings > Sounds & Haptics and disconnect any Bluetooth devices that may be redirecting audio.

If your iPhone is still not ringing, install the latest iOS updates and restart the device. Based on our repair experience, persistent ringing issues that remain after troubleshooting may indicate speaker damage, water-related audio faults, or internal hardware problems that require professional diagnosis.

14. How to Fix Phone Not Ringing on Android

Android phone ringing problems are among the most common issues our technicians diagnose. Whether you own a Samsung Galaxy, Google Pixel, Huawei, or another Android device, the cause is often related to sound settings, software conflicts, network issues, or audio hardware faults.

Begin by checking whether Silent Mode, Vibrate Mode, or Do Not Disturb settings are enabled. Then open Settings > Sound & Vibration and confirm that ringtone volume is turned up and Ring Mode is selected. You should also disconnect Bluetooth accessories, review blocked number settings, and ensure Airplane Mode is turned off.

If your Android phone is not ringing after completing these checks, restart the device and install any available software updates. From our experience repairing smartphones, unresolved ringing issues are often linked to faulty speakers, water damage, SIM card problems, or motherboard-related faults. Professional diagnostics can help identify the exact cause and prevent unnecessary repairs.

15. When a Phone Not Ringing Problem Indicates Hardware Damage?

Sometimes the issue extends beyond software settings. Professional diagnostics may reveal faults involving:

  • Internal speakers
  • Audio IC chips
  • Motherboard components
  • Charging circuits
  • Water damage corrosion
  • Power management systems

If your phone is also experiencing charging issues, overheating, or touch-screen problems, these symptoms may indicate a deeper hardware fault.

You may also find these guides helpful:

16. Why Choose iExpert Repairs?

At iExpert Repairs, we help customers across the UK diagnose and repair a wide range of smartphone faults, including incoming call and audio problems.

Our technicians regularly repair:

Our Repair Services Include

  • Speaker replacement
  • Audio diagnostics
  • Water damage assessment
  • Software troubleshooting
  • Battery replacement
  • Charging port repairs
  • Device health checks

Whether the issue is caused by a faulty speaker, damaged motherboard component, or software malfunction, our experienced technicians can identify the problem quickly and recommend the most effective solution.

17. What Our Technicians Commonly Find

After diagnosing hundreds of “phone not ringing” cases at our UK repair centres, here is what we actually find:

Root Cause% of CasesDIY Fix?Avg Fix Time
Silent Mode / DND / Volume45%✅ YesUnder 2 min
Bluetooth audio redirect15%✅ YesUnder 2 min
Software bug or glitch10%✅ Yes5–10 min
SIM / Network issue10%⚠️ Sometimes5–15 min
Third-party app conflict5%✅ Yes10–15 min
Speaker hardware damage25%❌ NoProfessional repair
Water damage (audio circuit)15%❌ NoProfessional repair
Motherboard / IC fault5%❌ NoProfessional repair

Key finding: 7 out of 10 phones that come to us with a “not ringing” complaint are fixed completely free – just by adjusting settings.

The remaining 3 in 10 require professional repair, most commonly due to speaker damage or water corrosion that developed silently over time.

James Mitchell, Senior Technician: “Most people assume their phone is broken. In reality, the majority of ringing problems are settings issues that take less than 2 minutes to fix. Always check Silent Mode and Bluetooth first.”

Frequently Asked Questions

1. Why is my phone not ringing even though the volume is turned up?

If your ringtone volume is already set to maximum, the problem may be caused by Silent Mode, Do Not Disturb settings, Bluetooth devices, call forwarding, software glitches, or a faulty speaker. It is important to check all sound-related settings before assuming there is a hardware problem.

2. Why does my phone vibrate but not ring?

This usually happens when the device is set to Vibrate Only mode. Some smartphones automatically switch to vibration mode through Focus Modes, scheduled Do Not Disturb settings, or custom sound profiles. Checking your sound settings can often resolve the issue quickly.

3. Can a damaged phone speaker stop my ringtone from working?

Yes. A damaged speaker can prevent your phone from playing ringtones, notifications, alarms, videos, and speakerphone audio. If multiple sound functions are affected, the speaker may require professional repair or replacement.

4. Why do incoming calls go straight to voicemail without ringing?

Calls may go directly to voicemail if your phone has no network signal, Airplane Mode is enabled, Do Not Disturb is active, call forwarding is configured incorrectly, or your carrier is experiencing network issues.

5. Can Bluetooth headphones stop my phone from ringing?

Yes. When Bluetooth devices are connected, incoming call audio may be routed through wireless headphones, earbuds, speakers, or your vehicle’s infotainment system. Disconnecting Bluetooth accessories can help determine whether they are causing the issue.

6. Why is my iPhone not ringing when someone calls?

Common reasons include the Ring/Silent switch being enabled, Focus Mode settings, low ringtone volume, Bluetooth connections, software bugs, or speaker damage. Reviewing these settings often resolves the problem.

7. Why is my Android phone not ringing?

Android phones may stop ringing because of Silent Mode, Do Not Disturb settings, app conflicts, notification restrictions, Bluetooth devices, or operating system glitches. A full settings review can help identify the cause.

8. Can software updates fix phone ringing problems?

Yes. Software updates frequently include bug fixes that address issues affecting calls, notifications, audio services, and network communication. Installing the latest operating system version is always recommended.

9. How do I know if a third-party app is causing my phone not to ring?

If the problem started after installing a new application, the app may be interfering with notifications or call settings. Booting the device into Safe Mode can help determine whether a third-party application is responsible.

10. Can water damage affect my phone’s ringtone?

Yes. Water damage can impact speakers, microphones, audio circuits, and motherboard components. Even if the phone appears functional, hidden corrosion may cause sound-related issues over time.

11. Why does my phone ring for some contacts but not others?

Certain contacts may have custom ringtone settings, notification preferences, call screening restrictions, or may accidentally be blocked. Reviewing contact-specific settings can often solve the problem.

12. Can a faulty SIM card stop my phone from ringing?

A damaged or improperly inserted SIM card can prevent your device from connecting correctly to the mobile network. This may result in missed calls, poor signal strength, or calls going directly to voicemail.

13. Why is my phone not ringing after a software update?

Although updates are designed to improve performance, occasional software bugs can cause unexpected issues. Restarting the device, checking sound settings, and installing any available patches may resolve the problem.

14. Does Airplane Mode stop incoming calls?

Yes. Airplane Mode disables cellular communication, preventing your phone from receiving calls, text messages, and mobile data connections until the feature is turned off.

15. Can low battery mode affect my ringtone?

In most cases, Low Power Mode does not disable ringtones. However, some battery-saving applications and aggressive power management settings may interfere with notifications and call alerts.

16. Should I factory reset my phone if it is not ringing?

A factory reset should only be considered after all other troubleshooting methods have failed. Since this process erases all data and settings, backing up important files beforehand is essential.

17. How can I test whether my phone speaker is working?

You can test your speaker by playing music, watching videos, using speakerphone during calls, or listening to notification sounds. If no audio is heard, the speaker may be damaged.

18. Can overheating cause a phone not to ring?

Yes. Excessive heat can affect smartphone performance, including audio systems and background processes. Severe overheating may also indicate deeper hardware issues requiring professional attention.

19. When should I seek professional phone repair?

If you have checked all settings, updated the software, tested the speaker, verified the SIM card, and restarted the device without success, professional diagnostics are recommended. Hardware faults often require specialist tools and expertise to identify accurately.

20. How can iExpert Repairs help with phone not ringing issues?

iExpert Repairs provides professional diagnostics and repair services for a wide range of smartphone problems, including speaker failures, audio faults, software issues, water damage, charging problems, and motherboard repairs. Our technicians can quickly identify the root cause and recommend the most effective solution.

Final Thoughts

Understanding how to fix phone not ringing issues starts with identifying the underlying cause. In many cases, simple troubleshooting steps such as checking ringtone settings, disabling Do Not Disturb mode, disconnecting Bluetooth devices, reviewing network settings, or updating your software can restore normal call alerts within minutes.

However, if your phone continues to miss calls after trying all recommended solutions, the issue may be related to speaker failure, SIM card problems, software corruption, water damage, or more complex hardware faults. Ignoring these symptoms can lead to additional performance issues and may result in more expensive repairs if left unresolved.

Regular maintenance, software updates, and prompt attention to audio-related problems can help keep your device operating reliably and ensure you never miss important calls from family, friends, customers, or colleagues.

Get Your Phone Ringing Again with iExpert Repairs

If you have followed every troubleshooting step in this guide and your phone still is not ringing, professional diagnostics may be the fastest and most cost-effective solution.

At iExpert Repairs, our experienced technicians specialise in diagnosing and repairing a wide range of smartphone issues, including:

  • Speaker and audio system faults
  • Software and notification problems
  • Water-damaged devices
  • SIM and network-related issues
  • Motherboard-level repairs
  • Battery and charging faults

We repair all major smartphone brands, including iPhone, Samsung Galaxy, Google Pixel, Huawei, and many others. Using professional diagnostic tools and years of hands-on repair experience, our team can accurately identify the cause of the problem and recommend the most effective repair solution.

Whether your device requires a simple software fix or an advanced hardware repair, iExpert Repairs is committed to providing expert advice, transparent pricing, and high-quality workmanship.

Book your repair today or contact the iExpert Repairs team for a professional diagnosis and reliable smartphone repair service anywhere in the UK.

Back to posts
Why Is My Phone Not Charging? Common Causes & Fixes

Introduction

Your phone just died – and no matter what you try, it won’t charge. Before you panic and rush to a repair shop, read this.

If you are searching for “why is my phone not charging”, you are not alone. This is one of the most common smartphone problems faced by users in the UK and worldwide. A phone that refuses to charge can interrupt your work, communication, banking apps, navigation, and daily routine.

In many cases, users immediately assume the battery is dead or the phone is completely damaged. However, the reality is often much simpler. Charging issues can be caused by something as small as dust in the charging port, a faulty cable, or a minor software glitch.

The good news is that most charging problems can be diagnosed quickly and sometimes fixed at home without expensive repair costs. In this guide, we will break down every possible reason behind charging failure and explain when you should consider professional help.

How Phone Charging Actually Works

To understand why your phone is not charging, it is important to know how the charging system works. When you plug your phone into a charger, a full chain of components must work together:

  • Power outlet supplies electricity
  • Charging adapter converts power
  • Charging cable transfers energy
  • Charging port receives power
  • Battery management system controls flow
  • Battery stores energy

If even one part of this system fails, your phone will stop charging properly.

This is why charging problems are not always related to the battery itself. In fact, in many repair cases across iPhone Repair, Samsung Phone Repair, and Google Pixel Repair services, the issue is often found in the charging port or cable rather than the battery.

Common Reasons Why Your Phone Is Not Charging

There are several possible reasons behind charging failure. Let’s go through each one in detail.

1. Faulty Charging Cable (Most Common Issue)

One of the most frequent causes of charging issues is a damaged or low-quality charging cable.

Charging cables are used daily and are constantly bent, twisted, and pulled. Over time, this causes internal wire damage that is not visible from outside.

Signs of a faulty cable:

  • Charging only works when cable is held at an angle
  • Charging stops randomly
  • Slow charging speed
  • Cable looks bent or frayed

Solution:

Try using:

  • A different certified charging cable
  • Original manufacturer cable (Apple, Samsung, etc.)
  • Another charging adapter

If your phone starts charging normally, the cable was the issue.

2. Damaged or Weak Charging Adapter

Sometimes the problem is not the cable but the power adapter (plug). Adapters can fail internally due to overheating or poor build quality.

Symptoms:

  • Phone does not respond when plugged in
  • Charging works on some outlets but not others
  • Very slow charging

Fix:

  • Try another wall adapter
  • Use a certified fast charger
  • Avoid cheap, unbranded chargers

Low-quality chargers are one of the biggest causes of long-term battery damage in phones.

3. Dirty or Blocked Charging Port

Dust and lint buildup inside the charging port is a very common issue, especially in pocket-carried phones.

Over time, small particles block the connection between cable and port.

Signs of a dirty port:

  • Charger feels loose
  • Charging disconnects easily
  • Cable does not fully insert
  • Intermittent charging

Safe cleaning method:

  • Use a soft brush
  • Use compressed air
  • Gently remove lint

Avoid using pins or metal objects as they can permanently damage the charging pins. In many Charging Port Repair cases, simple cleaning resolves the issue completely.

4. Battery Degradation

All smartphone batteries degrade over time. Lithium-ion batteries have a limited number of charging cycles. As the battery ages, it loses its ability to hold charge efficiently.

Common symptoms:

  • Phone drains quickly
  • Charging stuck at certain percentage
  • Random shutdowns
  • Overheating during charging

This is very common in older devices such as:

In such cases, battery replacement is usually the most effective solution.

5. Software-Related Charging Issues

Not all charging problems are hardware-related. Sometimes the operating system causes charging failure. Software manages how power is distributed to the battery. A bug or corrupted update can interrupt this process.

Possible software issues:

  • System freeze
  • Background apps consuming power
  • Battery calibration errors
  • Failed updates

Quick fixes:

  • Restart your phone
  • Update system software
  • Close all background apps
  • Perform a soft reset

Many temporary charging issues are fixed just by restarting the device.

6. Overheating Protection Mode

Modern smartphones are designed with safety features. If your phone becomes too hot, it may temporarily stop charging. This protects internal components from damage.

Why overheating happens:

  • Heavy gaming while charging
  • Using phone under direct sunlight
  • Faulty battery
  • Fast charging stress

Solution:

  • Let the phone cool down
  • Avoid using while charging
  • Remove phone case during charging

Once temperature normalizes, charging usually resumes.

7. Moisture or Water Detection

Many modern devices (especially Samsung and iPhones) have built-in moisture detection systems. If moisture is detected in the charging port, charging is automatically blocked.

Warning messages:

  • “Moisture detected”
  • “Charging paused”
  • “Unplug charger”

What to do:

  • Leave phone in a dry place
  • Do not use heat (hair dryer, etc.)
  • Wait for natural drying

This feature protects your device from short circuits.

8. Faulty Charging Port (Hardware Damage)

If none of the above solutions work, the charging port itself may be damaged. This is very common in phones that are:

  • 2-4 years old
  • Frequently charged
  • Exposed to dust or moisture

Signs of port damage:

  • Loose connection
  • No charging at all
  • Works only at specific angles
  • Visible physical damage

At this stage, professional Phone Charging Port Repair is usually required.

Why Your iPhone Is Not Charging (Detailed Guide)

iPhone charging issues are very common, especially in devices that are more than 2–3 years old. Apple devices are highly optimized, so when charging problems occur, they are usually related to hardware wear or port issues rather than major software faults.

1. Lightning Port Blockage

One of the biggest reasons an iPhone stops charging is dust and lint inside the Lightning port.

Because iPhones are often carried in pockets, debris gradually builds up and prevents proper connection between the cable and port.

Symptoms:

  • Cable does not fit properly
  • Charging disconnects easily
  • Phone charges only when cable is moved

Fix:

Careful cleaning with a soft brush or compressed air may solve the issue. Avoid metal tools as they can damage internal pins.

2. Battery Health Degradation

Apple provides a “Battery Health” feature in settings. Once battery health drops below 80%, charging issues become more noticeable.

Common signs:

  • Rapid battery drain
  • Unexpected shutdowns
  • Slow charging performance

Solution:

Battery replacement is usually required for long-term fix.

Professional iPhone Repair services often diagnose this quickly.

3. iOS Software Glitches

Sometimes iOS updates cause temporary charging bugs.

Fix:

  • Restart iPhone
  • Update to latest iOS version
  • Reset settings if needed

Why Your Samsung Phone Is Not Charging

Samsung devices come with advanced fast charging and USB-C technology. However, they also have specific charging-related issues.

1. Moisture Detection Issue

Samsung phones often stop charging when moisture is detected in the USB-C port.

Warning message:

  • “Moisture detected in charging port”

Solution:

  • Keep phone in dry environment
  • Wait for natural drying
  • Avoid heat or hair dryers

2. Fast Charging Not Working

Fast charging may stop due to:

  • Non-certified charger
  • Damaged USB-C cable
  • Software settings disabled
  • Battery degradation

Fix:

Enable fast charging in settings and use original Samsung charger.

3. USB-C Port Wear

USB-C ports wear out over time due to frequent use.

Symptoms:

  • Loose connection
  • Cable falls out easily
  • Charging stops randomly

This often requires professional Samsung Phone Repair service.

Why Your Huawei Phone Is Not Charging

Before diving into Huawei-specific issues, note that Huawei’s SuperCharge 2.0 supports up to 40W – using a standard 5W charger alone can reduce charging speed by up to 80%.

Huawei devices use SuperCharge technology, which requires compatible accessories.

Using third-party chargers often causes:

  • Slow charging
  • No charging
  • Interrupted charging

Always use Huawei-certified chargers.

2. Battery Aging

Older Huawei phones experience:

  • Slow charging
  • Fast battery drain
  • Overheating

Battery replacement is the most common fix.

3. Charging Port Damage

Frequent charging causes port wear and tear.

Professional Huawei Repair services can replace damaged ports safely.

Why Your Google Pixel Is Not Charging

Google Pixel phones are software-focused devices, but charging issues still occur. Note: Pixel’s Adaptive Charging feature deliberately slows charging overnight – this is normal, not a fault.

1. USB-C Debris Blockage

Even small dust particles can block charging pins.

Symptoms:

  • Charging only at certain angles
  • Slow charging

2. Software Updates

Android updates sometimes introduce charging bugs.

Fix:

  • Restart device
  • Install latest update
  • Safe mode testing

3. Hardware Failure

If charging still fails, the issue may be:

  • Battery failure
  • Charging IC issue
  • Port damage

Professional Google Pixel Repair is required.

Advanced Troubleshooting Steps

If your phone still does not charge, try these advanced methods:

1. Force Restart Device

Force restarting your device resets the power system without deleting any data. iPhone 8 or later: Press Volume Up → Press Volume Down → Hold Side button for 10 seconds until Apple logo appears. Samsung Galaxy: Hold Power + Volume Down together for 8 seconds until screen restarts. Huawei: Hold Power button for 10–15 seconds until device restarts. Google Pixel: Hold Power button for 30 seconds or until phone restarts.

2. Try Wireless Charging (If Available)

If your phone supports wireless charging, place it on a wireless charging pad and see if it responds.

If wireless charging works but wired charging does not, this confirms the problem is specifically with your charging port – not the battery or software. In this case, a charging port repair is the next step.

If wireless charging also fails, the issue is likely deeper – either the battery or an internal hardware fault.

3. Check Charging Temperature

Most smartphones are designed to charge only within a safe temperature range – typically between 0°C and 35°C.

If your phone was left in a cold car, near a heater, or under direct sunlight, it may refuse to charge until it returns to normal room temperature. Simply bring it indoors, wait 10 minutes, and try charging again. Do not use a hair dryer or any heat source to speed up the process.

4. Test Different Power Sources

Not all power sources deliver the same charging speed or stability.

Try these in order:

  • Wall socket – always the most reliable option
  • Power bank – must be rated 18W or above for effective charging
  • Laptop USB port – gives only 5W, too slow for most modern phones; use only as a last resort

If your phone charges on one source but not another, the issue may be with that specific outlet or USB port – not the phone itself.

When You Need Professional Phone Repair

You should visit a repair specialist if:

  • Phone does not charge at all
  • Multiple chargers fail
  • Charging port feels loose
  • Battery drains instantly
  • Device overheats
  • Water damage suspected

A technician can diagnose whether the issue is:

  • Charging port failure
  • Battery replacement needed
  • Motherboard issue
  • Charging IC fault

Preventing Future Charging Problems

To avoid charging issues in the future:

  • Always use original chargers
  • Avoid cheap cables
  • Keep charging port clean
  • Do not overcharge overnight regularly
  • Avoid heat exposure
  • Replace damaged cables immediately

Frequently Asked Questions (FAQs)

1. Why is my phone not charging even after changing the charger?

If your phone is still not charging after using a new charger, the issue is usually not the cable or adapter. It is most likely caused by a dirty charging port, internal port damage, battery failure, or software glitch. In such cases, a professional diagnosis is recommended because the fault is inside the device, not the accessories.

2. How do I fix a phone that is not charging at all?

To fix a completely unresponsive charging issue, try these steps in order:

  1. Restart your phone
  2. Try a different original charger
  3. Clean the charging port carefully
  4. Test another power socket
  5. Leave the phone to cool down if overheated

If none of these work, the problem may be hardware-related such as the charging port or battery, which requires repair.

3. Can a dead battery stop my phone from charging?

Yes. A severely degraded or “dead” battery may fail to accept charge properly. In this situation, your phone may:

  • Stay at 0%
  • Restart repeatedly
  • Show charging but not increase percentage

Battery replacement is usually required to solve this issue permanently.

4. How much does phone charging port repair cost in the UK?

In the UK, charging port repair costs depend on the device and damage level. On average:

  • Basic cleaning: £20 – £40
  • Minor repair: £40 – £70
  • Full charging port replacement: £60 – £120
  • Premium devices (iPhone, Samsung, Google Pixel): £80 – £150+

If other issues like battery or motherboard damage are involved, the cost may be higher after diagnosis.Prices are approximate as of 2024/2025 and may vary by location and device model.

5. Why does my phone charge only sometimes?

Intermittent charging usually means the charging port is loose or damaged. It can also happen due to:

  • Broken internal connector pins
  • Faulty cable connection
  • Dirt inside the port
  • Motherboard charging IC issues

If your phone charges only at a specific angle, it is a strong sign of charging port failure.

6. Is it safe to use my phone while charging?

Yes, it is generally safe, but heavy usage (gaming, video recording, hotspot use) can cause overheating. Overheating may slow down charging or temporarily stop it for safety reasons. It is always better to charge the phone without heavy usage for optimal battery health.

7. Why is my phone charging very slowly?

Slow charging can be caused by a faulty cable, low-quality charger, background apps, battery degradation, or a damaged charging port. Using an original fast charger often improves charging speed.

8. Can a dirty charging port stop charging completely?

Yes. Dust, lint, and debris can block the charging connection and stop the phone from charging or cause intermittent charging issues.

9. How long does a phone charging port repair take?

Most charging port repairs take between 30 minutes to 2 hours, depending on the device model and complexity of the issue.

10. When should I visit a phone repair shop?

You should visit a repair shop if:

  • Phone does not charge at all
  • Charging is inconsistent
  • Multiple chargers have been tested
  • Device overheats during charging

In such cases, professional diagnosis is the safest option.

Conclusion

Phone charging problems are frustrating – but rarely unfixable. Start with the simplest fix first. Change your cable. If that does not work, clean the charging port carefully. Still no improvement? Try a different adapter, restart your device, or let it cool down if overheating.

If you have tried everything and your phone still refuses to charge, that is your signal to stop guessing and get a professional opinion. At that point, the issue is almost always one of three things – a damaged charging port, a worn-out battery, or an internal charging fault – and all three are repairable.

The longer you wait, the worse it can get. A small port issue left unattended can become a motherboard problem. An aging battery pushed too far can swell and cause serious damage. Most repairs at iExpert Repairs are completed same day. Our certified technicians diagnose the exact fault first – so you only pay for what actually needs fixing.

Book a free diagnosis at iExpert Repairs today.

Looking for a quality refurbished phone instead? Visit iExpert Market for fully tested, affordable refurbished iPhones and Samsung devices – all backed by warranty.

Back to posts
How to Fix Phone Speaker: Step-by-Step Repair Guide

Introduction

Did you know that nearly 7 out of 10 phone speaker complaints are actually caused by software bugs, dust, or a simple settings mistake – not hardware failure?

Yet most people panic the moment their phone goes silent, assuming the worst.

Whether your speaker suddenly stopped working, your calls sound muffled, or your ringtone has gone suspiciously quiet – you are not alone. Speaker issues are one of the most common smartphone complaints in 2026, and the good news is that most of them are fixable at home in under 10 minutes.

In this complete guide, we will walk you through every possible cause – from blocked speaker grilles and rogue Bluetooth connections to water damage and hardware failure – and show you exactly how to fix each one. Whether you use a Samsung, iPhone, Google Pixel, or any other Android device, this guide covers you.

Let’s get your sound back.

How Phone Speakers Work?

Modern smartphones contain compact speaker modules designed to produce clear audio despite their small size. These components handle everything from incoming call sounds and alarms to music playback and video audio.

Most devices include multiple audio components. The earpiece speaker is used during calls, while the loudspeaker handles media playback, speakerphone conversations, notifications, and alarms. Premium smartphones may also include stereo speaker systems that improve sound quality and volume output.

Because these components are small and exposed to everyday environmental conditions, they can become affected by dust, moisture, physical impacts, and electrical faults over time. Understanding how these parts function makes it easier to identify where an audio problem originates.

Common Signs of Phone Speaker Problems

Speaker issues do not always appear in the same way. Different symptoms often point toward different underlying causes.

Some users notice that their phone becomes unusually quiet even when volume settings are at maximum. Others hear distorted sounds, crackling noises, or interruptions during playback. In certain cases, audio disappears completely despite videos and applications functioning normally.

Additional warning signs may include:

  • Sound cutting in and out randomly
  • Muffled audio during calls
  • Speakerphone failing to work
  • Alarms playing at very low volume
  • Distorted music playback
  • No ringtone despite active sound settings
  • Audio working only through headphones

Recognizing these symptoms early can help prevent a minor issue from developing into a more serious hardware failure.

Why Your Phone Speaker Suddenly Stops Working?

Many users assume a failed speaker automatically means hardware damage. In reality, software-related issues account for a large percentage of smartphone audio complaints.

A system update may introduce temporary bugs. An application might interfere with sound settings. Bluetooth connections can redirect audio unexpectedly. Even accessibility settings or Do Not Disturb modes can create confusion by altering how sounds are delivered.

Physical causes can also contribute, including:

  • Dust accumulation
  • Water exposure
  • Accidental drops
  • Internal component wear
  • Corroded connections
  • Damaged speaker membranes

Before replacing any hardware, it is important to investigate both software and physical factors.

Check Whether the Issue Is Hardware or Software

The first step in diagnosing a speaker problem is determining whether the fault is related to hardware or software.

Start by testing different audio functions. Play a video, make a phone call, use speakerphone mode, and listen to notification sounds. If one audio feature works while another does not, the problem may be software-related rather than a damaged speaker.

You can also try using headphones. If audio works perfectly through headphones but not through the loudspeaker, attention should shift toward the speaker system itself.

Another useful method involves restarting the device in Safe Mode. This temporarily disables third-party applications and helps determine whether a recently installed app is interfering with audio performance.

Identifying the source of the problem early saves time and helps avoid unnecessary repairs.

Test the Speaker Using Built-In Diagnostic Tools

Many smartphones include hidden diagnostic utilities that allow users to test hardware performance without visiting a repair shop. Knowing how to access these tools can save time and help confirm whether the speaker fault is hardware or software related.

Samsung:
Open the Samsung Members app, go to Get Help, then select Interactive Checks and tap Sound. This runs a live speaker test and shows whether the earpiece and loudspeaker are functioning correctly.

iPhone:
Apple does not offer a built-in speaker test for regular users. However, you can do a quick manual check by going to Settings → Sounds & Haptics and dragging the Ringtone volume slider – your phone should play a preview sound through the speaker. For deeper diagnostics, Apple runs hardware tests through their official support app or during in-store service visits.

Google Pixel:
Open the Phone app and dial *#*#7378423#*#* to access the service menu. Navigate to Test and select Audio to run a speaker diagnostic check.

Other Android Devices:
Most Android manufacturers include a hidden test menu. Try dialing *#*#0#*#* or *#0*# in the phone dialer. If a test menu opens, look for Speaker or Audio options.

When running any speaker test, pay attention to:

  • Audio clarity
  • Volume consistency
  • Distortion levels
  • Crackling sounds
  • Missing frequencies

If the diagnostic test produces distorted or absent audio, there is a stronger possibility that the speaker hardware requires professional attention.

Remove Dust and Debris from the Speaker Grille

One of the most overlooked causes of weak audio is simple dirt buildup.

Smartphone speakers contain tiny openings that easily collect dust, lint, pocket fibers, and environmental debris. Over time, these particles can partially block sound waves, making audio appear quieter or muffled.

To clean the speaker safely:

  1. Turn off the phone.
  2. Use a soft anti-static brush.
  3. Gently sweep across the speaker grille.
  4. Avoid using sharp metal objects.
  5. Never insert pins or needles into speaker openings.

Compressed air should be used carefully and only at a safe distance because excessive pressure may damage delicate internal components.

Many speaker performance complaints are resolved after a thorough cleaning procedure.

Check Sound Settings and Volume Controls

Sometimes the simplest explanation is the correct one.

Audio settings can change unexpectedly after updates, accidental button presses, or application installations. Before assuming a hardware fault exists, verify all sound-related settings.

Review:

  • Media volume
  • Call volume
  • Notification volume
  • Alarm volume
  • Accessibility settings
  • Focus modes
  • Do Not Disturb settings

Some phones allow separate volume profiles for different audio categories. A user may increase ringtone volume while media playback remains muted.

Taking a few minutes to inspect settings can prevent unnecessary troubleshooting efforts.

Disable Bluetooth and Connected Audio Devices

Wireless audio technology often creates confusion when diagnosing speaker issues.

If your phone remains connected to wireless earbuds, headphones, smart speakers, or a vehicle audio system, sound may continue playing through that external device instead of the built-in speaker.

Open Bluetooth settings and disconnect all paired devices. Then test audio playback again.

You should also check:

  • Smartwatches
  • Wireless earbuds
  • Car infotainment systems
  • Portable speakers
  • Home smart assistants

Many users discover that their phone speaker is functioning normally and that audio was simply being redirected elsewhere.

Restart Your Smartphone Properly

A simple restart remains one of the most effective solutions for temporary software-related audio problems.

Smartphones continuously manage numerous background processes. Occasionally, system services responsible for audio output can freeze or malfunction. Restarting the device refreshes these services and clears temporary memory conflicts.

Instead of merely locking and unlocking the screen, perform a complete restart. Allow the device to shut down fully before powering it back on.

This process may resolve:

  • Temporary sound loss
  • Audio lag
  • Speaker glitches
  • Notification sound failures
  • Application audio conflicts

Although basic, this step often solves problems that appear much more serious than they actually are.

Update the Operating System

Software updates frequently contain bug fixes related to device performance, security, and hardware compatibility.

If your speaker problem appeared after installing a new application or if your phone has not been updated recently, checking for available software updates is worthwhile.

Manufacturers regularly address:

  • Audio driver bugs
  • Speaker compatibility issues
  • Bluetooth conflicts
  • Sound processing errors
  • Operating system glitches

Keeping the device current improves stability and can eliminate issues that would otherwise be mistaken for hardware failures.

Check for Water Damage

If your phone speaker suddenly sounds quiet, muffled, or distorted after coming into contact with water, moisture could be the cause. This is a common issue that can happen after exposure to rain, spilled drinks, high humidity, or accidental drops in water. Even water-resistant phones are not completely immune to speaker problems caused by trapped moisture.

Some of the most common signs of water-related speaker damage include:

  • Muffled or unclear sound
  • Crackling or buzzing noises
  • Lower-than-normal volume
  • Distorted audio during calls or media playback
  • Sound cutting in and out intermittently

If your phone recently got wet, avoid using hair dryers, ovens, or direct sunlight to dry it. Excessive heat can damage internal components and make the problem worse. Instead, power off the device, wipe it with a microfiber cloth, and place it in a dry, well-ventilated area. Keeping the speaker side facing downward may also help moisture escape naturally.

Many modern smartphones include a speaker-cleaning or water-ejection feature that uses sound vibrations to push trapped water out of the speaker chamber. This can often improve audio quality without needing repairs.

However, if the speaker still sounds distorted after 24- 48 hours, moisture may have reached internal components. In that case, professional inspection is recommended to prevent long-term damage. For more recovery tips, check out our guide on how to remove moisture from a phone speaker.

Fix Distorted, Crackling, or Muffled Audio

Not every speaker problem results in complete silence. Sometimes sound is still present but lacks clarity. Crackling, buzzing, vibration noises, and muffled output often indicate a different type of issue.

Distorted audio may occur because of:

  • Moisture trapped inside the speaker
  • Dust blocking sound pathways
  • Damaged speaker membranes
  • Software audio processing bugs
  • Excessive volume usage over long periods

Try testing audio using different apps. If distortion only appears in a specific application, the issue may be software-related. If the same problem occurs during calls, videos, alarms, and music playback, hardware becomes a more likely cause.

Lowering the volume temporarily can also help determine whether the speaker itself has been physically damaged.

Speaker Problems After a Phone Drop

Dropping a smartphone can affect much more than the screen. Internal components may shift, connectors can loosen, and delicate speaker assemblies can suffer physical damage even when the exterior appears fine.

After an impact, users may experience:

  • No sound from the loudspeaker
  • Intermittent audio
  • Rattling noises
  • Reduced volume output
  • Distorted speakerphone calls

Modern smartphones are packed with tightly integrated components. Even a small drop can loosen internal connections responsible for audio transmission.

If sound problems begin immediately after an accidental fall, a professional diagnostic assessment is usually the fastest way to identify the damaged component.

Why Third-Party Apps Can Affect Audio Performance

Applications sometimes gain control over device audio systems in unexpected ways. Music apps, voice changers, call recording software, gaming tools, and Bluetooth management applications can interfere with normal speaker behavior.

Certain apps continue running in the background and may create conflicts with system audio services. As a result, sounds may become muted, delayed, or redirected incorrectly.

To identify whether an app is responsible:

  1. Restart the phone in Safe Mode.
  2. Test speaker functionality.
  3. Compare performance with normal mode.
  4. Remove recently installed applications one at a time.

If the issue disappears in Safe Mode, a software conflict is highly likely.

Reset Audio Settings

Sometimes audio settings become corrupted without the user realizing it. Updates, software bugs, accessibility features, or app conflicts can alter how sound behaves across the device.

Instead of performing a complete factory reset immediately, try resetting audio-related settings first.

Areas worth reviewing include:

  • Sound profiles
  • Equalizer adjustments
  • Accessibility audio enhancements
  • Dolby Atmos settings
  • Mono audio settings
  • Bluetooth preferences

Returning these options to their default state can often restore normal sound behavior without affecting personal data.

When a Factory Reset May Help

A factory reset should always be considered a last resort rather than a first troubleshooting step.

If every software solution has failed and there is no clear sign of physical damage, resetting the device may eliminate deeply rooted operating system issues.

Before proceeding:

  • Back up photos and videos
  • Save contacts and documents
  • Sync important accounts
  • Record passwords if necessary

A successful factory reset can resolve:

  • Persistent software corruption
  • Audio driver conflicts
  • System-level glitches
  • Unexplained speaker malfunctions

However, if the problem remains afterward, hardware repair becomes much more likely.

Signs the Speaker Module Needs Replacement

Eventually, some speaker failures cannot be solved through cleaning or software adjustments. The speaker module itself may require replacement when symptoms include:

  • Complete loss of sound
  • Constant crackling
  • Extremely low volume despite maximum settings
  • Audio cutting out randomly
  • Visible water corrosion
  • Damage following a drop

Speaker components naturally wear over time, especially on devices that are frequently exposed to dust, moisture, or heavy daily usage.

A qualified technician can confirm whether the module itself has failed or if another component is responsible.

Professional Phone Speaker Repair Process

When professional repair becomes necessary, technicians follow a structured diagnostic process to identify the exact source of the problem.

A typical repair procedure includes:

Initial Diagnosis

The technician evaluates speaker performance using diagnostic tools and hardware tests.

Device Inspection

The phone is checked for signs of liquid damage, impact damage, and internal component failures.

Component Testing

Audio circuits, speaker connectors, and related hardware are inspected individually.

Repair or Replacement

If the speaker module has failed, it is replaced with a compatible component.

Final Quality Testing

The device undergoes call testing, media playback testing, and speakerphone evaluation before being returned.

This process ensures that the root cause is addressed rather than simply replacing parts unnecessarily.

How Much Does Phone Speaker Repair Cost?

The cost of phone speaker repair in the UK depends on several factors, including the smartphone model, the type of speaker fault, and whether additional repairs are required. Issues such as dust buildup or minor speaker blockages are usually less expensive to fix, while water damage and internal audio circuit faults can increase repair costs.

On average, UK repair prices typically range from:

  • Speaker cleaning services: £20 – £40
  • Earpiece speaker repair: £30 – £70
  • Loudspeaker replacement: £40 – £90
  • iPhone speaker repair: £50 – £120
  • Samsung speaker repair: £45 – £110
  • Water-damaged speaker repair: £50 – £150+
  • Audio IC or motherboard-related repairs: £80 – £200+

Not Sure What’s Wrong With Your Speaker?

Don’t guess – let our experts find out for free.

At iExpert Repairs, we offer a free diagnostic assessment for all phone speaker issues – whether it’s low volume, crackling sound, water damage, or complete silence.

  1. Same-day repairs available
  2. All major brands covered
  3. No fix, no fee guarantee

Book Your Free Diagnostic Today

Premium smartphones and newer flagship devices often cost more to repair because replacement parts and labour requirements are typically higher. The final price may also vary depending on the severity of the damage and the availability of genuine or high-quality replacement components.

Preventing Future Speaker Damage

Preventative care is often easier and cheaper than repair. To keep your phone’s audio system working properly:

  • Keep the device away from excessive moisture.
  • Clean speaker openings regularly.
  • Avoid placing phones in dusty environments.
  • Use protective cases.
  • Do not play audio at maximum volume continuously.
  • Keep software updated.
  • Handle the device carefully to avoid drops.

These simple habits can significantly extend speaker lifespan and maintain sound quality.

Why Choose Professional Repair Instead of DIY?

Online repair tutorials make speaker replacement appear simple, but modern smartphones are far more complex than they seem.

Opening a device without proper tools can lead to:

  • Screen damage
  • Battery punctures
  • Water-resistance loss
  • Connector failures
  • Additional repair costs

Professional technicians have specialized equipment, diagnostic tools, and experience working with delicate smartphone components.

For most users, professional repair is safer, faster, and ultimately more cost-effective than attempting complex internal repairs at home.

Conclusion

A faulty smartphone speaker can make everyday tasks frustrating, from taking calls to watching videos and receiving important notifications. Fortunately, as this guide has shown, the majority of speaker problems are not as serious as they first appear.

Start with the basics – check your volume settings, disconnect Bluetooth devices, and restart your phone. If the issue continues, clean the speaker grille, look for water damage, and test your device using the built-in diagnostic tools covered in this guide. Work through each step methodically before assuming the worst.

The truth is, most speaker problems can be solved at home in minutes. But when the sound stays distorted, completely silent, or keeps cutting out after everything you have tried – that is your phone telling you it needs professional attention. Ignoring it rarely makes things better, and often makes repairs more expensive.

Take action early. A small speaker issue today can become a motherboard problem tomorrow.

“Your phone’s speaker is trying to tell you something – listen to it before a small problem becomes an expensive one.”

Frequently Asked Questions About Phone Speaker Problems

1. Why is my phone speaker suddenly not working?

A phone speaker can stop working for several reasons, including software glitches, Bluetooth connections, blocked speaker grilles, water exposure, or physical damage. Before assuming the speaker has failed, check volume settings, disconnect wireless devices, and restart the phone. Many audio issues are temporary and can be resolved without replacing any hardware.

2. How can I tell if my phone speaker is damaged?

A damaged speaker usually produces symptoms such as crackling sounds, distorted audio, extremely low volume, or complete sound loss. If these issues continue after cleaning the speaker, updating software, and resetting audio settings, the speaker module may require professional inspection or replacement.

3. Can water permanently damage a phone speaker?

Yes, prolonged exposure to moisture can damage internal speaker components. Water may cause corrosion, weaken speaker membranes, or affect electrical connections. Acting quickly by drying the device properly can reduce the risk of permanent damage and improve recovery chances.

4. Why does my phone speaker sound muffled?

Muffled sound is often caused by dust, dirt, lint, or moisture blocking the speaker openings. In some cases, audio distortion may also result from internal speaker wear or software-related issues. Cleaning the speaker grille carefully and testing audio performance can help identify the cause.

5. Can a software update fix speaker problems?

Yes. Software updates frequently contain bug fixes that improve audio performance and correct operating system errors. If your speaker issue began after installing an app or if your device has not been updated recently, checking for available updates is recommended.

6. Why is sound only working through headphones?

This usually happens when the phone mistakenly detects a connected audio device or has a problem with its audio routing system. Bluetooth connections, damaged headphone ports, or software glitches can all cause sound to bypass the built-in speaker.

7. Should I use rice to dry a wet phone speaker?

Using rice is generally not recommended. While it may absorb some moisture, it does not effectively remove water trapped inside the speaker assembly. A dry, ventilated environment and manufacturer-recommended drying methods are usually safer and more effective.

8. How much does phone speaker repair usually cost?

Phone speaker repair costs in the UK vary depending on the device and the type of fault. On average, speaker cleaning services cost £20–£40, while speaker repairs or replacements typically range from £30–£90. For premium devices such as iPhones and Samsung phones, repairs can cost between £45–£120. More complex issues, including water damage or motherboard-related audio faults, may cost £80–£200+. A professional diagnosis can provide an accurate repair quote.

9. Is it safe to replace a phone speaker at home?

DIY repairs are possible but can be risky, especially on modern smartphones with sealed designs. Incorrect repairs may damage the screen, battery, charging components, or waterproof seals. Professional repair services are usually the safer option for most users.

10. When should I seek professional phone speaker repair?

Professional repair is recommended when troubleshooting steps fail, sound remains distorted, the speaker stops working completely, or the phone has suffered water or impact damage. A technician can identify the exact cause and prevent further complications.

Final Thoughts

Phone speaker issues can range from simple software glitches to more serious hardware failures, but the good news is that many problems can be resolved without immediately replacing your device. By taking the time to diagnose the cause, clean the speaker properly, review audio settings, and perform basic troubleshooting, you can often restore clear sound and avoid unnecessary repair costs.

Regular maintenance also plays an important role in keeping your smartphone’s audio system performing at its best. Protecting your device from moisture, dust, and accidental drops can significantly reduce the chances of future speaker-related issues.

If you’ve tried the solutions in this guide and your phone still isn’t producing clear audio, it may be time for a professional assessment. Ignoring speaker problems can sometimes lead to further damage, especially when water exposure or internal component failure is involved.

Need Expert Phone Speaker Repair?

At iExpert Repairs, our experienced technicians diagnose and repair common phone speaker issues, including low volume, distorted audio, crackling sounds, water damage, and complete speaker failure. We provide professional repair services for Samsung, iPhone, Google Pixel, Huawei, and other leading smartphone brands.

Back to posts
How to Fix Phone Screen Unresponsive Touch?

Introduction

An unresponsive phone screen is one of the most frustrating smartphone issues. Whether you use your phone for work, social media, online banking, gaming, or communication, a touch screen that stops responding can make the device nearly unusable. This problem can occur on any smartphone, including iPhones, Samsung Galaxy devices, Google Pixels, Huawei phones, and other Android models.

The good news is that many touch screen issues can be fixed without replacing the entire phone. In this detailed guide, we’ll explain the causes, symptoms, troubleshooting methods, professional repair options, and preventive measures to help you restore your phone’s touch functionality.

What Causes a Phone Touch Screen to Become Unresponsive?

A phone touch screen can become unresponsive due to software glitches, physical damage, water exposure, or faulty hardware components. Issues such as a damaged digitizer, low storage space, outdated software, or a poor-quality screen protector can also affect touch sensitivity. In some cases, a simple restart can fix the problem, while more serious issues may require professional repair. Identifying the root cause is essential for restoring your phone’s touch functionality and preventing further damage.

1. Physical Damage

Dropping a phone can damage the digitizer, the component responsible for detecting touch input. Sometimes the glass appears intact, but internal layers are damaged, causing touch issues.

2. Water Damage

Liquid exposure can short-circuit touch sensors and damage internal components. Even small amounts of moisture may affect touch responsiveness.

3. Software Bugs

Operating system glitches, failed updates, or corrupted apps can temporarily disable touch functionality.

4. Low Storage Space

When a phone’s storage is nearly full, system performance may slow down, leading to delayed or unresponsive touch input.

5. Faulty Screen Protectors

Cheap or poorly installed tempered glass protectors can interfere with touch sensitivity.

6. Battery Problems

A swollen battery can press against the display assembly and affect touch performance.

Signs Your Phone Screen Has Touch Problems

When a phone touch screen starts developing problems, it often shows warning signs before failing completely. You may notice that the screen responds slowly to taps and swipes, certain areas become unresponsive, apps open unexpectedly due to ghost touches, or the display freezes during normal use. These symptoms can indicate software issues, digitizer damage, or other hardware faults. Identifying these touch screen problems early can help prevent further damage and ensure your device receives the right repair solution before the issue becomes more serious.

Common symptoms include:

  • Screen ignores taps or swipes
  • Touch response is delayed
  • Ghost touches (the screen registers touches you didn’t make)
  • Only certain areas of the screen work
  • The display freezes intermittently
  • Multi-touch gestures stop functioning

These signs help determine whether the issue is software-related or hardware-related.

Quick Fixes Before Considering Repairs

Before spending money on a repair, it’s worth trying a few simple troubleshooting steps that can often resolve minor touch screen issues. Restarting your phone, cleaning the display, removing the screen protector, updating the software, and charging the device can help restore normal touch functionality if the problem is caused by temporary software glitches or touch sensitivity issues. These quick fixes are easy to perform and may save you the time and cost of an unnecessary repair.

Restart Your Device

A restart clears temporary system errors and often restores touch functionality.

Android: Hold the Power button and tap Restart.
iPhone: Perform a force restart according to your model.

Remove the Screen Protector

Remove any screen protector and test the display. If touch responsiveness improves, the protector was likely the cause.

Clean the Display

Use a microfiber cloth and a screen-safe cleaner to remove dirt, grease, and moisture. Avoid harsh chemicals that may damage the display coating.

Charge the Phone

Low battery voltage can sometimes affect touch performance. Charge the device for at least 30 minutes and test it again.

Check for Software Issues

Software-related problems are one of the most common reasons why a phone touch screen becomes unresponsive. System bugs, outdated operating systems, corrupted apps, insufficient storage space, or failed software updates can all affect touch screen performance and cause delayed or inaccurate responses. Before considering a hardware repair, it’s important to check for software issues by updating your device, removing problematic apps, clearing cache files, and testing the phone in Safe Mode. These steps can often resolve touch screen problems and restore normal functionality without the need for professional repair.

Update the Operating System

Manufacturers frequently release updates that fix touch-related bugs.

Android: Settings → Software Update
iPhone: Settings → General → Software Update

Boot Into Safe Mode

Safe Mode disables third-party apps. If the touch screen works normally in Safe Mode, an installed app is likely causing the problem.

Remove Problematic Apps

Uninstall recently installed apps, especially those that use screen overlays, display customisation, or gaming enhancements.

Clear System Cache

Corrupted cache files can affect system performance. Clearing the cache partition may improve touch responsiveness on many Android devices.

How to Test Your Phone Touch Screen?

If your phone screen is not responding properly, testing the touch functionality can help determine whether the issue is related to software or hardware. You can use built-in diagnostic tools, touch screen testing apps, or manufacturer-specific testing features to check for dead zones, ghost touches, and areas with poor touch sensitivity. Running a touch screen test is an effective way to identify the source of the problem and decide whether simple troubleshooting or professional iExpert repair is required.

Touch Diagnostic Apps

These apps map touch input across the display and can identify:

  • Dead zones
  • Ghost touches
  • Sensitivity problems

Manufacturer Diagnostics

Many brands include hidden diagnostic tools that test the display and touch sensors. This is especially useful for Samsung, Google Pixel, Huawei, and Xiaomi devices.

When the Digitizer Is Damaged

When the digitizer is damaged, the phone loses proper touch control and becomes difficult to use. You may tap the screen but it won’t respond correctly or may respond in the wrong places.

This issue usually occurs after a drop, heavy pressure, or internal screen damage. To restore normal function, the digitizer or full display unit often needs replacement. The digitizer is the layer that converts touch into digital signals. If it is damaged, you may experience:

  1. Intermittent touch response
  2. Dead areas on the screen
  3. Ghost touches
  4. Complete touch failure

Unfortunately, digitizer damage usually requires professional repair or screen replacement.

Water Damage and Touch Screen Failure

Water damage is one of the common reasons behind touch screen failure, as moisture can enter the phone and affect the internal digitizer and display connections. When liquid seeps inside, it may cause short circuits, unresponsive touch areas, flickering screen, or completely stop touch response.

Even a small amount of water can slowly corrode internal components over time, leading to worsening performance. In most cases, proper drying is not enough, and professional repair or part replacement is required to restore normal touch functionality.

Water exposure is one of the most serious causes of touch failure.

Symptoms include:

  • Random touches
  • Screen flickering
  • Black display
  • No touch response

What to Do Immediately

  • Turn off the phone.
  • Remove accessories and the SIM tray if possible.
  • Do not charge the device.
  • Seek professional diagnostics as soon as possible.

Screen Replacement vs. Touch Repair

Screen Replacement vs. Touch Repair refers to the difference between fixing only the touch-related issue or replacing the entire display unit. Touch repair usually targets minor problems like faulty connectors, digitizer issues, or software-related glitches, which can sometimes be resolved without changing the full screen.

On the other hand, screen replacement involves changing the complete display assembly, including the glass, LCD/OLED, and digitizer, and is needed when the damage is severe such as cracks, dead pixels, or major touch failure. Choosing between the two depends on the level of damage and cost-effectiveness of the repair.

Touch Repair May Be Enough If:

  1. Display connectors are loose
  2. Software is causing the issue
  3. Touch calibration is incorrect

Screen Replacement Is Necessary If:

  1. The display is cracked
  2. The digitizer is damaged
  3. Internal screen layers are affected

How iExpert Technicians Fix Touch Screen Issues?

iExpert technicians first diagnose the touch screen problem using proper testing tools to identify whether the issue is in the digitizer, display, or internal connections. After inspection, they carefully open the device and check for loose flex cables, damaged parts, or moisture effects that may be causing the fault.

If needed, they clean internal components, re-seat connectors, or replace the faulty digitizer or full screen assembly. Finally, they test the device again to ensure smooth and accurate touch response before completing the repair.

Step 1: Visual Inspection

Technicians check for cracks, frame damage, and water indicators.

Step 2: Internal Diagnostics

They test display connectors, motherboard components, and the touch controller IC.

Step 3: Component Repair

Depending on the diagnosis, repairs may include connector reseating, screen replacement, IC repair, or board-level repair.

Preventing Future Touch Screen Problems

Future touch screen issues can be avoided by taking proper care of your device on a regular basis. Always use a high-quality screen protector and keep your phone away from moisture, heat, and dust. Avoid dropping or applying extra pressure on the screen, as it can damage internal touch components over time. Keeping your software updated and restarting your device occasionally also helps maintain smooth touch performance and prevents common responsiveness problems.

To reduce the risk of future issues:

  • Use a high-quality protective case.
  • Install a premium tempered glass screen protector.
  • Avoid exposing the phone to water.
  • Keep software updated.
  • Use certified charging accessories.
  • Avoid overheating the device.

Why Choose Professional Repair Instead of DIY?

Choosing professional repair instead of DIY is important because trained technicians have the right tools and experience to diagnose the exact problem accurately. DIY fixes can often cause more damage to delicate internal parts, especially the display and touch components.

Professional repair ensures quality parts, safe handling, and a proper long-lasting solution. It also saves time and reduces the risk of costly mistakes that may happen with trial-and-error methods.

DIY repairs can sometimes cause additional damage. Professional repair offers:

  1. Accurate diagnostics
  2. High-quality replacement parts
  3. Warranty coverage
  4. Faster turnaround times
  5. Lower long-term repair costs

For expensive smartphones, professional repair is usually the safest option.

FAQs About Phone Touch Screen Not Responding

1. Why is my phone screen not responding to touch?

A phone screen may stop responding to touch due to software glitches, physical damage, water exposure, low storage space, a faulty screen protector, or a damaged digitizer. In many cases, a simple restart or software update can resolve the issue. However, if the phone has been dropped or exposed to liquid, professional diagnostics may be required to identify hardware damage. If your device continues to ignore taps and swipes after basic troubleshooting, consider seeking a professional touch screen repair service.

2. How do I fix a phone touch screen that is not working?

To fix an unresponsive phone touch screen, start by restarting the device, removing the screen protector, cleaning the display, and updating the operating system. You can also boot the phone into Safe Mode to determine whether a third-party app is causing the problem. If these steps do not restore touch functionality, the issue may be related to the digitizer or display assembly, which often requires professional repair.

3. Can a cracked phone screen cause touch problems?

Yes. A cracked screen can damage the digitizer layer located beneath the glass. Even if the display appears normal, cracks may prevent the screen from accurately registering touch input. Common symptoms include dead zones, delayed responses, ghost touches, and complete touch failure. In most cases, a screen replacement is the most reliable solution.

4. Why is my phone experiencing ghost touches?

Ghost touches occur when the screen registers taps, swipes, or gestures that you did not perform. This problem can be caused by water damage, software bugs, faulty charging accessories, damaged digitizers, or low-quality screen protectors. Updating your device, removing accessories, and testing the phone without a screen protector can help identify the cause.

5. Can water damage make a touch screen stop working?

Yes. Water can interfere with the electrical signals used by the touch screen digitizer and may damage internal components. Symptoms often include random touches, screen flickering, display discoloration, or a completely unresponsive screen. If your phone has been exposed to liquid, turn it off immediately and avoid charging it until it has been professionally inspected.

6. How do I know if my phone’s digitizer is damaged?

A damaged digitizer usually causes touch-related issues even when the display itself looks normal. Signs of digitizer failure include unresponsive areas on the screen, ghost touches, inaccurate touch detection, and intermittent touch functionality. Professional diagnostic testing can confirm whether the digitizer or another component is responsible for the problem.

7. Can software updates fix touch screen issues?

Yes. Smartphone manufacturers regularly release software updates that address bugs, improve system stability, and enhance touch sensitivity. If your touch screen problem started after installing a new app or system update, checking for the latest software version may help resolve the issue. Keeping your device updated is an important part of maintaining optimal performance.

8. Should I repair or replace my phone if the touch screen is not working?

The answer depends on the age of the device, repair cost, and extent of the damage. If the phone is relatively new and only the screen or digitizer is damaged, repair is usually more cost-effective than replacement. However, if the device has extensive motherboard damage or multiple hardware issues, replacing the phone may be the better long-term investment.

9. How much does it cost to repair an unresponsive touch screen?

Touch screen repair costs vary depending on the smartphone model, the extent of the damage, and the quality of replacement parts used. Premium smartphones such as iPhones, Samsung Galaxy Ultra devices, and Google Pixel models typically have higher repair costs due to the complexity and price of their displays. A professional diagnostic assessment can provide an accurate repair quote.

10. How can I prevent touch screen problems in the future?

The best way to prevent touch screen issues is to protect your device from physical and environmental damage. Use a high-quality case and tempered glass screen protector, avoid exposing the phone to water, keep software updated, and use certified charging accessories. Regular maintenance and careful handling can significantly extend the lifespan of your smartphone and reduce the risk of costly repairs.

Final Thoughts

An unresponsive phone touch screen can be caused by software glitches, accidental drops, water damage, faulty accessories, or internal hardware failures. In many cases, simple troubleshooting steps such as restarting the device, removing the screen protector, cleaning the display, or installing the latest software update can resolve the issue. However, if the problem continues, it may indicate damage to the digitizer or other internal components that require professional attention.

To avoid expensive repairs and unexpected device failures, it is important to protect your smartphone with a quality case and screen protector, keep your software updated, and avoid exposure to moisture and extreme temperatures. Regular maintenance and early diagnosis can help extend the lifespan of your device while ensuring smooth and reliable performance.

If your phone screen is still not responding after trying the solutions in this guide, professional diagnostics and repair services are recommended. At iExpert Market, you can find alternative solutions for a wide range of devices, along with a selection of professionally tested refurbished phones from leading brands such as Apple, Samsung, and Google. Whether you need a repair or are looking for a cost-effective refurbished smartphone, iExpert Market offers reliable technology solutions designed to keep you connected.

Visit iExpert Market today to explore refurbished phones – Shop Now

Back to posts
How Much Does It Cost to Repair a Phone Screen

Cracked your screen? You’re not alone. A broken phone screen is one of the most common tech mishaps people deal with every day – and the first question that pops into everyone’s head is: how much does it cost to repair a phone screen?

The honest answer is: it depends. But don’t worry – by the end of this guide, you’ll know exactly what to expect, what affects the price, and how to make the smartest decision for your phone and your wallet.

What Affects the Cost of a Phone Screen Repair?

Before we get into the numbers, it’s worth understanding why phone screen repair costs vary so much. Two phones sitting side by side on a table could have completely different repair bills – here’s why:

1. The Brand and Model

An iPhone 17 Pro max screen repair is significantly more expensive to replace than a budget Android handset. Premium devices use high-end display technology like OLED and ProMotion panels, which cost more to source and fit.

2. Screen Technology (LCD vs OLED)

LCD screens are generally cheaper to replace. OLED screens – found on most flagship phones – are pricier because of the display quality and manufacturing cost.

3. Where You Get It Repaired

Manufacturer repair centres, independent local shops, and mobile repair services all charge differently. Independent repair specialists like iExpert Repairs often offer the same quality at a more competitive price than going directly to the manufacturer.

4. Original vs Third-Party Parts

OEM (original manufacturer) parts cost more but maintain full functionality – including Face ID, True Tone, and other sensor-dependent features. Third-party parts are cheaper but may affect display quality or certain phone features.

5. Whether the Touch Layer or Just the Glass Is Damaged

Sometimes only the outer glass is cracked but the display underneath still works fine. A glass-only repair is cheaper than a full screen assembly replacement.

How Much Is a Phone Screen Repair? A Full Breakdown by Device

iPhone Screen Repair Costs

iPhones are the most commonly repaired smartphones in the UK. Here’s a rough guide to iPhone screen repair costs:

iPhone ModelEstimated Repair Cost (UK)
iPhone SE (2nd/3rd Gen)£60 – £90
iPhone 11£80 – £120
iPhone 12 / 12 Pro£99 – £150
iPhone 13 / 13 Pro£110 – £160
iPhone 14 / 14 Pro£130 – £180
iPhone 15 / 15 Pro£150 – £220
iPhone 16 / 16 Pro£160 – £249
iPhone 17 / 17 Pro£199 – £399

Older models and budget iPhones tend to sit at the lower end. The newer and more premium the device, the higher the cost to repair a phone screen. Apple’s own repair service will typically be at the top of this range or above it.

Going to an experienced independent specialist like iExpert Repairs means you can often save £90 – £200 compared to manufacturer pricing, without compromising on parts quality.

Samsung Screen Repair Costs

Samsung is the UK’s most popular Android brand, and Samsung screen repair is one of the most frequently requested services at repair shops.

Samsung ModelEstimated Repair Cost (UK)
Samsung A-Series (A14, A34, A54)£50 – £100
Samsung S23 / S23+£110 – £160
Samsung S23 Ultra£140 – £200
Samsung S24 + S25£199 – £290
Samsung Z Fold / Z Flip£200 – £400+

Samsung’s foldable range (Z Fold and Z Flip) can be considerably more expensive due to the specialist folding display technology involved.

iPad Screen Repair Costs

If you’ve cracked your tablet, iPad screen repair costs depend heavily on the generation and model:

iPad ModelEstimated Repair Cost (UK)
iPad (Standard, 9th/10th Gen)£80 – £130
iPad Mini£90 – £140
iPad Air£110 – £170
iPad Pro 11″£140 – £220
iPad Pro 12.9″£180 – £280

iPad screens are often larger and more complex to replace than phone screens, which is reflected in the pricing. The Pro models with Liquid Retina XDR displays are particularly specialist repairs.

MacBook Screen Repair Costs

A cracked MacBook display is one of the more expensive repairs you’ll encounter. MacBook screen repair prices vary by model:

MacBook ModelEstimated Repair Cost (UK)
MacBook Air (Intel)£150 – £250
MacBook Air (M1/M2/M3)£200 – £350
MacBook Pro 13″£220 – £350
MacBook Pro 14″/16″£300 – £500+

MacBook screen repairs are more involved because the display assembly is often integrated with the chassis, especially on newer M-series models. Always go to a qualified technician for these.

Samsung Tab & Android Tablet Screen Repair Costs

For tab screen repair on Samsung Galaxy Tabs and other Android tablets, costs are broadly similar to iPads depending on screen size and quality:

TabletEstimated Repair Cost (UK)
Samsung Galaxy Tab A£70 – £120
Samsung Galaxy Tab S8 / S9£120 – £200
Samsung Galaxy Tab S9+ Series£180 – £400 +

How Much to Repair a Phone Screen: General Phone Screen Repair Pricing

For a general phone screen repair, here’s a rough guide based on device tier:

  • Budget Android phones (Xiaomi, Motorola, Nokia entry-level): £30 – £70
  • Mid-range Android phones (Google Pixel 7a, OnePlus Nord): £70 – £170
  • Flagship Android phones (Google Pixel 8 Pro, Sony Xperia 1): £120 – £200
  • iPhones (all models): £60 – £299 depending on model (see above)

Repair vs Replace: Which Is the Smarter Choice?

This is the big question everyone asks after dropping their phone. Here’s a simple way to think about it:

Repair makes sense when:

  • The repair cost is less than 50% of the phone’s current market value
  • The rest of the device is in good working condition
  • The phone is less than 3-4 years old

Replacement makes sense when:

  • The repair cost nearly matches what you could get the same phone for second-hand
  • There are other faults developing (battery, camera, buttons)
  • The phone is older and no longer receiving software updates

If you’re considering replacing your device, it’s worth checking out iExpert Market – iExpert’s platform for quality refurbished phones and tablets. Buying refurbished is a smart, budget-friendly option that’s also better for the environment. You can often pick up a refurbished iPhone or refurbished Samsung for a fraction of the new price, fully tested and ready to go.

Can You Repair a Cracked Screen on a Phone Yourself?

It’s technically possible to repair a cracked phone screen yourself – DIY kits are widely available online. But here’s what you need to know before you try:

  • Modern phones are not designed for easy DIY repair. iPhones in particular have components that are software-paired to the logic board. Even if you physically replace the screen, you may lose Face ID functionality or get warning messages about non-genuine parts.
  • You could cause more damage. Cracking the battery or bending internal connectors during a DIY attempt can turn a £100 screen repair into a £300+ logic board issue.
  • It may void warranties. If your device is still under warranty or covered by AppleCare or a manufacturer plan, opening it yourself will void that coverage.

For most people, the safer and more cost-effective route is to take it to a trusted repair specialist.

What to Look for in a Phone Screen Repair Service

Not all repair shops are the same. Here’s what to check before handing over your device:

  • Warranty on repairs – A reputable repair shop should offer at least a 30–90 day warranty on their work. iExpert Repairs provides a warranty on all screen repairs, giving you peace of mind that if anything goes wrong with the repair itself, you’re covered.
  • Quality of parts – Ask whether they’re using OEM-quality parts or budget alternatives. For iPhones especially, OEM parts preserve all native features.
  • Turnaround time – Most straightforward screen repairs can be completed same-day or within a few hours. If a shop is quoting a week for a standard repair, look elsewhere.
  • Reviews and reputation – Check Google reviews and Trustpilot. A shop with hundreds of consistent 5-star reviews is a far safer bet than an anonymous listing.
  • Transparent pricing – You should be able to get a clear quote before any work begins, with no surprise charges at collection.

Is It Worth Getting Phone Insurance Instead?

Phone insurance through your network, bank, or a standalone insurer can cover accidental screen damage. But there are a few things to keep in mind:

  • Most policies have an excess charge of £25-£100, which partially offsets the repair cost
  • Some insurers send refurbished replacement devices rather than repairing your original phone
  • Monthly premiums can add up – £10/month over two years is £240, which would cover most screen repairs outright

Insurance makes the most sense for premium devices (£800+) where screen repairs are expensive and the risk of damage is high.

Back to posts
How to Fix Water Damaged Phone

Dropping your phone in water is one of those heart-stopping moments. Whether it slipped into the sink, fell into the bath, or got soaked in the rain, the panic is immediate – and the first thing most people do is search how to fix a water damaged phone.

The truth is, water damage doesn’t always mean your phone is dead. In many cases, you can save it – or at least avoid making things worse – if you act quickly and follow the right process.

This guide is not just a checklist. It’s a real, practical walkthrough that explains what’s happening inside your phone, what you should do step by step, and when it’s smarter to get professional help from iExpert Repairs.

What Actually Happens When Your Phone Gets Water Damaged?

When water enters your phone, it starts affecting internal components immediately. It can cause short circuits, corrosion, and failure in parts like speakers or screens.

That’s why users often search:

  • how to fix a phone that has water damage
  • how can you fix a phone with water damage
  • how do you fix a water damaged phone

Understanding this helps you avoid making the situation worse.

What To Do Immediately (Critical First Steps)

If your phone just got wet, follow these steps right away: Step-by-step quick action:

  • Turn off your phone immediately
  • Remove SIM card, case, and accessories
  • Do NOT charge it
  • Gently dry the outside with a cloth

These first actions alone can determine whether your phone survives.

Drying Your Phone Properly (What Actually Works)

A lot of people rely on rice – but it’s not the best solution.

Better drying methods:

  • Place the phone in a dry, ventilated area
  • Use airflow (fan is ideal)
  • Use silica gel if available

What to avoid:

  • Hairdryers (heat damage)
  • Shaking the phone
  • Turning it on too early

This is where many people go wrong when trying how to fix a phone that fell in water.

How Long Should You Wait?

Patience is one of the most important parts of fixing a water damaged phone.

Recommended wait time:

  • Minimum: 24 hours
  • Ideal: 48 hours

Turning it on too early is one of the biggest reasons phones fail after water exposure.

Turning Your Phone Back On (What To Check)

Once your phone is dry, turn it on and check for issues. Common problems to look for:

  • Speaker not working (how to fix phone speaker)
  • Microphone issues (how to fix phone microphone)
  • Touch not responding (how to fix phone screen unresponsive touch)
  • Black or flickering screen

These problems often appear after water damage and may need further repair.

Why Water Damage Causes These Issues

Water affects multiple components at once. For example:

  • Speakers fail due to moisture in sound components
  • Screens become unresponsive due to circuit interference
  • Charging ports stop working due to corrosion

This is why people often end up searching:

Even if the screen isn’t physically cracked, water can cause similar symptoms.

When DIY Fixes Are Not Enough

Sometimes drying your phone simply isn’t enough. Signs you need professional repair:

  • Phone won’t turn on
  • Charging not working
  • No sound or distorted audio
  • Screen issues persist

At this stage, continuing DIY attempts can make things worse.

Professional Water Damage Repair

Professional services like iExpert Repairs handle:

What professionals actually do:

  • Open the device
  • Clean internal components
  • Replace damaged parts
  • Run diagnostics

This significantly increases the chances of saving your device.

How Much Does It Cost to Fix a Phone?

Many users also search:

  • how much does it cost to fix a phone screen
  • how much is it to fix a phone screen
  • how much to fix a phone screen

Cost factors:

  • Device model
  • Severity of water damage
  • Parts required

Fixing issues early usually keeps costs lower.

Repair vs Replace (What’s the Better Option?)

Sometimes repairing isn’t worth it. Consider replacement if:

  • Multiple components are damaged
  • Repair cost is too high
  • Phone is older

In that case, iExpert Market offers refurbished phones at more affordable prices.

Final Thoughts

If you’re trying to learn how to fix a water damaged phone, the key is balance:

  • Act quickly
  • Follow the right steps
  • Avoid common mistakes
  • Get professional help when needed

Water damage doesn’t always mean your phone is gone – but your response makes all the difference.

Worried about photos or messages on a water damaged phone? See our guide on how to get data off a broken phone before you plug it in or try switching it on again.

Need Help?

If your phone still isn’t working properly, iExpert Repairs can help with expert diagnostics and repair services.

Or explore iExpert Market for reliable refurbished devices if replacement is the better option.

Back to posts
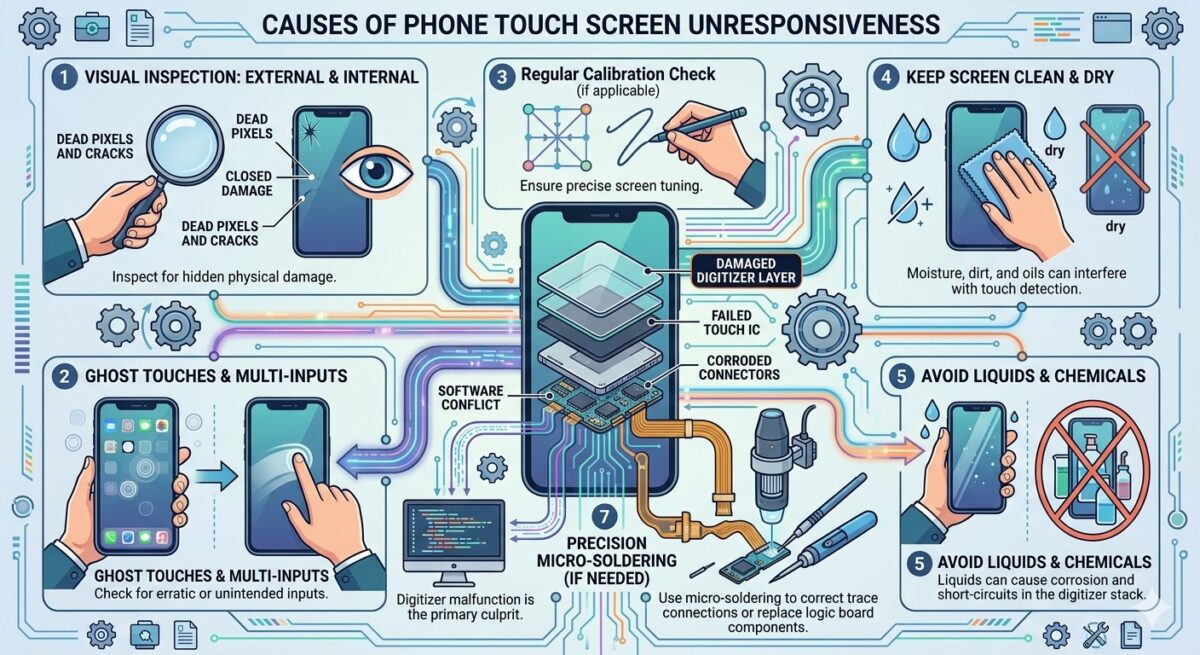
How Much Does a Laptop Screen Repair Cost?

Laptops are one of the most important tools in our daily lives, serving us for work, education, and entertainment. But what happens when your laptop screen goes black or gets damaged? This article will guide you through the costs associated with repairing a laptop screen and provide useful tips for handling a black screen issue. Understanding these elements will help you make informed decisions about your laptop repair options.

If your laptop screen is cracked, flickering, showing lines, or completely black, you’re probably asking: how much does it cost to repair a laptop screen in the UK? Whether you’re using a MacBook, Dell, HP, Lenovo, Acer, Asus, or Microsoft Surface, screen repair costs can vary widely based on your device’s brand, model, and screen type.

A laptop screen can encounter several issues, ranging from minor glitches to significant hardware failures. The most common problems include cracks, dead pixels, flickering, and the dreaded black screen. Identifying the issue is the first step in determining whether a repair is necessary and what it might cost.

In this guide, we’ll break down the average laptop screen repair prices, what affects the cost, where to get your screen fixed, and whether it’s better to repair or replace your laptop.

Common Causes of a Laptop Black Screen

Seeing a black screen on your laptop can be worrying, but it doesn’t always mean your device is beyond repair. The cause can range from simple software glitches to serious hardware failures. Below are some of the most common reasons:

  • Software Issues: A recent software update, driver conflict, or incompatible program can sometimes trigger a black screen. In many cases, restarting the laptop or booting into safe mode can fix the problem.
  • Overheating: Excessive heat can force your laptop to shut down as a safety measure. This often results in a blank or black screen. Make sure your cooling system is working properly and clean out any built-up dust or debris.
  • Hardware Problems: Faulty components such as the graphics card, motherboard, or display panel may be to blame. If the issue persists after a reboot, you’ll likely need a professional technician to inspect and repair the hardware.

How to Repair a Laptop Black Screen

Before rushing to a repair shop, you can try some troubleshooting steps to fix a black screen issue:

  1. Restart Your Laptop: A simple restart can sometimes fix the problem. Hold the power button down for 10 seconds to shut down the laptop, then restart it.
  2. Check the Connections: Ensure that all cables and connections are secure. Loose cables can cause display issues.
  3. Boot in Safe Mode: If the screen remains black, try booting the laptop in safe mode. This will help identify if the issue is software-related.
  4. Update Drivers: Outdated or corrupt drivers can cause display issues. Ensure your graphics and display drivers are up-to-date. If these steps don’t resolve the problem, it might be time to consider professional repair.

How Much Does It Cost to Repair a Laptop Screen?

The cost of repairing a laptop screen varies depending on several factors, including the severity of the damage, the type of laptop, and the repair service provider. Here’s a breakdown of potential costs:

Key Factors That Affect Laptop Screen Repair Cost

Brand and Model: Some brands use proprietary parts or specific LCD/LED panels, especially Apple and Microsoft. These typically cost more due to limited supply or complex installation.

Screen Type:

  • Standard LCD: The most affordable type of screen; common in budget and older laptops.
  • LED / IPS Panels: More vibrant and efficient; cost slightly more.
  • Touchscreens: Found on many 2-in-1 laptops; usually double the cost of standard screens.
  • 4K or OLED Displays: Premium screens on high-end laptops and gaming machines; significantly more expensive.
  • Retina Displays (MacBook): High-density displays with complex layers; require specialist tools and carry premium repair fees.

Labour Cost: Labour charges typically range from £30 to £90 depending on the technician’s expertise, location, and whether the repair is done same-day.

Availability of Replacement Parts: Rare models or discontinued devices may have more expensive replacement screens due to supply shortages.

Extent of Damage: Minor issues like dead pixels or loose connections are generally cheaper to fix than a fully cracked screen.

Average Laptop Screen Repair Cost

The typical cost to repair or replace a laptop screen in the UK ranges from £50 to £350, depending on several factors:

Laptop BrandScreen TypeEstimated Cost (2026)
HP / Dell / LenovoStandard LCD£70 – £150
Acer / AsusHD / LED screen£60 – £130
Apple MacBookRetina / Liquid Retina XDR£250 – £350+
Microsoft SurfaceTouchscreen LCD/LED£180 – £300
Gaming Laptops (Alienware, ROG, MSI)High refresh rate / 4K£180 – £350+

Note: Prices vary depending on screen size, availability, and whether the screen is a touchscreen, OLED, or Retina display.

DIY Screen Replacement (Money saving tip):

For those with technical skills, replacing a laptop screen yourself can save money. However, it’s important to weigh the risks and benefits. DIY repairs can void warranties and may lead to further damage if not done correctly. If you choose this route, ensure you have the right tools and follow a reliable guide.

Choosing the Right Laptop Repair Service

1. Authorised Service Centres

Great for keeping your warranty intact. However, screen repairs at official Apple, Microsoft, or Dell centres can be significantly more expensive – often £300+ for premium laptops.

2. Independent Repair Shops

Trusted local or nationwide repair centres offer more affordable laptop screen replacement services, often using OEM or high-quality compatible screens.

At iExpert Repairs, we offer screen repair for all laptop brands, including HP, Dell, Acer, Asus, Lenovo, MacBook, and Surface models – with free diagnostics and 12-month warranty.

3. Mail-In Repair Services (UK-Wide)

Ideal if you’re not near a repair shop. These services let you post your laptop in for fast screen replacement, usually within 1-3 working days.

Conclusion

Repairing a laptop screen can be a straightforward process if you understand the potential costs and choose the right service provider. Whether you’re dealing with a black screen or a cracked display, taking the time to diagnose the issue and explore your options will help you make the best decision for your laptop.

Remember, if you’re not comfortable attempting repairs yourself, it’s best to seek professional assistance or contact us to avoid further damage. By following the tips in this guide, you’ll be well-equipped to handle any laptop screen issue that comes your way.

Ready to Book Your Repair at iExpert Repairs?

Get an instant price estimate online or call us for expert advice. We fix screens for all major brands with fast turnaround and warranty. Find more here about our Laptop repair services.

Back to posts
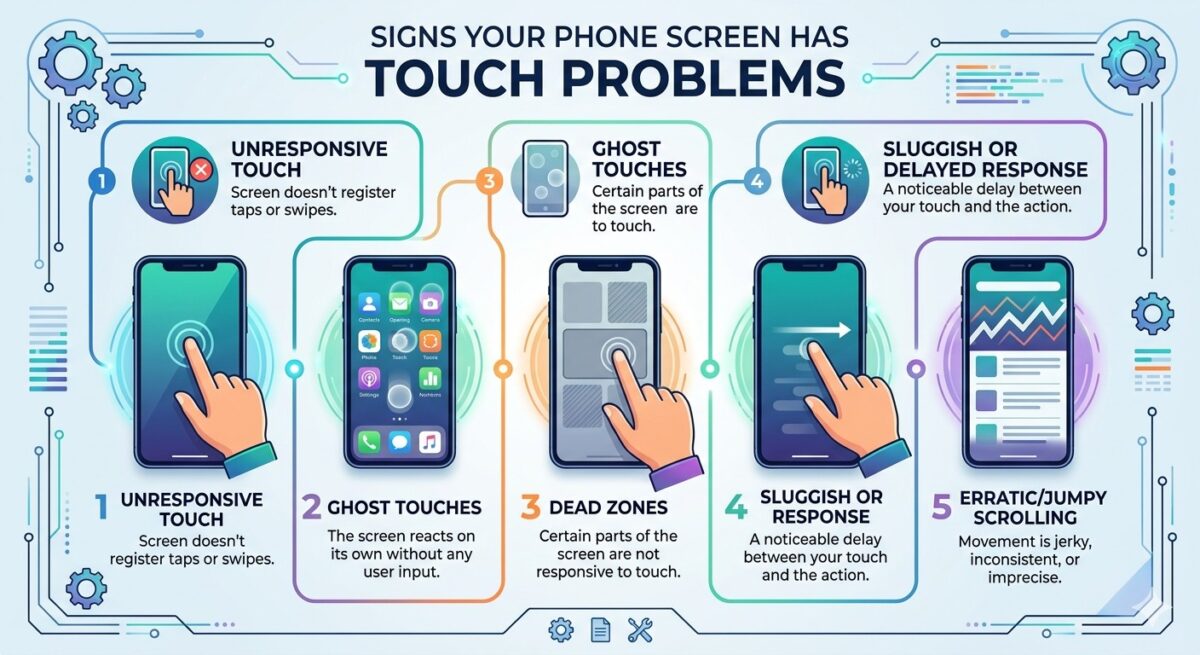
Tell us what's broken, get a free quote

Older device, rare model, or a fault you can't describe? Send us a message with a photo and we'll come back with a fixed price.

Request a Quote
Request a same-day personalised quote!
×

    Please upload a image showing the back of your device or any visible damage for assessment (optional)